The ControlUp Monitor is a crucial component in any VDI & DaaS environment. This article provides a guide on the various installation options to set up the monitor. For additional details, see here.
You can install a monitor on workgroup machine using PowerShell. However, deploying a monitor from the console is still limited to domain-joined machines. To learn more about installing a monitor on a workgroup machine, click here.
For versions lower than 9.0, see steps below to configure and install your monitor.
Prerequisites for ControlUp Monitor
Important
Install the monitor on a dedicated VM to ensure optimal performance. Avoid running other business-critical applications or the Real-Time DX Console on this VM, as the monitor's operation is resource-intensive.
Monitor requirements
General Requirements (Domain-joined and workgroup monitors)
Communication to our backend services.
Communication with management monitors. All monitor machines must be able to communicate with the management monitors (active and backup coordinator monitors) over TCP port 40706.
Windows Server 2016 or higher. Windows client OS are not supported.
.NET Framework 4.8
PowerShell 5.1
General Requirements (Domain-joined monitors only)
RPC access from the console to the monitor
Enable administrative shares on the monitor machine
Configure the Monitor (pre 9.0)
Before you install a monitor on a machine, you first need to configure the monitor settings in the Real-Time DX Console.
To configure the monitor:
In the console, go to Home > Add Monitor.
As you need to provide a service account credential for the Primary domain credential, make sure that you already you prepared this account prior to the installation of the monitor.
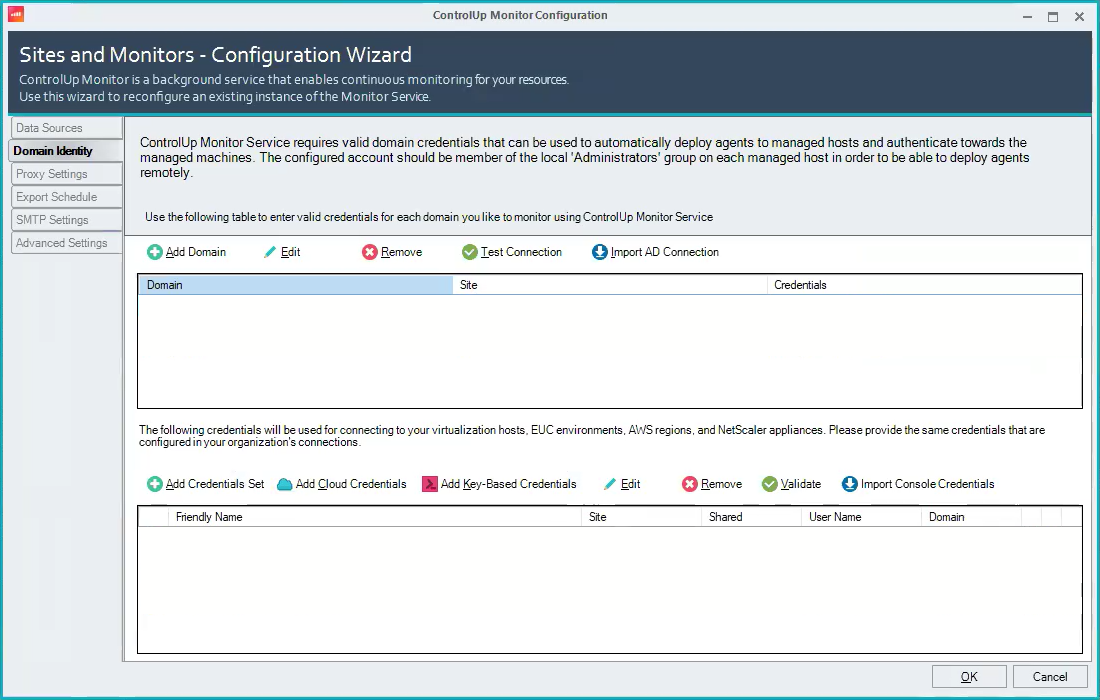
In the Monitors tab, click Monitors Settings. The Sites and Monitors - Configuration Wizard opens.
Add Monitor Credentials (pre 9.0)
For ControlUp On-premises environments, or Hybrid Cloud environments lower than version 9.0, you need to assign domain credentials to the monitor service to enable the ControlUp Monitor to connect to managed machines, as described below.
In the Domain Identity tab, add credentials so your monitors can connect to your environment and resources, such as hypervisors, EUC environments, cloud environments, NetScaler applicances.
To add monitor service account credentials:
Click Add Domain. The Add New Domain Identity popup appears.
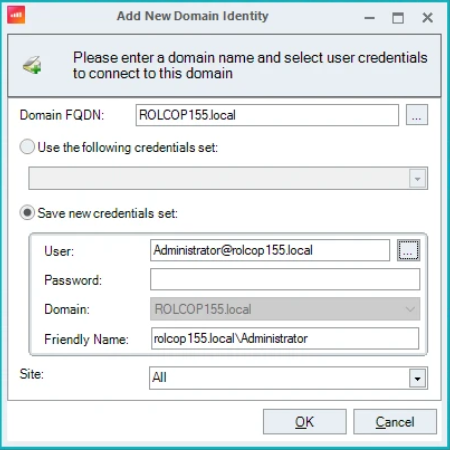
Enter or select the Domain FQDN from the Domain Selection list, enter valid domain credentials, and click OK. We recommend that the domain account be a member of the local administrator group to deploy agents remotely.
Optionally, to save new credentials, select Save a new credentials set, enter the new credentials into each field as required, and click OK.
Select Shared credentials for each credential set. To learn more about this option, see Configuring Shared Credentials.
Shared Credentials
Note that all monitors and consoles in your environment must use the same credentials when connecting to your resources. You can share your credentials in your Monitor Settings so that all ControlUp users can easily connect to your resources without having to know the service account username and password. For more information, see Configuring Shared Credentials.
Optionally, to add additional credentials for hypervisor connections or EUC environment connections:
Click Add Credentials Set and the Add New Credentials popup appears.
Enter the new credentials into each field as required, click OK, and the credentials are added.
Repeat the process as needed to add credentials for all of the resources that you connect to ControlUp.
Optionally, click the Proxy Settings tab to configure any proxy settings for the default site, if required.
Proxy Settings
You can configure the proxy settings option separately for each site.
Optionally, click the SMTP Settings tab to configure Trigger Alerts. Follow the instructions to configure a priorty list of SMTP servers and their connection details and click OK.
Optionally, click the Advanced Settings tab to change the default monitor service resource settings. For more information about changing the default settings, see Performance Optimization for Real-Time Console & Monitor.
Global Settings
The SMTP Settings and Advanced Settings are global and aren't set per site.
Install Monitor (pre 9.0)
After you configure your monitor settings, you can install the monitor on a domain-joined machine with the following steps:
In console, go to Home > Add Monitor > Monitors > Add Monitors to Site.
Select the machine on which you want to install the monitor. By default, the port that the monitor listens on local port TCP 40706. Console machines and other monitors use this port for internal communication.
Click Install. The installation process might take a few seconds.
The monitor installation wizard tests various components of the target machine before deploying the service to ensure that it will be able to run.After the installation completes, click Finish > OK.
The monitor you installed appears in the Monitors tab next to a green icon.
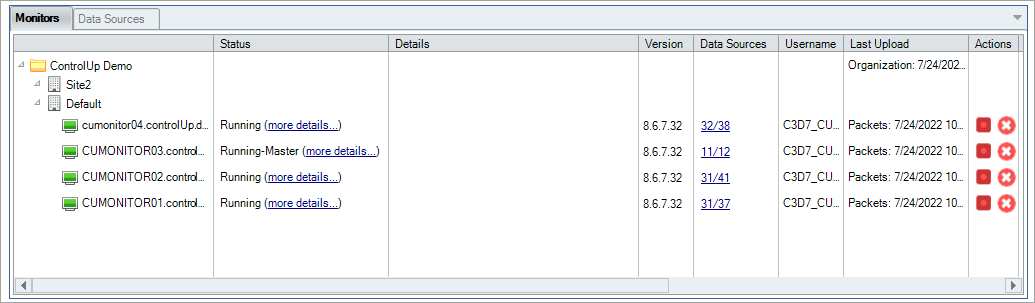
Confirm Monitor Connection
To learn how to manage your monitor resources connections, watch our video.
After you install a monitor, you can go to Settings > Monitors to view the connection status of each monitor, and all of the data sources that the monitor(s) is connected to.