You can configure any ControlUp Agent to communicate outbound by running the Set Outbound Communication agent action in the Real-Time DX Console. This article explains how to perform the necessary steps.
This new change is not relevant for MSI-based agent installations.
Set an Agent Outbound On-demand
-
Extract ControlUpConsole_Secure_SIGN.zip and open the ControlUpConsole.exe. Make sure that no other ControlUp users in the same organization have an older Real-Time DX Console version open on their machines.
-
Upgrade your monitor machines to the latest version. Note that upgrading the monitors will automatically install the agent on the monitor machines.
-
Once the agent is installed, the monitor will establish an inbound connection to this agent.

-
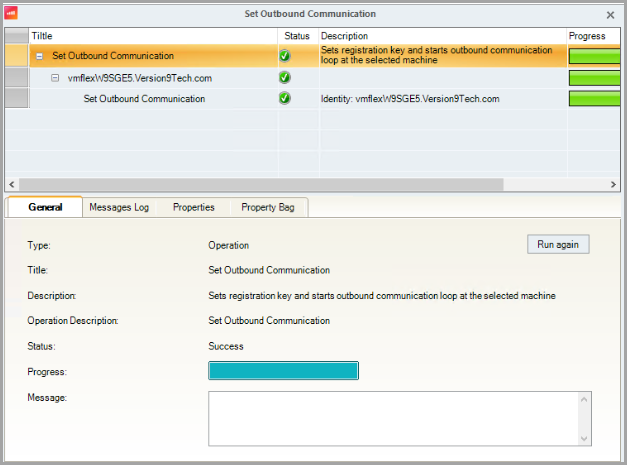
In the console, right-click an agent and select Set Outbound Connection.

A new wizard opens in which you see whether the agent was successfully registered as outbound. If the registration succeeds, you see status Success.
-
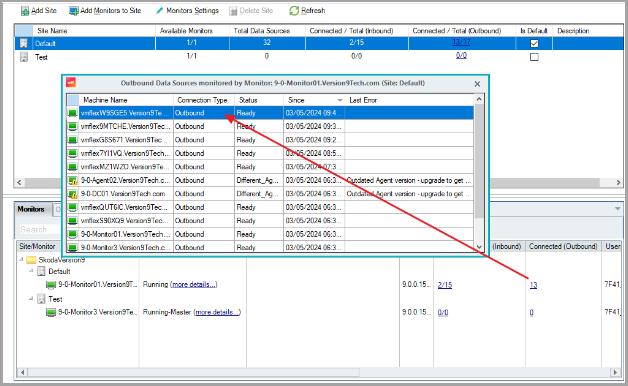
In Monitors Settings, verify that the agent appears as Outbound.
-
Perform this action on all agents you want to move to outbound.