You can assign roles to users based on SSO groups in your IdP. For example, let's say that your level 1 help desk employees are in the SSO group "Level 1 Help Desk". You can create a role for level 1 help desk employees and assign that user role to the "Level 1 Help Desk" SSO group. All users in the "Level 1 Help Desk" group are automatically assigned that user role when they sign in.
Roles are assigned based only on SSO groups that are sent in the SAML assertion and added to your SSO Groups settings. If multiple groups are sent in the SAML assertion, then the user is assigned all relevant roles for all groups.
ControlUp checks a user's SSO groups and assigns the relevant roles each time a user signs in. If you change a user's groups in your IdP, then the user's roles and permissions are automatically updated the next time they sign in.
Note that it is possible for a user to have roles assigned other than the roles assigned to their SSO groups. This can happen if you manually assign roles to a user, or if a new user signs in for the first time and is assigned the default role for automatically provisioned accounts (configured in your SAML settings).
Prerequisites
This feature requires that you have SAML SSO configured. Read How to Configure SAML Single SSO with Your IdP for details.
Create an SSO group
Configure your IdP to send either the names or the IDs of the SSO groups in one of the following attributes. We recommend that you send the ID because it is guaranteed to uniquely identify the group.
userGroupsuser.groupshttp://schemas.xmlsoap.org/claims/Grouphttp://schemas.microsoft.com/ws/2008/06/identity/claims/groupshttp://schemas.microsoft.com/ws/2008/06/identity/claims/groupsid
In ControlUp, go to Settings > SAML Single Sign On > SSO Groups.
.png)
3. Click Create SSO Group.
4. In the Group Name/ID field, enter either the group name or ID, depending on which one you configured your IdP to send in the userGroups attribute. The value you enter in this field must exactly match what your IdP sends in SAML assertion.
5. In the Display Name field, enter a name for the group. This is the name that appears when assigning roles to the group.
6. Click Save.
Assign SSO groups to roles in app.controlup.com
After you create an SSO group, you can assign the group to a role in app.controlup.com.
To assign an SSO group to a role in app.controlup.com:
In your Roles settings, select a role and go to Groups > Add/Remove Groups to add the group to the role.
.png)
Save the changes to the user role.
Assign SSO groups to roles in the Real-Time Console Security Policy
Only for Real-Time DX version 9.0 or higher
The features in this section are available only for version 9.0 or higher. If you use a lower version, then you can't use a ControlUp DEX account to access the VDI & DaaS web interface through DEX. Click here to learn how to sign in to the VDI & DaaS web interface for versions lower than 9.0.
Note about editing existing SSO groups
If you edit an SSO group in the DEX settings page to use a different group name or ID from your IdP, the changes are not automatically applied to the Security Policy. You must remove and re-add the SSO group to the Security Policy roles to apply the changes.
After you create an SSO group, you can assign the group to a role in the Real-Time Console Security Policy. When a user signs in to app.controlup.com with SAML, they are automatically granted roles in the Security Policy according to their SAML SSO groups. Security Policy roles determine what a user is allowed to do in the VDI & DaaS web interface (for example, viewing certain machines/folders and running actions). Note that users must have the permission Use Web Application assigned in the Security Policy to access the VDI & DaaS web interface. Learn more about how to access the VDI & DaaS web interface.
To assign an SSO group to a role in the Security Policy:
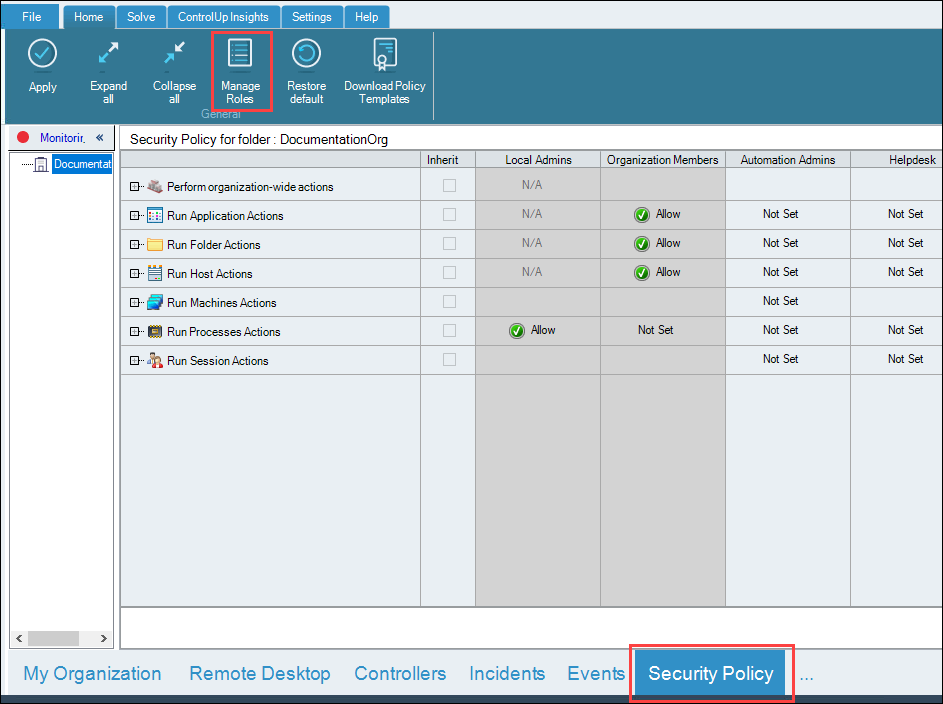
In the Real-Time Console, go to Security Policy > Manage Roles.
Select a role and click Edit > Add Users/Groups.
.png)
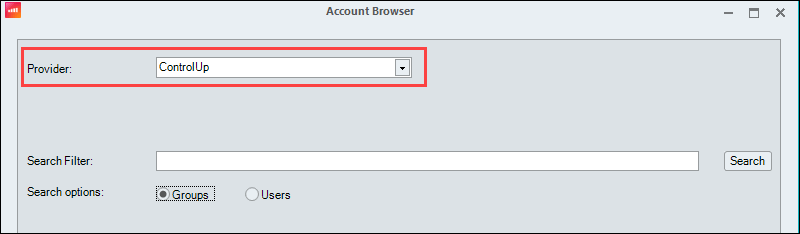
Set Provider to ControlUp.
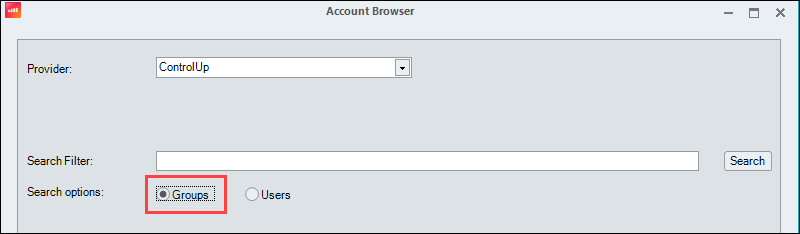
Set Search Options to Groups.
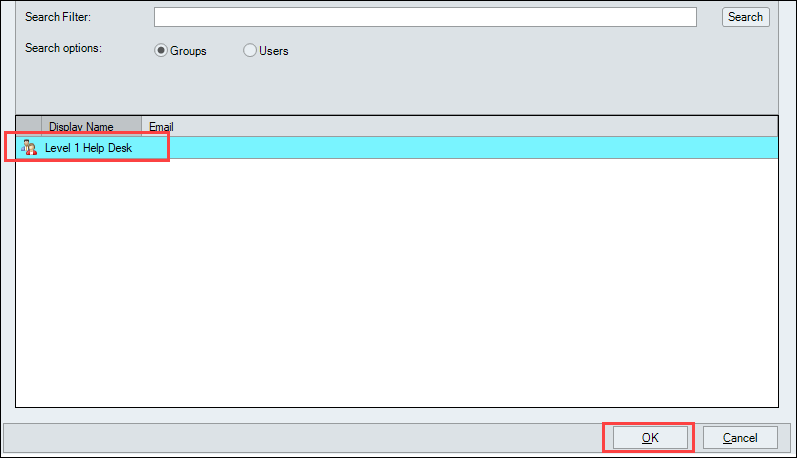
Click Search. All SSO groups that you created appear in the list.
Select which SSO groups you want to add to the role and click OK.
How to see your SSO groups in ControlUp
The SSO groups feature dynamically assigns user roles each time a user signs in. This means that a user's SSO groups and their roles assigned by the SSO groups feature are not saved to the user account entity in ControlUp. There are two ways to see which SSO groups are applied to a ControlUp user account:
A user's assigned roles and SSO groups are stored in the Audit log each time they sign in.
Click on your profile icon to see all of the SSO groups that were included in the SAML assertion when you signed in to ControlUp. If any of these groups are configured for the SSO groups feature and assigned to a user role, then you are assigned that user role for your current session.