Prerequisites
- Must have an Azure Enterprise account.
- Microsoft Entra ID must be configured.
- Must have the necessary permissions to create the application.
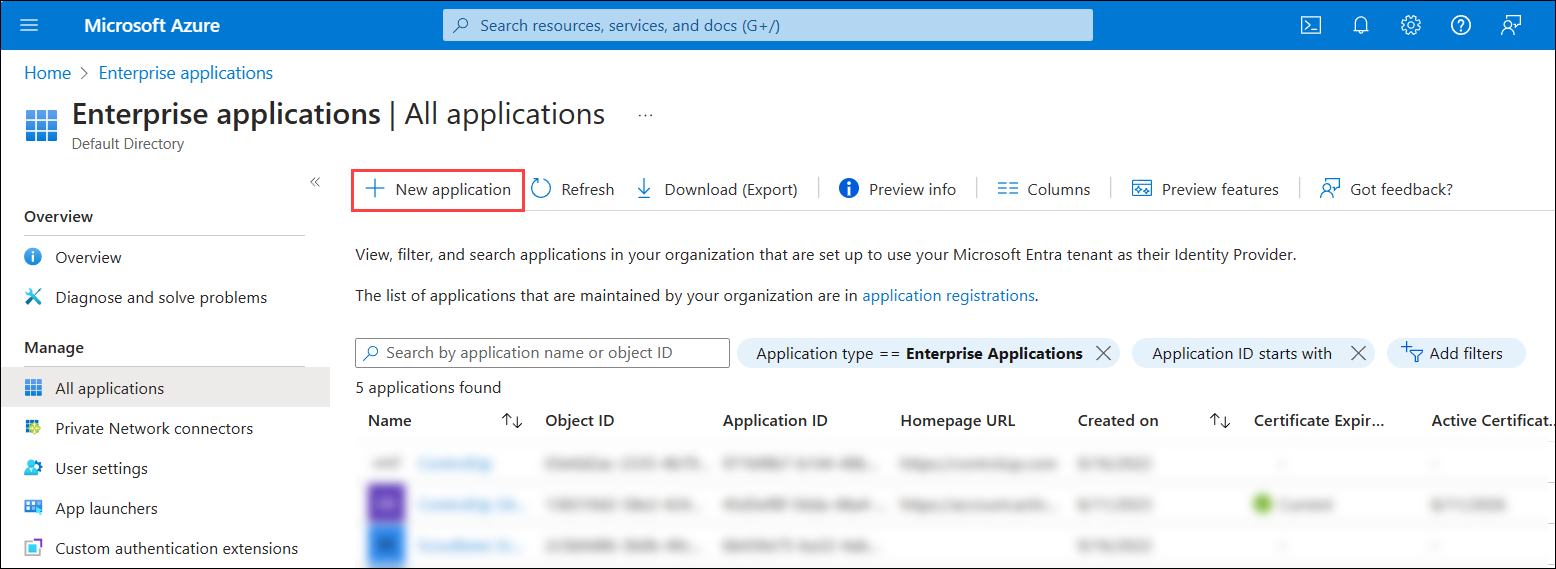
Step 1 - Create the application in Microsoft Azure
- In Microsoft Azure, go to Enterprise Applications > New application.
- Click Create your own application.
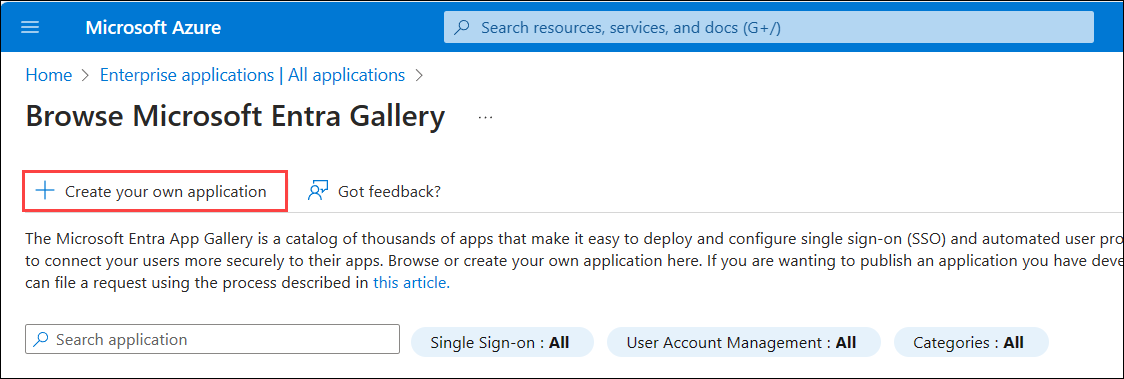
- Enter a name for the application, select Integrate any other application you don't find in the gallery, and click Create.

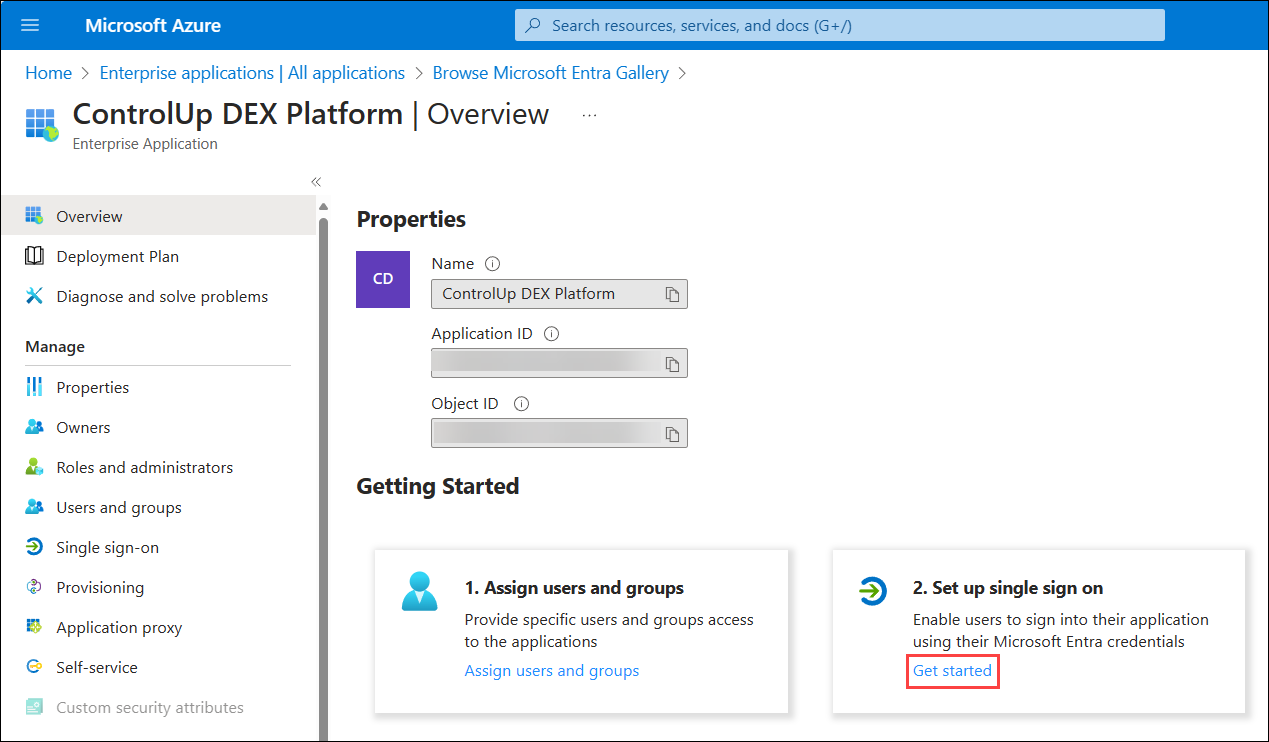
- Click Get started under 2. Set up single sign on.
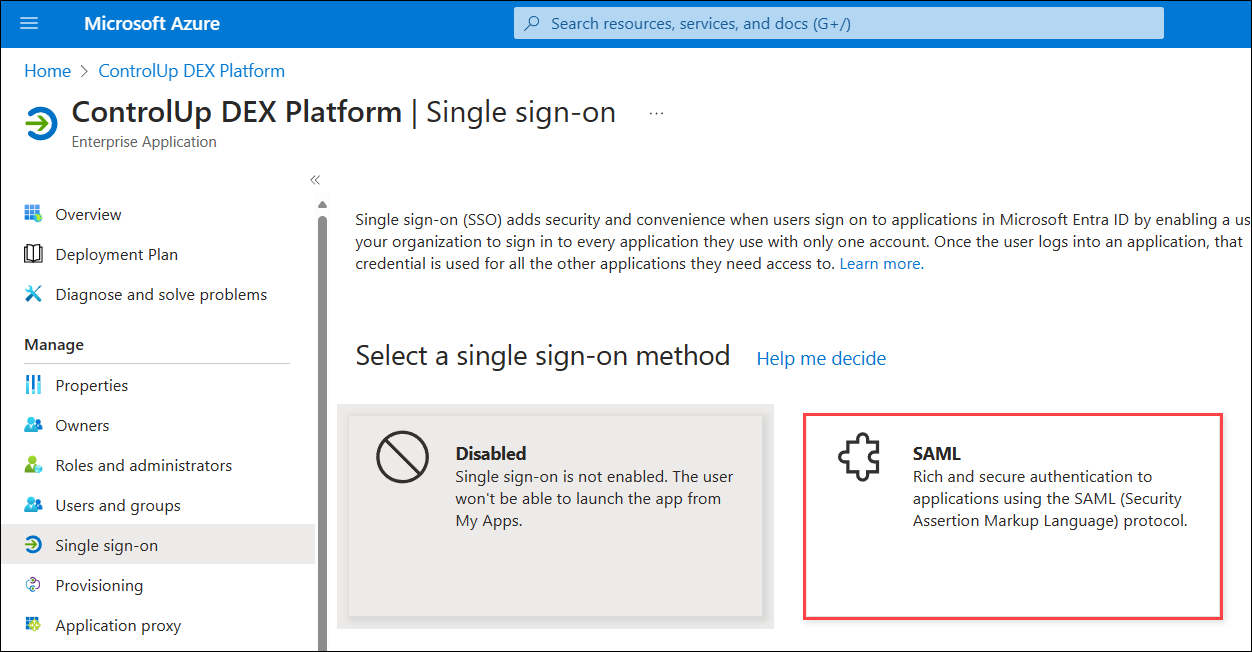
- Select SAML as the single sign-on method.
Step 2 - Import data from ControlUp into Entra ID
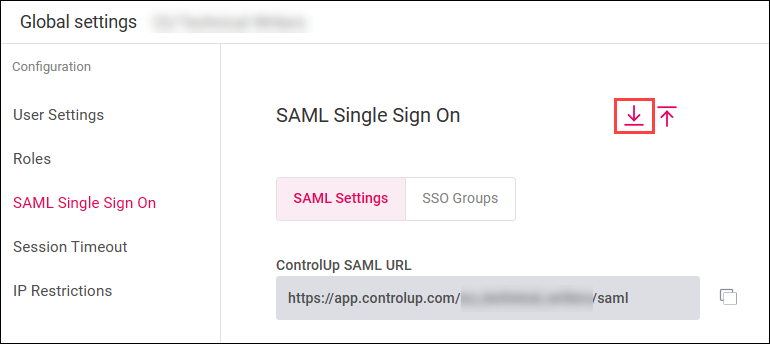
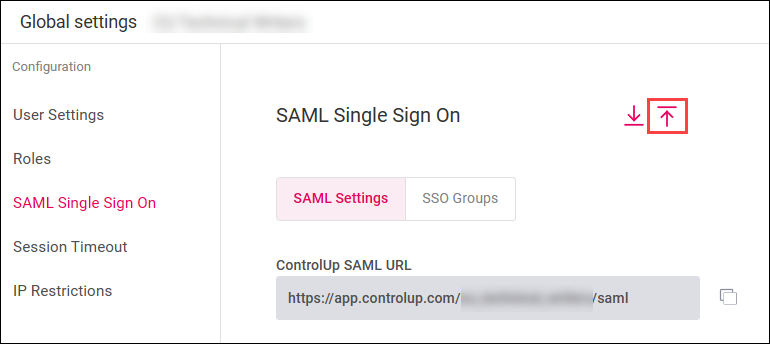
- In the ControlUp SAML settings page, click the Export icon and save the metadata file.
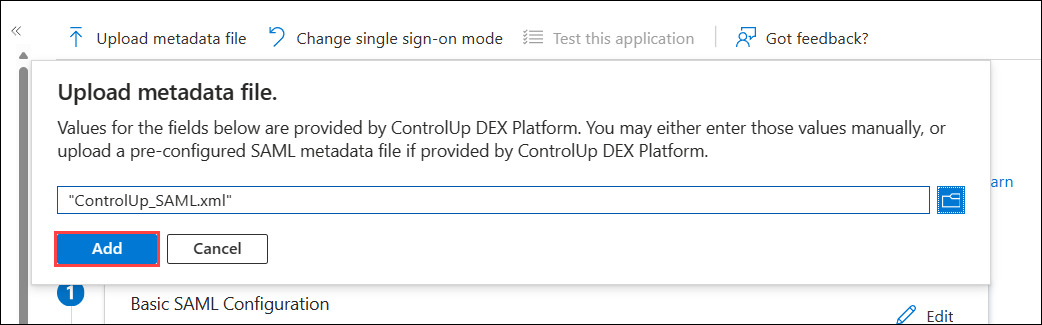
- In Entra ID, click Upload metadata file.
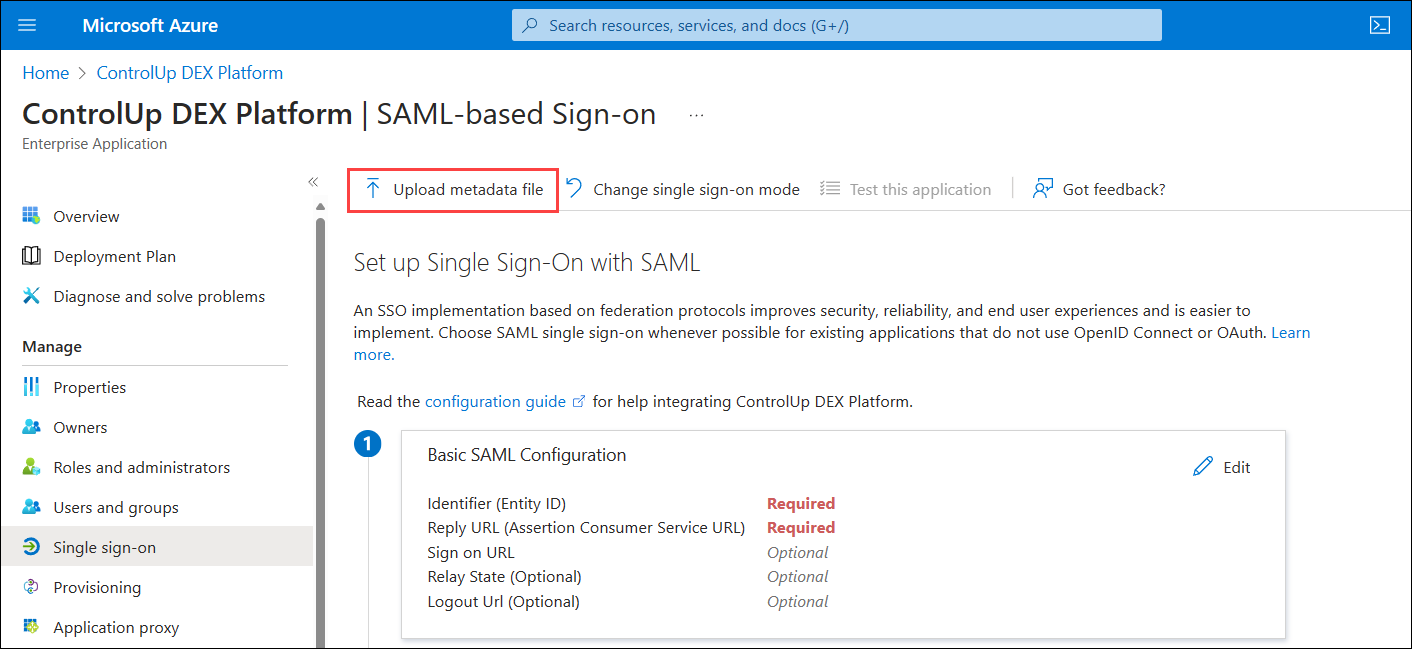
- Select the file you exported from ControlUp and click Add.
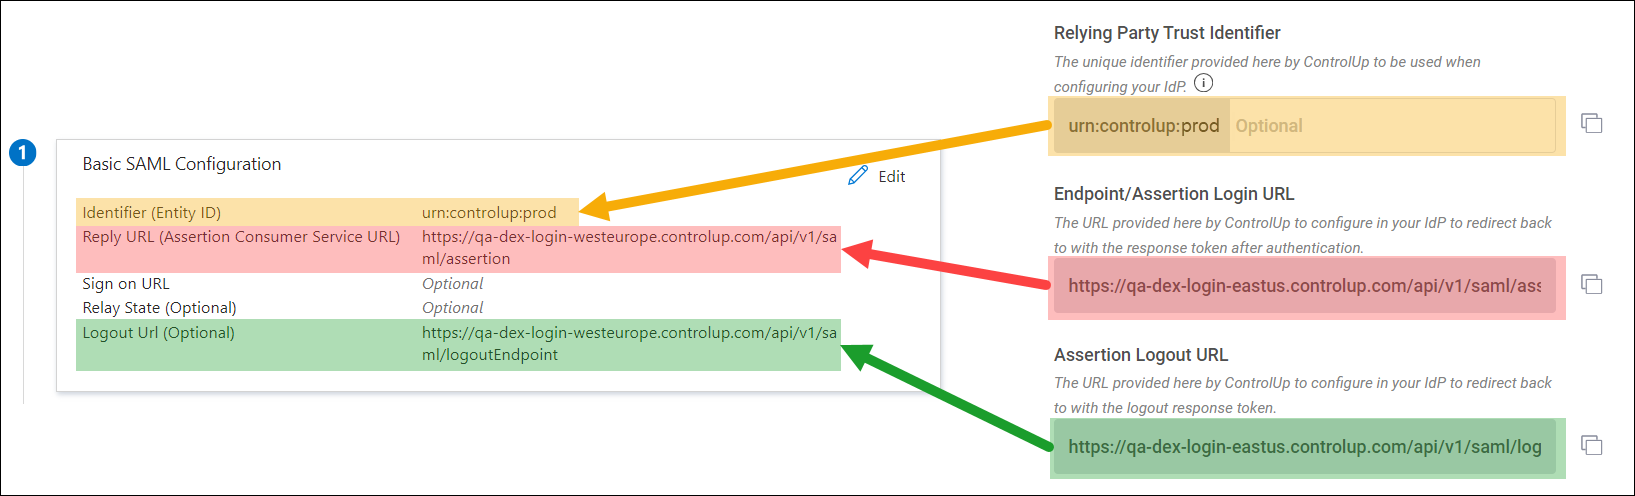
- The Identifier and Reply URL fields are automatically filled out. Click Save.
.png)
If you want to use SLO, you must manually fill out an additional field in Entra ID. Copy the IdP Logout URL from the ControlUp SAML settings page and paste it into the Logout Url field in Entra ID.
Step 3 - Import data from Entra ID into ControlUp
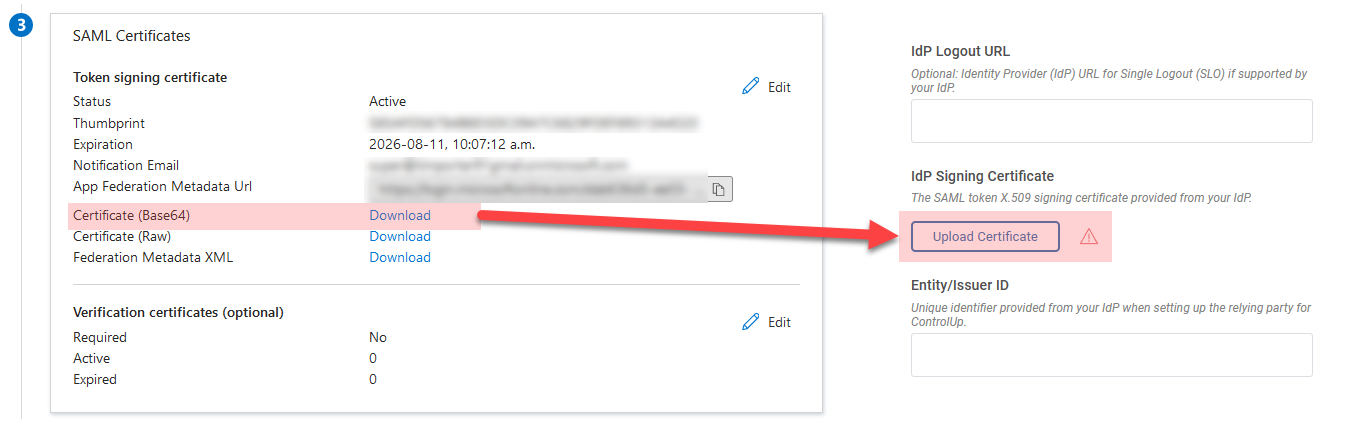
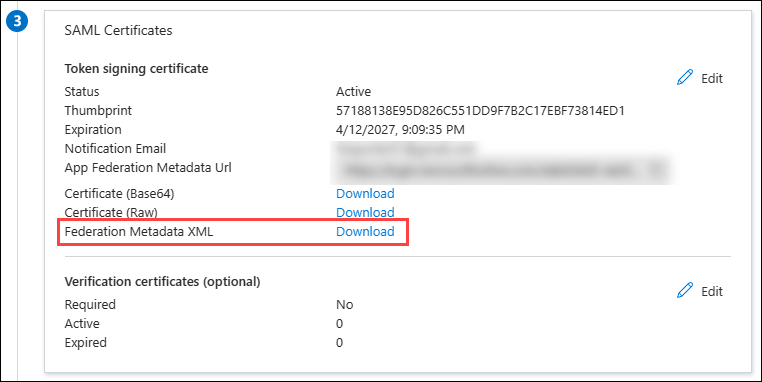
- In Entra ID, download the Federation Metadata XML file.
- In the ControlUp SAML settings page, click the Import icon and select the file you download from Entra ID in the previous step.
Step 4 - Configure user attributes in Entra ID
The required user attributes depend on how you use ControlUp and which SAML features you want to use. Read through this section and configure all user attributes that apply to your situation. Note that it is possible that none of the following sections apply to you and the default user attributes in Entra ID contain all the required information.
IdP-initiated SSO
Follow these steps if you want to use IdP-initiated SSO:
- Click Edit in the Attributes & Claims section.
- Click Add new claim.
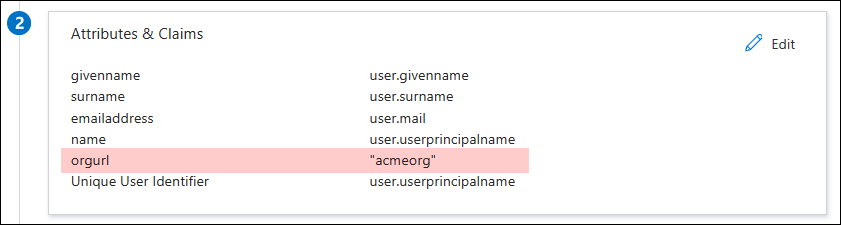
- Enter "orgurl" in the Name field and enter the name of your organization in the Source attribute field. For example, if you access ControlUp from app.controlup.com/acmeorg, enter acmeorg for the source attribute.
- Click Save.
Assign user roles based on Entra ID group membership
Follow these steps if you want to assign ControlUp user roles based on Entra ID group membership. Note that this feature requires additional configuration in your ControlUp SAML settings page. Read Microsoft's documentation to learn more about adding group claims.
- Click Edit in the Attributes & Claims section.
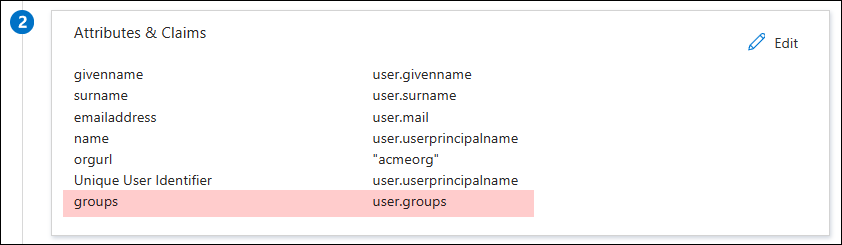
- Click Add a group claim.

- Select the groups to add to the claim and click Save. Note that `groups` shown in the screenshot below is just the friendly name for the attribute. You should not change the real name of the attribute from it's default value: `http://schemas.microsoft.com/ws/2008/06/identity/claims/groups`.
ControlUp for VDI & DaaS
The attributes in this section are necessary only if you use ControlUp for VDI & DaaS and either of the following is true:
- You use Real-Time DX version 9.0 or higher AND use LDAP to authorize to the VDI App in the web interface. To learn more about web interface authorization methods, see here.
- You use a Real-Time DX version lower than 9.0.
If either of the above bullet points applies to you, perform the following steps:
- Click Edit in the Attributes & Claims section.
- Click Add new claim.
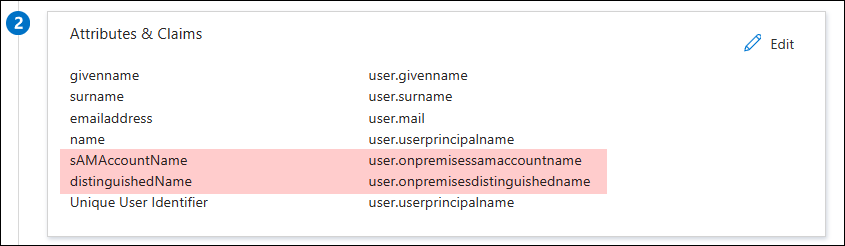
- Enter sAMAccountName in the Name field and select user.onpremisessamaccountname in the Source attribute field. Click Save.
- Click Add new claim to add a second attribute.
- Enter distinguishedName in the Name field and select user.onpremisesdistinguishedname in the Source attribute field. Click Save.
Step 5 - Set default role and save changes
In the ControlUp SAML settings page, set the Default user role for DEX user accounts that are automatically provisioned when a new user signs in with SAML for the first time. Click Apply to save your SAML settings..png)
If you want to set ControlUp user roles based on Entra ID group membership, make sure you go to the SSO Groups settings and follow the steps in Assign User Roles with SSO Groups.
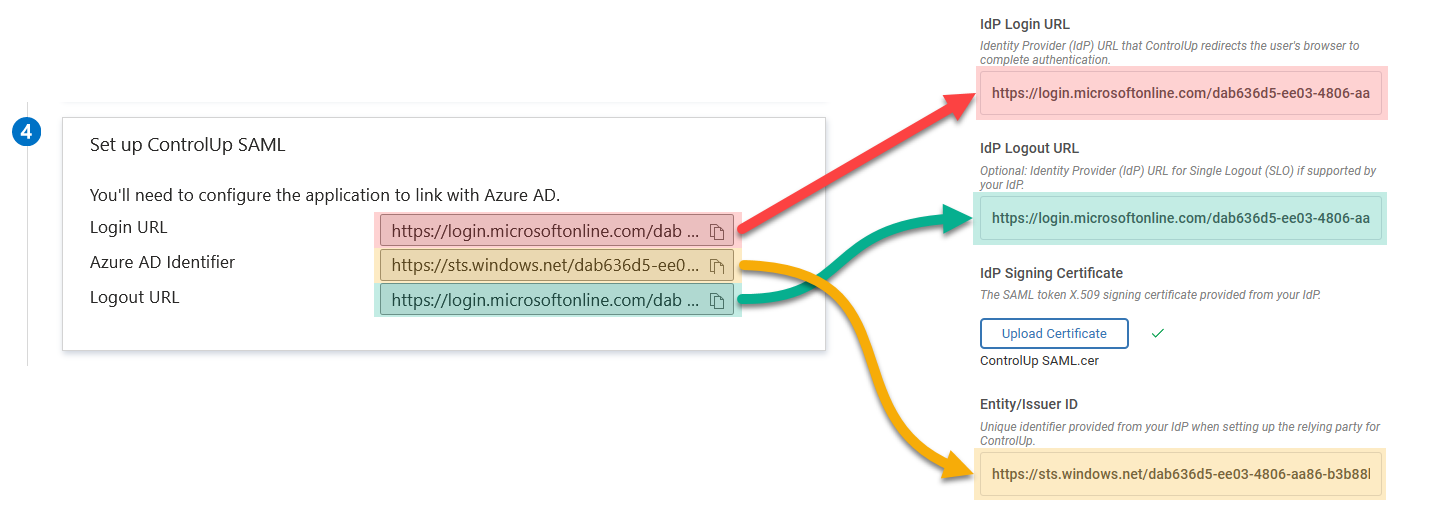
Manual configuration (not required)
The steps above show you how to set up SAML by importing and exporting XML metadata files between ControlUp and Entra ID. If you want to configure SAML manually, you can use these screenshots for reference. Note that this is not required if you followed the steps above.