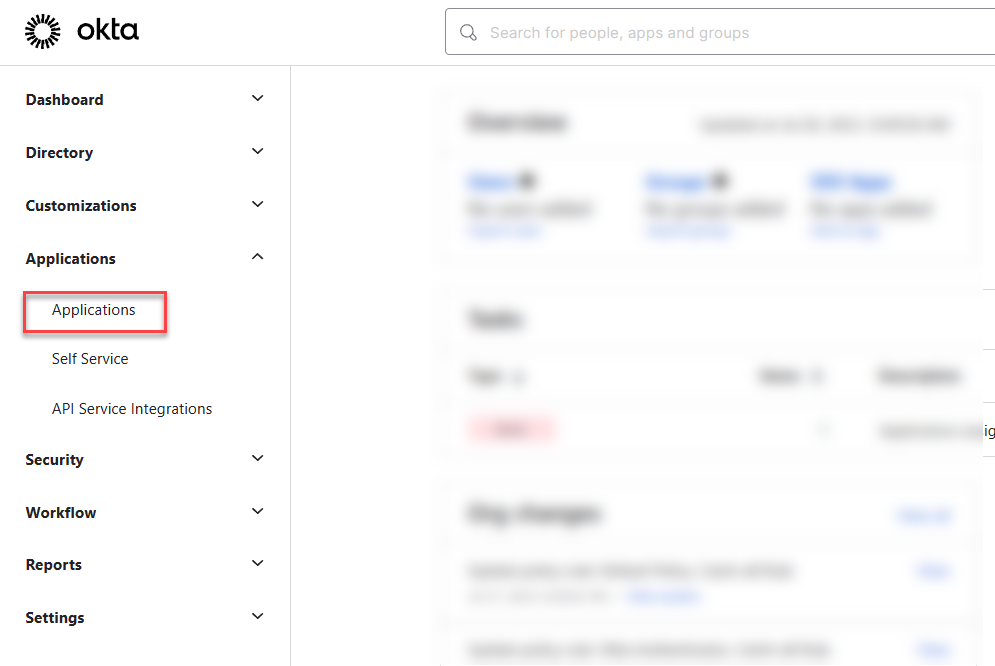
Step 1 - Create the application in Okta
- Sign in to the Okta admin dashboard with a user who has the Create App Integration and go to Applications.
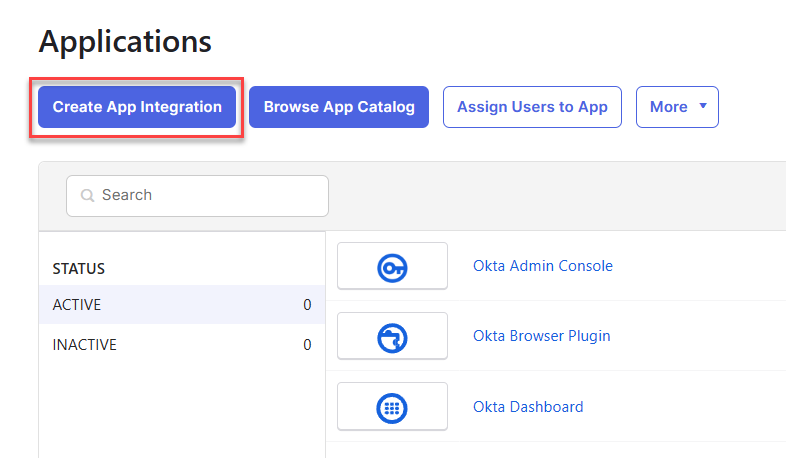
- Click Create App Integration.
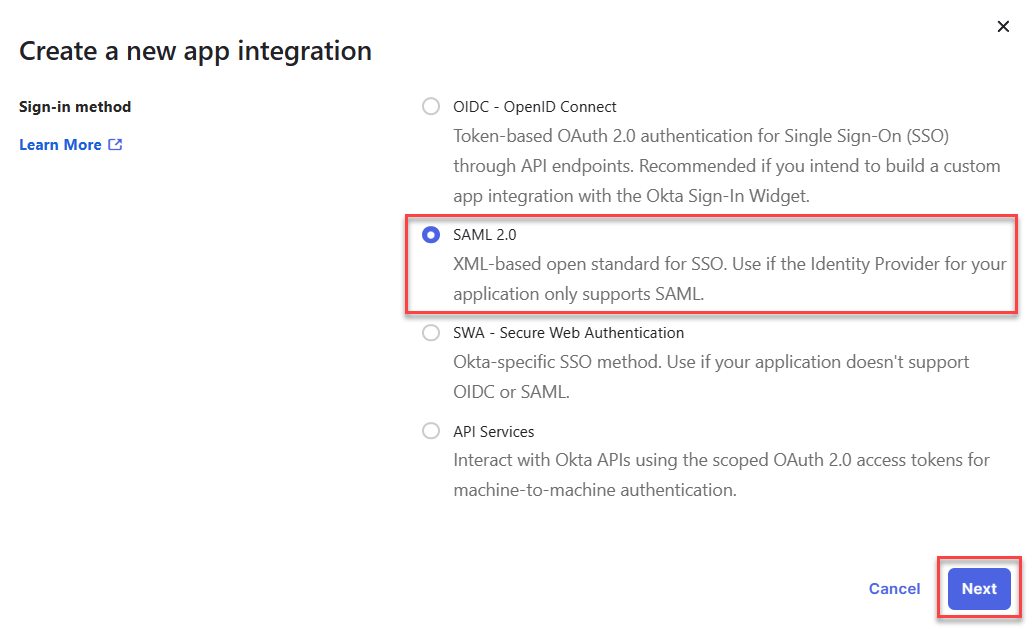
- Select SAML 2.0 as the sign-in method and click Next.
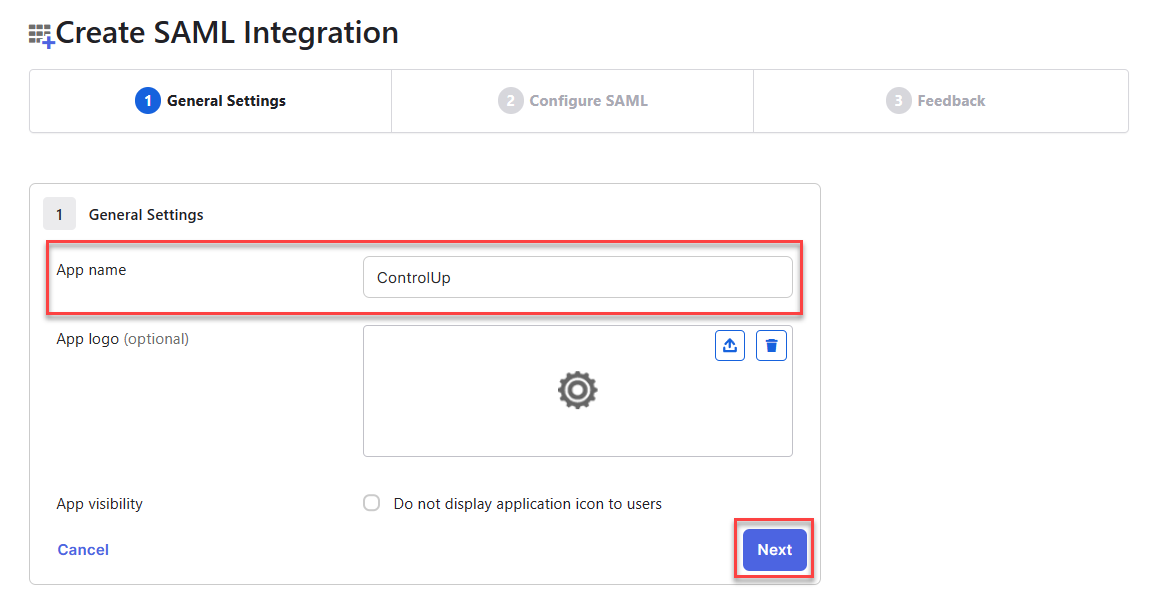
- Enter an App name of your choosing and click Next.
Step 2 - Copy data from ControlUp into Okta
- Under SAML Settings, fill out the following fields using values from your DEX SAML settings page.
- In the Single sign-on URL field, enter the Endpoint/Assertion Login URL from DEX.
- In the Audience URI field, enter the Relying Party Trust Identifier from DEX.
.png)
- Optionally, if you want to use single logout:
- Click Show Advanced Settings.
- Download the Signing Certificate from DEX SAML settings and upload it into the Signature Certificate field in Okta.
- In the Single Logout URL field, enter the Assertion Logout URL from DEX.
- In the SP Issuer field in Okta, enter the Relying Party Trust Identifier from DEX.

Step 3 - Configure attributes in Okta
Required attributes
In the Map attributes section, add the following attributes: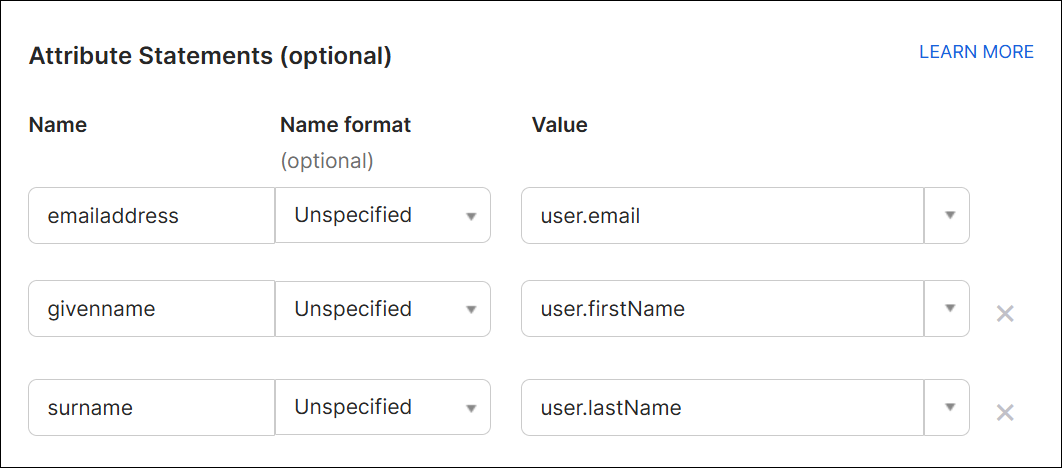
Optional attributes
Depending on which SAML features you want to use, you might have to add more attributes. Read through this section and configure all attributes that apply to your situation.
IdP-initiated SSO
To use IdP-initiated SSO, enter your ControlUp organization URL in the following attribute. For example, if you access ControlUp from app.controlup.com/acmeorg, configure the orgurl attribute to send "acmeorg".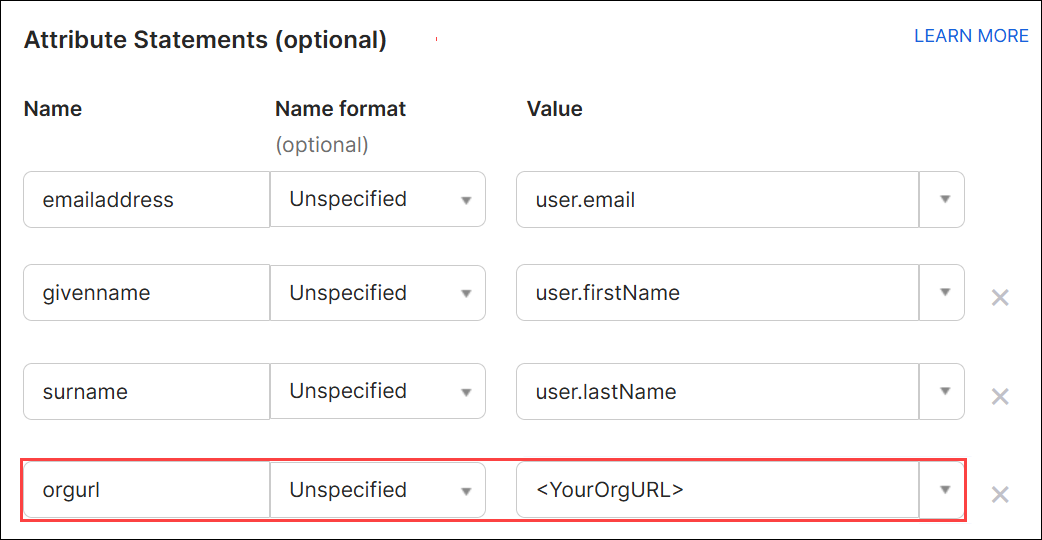
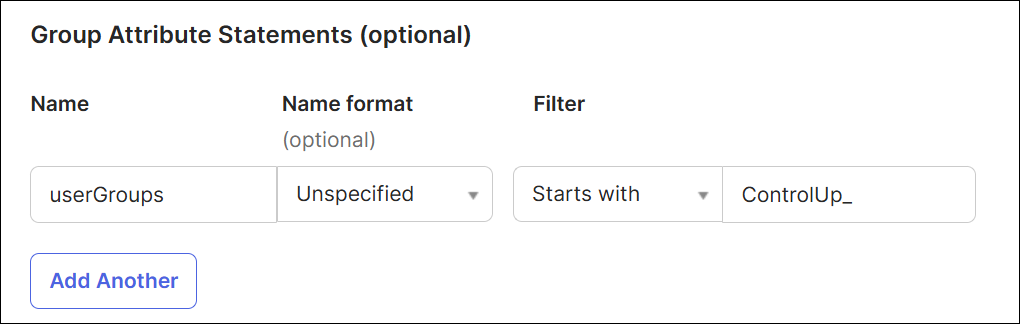
Assign user roles based on Okta group membership
To assign ControlUp user roles based on Okta group membership, you must add group attributes. Select a filter and search term that captures all user groups relevant to ControlUp. Note that this feature required additional configuration in your ControlUp SAML settings. Read Assign User Roles with SSO Groups for details.
ControlUp for VDI & DaaS
Add the following attributes if you use ControlUp for VDI and use LDAP for authorization to the VDI App. To learn more about VDI App web interface authorization methods, see here.
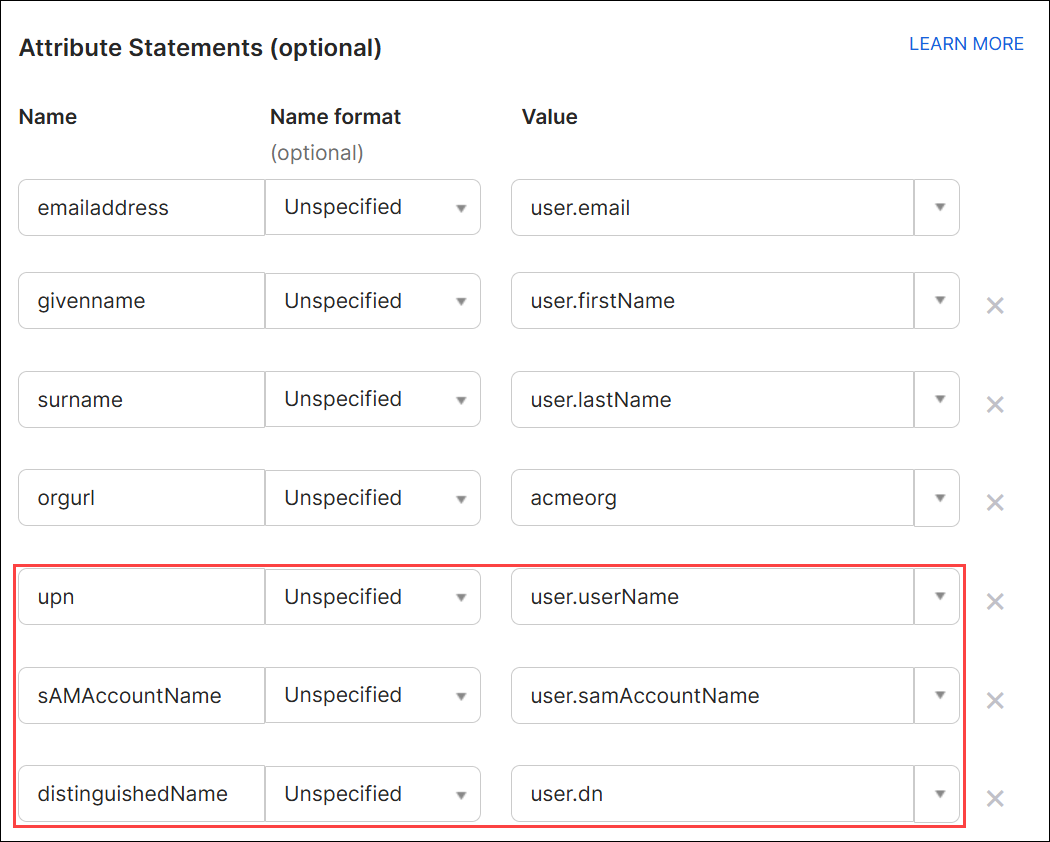
Note that the upn, sAMAccountName, and distinguishedName attributes are based on the attributes that have been mapped from Active Directory (described below) Ensure that the Values in the attribute statements refer to the correct attributes in your Okta user profiles.
Step 4 - Copy data from Okta into ControlUp
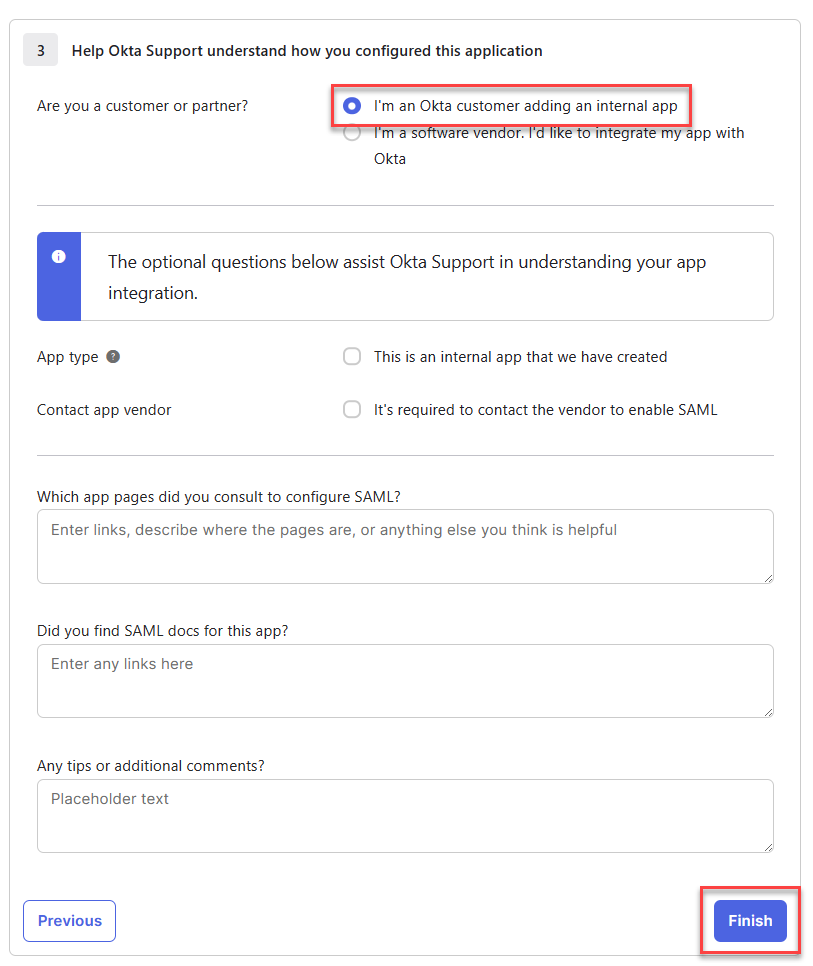
- At the bottom of the page, click Next.
- Select I'm an Okta customer adding an internal app and click Finish.
- In the Sign On tab, under Metadata details, click More details.

- Copy the Sign on URL and paste it into the field IdP Login URL in ControlUp.
- Optionally, if you want to use single logout, copy the Sign out URL and paste it into the field IdP Logout URL in ControlUp.
- Copy the Issuer and paste it into the field Entity/Issuer ID in ControlUp.
- Download the Signing Certificate and upload it in the field IdP Signing Certificate in ControlUp. Note that Okta must be configured to sign the SAML assertion.
Step 5 - Set default role and save changes
In the ControlUp SAML settings page, set the default user role for ControlUp user accounts that are automatically created when a new user signs in with SAML for the first time. Click Apply to save your SAML settings.
.png)
Adding Active Directory attributes for legacy VDI & DaaS authorization
If you use LDAP to access the VDI App, Okta must send the UPN, sAMAccountName, and distinguishedName attributes from your Active Directory. If these attributes aren't already included in your Okta user profiles, follow these steps to map the attributes from Active Directory to Okta. After mapping the attributes, you can add them to the SAML attribute statement.
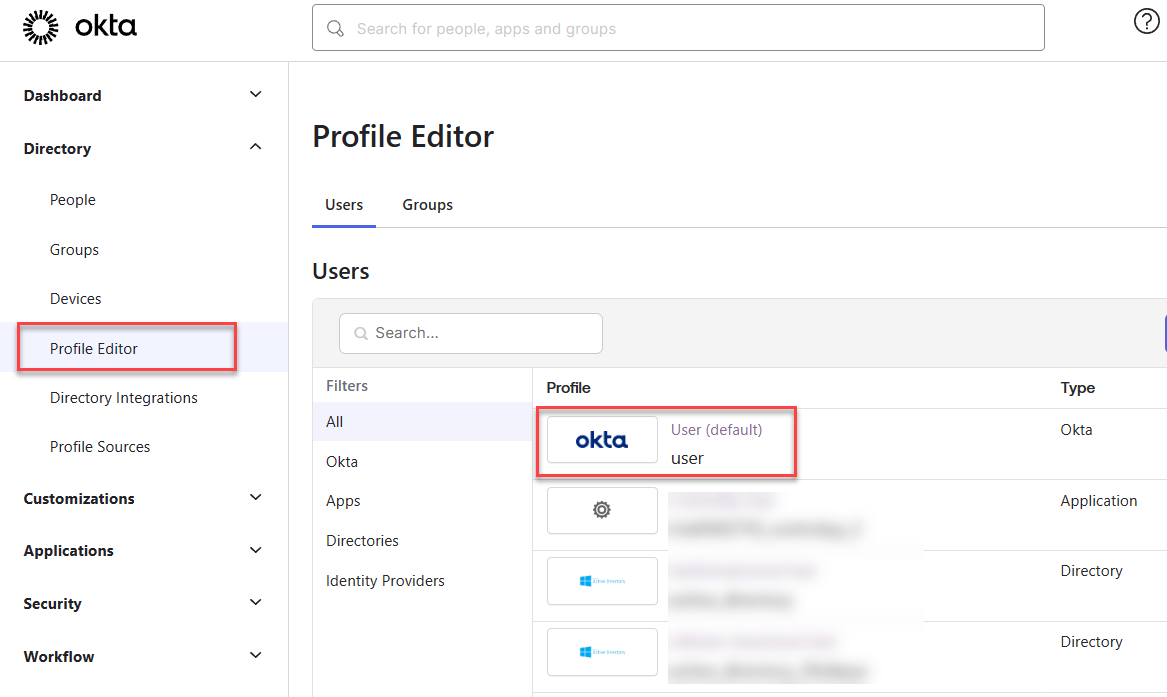
- In Okta, go to Profile Editor and select the Okta User (default) user profile.
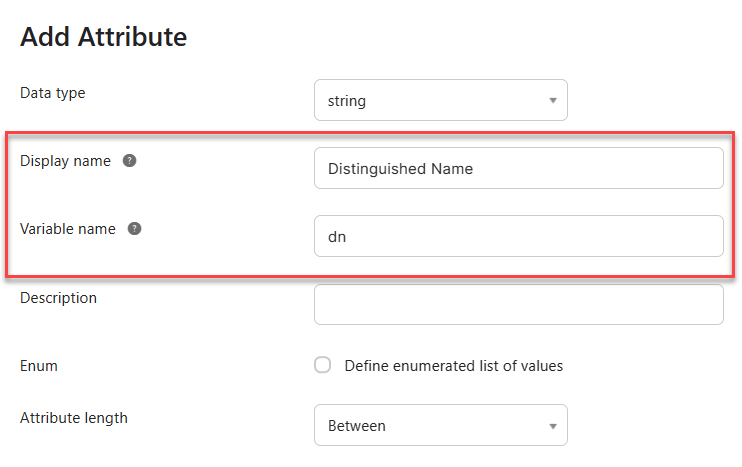
- Click Add Attribute.
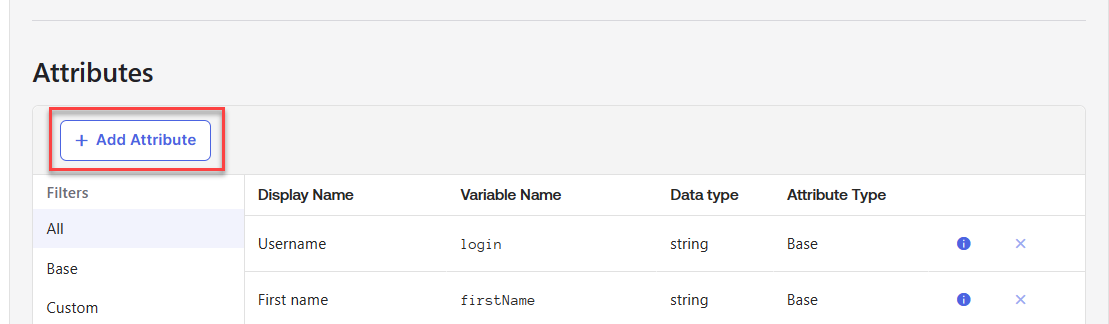
- Add three new attributes:
- Display name = "Distinguished Name", Variable name = "dn".
- Display name = "SAM Account Name", Variable name = "samAccountName".
- Display name = "User Principal Name", Variable name = "userName".
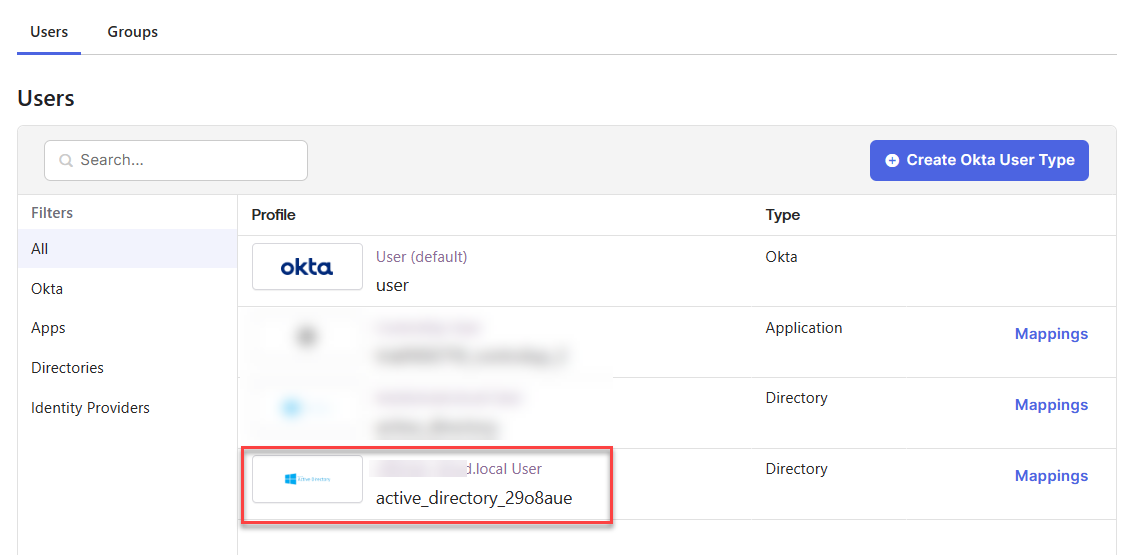
- After saving the attributes, go back to your profiles and select your Active Directory.
- Click Mappings.
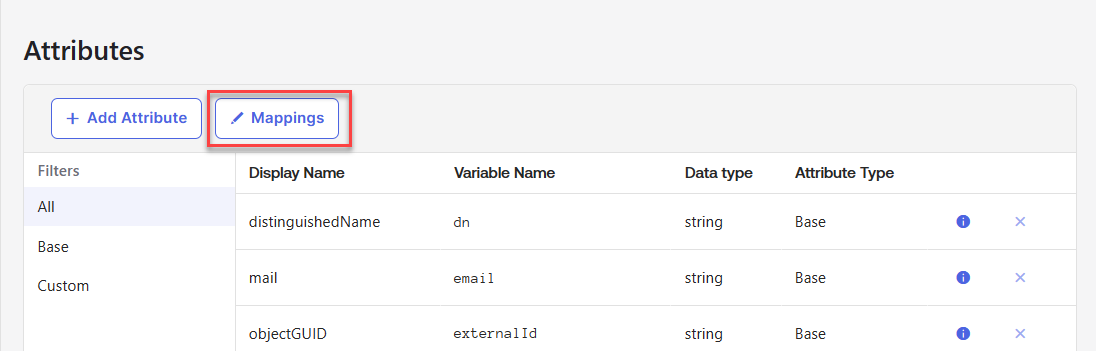
- Map the following Active Directory attributes to the new Okta user profile attributes you just created, and click Save Mappings.

Troubleshooting
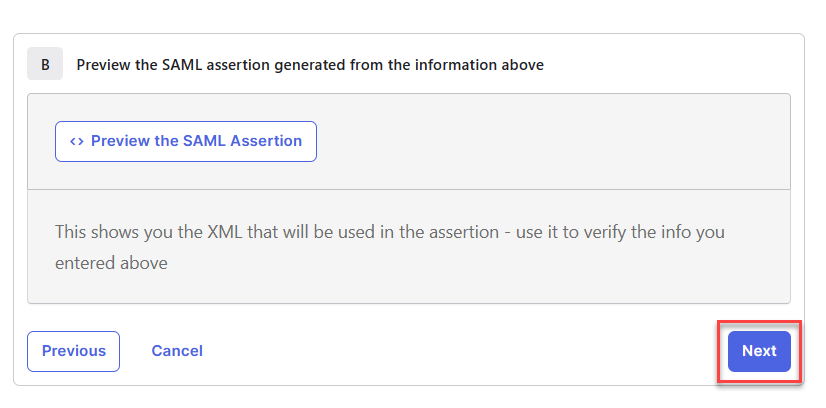
If SAML isn't working correctly after following the procedure above, it's possible that the SAML assertion isn't sending the correct information. To preview the SAML assertion, edit the application and go back to the page where you added the attribute statement, and click Preview the SAML Assertion. Note that your Okta user must be assigned to the application to preview the assertion.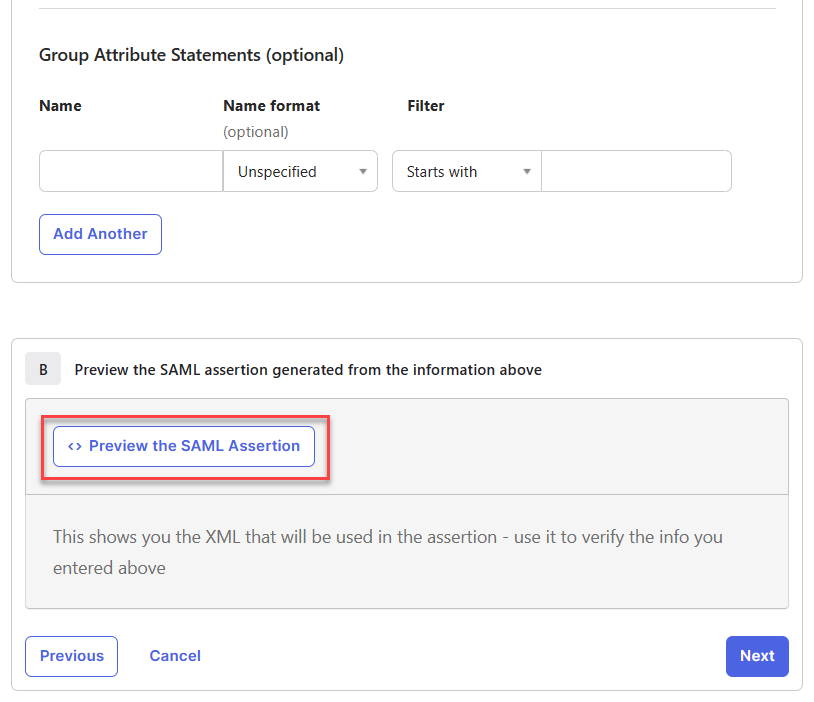
Compare the generated SAML assertion against the attribute table and make sure that:
- The Attribute Name of each attribute is written exactly as it appears in the attribute table.
- The AttributeValue of each attribute contains the correct information about the user.