The following article explains how to configure automated Script Actions, and how to set Script Actions as the follow-up actions for triggers in the Real-Time DX Console. You can also configure trigger actions with PowerShell cmdlets. For more details about how to use the Automated Actions feature, see Automated Actions.
Configure Automatic Actions Security Control
To use Automatic Actions, you must first configure:
Which Script Actions are allowed to be Automated Actions.
Which users are allowed to create and use Automated Actions.
You can use the Automated Actions Setup Wizard to configure Automated Actions. If you use the wizard, you can only grant a user permission to run all Automated Actions. You must be a user with the Configuration Owner role or have the Change Permissions permission to open the wizard.
If you require finer security control, for example, to grant a user permission to run specific Automated Actions, or to allow different actions in each folder in your organization, you can use the Security Policy pane to manually configure Automated Actions.
Configure Automated Actions in Setup Wizard
To configure Automated Actions in the Automated Actions Setup Wizard:
In the Real-Time Console, click Triggers.
Click Add Trigger or select the row of an existing trigger and click Edit to open the trigger configuration window.
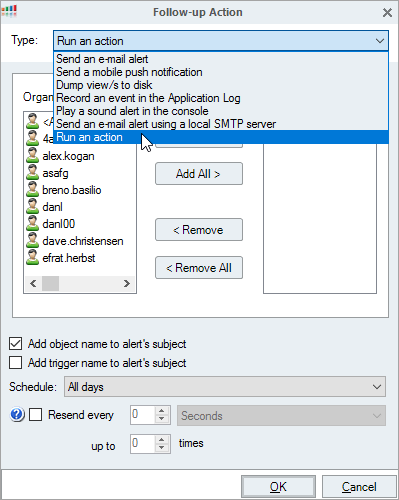
In the trigger configuration window, navigate to the Follow-up actions page, click Add, and set the Type to Run an action.
Click Next. A list appears of the scripts currently defined in your organization.
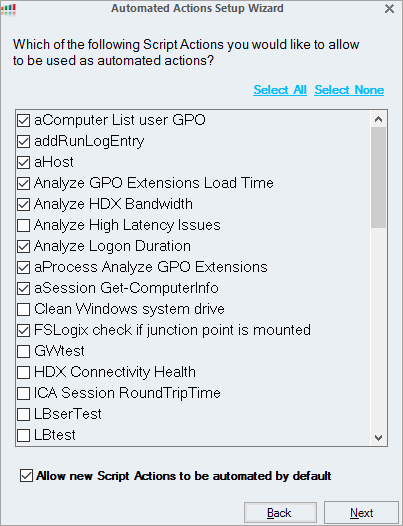
Select the scripts that you want to use as Automated Actions.
Optionally, to make all future scripts added to your ControlUp environment available for automation by default, select Allow new Script Actions to be automated by default.
Click Next. A list appears of the users and groups that currently have permission to use Automated Actions.
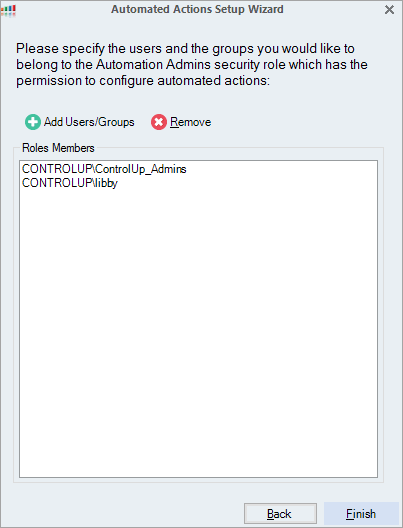
To add users or groups to the list to use Automated Actions, click Add Users/Groups to open the Account Browser window.
To search for users or groups, select the domain and root where the user accounts are defined. You can filter the list with the Search Filter and Search options.
Select the users and groups that you want to grant Create Automated Actions permissions. Hold Ctrl or shift to select multiple items.
Click OK. The users and groups you selected are added to the list of users in the Automated Actions Setup Wizard.
Click Finish to apply your changes.
Repeat these steps with the Automated Actions Setup Wizard whenever you need to modify your security settings.
Note
The wizard only enables or disables automation for scripts at the root level of the organization. By default, these settings are inherited by all of the scripts in the organization. If you manually disable the inheritance and change the settings of a script in folders below the root, these settings are not affected if the wizard is used later on to enable or disable automation for that script.
Configure Automated Actions in Security Policy Pane
If you require finer security control, use the Security Policy pane settings to allow actions to be automated only in certain folders in your organization.
To allow a user or group to set up Automated Actions, you must grant them the Configure Incident Triggers and Create Automated Actions permissions. By default, Create Automated Actions is granted to the Automation Admins role.
To allow a Script Action to be used as an Automated Action, you must allow the action to be run by the Automation Admins role.
To manually configure the automation settings of a Script Action:
In the Security Policy pane, change the Automation Admins permission of the Script Action as required (Allow or Deny).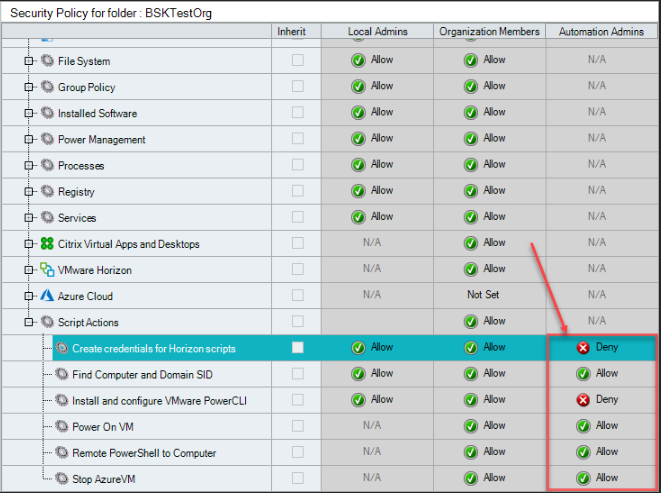
Use an Automated Action as a Trigger Follow-up Action
After you configure automation security with either the setup wizard or the security policy, you can use a Script Action as a trigger follow-up action.
To use a Script Action as a follow-up action:
Set up a trigger as described in Setting up Triggers until the step where you choose a follow-up action.
Set the follow-up action Type to Run an action. The settings for the automated action open.
Set the Action Type to Script Action.
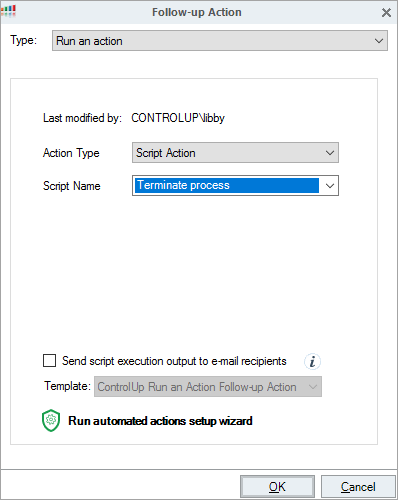
Select the name of the Script Action that you want to use. All script actions defined in the trigger's scope are listed. Script Actions that can't be automated appear gray.
Note
Select a gray Script Action to see why it can't be automated and what you need to change. For more details, see Modify Scripts for Automation.
Optionally, to send information about the script's execution to users, select Send script execution output to e-mail recipients. The script execution output contains information about the Script Action performed, including the full script output as an attached text file.
Note
If you select this option, the email is sent only if either Send an e-mail alert or Send an e-mail alert using a local SMTP server are also set as a follow-up action for the specific trigger. In this case, the recipient recieves one email when the trigger activates, and a second email when the Script Action completes.
Optionally, if you select Send script execution output to e-mail recipients, select the Template to use for the email.
Click OK to save the follow-up action.