ControlUp can monitor IGEL endpoints via the Linux Data Collectors feature. This exciting combination of ControlUp and IGEL gives administrators the ultimate visibility of their environment. From the actual user to the backend, you can see it all.
Prerequisites
To enable complete integration, ControlUp requires some configuration changes to your IGEL endpoints.
- SSH must be enabled on the endpoints.
The restricted “user” account can be used but process disk metrics will not be displayed. We recommend using “root” to display all metrics.NoteIf your ControlUp Console is unable to connect to the IGEL device, ensure that you can connect with PuTTY using the same account you have configured for ControlUp. When you connect with PuTTY, you should end at a prompt. If you get disconnected immediately, then the same will happen to ControlUp and the integration will be unsuccessful. - A ControlUp Monitor Cluster is highly recommended for monitoring your endpoints.
- IGEL OS 10+ with Enterprise Management Pack.
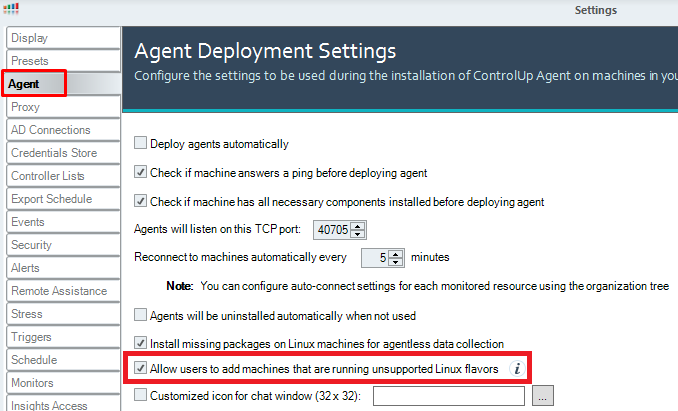
- In the Agent Settings, enable "Allow users to add machines that are running unsupported Linux flavors"
Installation Guide
The main benefit of integrating your IGEL devices into ControlUp is the ability to monitor and manage your IGEL endpoints from the Real-Time Console. If you use IGEL firmware version 11.04 or below, you need to create a custom partition which is explained in the [Installation for IGEL v11.04 and below guide](#installation-for-igel-v1104-and-below). If you use IGEL 11.05 and above, there is no need to create a custom partition and you can directly add your IGEL appliances into ControlUp.
Installation for IGEL v11.04 and below
- Download the ControlUp Integration pack from here.
- Extract both files, ControlUp.inf and ControlUp.tar.bz2, to your UMS server.
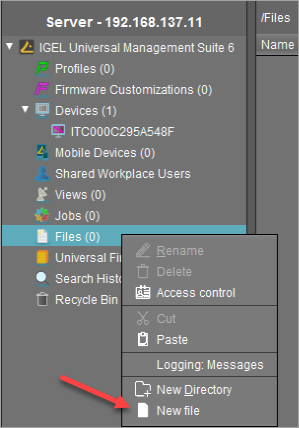
- On your IGEL UMS server, import the two ControlUp files
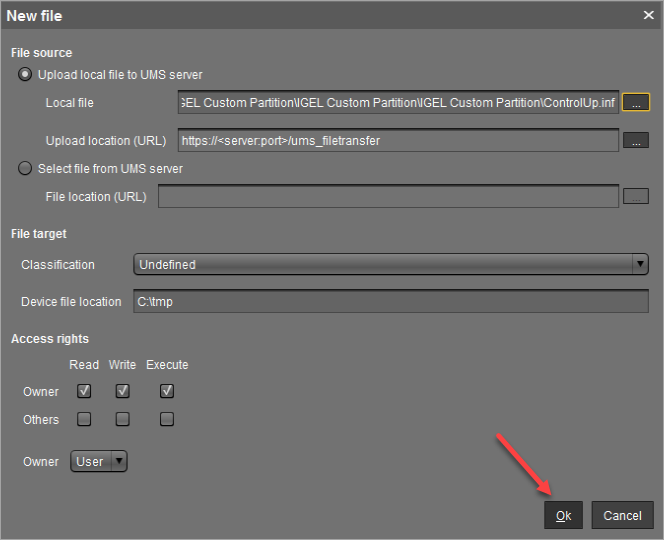
To import the ControlUp files:- Right-click Files and select New file.
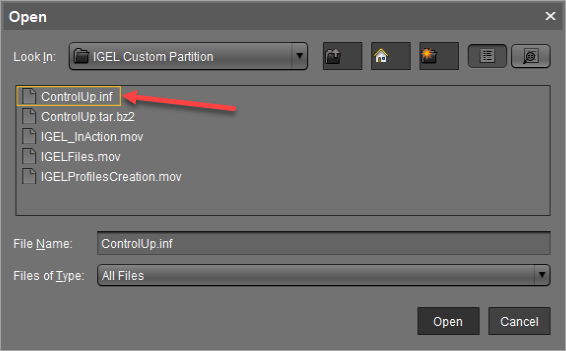
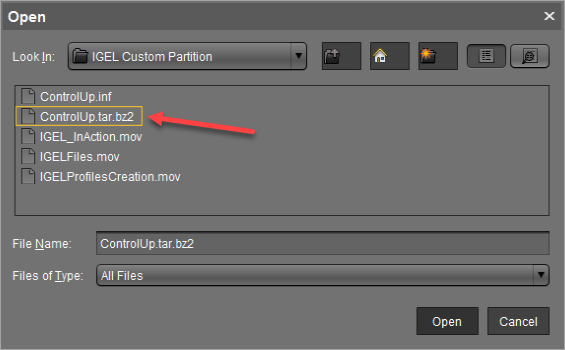
- In the New file dialog, click ... and navigate to the ControlUp.inf file and click Open.
- Click OK to upload the file to the UMS server.
- Repeat Step b + c with the ControlUp.tar.bz2 file.
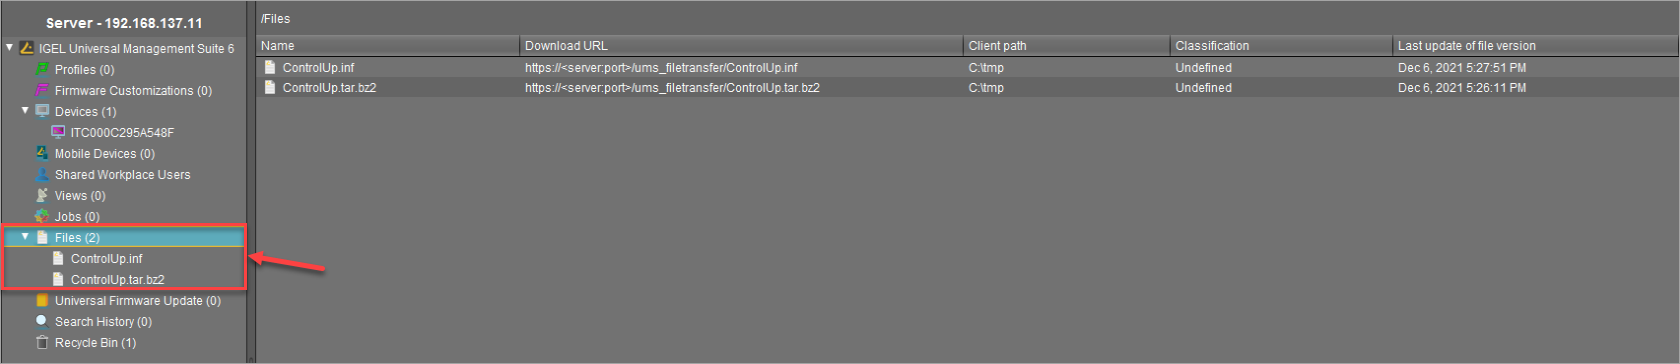
- Once you uploaded both files, make sure that both files appear under Files.
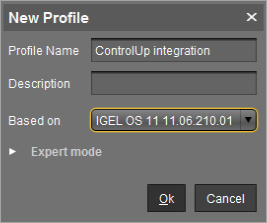
To create a new profile:- In your UMS console, right-click Profiles and select New Profile.

- Provide a profile name and click OK. In our example, we use the profile name ControlUp integration, but you can give it any name you want.
- In the configuration wizard of your new profile, navigate to System > Firmware Customization > Custom Partition > Partition.
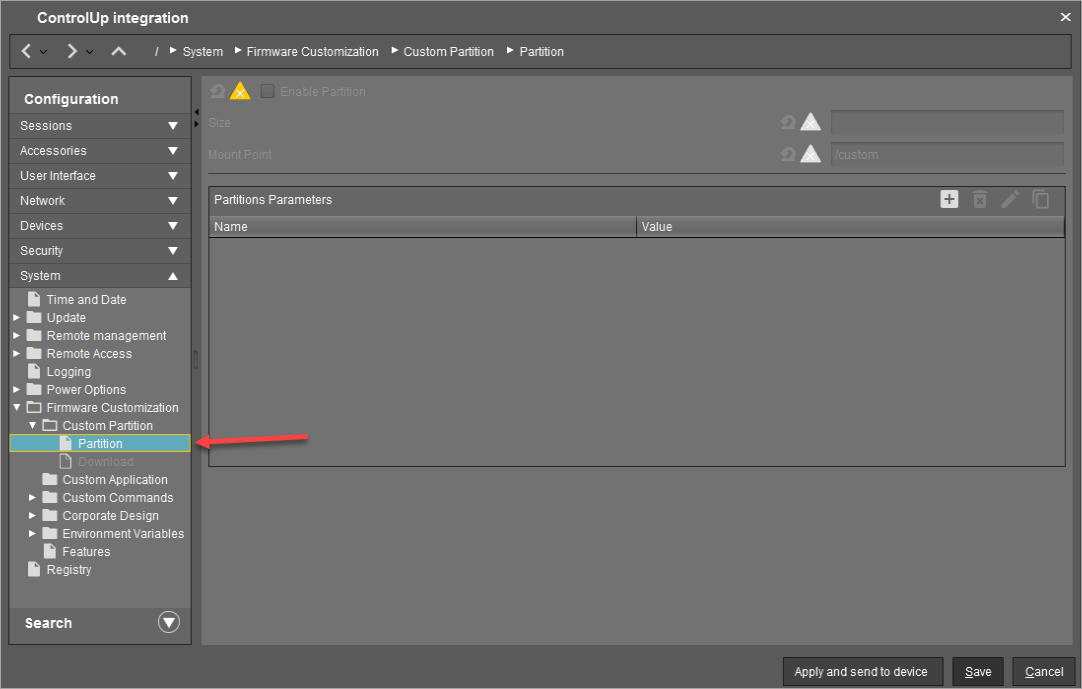
- Click the
 icons under Enable Partition, Size, and Mount Point to activate the input controls. Select the Enable Partition checkbox and set the size of the partition to 100M and the Mount Point to /custom. Click Save to apply the configuration.
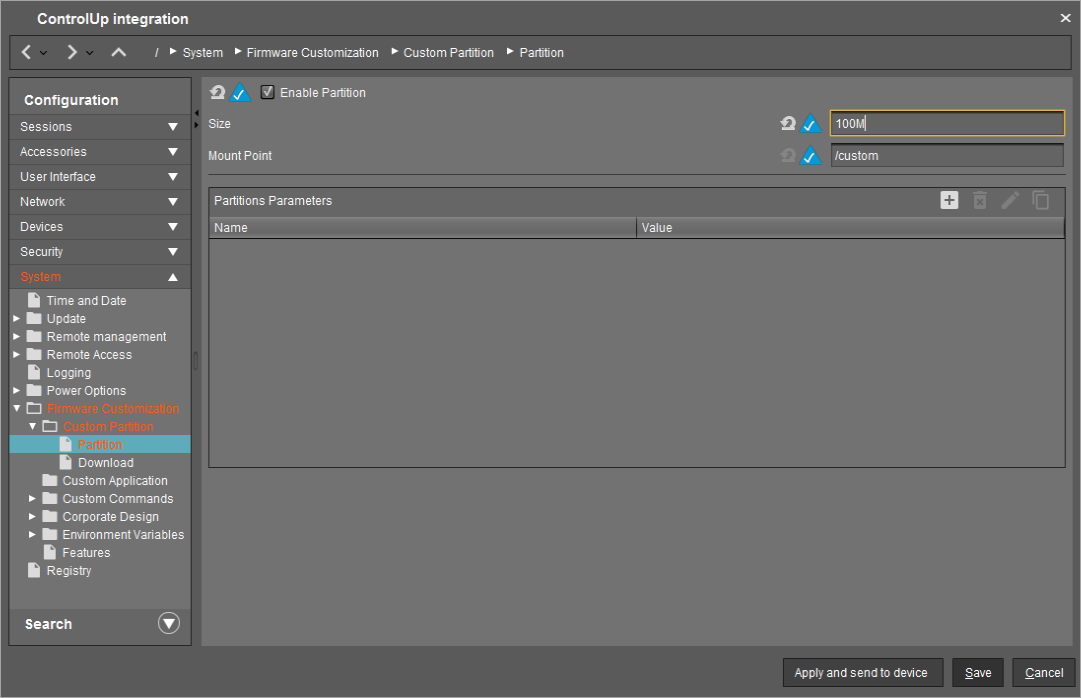
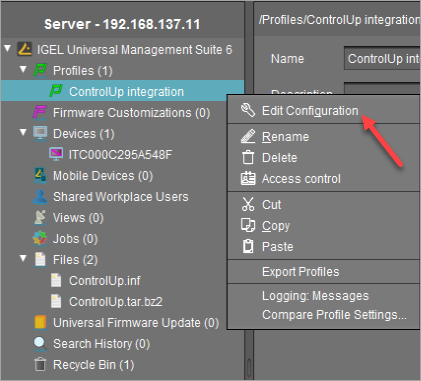
- Right-click the profile and select Edit Configuration.
- Under System > Firmware Customization > Custom Partition > Download (1), click the
 icon.
icon. 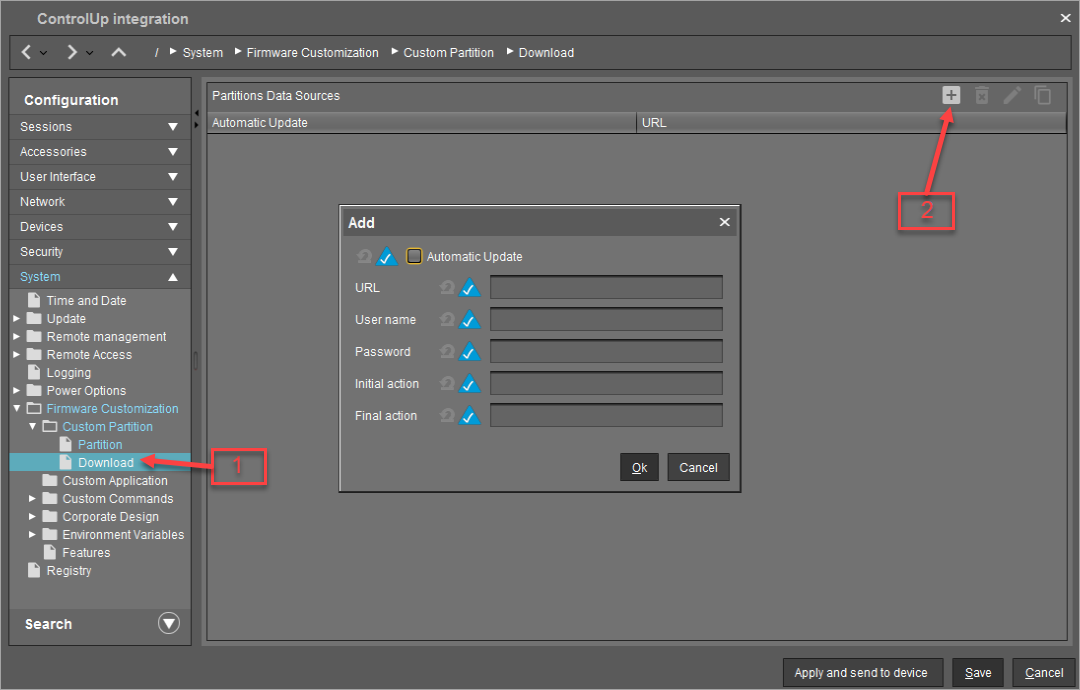
- In the Add wizard, enter the parameters of your download source and click OK.
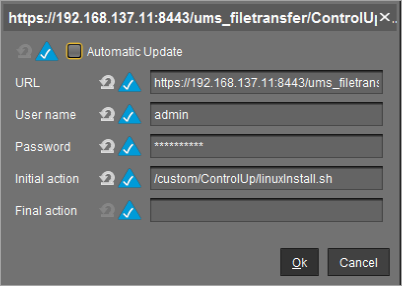 Once done, click Save.
You are now up and running with monitoring your IGEL devices in ControlUp. The next chapter explains how to add IGEL appliances to ControlUp.
- Right-click Files and select New file.
Add IGEL Devices to ControlUp
In this section, we guide you through to process of adding IGEL devices to your Real-Time Console.
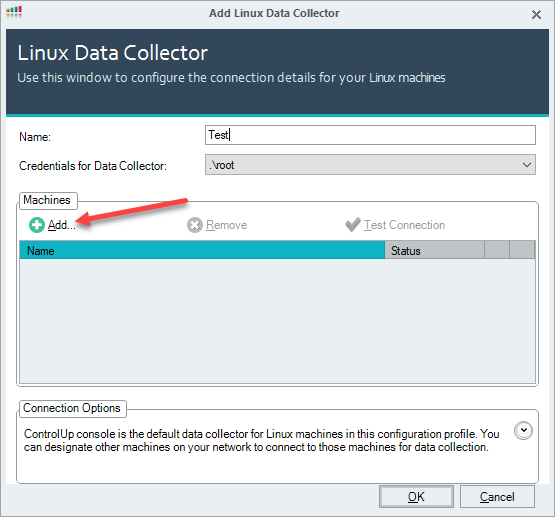
Create a New Linux Data Collector
The first thing you need to create is a Linux Data Collector.
If you already have a Linux Data Collector configured in your ControlUp organization, you can skip this step.
To create a new Linux Data Collector:
- Click Linux Data Collector in the Home ribbon.
- Under the Machines tab, click the + Add button.
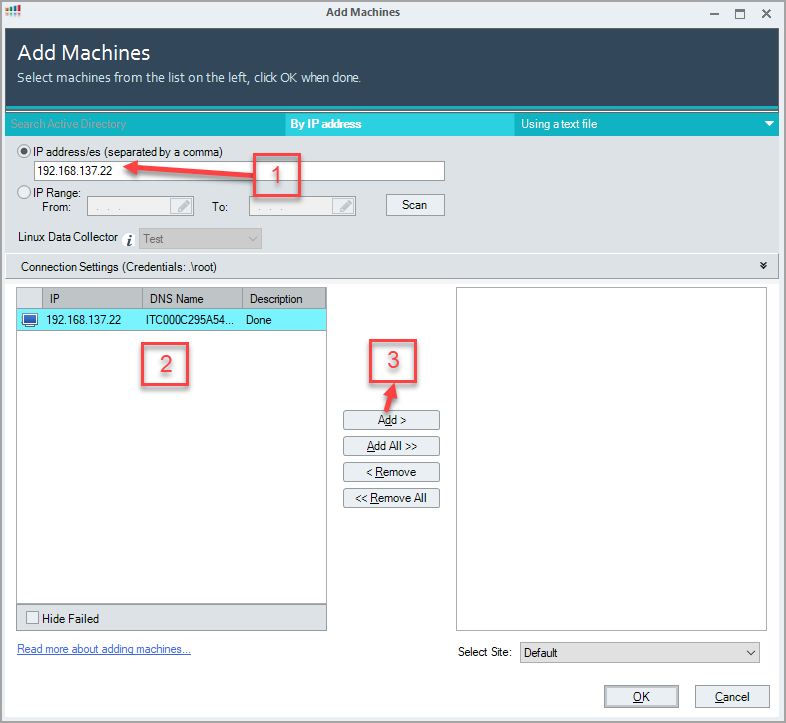
- In the Add Machines wizard, search for your IGEL devices(s) by entering the IP address(es) (1). Click Scan to search for the device. Once found, the device is shown in the list (2). If ControlUp establishes a successful connection to the device, the screen icon appears blue and you can start adding the device by clicking the Add button (3). Click OK to confirm the selection.
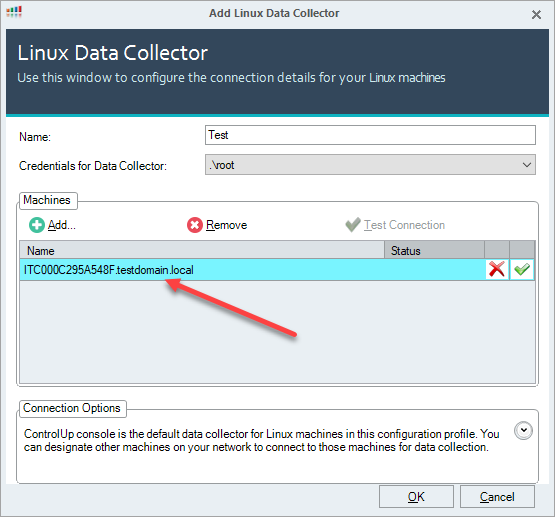
- The added machine is shown under Machines as shown in the screenshot below. Click OK to add the listed machines to ControlUp.
- Confirm the popup by clicking Yes. Necessary packages are installed on your IGEL device.
- Once the installation of the packages is finished, you can start monitoring your IGEL endpoint in ControlUp.

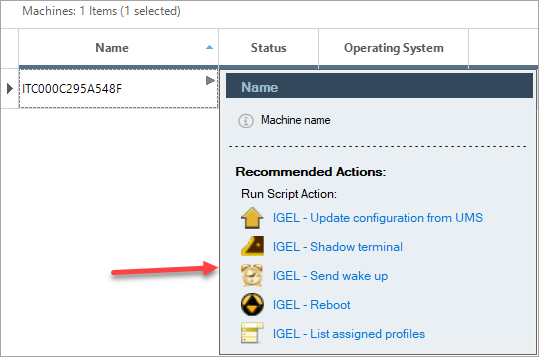
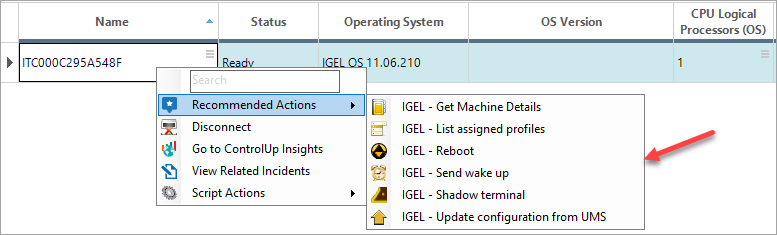
IGEL Management Actions in ControlUp
We created an initial set of management script actions to use in the Real-Time Console. Right-click your preferred IGEL devices and you can run the following actions:
Machine Actions:
- Get Machine Details
- List assigned profiles
- Reboot
- Send Wake Up
- Shadow Terminal
- Update configuration from UMS
Session Actions:- Get Machine Details
 If you have “Show Recommendations for Non-Stressed Metrics” enabled under the “Display” options, then clicking the “
 ” icon will reveal the Top Recommended Actions menu.