You can use built-in VDI actions to remotely control a user session from our VDI App.
Prerequisites
Known Issue
For Remote Control to work, ControlUp Agents must be installed in the default C: drive path.
Allow the Run Session Actions below.
Make sure to enable or allow pop-ups in your browser. For example, if you’re using Chrome as your browser, make sure app.control.com is set as “Allowed popups and redirects”.
Allow list the folder C:\Program Files\Smart-X. If you can’t allow this folder, you must allow the following files under folder C:\Program Files\Smart-X\ControlUpAgent:
cu_rc.exe
cuagent_rc.exe
Make sure that both the Monitors and the Agents can access the following URLs over TCP port 443 (HTTPS / WSS):
Region | URLs |
|---|---|
US + Rest of the World (non-EU) |
|
EU |
|
Permissions
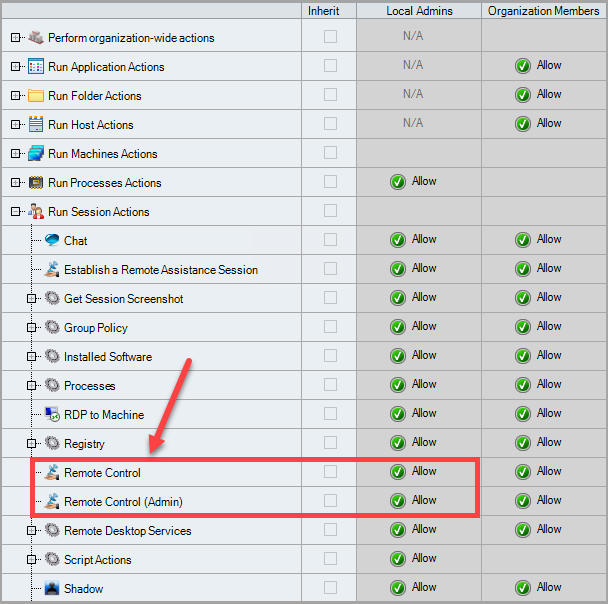
In the Security Policy pane of the Real-Time Console, you must allow the following Run Session Actions:
Remote Control, allows starting a Remote Control session requiring user consent.
Remote Control (Admin), allows starting a Remote Control session with optional user consent, and the ability to use Elevated Command Prompt.
Start Remote Control Session
To start a Remote Control session on a user’s device:
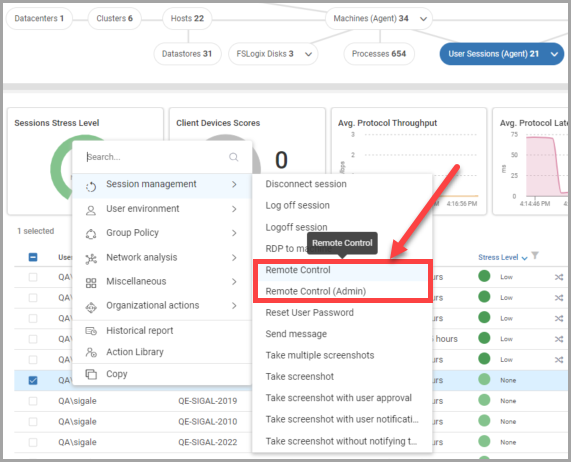
In the Topology view of the VDI App, drilldown to User Sessions (Agent) and select a user. You can remotely control a single device per Remote Control session.
Right-click the user, select Session management and then select one of the following options:
Remote Control, user consent required
Remote Control (Admin), user consent optional, can open Elevated Command Prompt
Click Start session:
If you selected to Ask for user consent, a Remote Control request popup to allow or decline appears on the user’s screen. Only if they click Yes, the user’s screen appears on your screen. If they click No or don’t click Yes after 1 minute, the Remote Control action fails.
If you didn’t select to Ask for user consent, a Remote Control notification popup appears on the user’s screen, and the user’s screen appears on your screen.
While the Remote Control session is active, an icon appears on the end user's device:
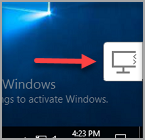
If the user clicks on the icon, they can see who initiated the Remote Control session and they have the option to end the session. Note that user can end the Remote Control session even if you initiated the session without asking for consent. By default, the Remote Control session ends after 10 minutes.
Remote Control Functionalities
![]()
Multi-monitor support
You can select which display to control if the remote user has multiple monitors (displays) on a machine with the ControlUp Agent installed. To view and control all displays at the same time, Select All Displays on the machine. If the remote user doesn’t have multiple monitors, the All Displays selector doesn’t appear.
Copy and paste between displays
You can select the Clipboard checkbox to copy and paste between your local admin display and the remote user display.
Zoom in
Click Zoom to zoom in on the remote display. After you zoom in, you can select which part of the screen to view by clicking on the screen area map at the top right corner.
Take a screenshot
Click Screenshot to take a screenshot of the remote display. The screenshot is saved to your local Downloads folder.
File transfer
You can transfer files up to 100MB between your admin device and the user's device.
To retrieve a file from a device:
Click Retrieve Files.
Navigate to and select the files you want to retrieve.
Click Retrieve. A progress bar appears at the top of the Remote Control session to show the progress of the file transfer.
The retrieved files are saved to your local Downloads folder.
To send files to a device:
Click Send Files and select whether you want to send Files or entire Folders.
Navigate to and select the file or folder you want to send.
Click Upload or Open. A progress bar appears at the top of the Remote Control session to show the progress of the file transfer.
The sent files are saved to the device in the local Downloads folder.
Task Manager
Click Ctrl-Alt-Del to open Task Manager on the user’s device. You can also use Ctrl-Alt-Del to lock the device, sign out, change the password, shut down, or restart the device.
Open an elevated command prompt
Click Elevated Cmd to open an Elevated Command Prompt, which gives you admin privileges. The Elevated Command Prompt automatically closes at the end of the Remote Control session so that the user device doesn’t have admin access.