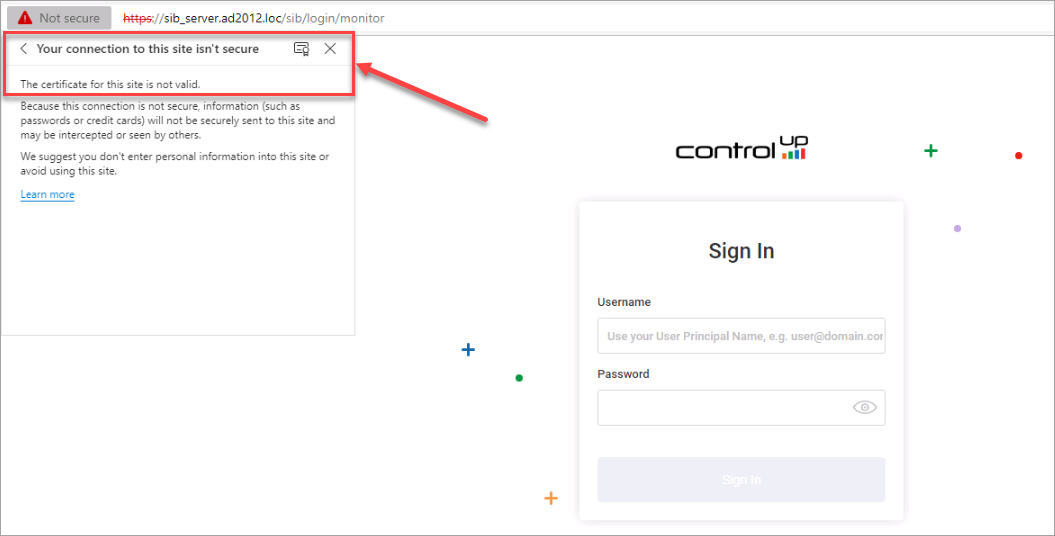
By default, Solve On-Premises (SOP) creates its own self-signed certificate once you deploy a new SOP appliance. When connecting to the SOP server from the browser, a warning message indicates that the certificate is not valid for the site.
Instead of using the self-signed certificate, we recommend to use a certificate from a trusted certificate authority (CA). In this article, we show you how to replace the self-signed certificate trusted by a certificate authority. There are several ways to perform this task. Our recommended steps are outlined below.
How to Replace a Certificate
-
SSH into your SOP server with the user cuadmin. As the password, use the password you provide during the OVA deployment.
ImportantNote that the root user is deactivated by default from version 8.6 and higher.
-
Run hostname to get the fully-qualified domain name (FQDN) of the machine.
cuadmin@sib_server [ ~ ]$ hostname sib_server.AD2012.LOC -
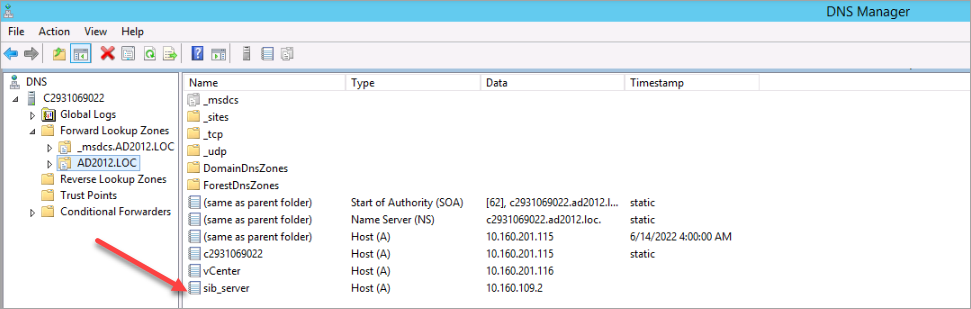
In your DNS configuration, create an A Record and make sure the hostname resolves.
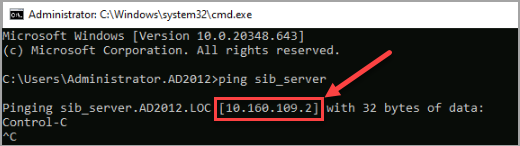
Ping the hostname of the SOP server to verify that it can be resolved. The ICMP protocol is deactivated on the SOP server. The DNS configuration is correct if the IP address of the SOP machine is correctly displayed.
-
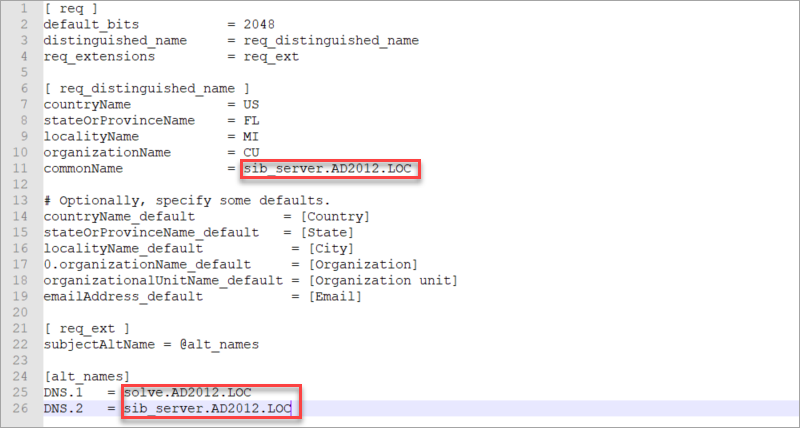
Download the attached file openssl-san.cnf and replace the hostname and the DNS entries in the red-marked fields. Once done, copy the file to the /tmp folder of your SOP server using WinSCP or any other file transfer tool.
 Note
NoteIf the connection to the SOP server from WinSCP is refused, restart the sshd service by running the following command on the SOP server:
systemctl restart sshd -
Once you uploaded the file to the /tmp folder, run the following commands on the SOP machine:
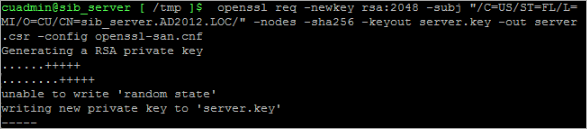
cuadmin@sib_server [ ~ ]$ cd /tmp
openssl req -newkey rsa:2048 -subj "/C=US/ST=FL/L=MI/O=CU/CN=sib_server.AD2012.LOC/" -nodes -sha256 -keyout server.key -out server.csr -config openssl-san.cnf
Change the -subj param values to match what you entered on .cnf file. Make sure to use server as the name for the csr and key file.
-
The private key is generated when you see the following message:
-
Verify that both files, server.key and server.csr, have been created.

-
Submit the server.csr to your Certificate Authority. Create a certificate from your Enterprise CA or preferred public CA and make sure that you use a Web Server certificate, using the same template. Make sure to download the cert in Base64 Encoded.
In our case, we use AD CS Web Enrollment to create the web server certificate.
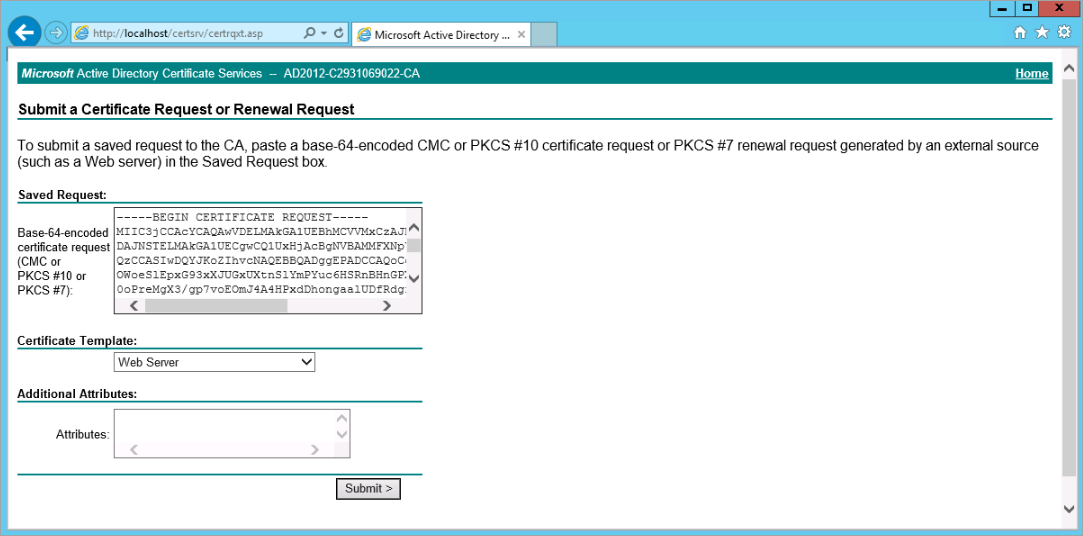
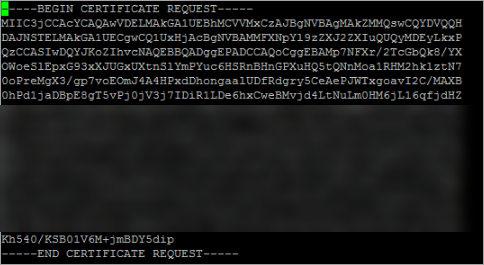
Copy the certificate request, submit and create the certificate.
-
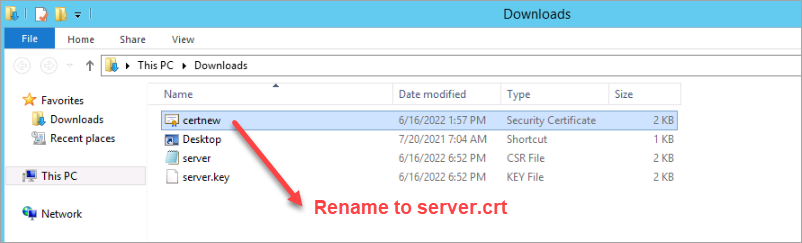
Rename the certificate file to
server.crtand copy the key file from the appliance.
-
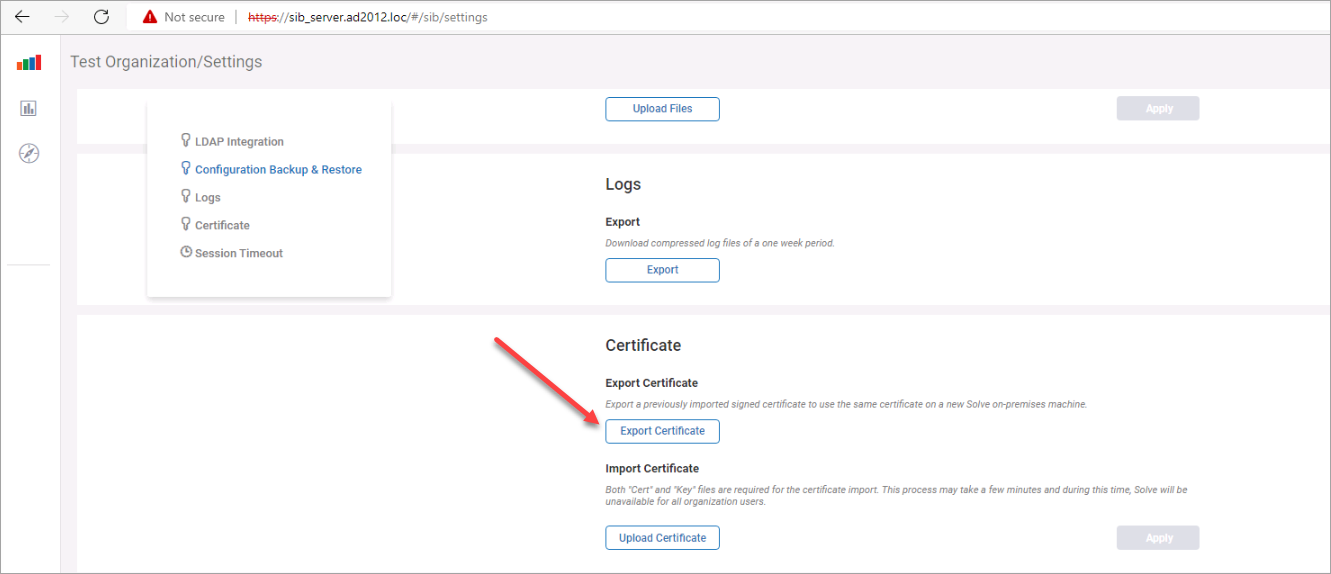
Back up the original files. From the Solve web interface, navigate to Settings > ** Export Certificate. Download the generated ZIP on the local disk of your computer.
-
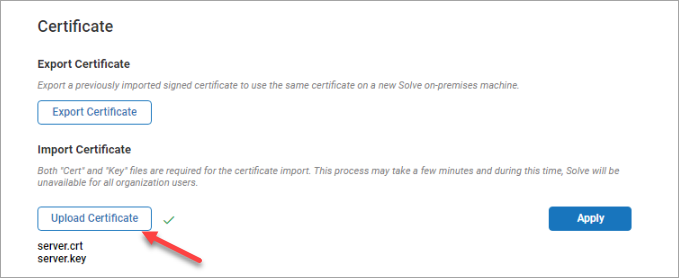
Click Upload Certificate and upload the certificate and private key files. The files you upload must be named
server.crtandserver.keyor else the upload will fail.
-
Log in to the SOP web interface and check if the certificate is shown as valid.

You have successfully replaced the default self-signed certificate on your SOP machine with a certificate from a trusted authority.