Ask us for help!
If you want assistance with creating your organization in app.controlup.com, contact ControlUp Support or your Customer Success Manager.
What is app.controlup.com?
app.controlup.com is the site to access all ControlUp products from a browser.
A consistent way of accessing all ControlUp solutions with centralized settings and user management.
More authentication options including email address-based user accounts and support for Google and Microsoft Entra ID.
Improved role-based access control:
Many new features will be available only for users accessing ControlUp through the DEX web application.
Standalone Edge DX and Synthetic Monitoring Users
The standalone URL for Edge DX and Synthetic Monitoring is no longer available and you must access them through the DEX platform at app.controlup.com.
If you have an existing DEX account or if have to create one, you must contact ControlUp Support or your Customer Success Manager to connect your standalone Edge DX or Synthetic Monitoring organization to the organization created in DEX app.controlup.com.
How to start using DEX at app.controlup.com
Users must have an email inbox to receive a one-time passcode.
Go to app.controlup.com.
Enter the email address of a user who will be the organization's Admin and click Continue.
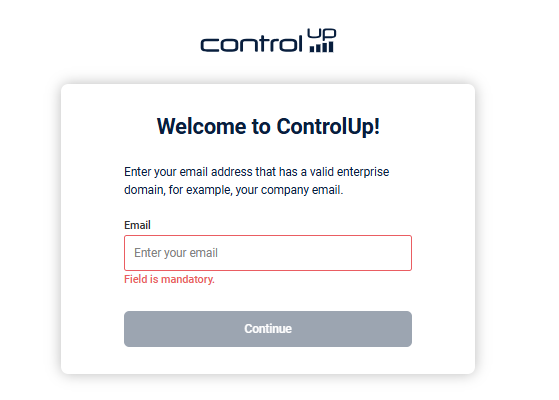
3. Enter the verification code sent to your email address and click Verify Email.
.png)
4. Select the organization you want to use from the dropdown and click Sign in.
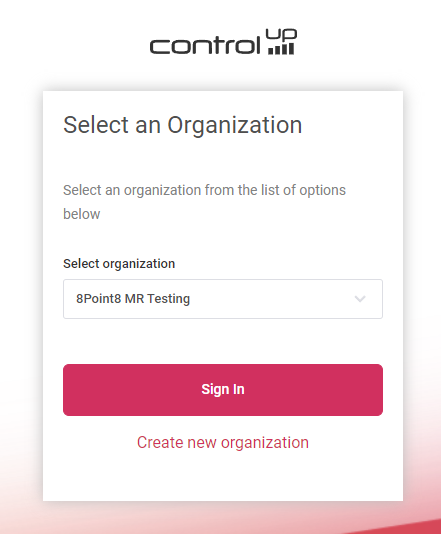
Note: If you are an admin, you may get a message regarding setting up users and permissions.
5. Optionally, select ControlUp users to invite to the DEX platform. All selected users receive an invitation link in their email inbox. You can skip this step if you want to invite users later, or if you will use SAML to provision user accounts.
.png)
Create your new DEX account for accessing the DEX platform. You can either sign in with Microsoft Entra ID or Google OAuth, or you can manually create your DEX account by entering your information and creating a password. To sign in with Entra ID, you might need to Configure SSO with Entra ID.
.png)
After creating your account, you are signed in to the DEX platform.
Set up your environment
Follow these steps to fully set up you environment in app.controlup.com.
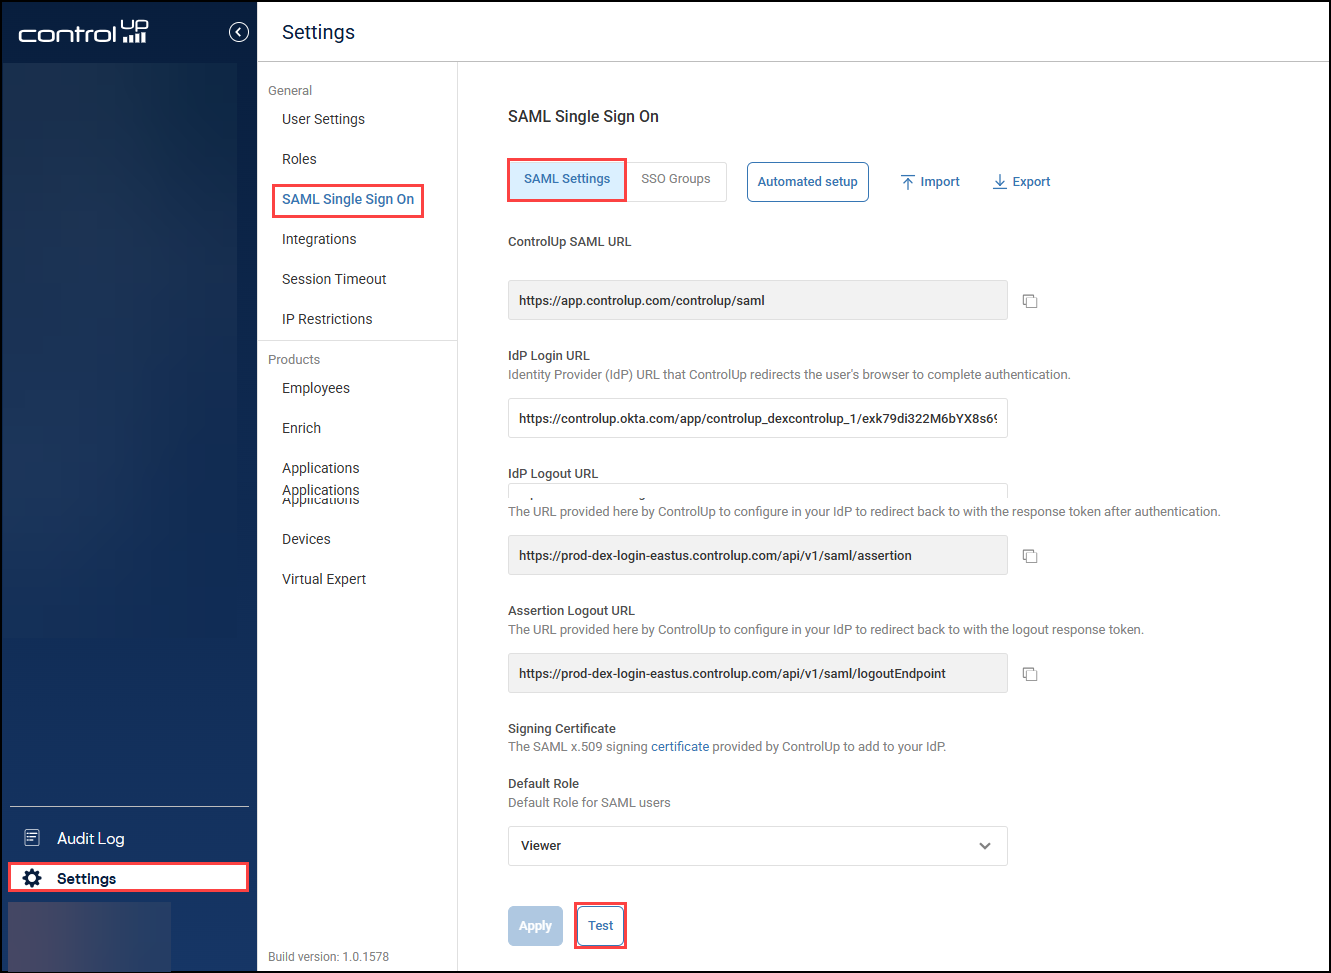
Step 1 - Review your SAML settings
To test if SAML is configured correctly, go to Settings > SAML Single Sign On and click Test at the bottom of the page. If the test fails and you can't sign in, review the necessary SAML attributes for DEX.
Step 2 - Configure login methods
To control how users are allowed to sign in to your environment through the DEX platform, configure the allowed login methods:
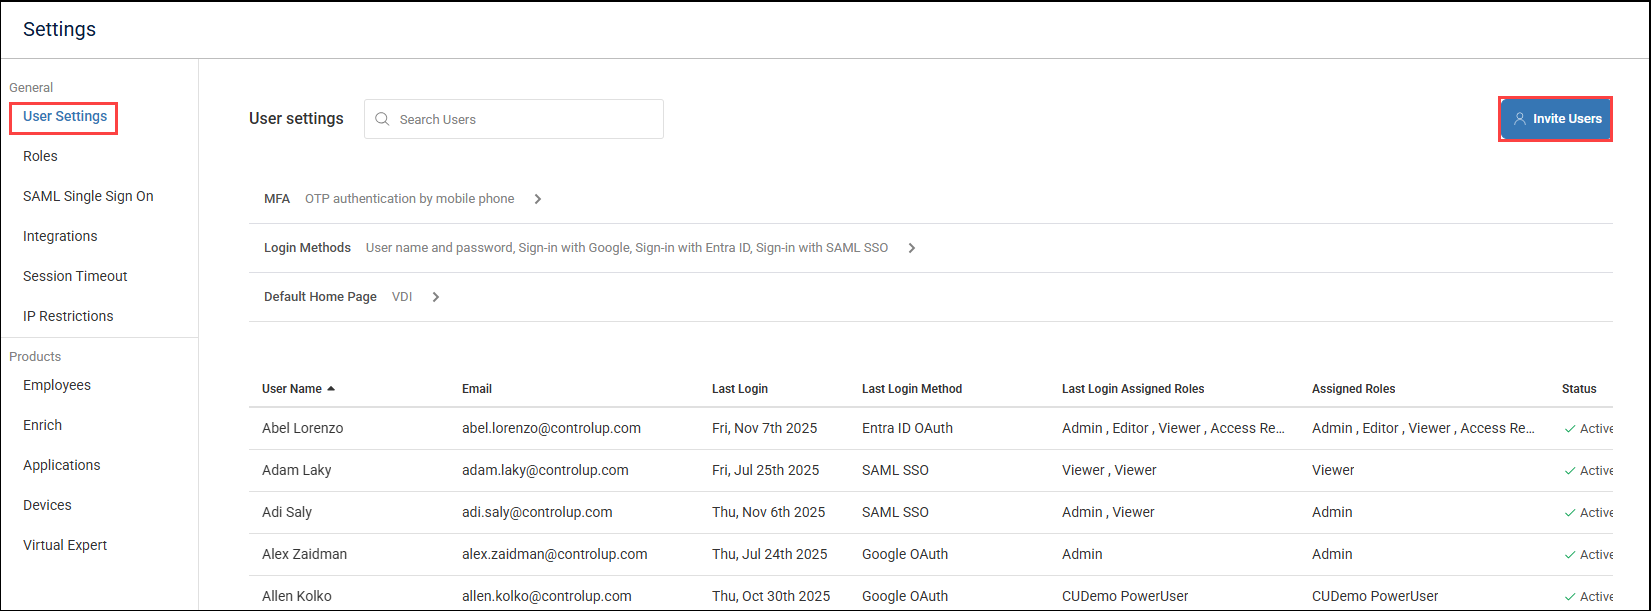
Go to Settings > User Settings > Login Methods.
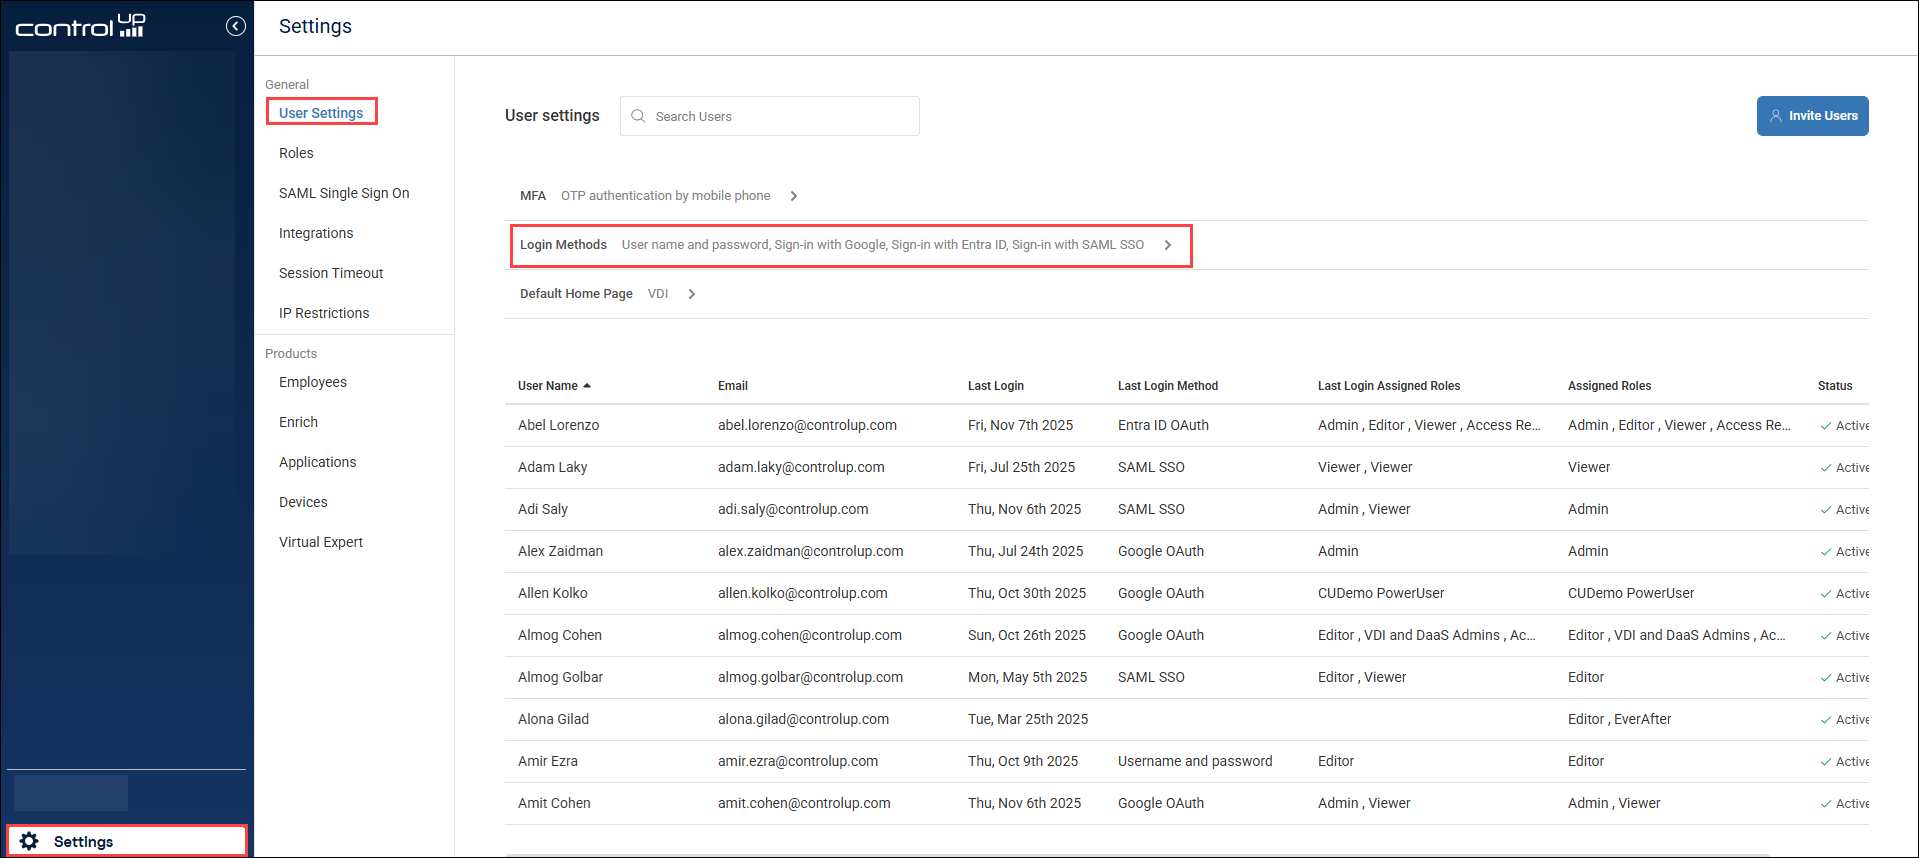
2. Select which login methods to allow. Note that if you set up SAML with app.controlup.com, you must allow Sign-in with SAML SSO.
Prerequisites for signing in with Entra ID
If you are using Entra ID to sign into your environment, you must complete certain prerequisites in Azure. For details, see Entra ID for DEX
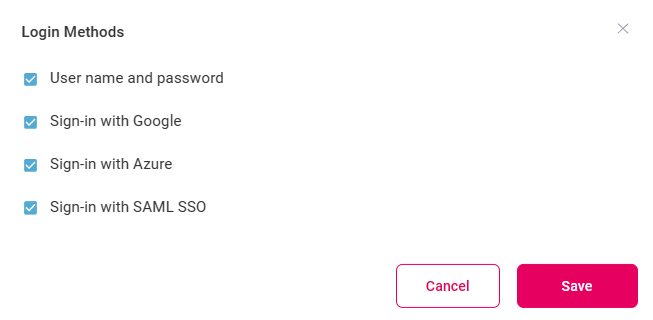
3. Click Save.
For more details, see Login Methods Overview.
Step 3 - Configure roles and permissions
Before you invite your users and they create their DEX accounts, you might want to review your settings for roles and permissions. Permissions granted to a DEX account are related to:
ControlUp for Desktops (physical device monitoring, unified communications monitoring, and user sentiment)
Synthetic Monitoring
Modifying access control settings in the DEX platform
To view app.controlup.com's settings for Roles, go to Settings > Roles.
.png)
There are default user roles (Admin, Editor, Viewer), and you can create new roles with customized permissions. Click here for more details about permissions.
Step 4 - Add users
You can now add the rest of your team to the DEX platform.
If you are using SAML to access app.controlup.com, a user account is automatically created when a new user signs in to your environment with SAML. The user is assigned the Default Role configured in your SAML settings. In this case, send your users to your ControlUp SAML URL, and they can sign in with SAML.
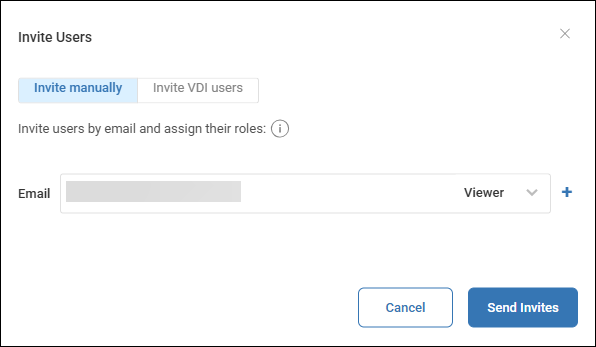
If you are not using SAML to access app.controlup.com, you can manually invite your users by their email address. To invite users:
Go to Settings > User Settings.
Click Invite Users.
Enter the email addresses of the users to invite, select a role for each user, and click Send Invites.
For more details, see Users and Permissions.