The upgrade process is done by running an installer file with specific command line arguments that tell it which existing hive to update. When you download the latest Custom Hive version, the executable file is not automatically assigned to a specific hive. Instead, you manually run the file on the machine where the hive is installed, and use the hive's name to identify it.
When you upgrade a Hive, your Hive configuration is saved and it automatically connects to Synthetic Monitoring. Your Scouts continue to run from the upgraded Hive.
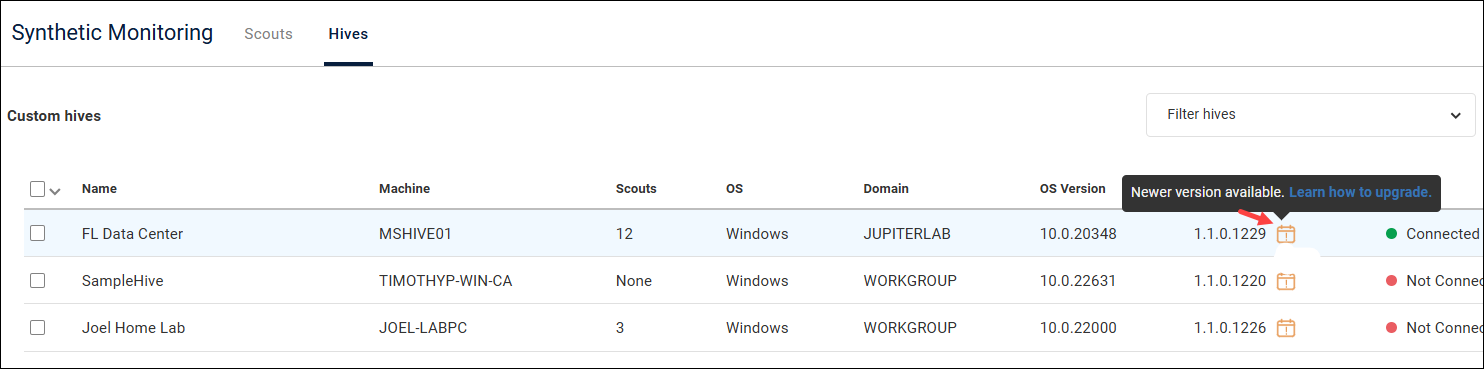
You can check for a new version of a Custom Hive by going to the Hives tab and looking at the Hive Version column. A warning icon appears if a newer version is available.
To see what's new in each Custom Hive version, read the Release Notes.
Upgrade a Custom Hive
To upgrade a Custom Hive to the latest version:
Step 1 - Download the latest Hive version
In Synthetic Monitoring, go to the Hives tab and click Download Custom Hive to download the latest Custom Hive version.

Step 2 - Run the installer file
Run the installer file that you downloaded in step 1 on the machine where the Custom Hive is installed. If you have multiple Custom Hives, then you must run the file on each Custom Hive machine. There are three ways to run the file:
- Manually by opening it
- Using a Command Line script
- Using a PowerShell script
**Important: To ensure the upgrade is assigned to the correct hive, you must use command line arguments. **
Use either:
.\hive110_1208x64.exe /SILENTto upgrade the Hive without input, but show the Hive window..\hive110_1208x64.exe /VERYSILENTto upgrade the Hive without input and without showing the Hive window.
You must change the installer file name to the latest Hive version you downloaded in step 1. This tells the installer to upgrade the existing hive with that name.**
Exit codes
When the script has finished running, type echo %ERRORLEVEL% to see the exit codes:
Exit code 0 = success
Exit code 1 = failure
Note: To upgrade the custom hive and go back to the default configuration, use the following parameter: use-default-values. For example:
.\hive110_1230x64-44d352c5_job_5771.exe /VERYSILENT /SUPPRESSMSGBOXES /token="eu_0c2eebbd4cf1b8ef3eede3cae518ef3a819115dc42cc8ffd2d3f92a7f50f3f49" /name="ScoutbeesDemoHive" /use_default_values=True
It is recommended that you upgrade a few Custom Hives and ensure that your Scouts are still working properly before you upgrade the rest of your Custom Hives.
Custom Hives can take up to a minute to upgrade. Scouts configured to run during this time might not run successfully.
This procedure also applies to Custom Hives that used Silent Install for Synthetic Monitoring Custom Hives.
Downgrade a Custom Hive
If you have problems after upgrading a Custom Hive, and you urgently need your Scouts back up and running, you can downgrade a Custom Hive by running the installation file of a previous version.