Use presets to quickly switch views on a Discovery grid or Report grid. Select from out-of-the-box presets, or create a custom preset.
Select a Preset
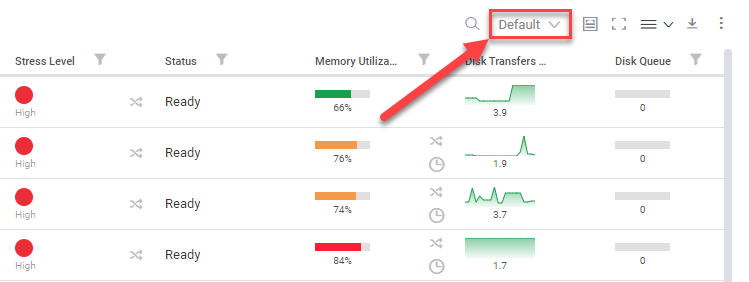
The currently selected preset is indicated at the top right of the grid or report. Click this icon to change the preset.
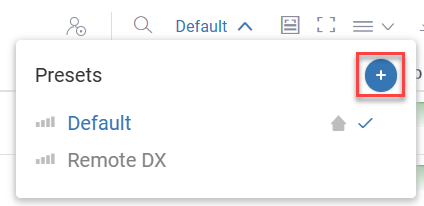
You can select from presets that have been configured for the view you are currently in. Available presets include those that you have created, others have created and shared, or ControlUp has created as an out-of-the-box preset.
Presets are unique to the context in which they are created. For example, if you create a preset in the Machines view, you can't select that preset in the User Sessions view.
Version-Specific Presets
Starting from version 9.2, ControlUp adds dedicated out-of-the-box presets for each new release to help you quickly identify metrics introduced in that version. These presets are available in every view that contains at least one newly introduced metric, giving you a focused look at exactly which metrics are new in that version.
For example, views containing metrics introduced in version 9.2 will include a "9.2 Metrics" preset. Selecting this preset filters the view to display only the metrics added in that release
Create and Customize a Preset
With a custom preset, you can set:
- Which columns to display
- The order of the columns
- Which filters to apply
To create a new preset:
- Click on the preset selector at the top-right of the grid and click the plus icon.
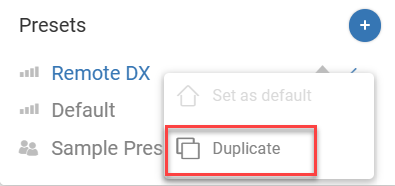
If you only need to make small changes from an existing preset, you can duplicate an existing preset instead of starting from scratch.
-
Enter a name for the preset and press Enter.
-
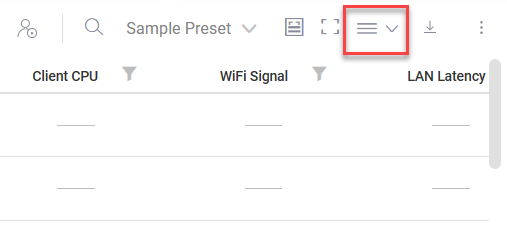
Customize your new preset by changing the columns:
- Select the column picker at the top right of the real-time grid or historical report.
- The left side of the window shows all of the available columns. The right side shows the currently displayed columns. You can add and remove columns to the list of displayed columns, and rearrange the order that they appear.
- Select the column picker at the top right of the real-time grid or historical report.
-
Add filters to your new preset. For example, you might want to use this preset to see only machines with a CPU utilization greater than 50%. You can add filters by clicking the filter icon next to the column name in the column header.
You can now use your new preset to quickly see exactly the data you need.
Presets auto-save any changes you make while the preset is selected. If you change columns or filters while viewing a certain preset, then the preset is updated with the changes you made.
Share Presets
After you have created a custom preset, you can share it so your colleagues can use the preset.
To share a preset, you must have Manage Web Application permissions. Any other user with Manage Web Application permissions can remove sharing for the preset. If a user removes sharing for a preset, the preset is visible only to the user who created the preset. Only the user who originally created and shared the preset can edit or delete the preset.
If you share a preset and then edit the preset (for example, by filtering or sorting columns), then the shared preset automatically updates and all other users will see your changes.
To share a preset:
-
In the preset selector dropdown, click the 3 dots next to the preset you want to share.
-
Select Share and agree to share the preset.
The preset is now available to all users in your organization. Shared presets are indicated by with the sharing icon .
.