/on-premises/docs/centralized-audit-logSolve is our hosted web application for accessing monitoring and analysis on your IT infrastructure. Read more about this interface here.
Getting Started with Solve
To use and access Solve, here are the basic steps to follow. Details for each appear in the links below.
Check that you have all the necessary Prerequisites.
Manage ControlUp Monitors. Monitors are required for getting data into Solve.
Access Solve from the ControlUp Real-Time Console when accessing for the first time.
Set Users and Permissions to manage who can configure and access Solve.
Optionally, Access Solve via Direct URL and set up LDAP or SAML authentication.
Optionally, view the ControlUp Audit Log within Solve.
Optionally, Troubleshoot Monitor Issues if you don't see data available in Solve.
Prerequisites
Users must have an Active Directory account.
Port 443 must be available from the monitor to communicate to the Solve client.
TCP ports required for connecting to the ControlUp Monitors:
RPC/WMI - for monitor deployment via the console.
40706 - for monitor management.
If you use one of the following proxy authentication methods, these are supported for Solve: Negotiate proxy or Basic proxy. NTLM-based proxy authentication is not supported.
Manage ControlUp Monitors
Monitors are integral and required for using Solve to enable continuous monitoring of your resources. Ensure you have monitors connected to your ControlUp environment before accessing data in Solve.
The Manage Monitors feature in the Solve tab of the Real-Time Console allows you to view the status of installed monitors in your environment. This feature also enables you to add and delete sites, add monitors to existing sites, and modify monitor settings.
For complete information regarding ControlUp Monitors, see here.
Manage Monitors
To access the Manage ControlUp Monitors section, click Manage Monitors from the Solve tab of the console.
The Manage ControlUp Monitors screen contains two tabs displaying the status of your monitors and data sources. Only connected data sources are visible.
Monitors Tab
The Monitors tab displays the monitors connected to the environment.
In the examples below, all monitors are connected properly and are displayed with a green symbol next to them.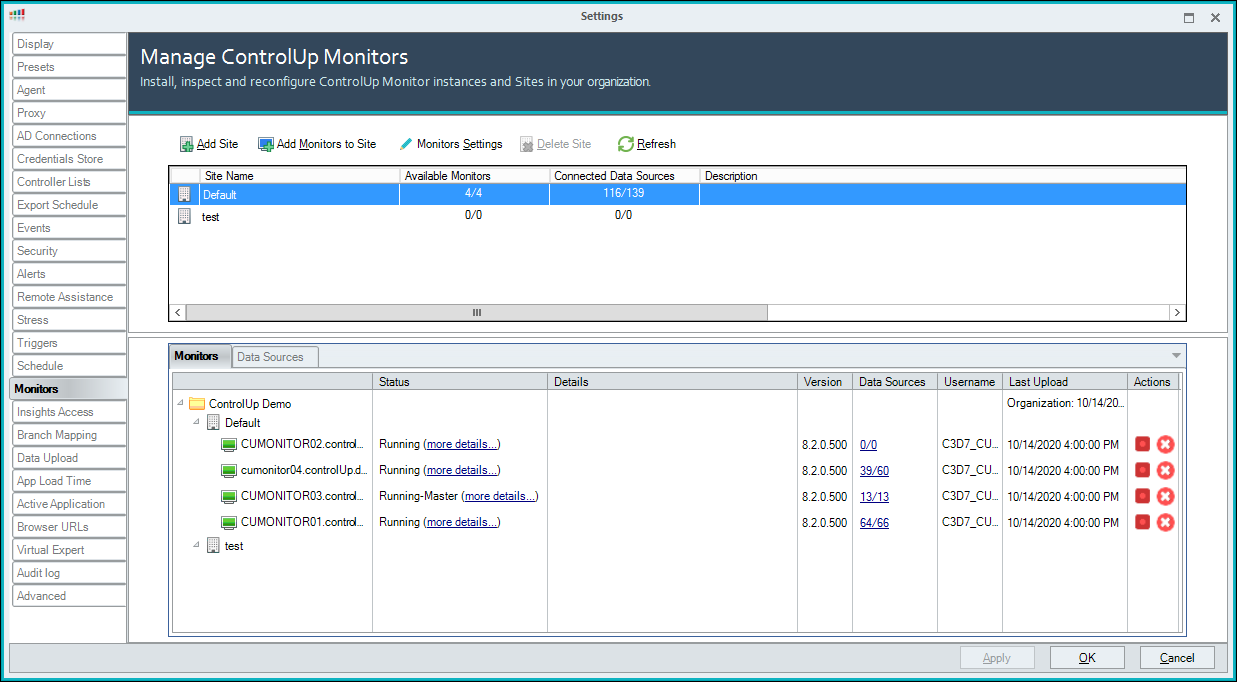
If there is an issue with a monitor, the green symbol next to the monitor turns yellow to alert about a warning, or red to alert about an error. A brief description of the issue appears in the Details column. To learn more about the issue, click more details... in the Status column and the More Detail popup appears. For a list of possible monitor issues, see Troubleshoot Monitors.
Data Sources Tab
The Data Sources tab displays the components of the environment.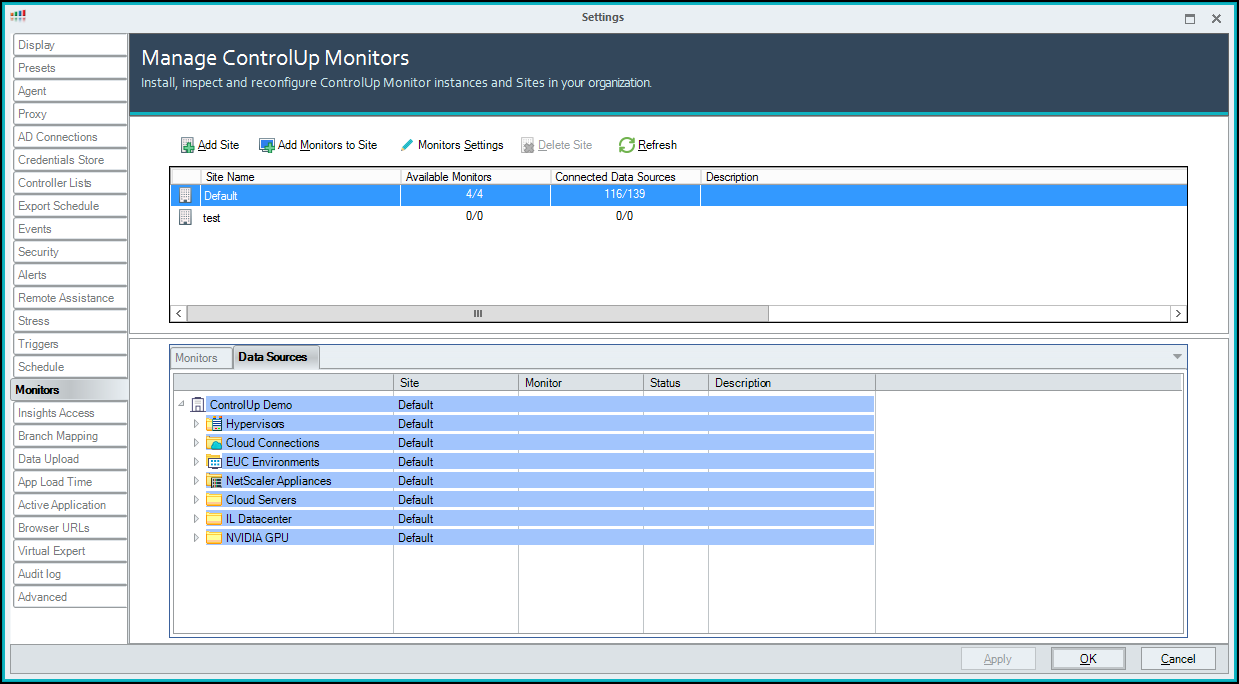
Click on a data source to expand and see which monitor it is connected to each component.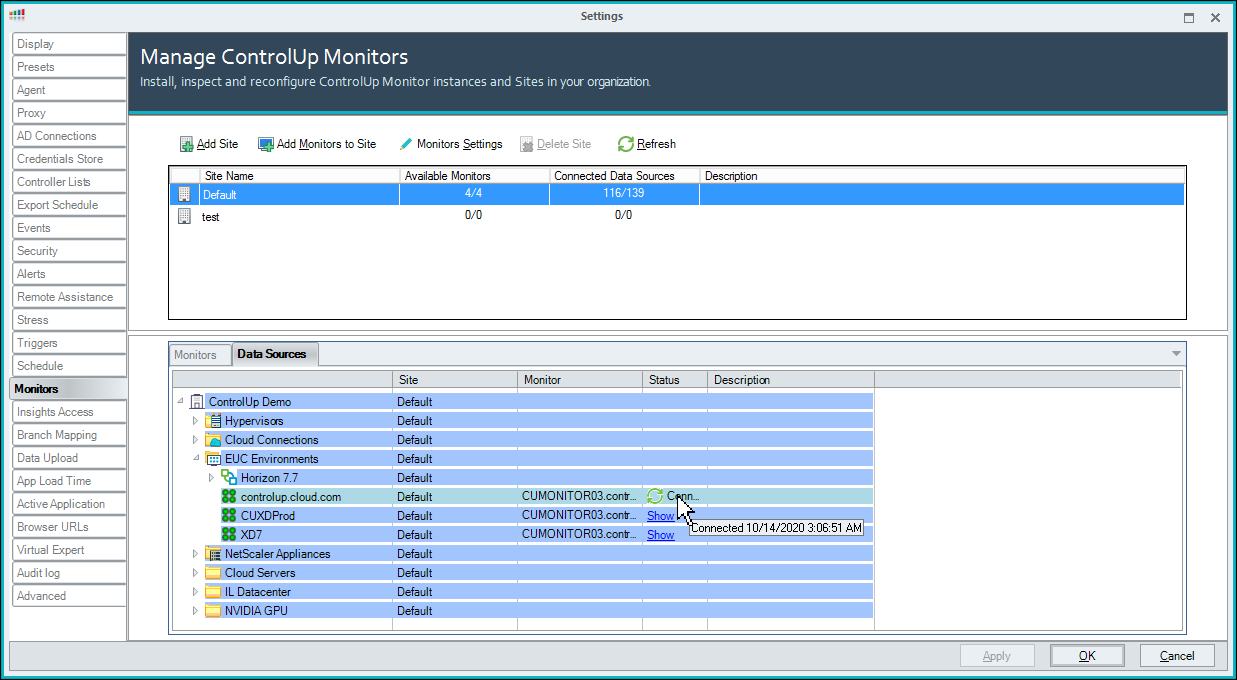
Access Solve
There are two ways that Solve can be accessed:
From the Console
A Direct URL that can be personalized from within Solve
First-time access to Solve must be through the Console. Once Solve has been accessed initially from the Console, it can be configured to be accessed with a Direct URL.
Access from the Console
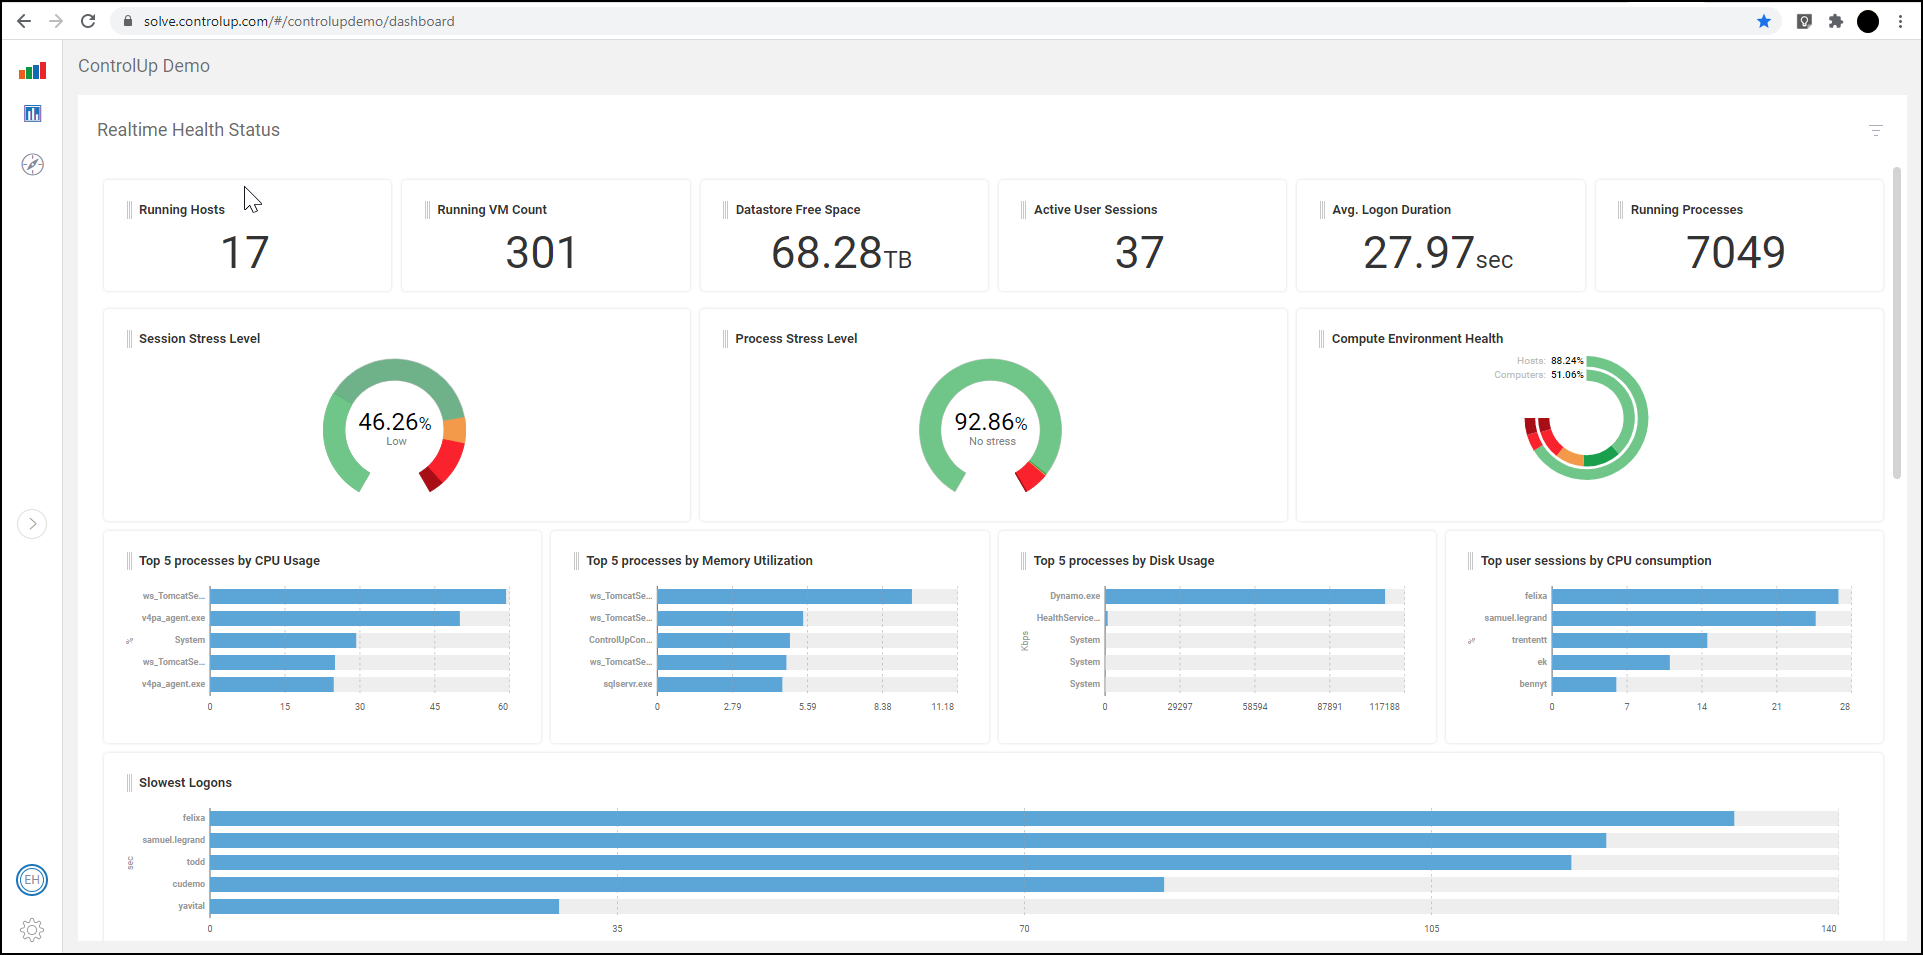
You can access Solve from the ControlUp Console by clicking Solve from the Solve ribbon.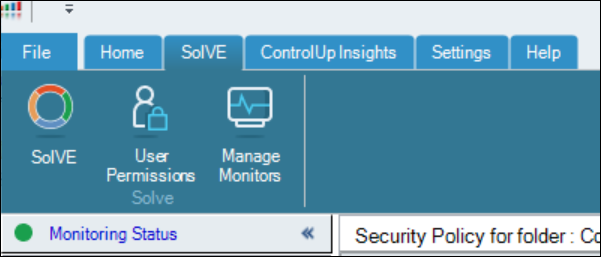
Once clicked, Solve opens in your web browser.
Access with a Direct URL
Solve can be accessed with a direct URL that you can customize from the Solve settings page.
By default, the URL is set as https://solve.controlup.com/< ORG_NAME >/ login, where ORG_NAME is the name of the organization.
To customize the direct URL:
Click the settings button in the lower left-hand button of the Solve window and the settings page opens.

Enter the name you want to add to the URL in the textbox of the Instance URL section.
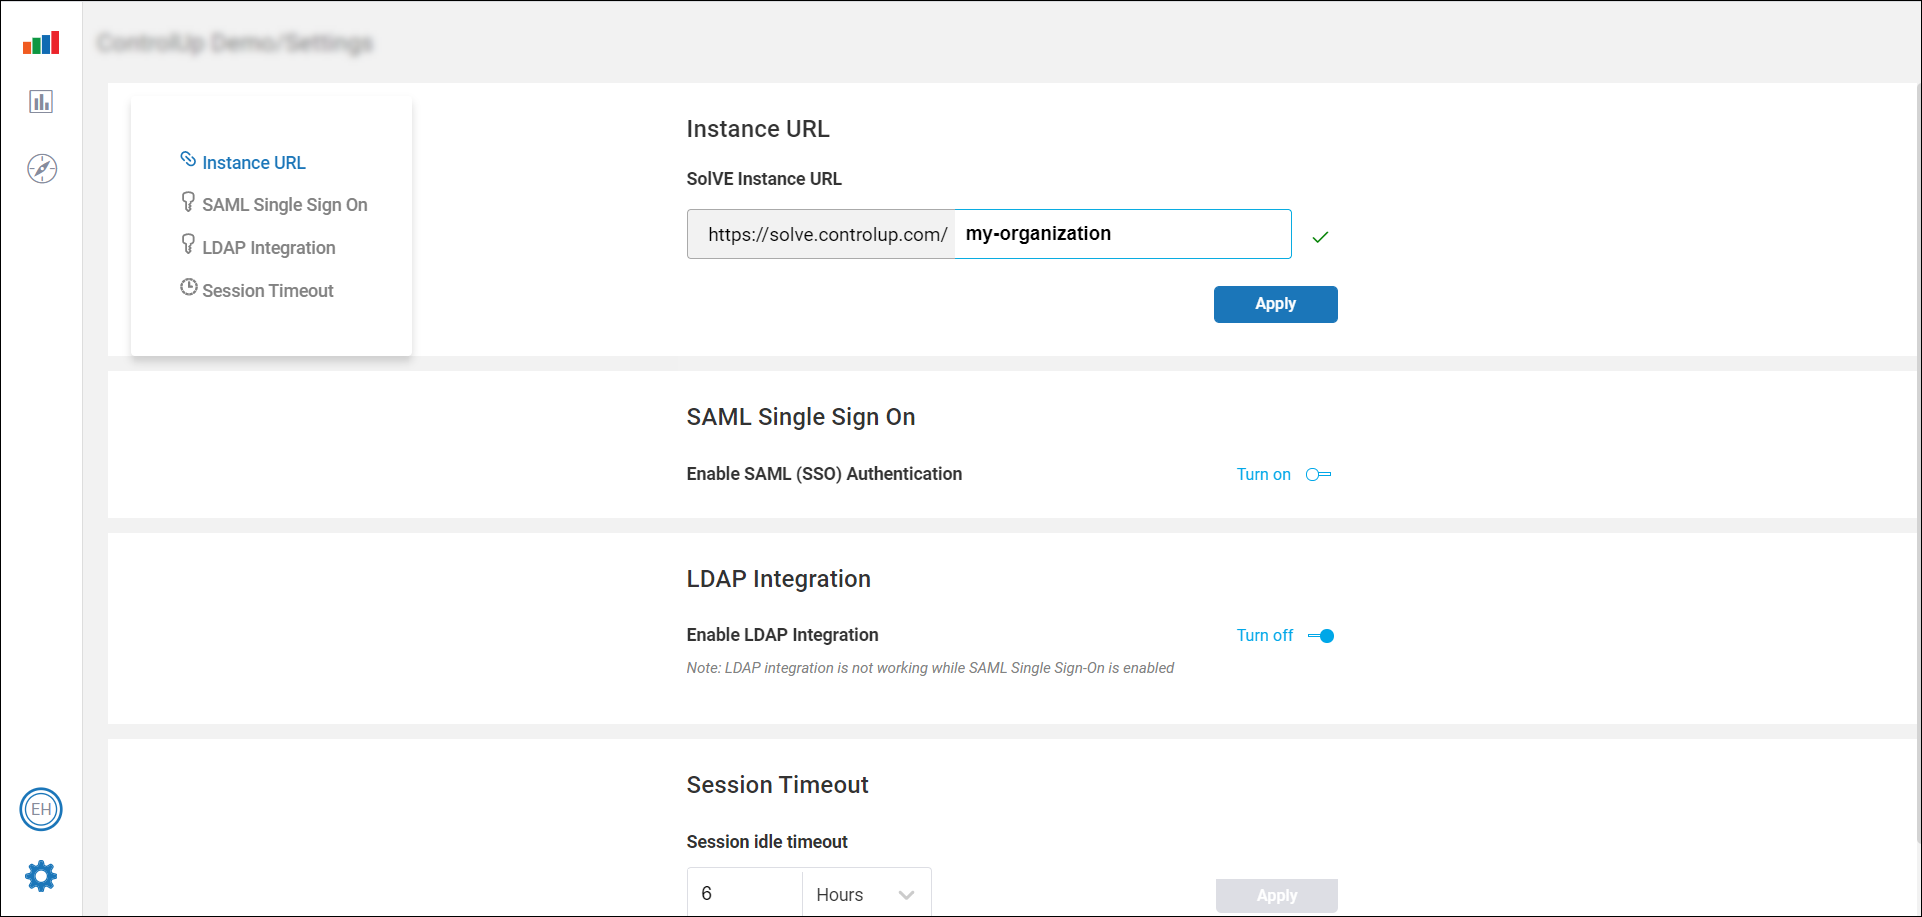
Once a valid and unique name has been entered, click Apply and the URL is saved and ready to use.
To access Solve with your direct URL, go to the URL and the sign in page appears as follows: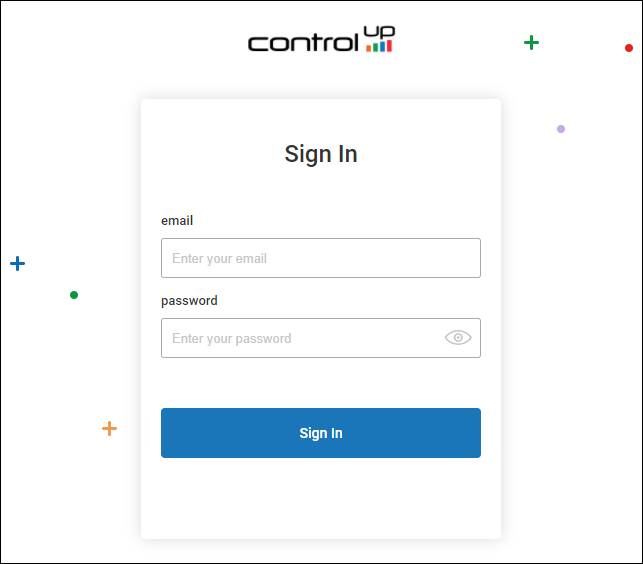
You can also set either SAML or LDAP authentication to access Solve via a direct URL. For details on login options, see here. For details on configuring SAML authentication, see SAML SSO for Solve.
Add Users & Permissions
To access Solve, all users need an account in your ControlUp organization. There are multiple ways to create this account.
Each user can register for an account by downloading and running the Real-Time Console. The user can then use their account to sign in to Solve.
You can create accounts for your users by uploading a CSV file that contains user information from your Active Directory. We have a script action that generates the CSV file. Users added with the CSV file can sign in to Solve and do not need to use the Real-Time Console. For details, visit Add ControlUp Users from Solve.
If you use SAML SSO for Solve, you can enable the option Create Solve Users Automatically. This option creates an account for users from the information in your IdP as they sign in to Solve via SAML. Users added with this method do not need to use the Real-Time Console. For details, visit SAML SSO for Solve.
For all methods of adding users, the users can access Solve once they are granted Use Solve or Manage Solve permissions. You can manage permissions in your ControlUp security policy.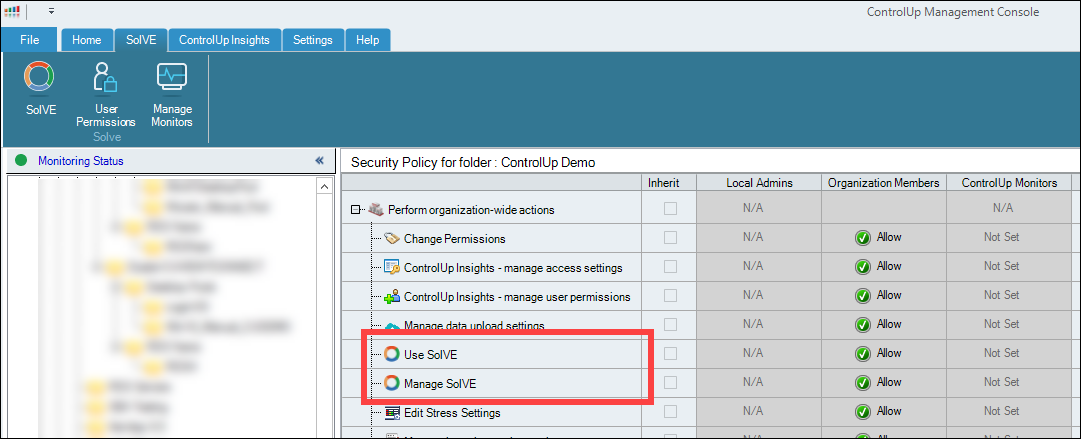
Use Solve
You must grant this permission to all users from your active directory that are required to access to Solve. This permission also allows the user to perform the following:
View folder
Use shared credentials
View all hypervisors
Connect to data source
Connect to Windows machine
Connect to Linux machine
For more information about this permission, see here.
Manage Solve
The Manage Solve permission is intended for admin users of Solve. This permission grants configuration privileges, including:
Instance URL modification
SAML Single Sign-On settings
LDAP Integration settings
Session Timeout settings
To access these settings, click the setting button on the lower left-hand corner of the Solve window.
Note:
The settings button is only available to users with Manage Solve permissions.
Troubleshoot Monitors
Here is a list of possible issues you may encounter when monitors are reporting data to Solve. You can access this list from the Solve tab in the Real-Time Console under Manage Monitors.
Details | Severity Indication | More Details Description |
Failed to open Solve connection. | Error (Red) | Solve connection failed. Please check if the required port (443) is open and proxy settings are configured correctly. |
Solve is Connected using HTTPS. | Warning (Yellow) | Solve connection failed using the desired WebSocket protocol. |
Solve is Disconnected. | Normal (Green) for up to three minutes.
| Solve is disconnected. This issue may occur due to network issues, or high latency. If this issue persists, please contact ControlUp support. Restart monitor if failed to recover |
Solve is Disabled | Normal (Green) | Solve is disabled by the admin. |