HP ThinPro (Citrix) Remote DX Installation
- Print
- DarkLight
- PDF
HP ThinPro (Citrix) Remote DX Installation
- Print
- DarkLight
- PDF
Article Summary
Share feedback
Thanks for sharing your feedback!
You can follow these procedures to deploy Remote DX monitoring onto machines running the HP ThinPro operating system that connect into a Citrix environment. You can deploy Remote DX monitoring onto:
- Online machines that can access the internet
- Offline machines without internet access
- Machines running a Windows environment
For details on the feature, read Remote DX - Client Device Metrics.
HP ThinPro online deployment for Citrix environments
If the machine with HP ThinPro has an internet connection, you do not have to download any files. You just need to follow this procedure using the provided scripts in step 4.
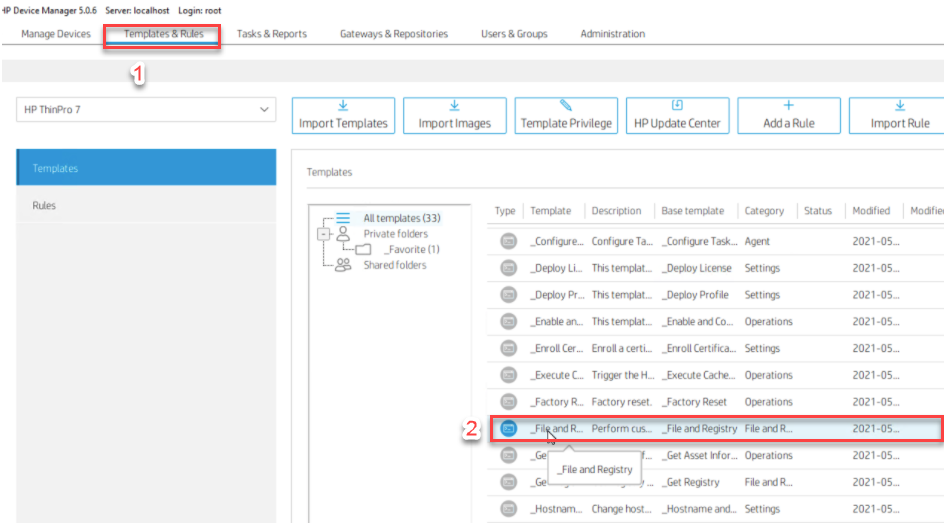
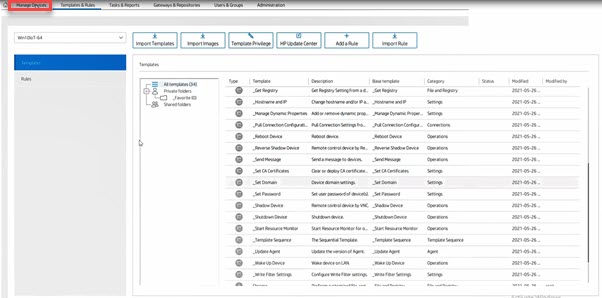
- In the HPDM, go to the Templates & Rules page.
- Select the _File and Registry template to open the Template Editor.
- Select Add > Script. Click OK.

- In the Script Editor, enter the following shell script:


echo "Starting RemoteDX script"

echo "Pre-existing RemoteDX entries in module.ini if any"
cat /usr/lib/ICAClient/config/module.ini | grep -B 3 -A 3 cuepux

echo "Getting cuepux.dll from the repository"
wget https://downloads.controlup.com/RemoteDX/citrix/hp/cuepux.dll -O /tmp/cuepux.dll
chmod 555 /tmp/cuepux.dll

echo "Copy cuepux.dll to ICAClient"
cp /tmp/cuepux.dll /usr/lib/ICAClient/.


echo "Checking if cuepux is already in module.ini"
if grep -w "cuepux.dll" /usr/lib/ICAClient/config/module.ini
then
    echo "Found cuepux, exiting"
    exit 0
else
    echo "cuepux not found, adding VC config"
    sed -ie 's/^VirtualDriver.*$/&, cuepux/g' /usr/lib/ICAClient/config/module.ini
    sed -ie '/^Thinwire3.*/a cuepux = On' /usr/lib/ICAClient/config/module.ini
    sed -ie '/^\[Clipboard\]/i \[cuepux\]\nDriverName = cuepux.dll\n' /usr/lib/ICAClient/config/module.ini
fi

echo "Checking if RemoteDX exists in module.ini"
cat /usr/lib/ICAClient/config/module.ini | grep -B 3 -A 3 cuepux
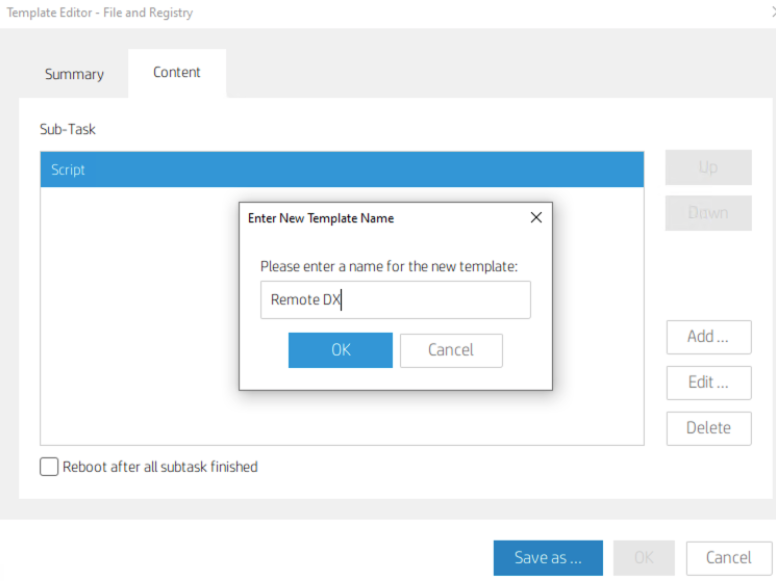
- Select Save as , enter a name for the new template, and then select OK . The template is added to the Task Templates list.
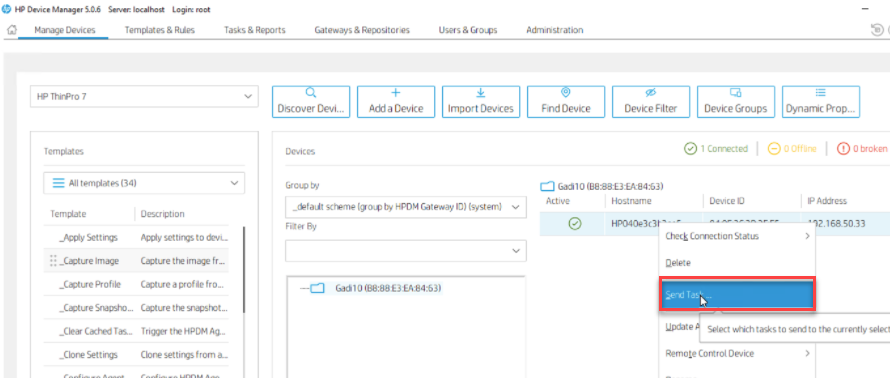
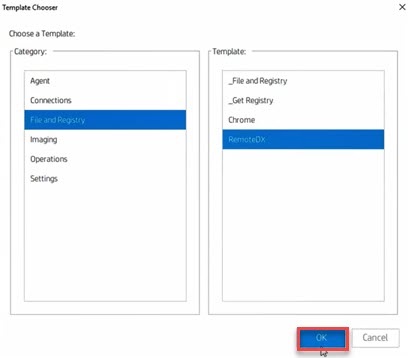
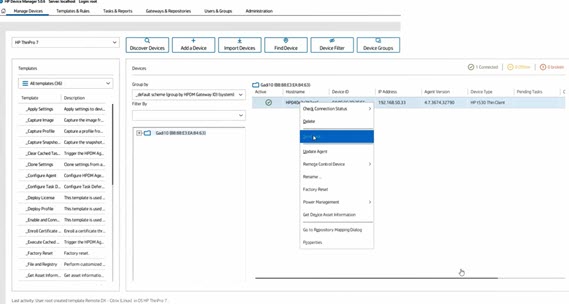
- From the Manage Devices tab, right-click a device in the device pane or a folder in the device tree, and then select Send Task to open the Template Chooser.

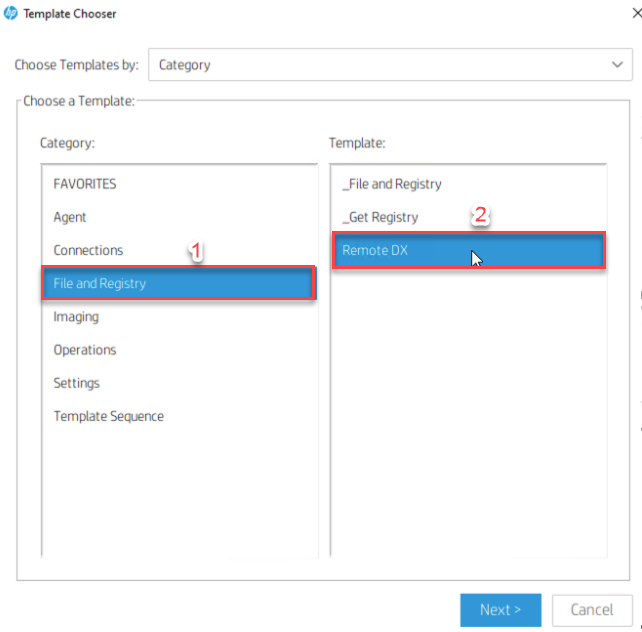
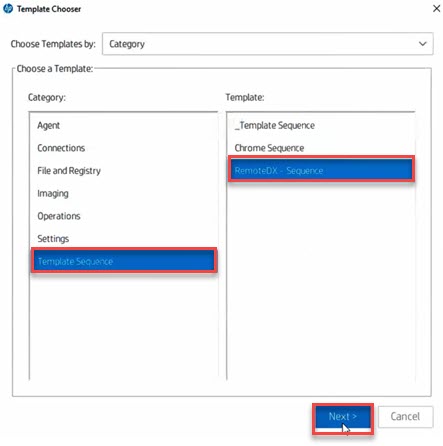
- In the Template Chooser window, select a category and the task template, and then click Next.


HP ThinPro offline deployment for Citrix environments
To perform the deployment on machines that cannot access the internet, you must download the ControlUp Remote DX for HP ThinPro plugin from https://downloads.controlup.com/RemoteDX/citrix/hp/cuepux.dll.
- In the HPDM, go to the Templates & Rules page.
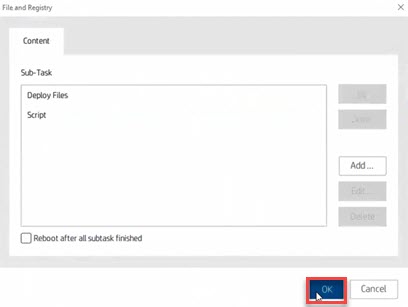
- Select the _File and Registry template to open the Template Editor.

- Select Add > Deploy Files . Click OK.
- Click on the cuepux.dll file and select Add from local.
- Edit the Path On Device to set /usr/lib/ICAClient/ as the device path. Click OK.
- Add another Script subtask.
- In the Script Editor, enter the following shell script and click OK.

echo "Starting RemoteDX script"

echo "Pre-existing RemoteDX entries in module.ini if any"
cat /usr/lib/ICAClient/config/module.ini | grep -B 3 -A 3 cuepux

chmod 555 /usr/lib/ICAClient/cuepux.dll

echo "Checking if cuepux is already in module.ini"
if grep -w "cuepux.dll" /usr/lib/ICAClient/config/module.ini
then
    echo "Found cuepux, exiting"
    exit 0
else
    echo "cuepux not found, adding VC config"
    sed -ie 's/^VirtualDriver.*$/&, cuepux/g' /usr/lib/ICAClient/config/module.ini
    sed -ie '/^Thinwire3.*/a cuepux = On' /usr/lib/ICAClient/config/module.ini
    sed -ie '/^\[Clipboard\]/i \[cuepux\]\nDriverName = cuepux.dll\n' /usr/lib/ICAClient/config/module.ini
fi

echo "Checking if RemoteDX exists in module.ini"
cat /usr/lib/ICAClient/config/module.ini | grep -B 3 -A 3 cuepux
- From the Manage Devices tab, right-click a device in the device pane or a folder in the device tree, and then select Send Task to open the Template Chooser.
- In the Template Chooser windows, select a category and the task template, and then select Next.


HP ThinPro deployment for Windows environments
To perform the deployment on machines running a Windows environment, download the Windows installer file from https://downloads.controlup.com/RemoteDX/citrix/windows/curdx_windows_citrix.exe.
In the HPDM, go to the Templates & Rules page.
Select the _File and Registry template to open the Template Editor.

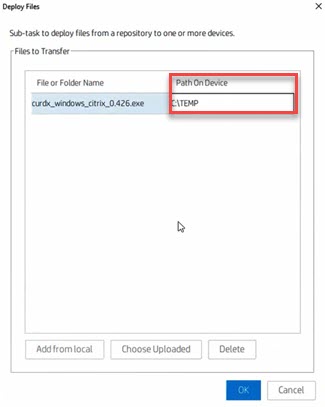
Select Add > Deploy Files. Click OK.

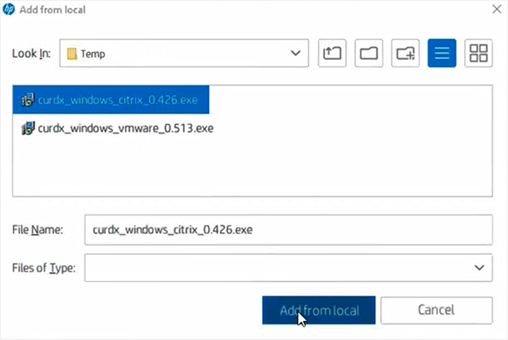
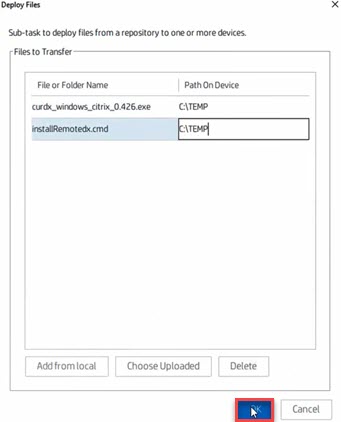
Select the installer file and click Add from local.
Enter the Path On Device where the file is saved on your machine. For example: C:\TEMP.
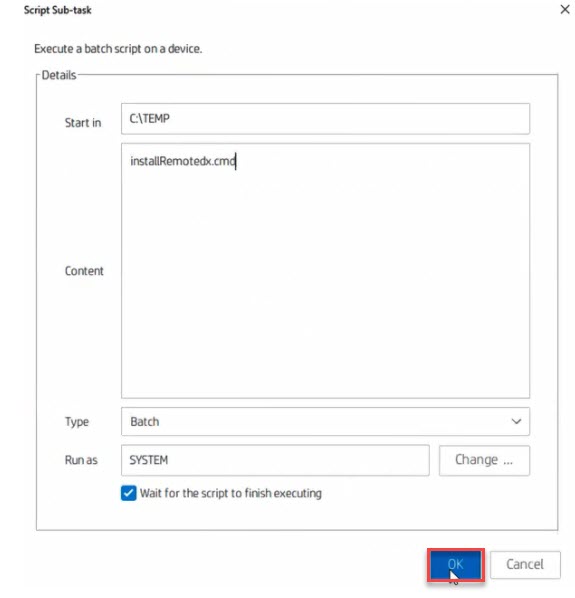
Create a .cmd script and name it, for example: installRemotedx.
Edit the script with the following code:
curdx_windows_citrix_exe /VERYSILENT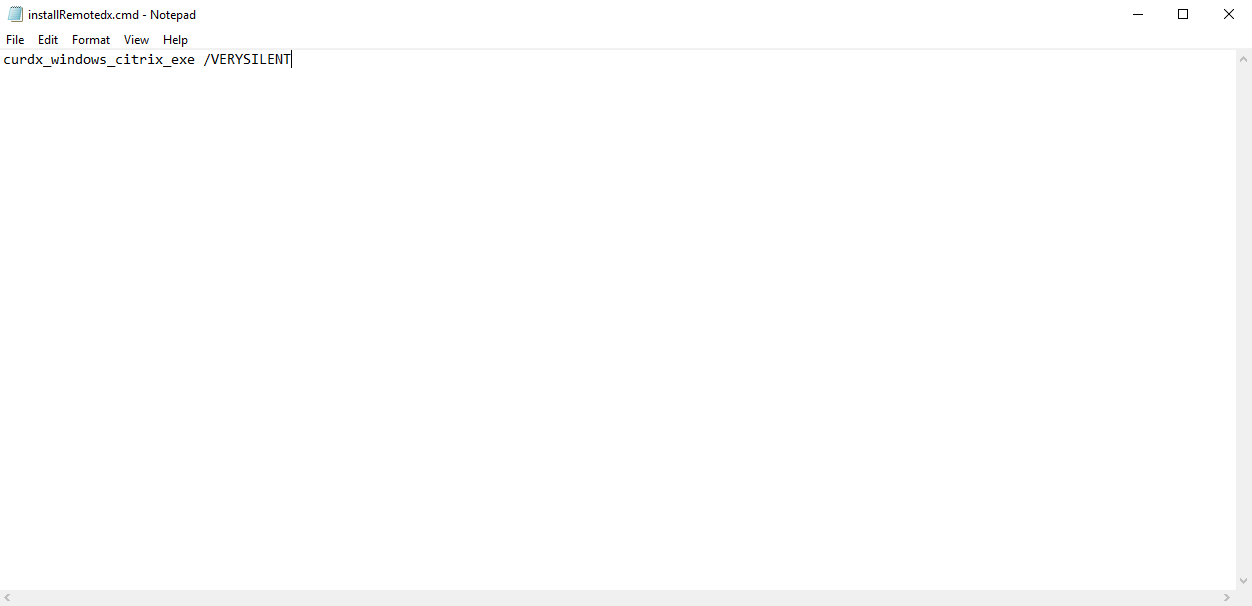
Click Add from local, select the script and click Add from local.
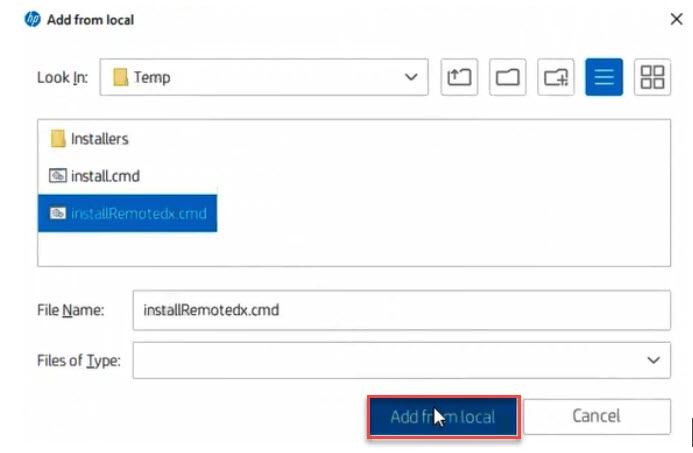
Enter the Path On Device where the file is saved on your machine. For example: C:\TEMP. Click OK.
Select Add > Script and then click OK.
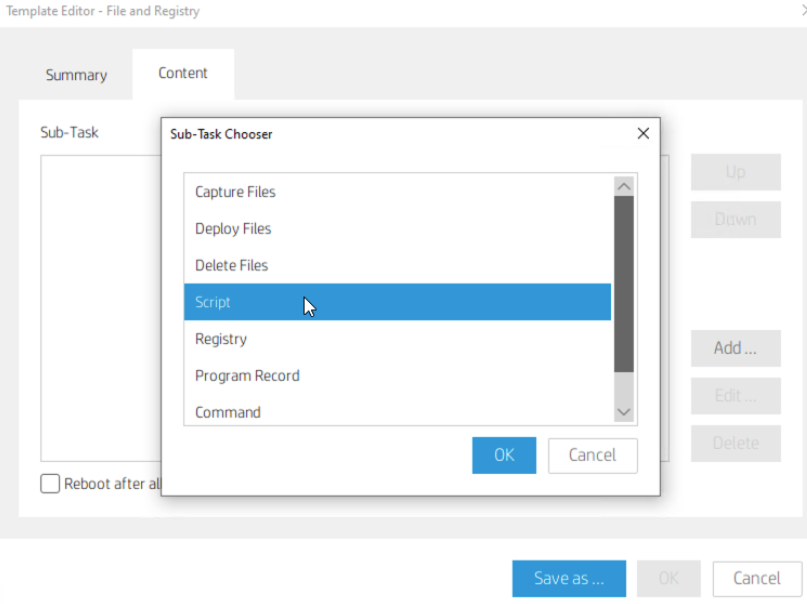
Enter the name of the .cmd script you created above and click OK.
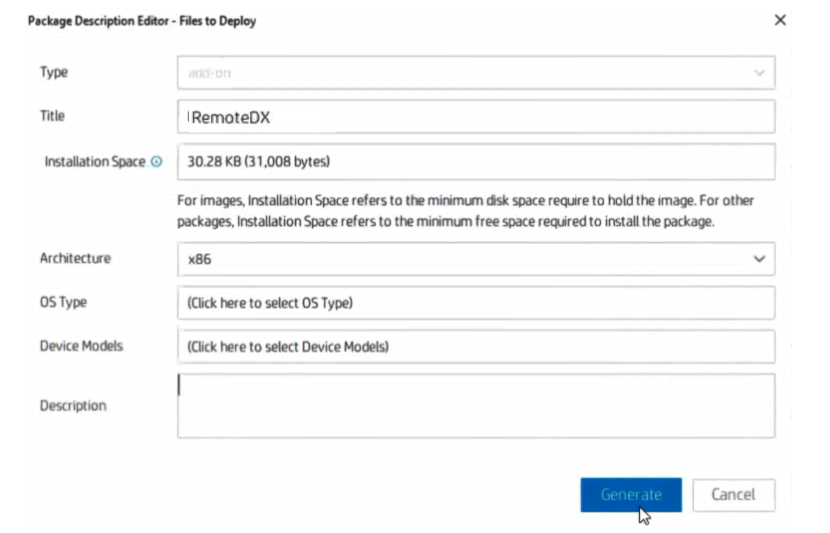
Select Save as, enter a name for the new template and click OK. The template is added to the Task Templates list.

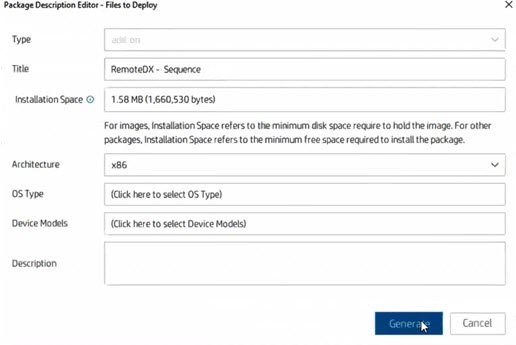
Click Generate.
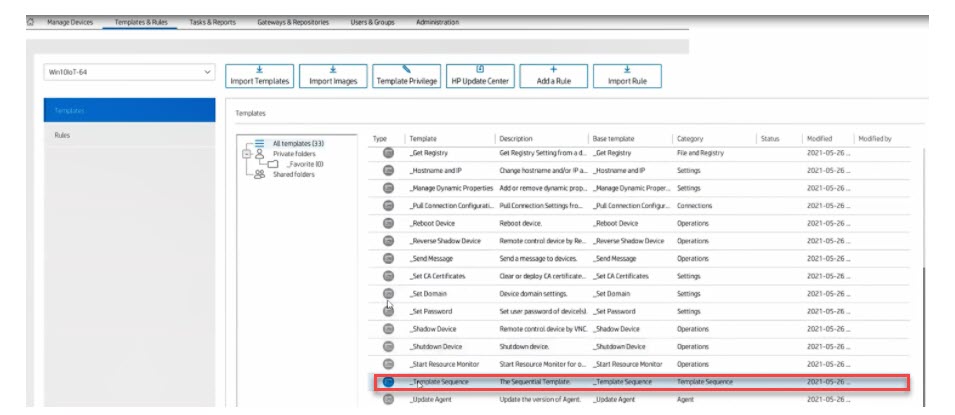
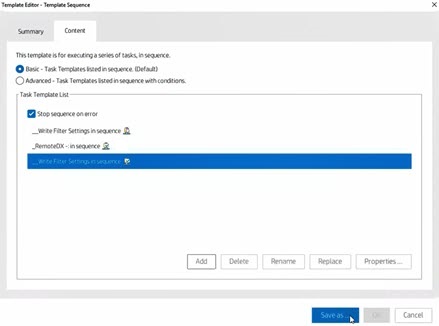
Click _Template Sequence.
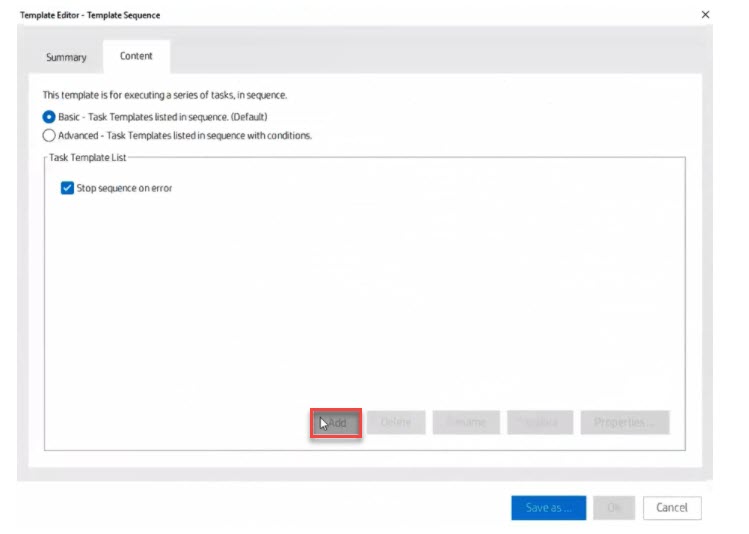
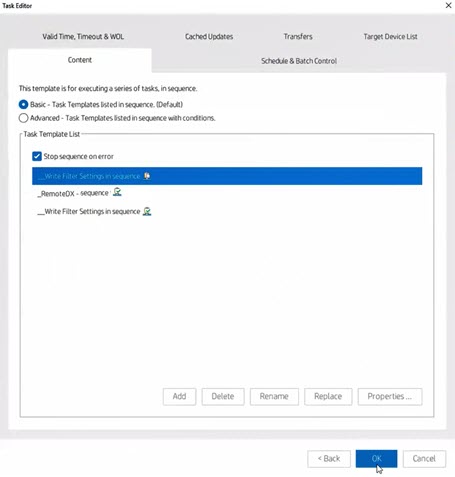
Click Add.
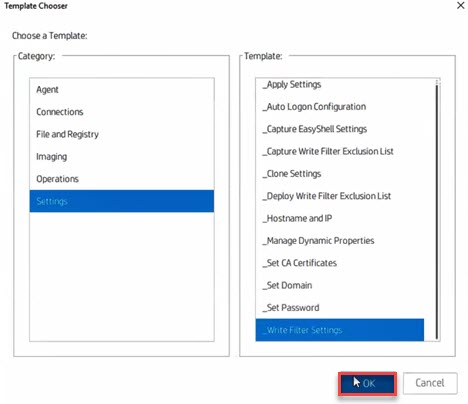
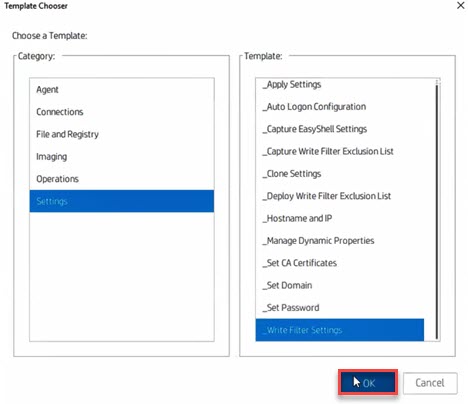
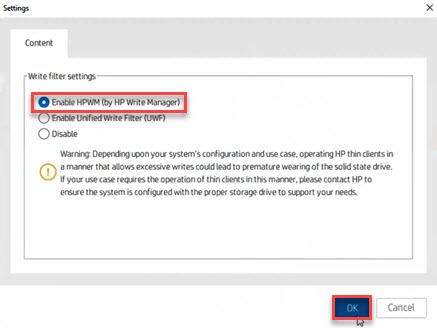
Select Settings > _Write Filter Settings and click OK.
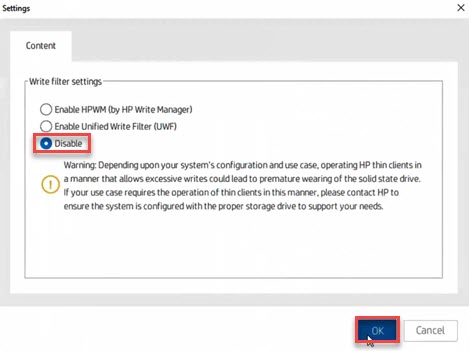
Select Disable and click OK
Click Add.
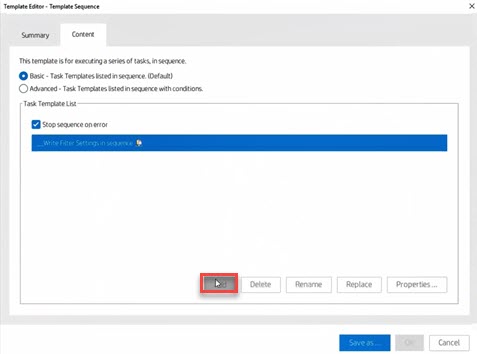
Select File and Registry and the template you created, and click OK.
Click OK.
Click Add.

Select Settings > _Write Filter Settings and click OK.
Verify Enable HPWM is checked and click OK.
Click Save as...
Enter a name for the sequence template and click OK.
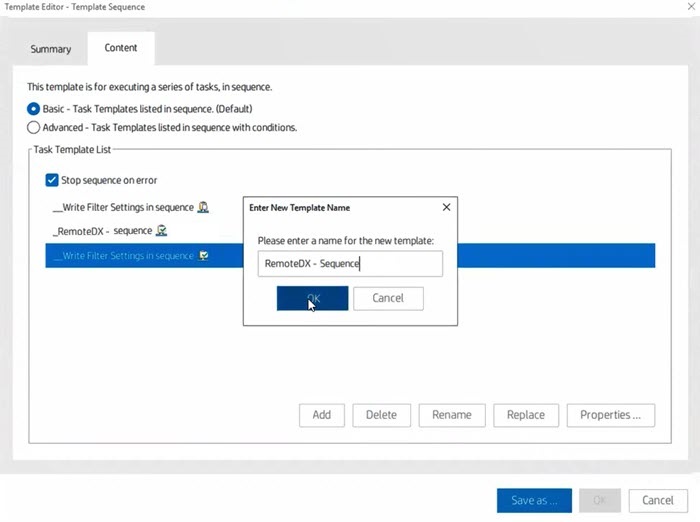
Click Generate.
Click Manage Devices.
Right-click the relevant device and click Send Task.
Select Template Sequence and the template you created, and click Next.
Click OK to finish and the monitoring can begin once the client device is connected to your environment.


Was this article helpful?