- Print
- DarkLight
- PDF
First Steps with VDI & DaaS On-Premises
- Print
- DarkLight
- PDF
Welcome to ControlUp! The following article guides you through the installation and configuration process for the Real-Time Console on ControlUp On-Premises (COP). Each section explains the different components of an on-premises deployment, where you can find links to learn more details about the installation and configuration process.
Release Notes
Find information about the latest features and bugfixes in our ControlUp On-Premises Release Notes.
Architecture Diagram
The following high-level architecture diagram displays the different components of a COP environment. The main difference between a COP and Hybrid Cloud deployment is that in an on-premises environment, you install and run all ControlUp components on your organization's servers, providing you full control and responsibility of maintenance.
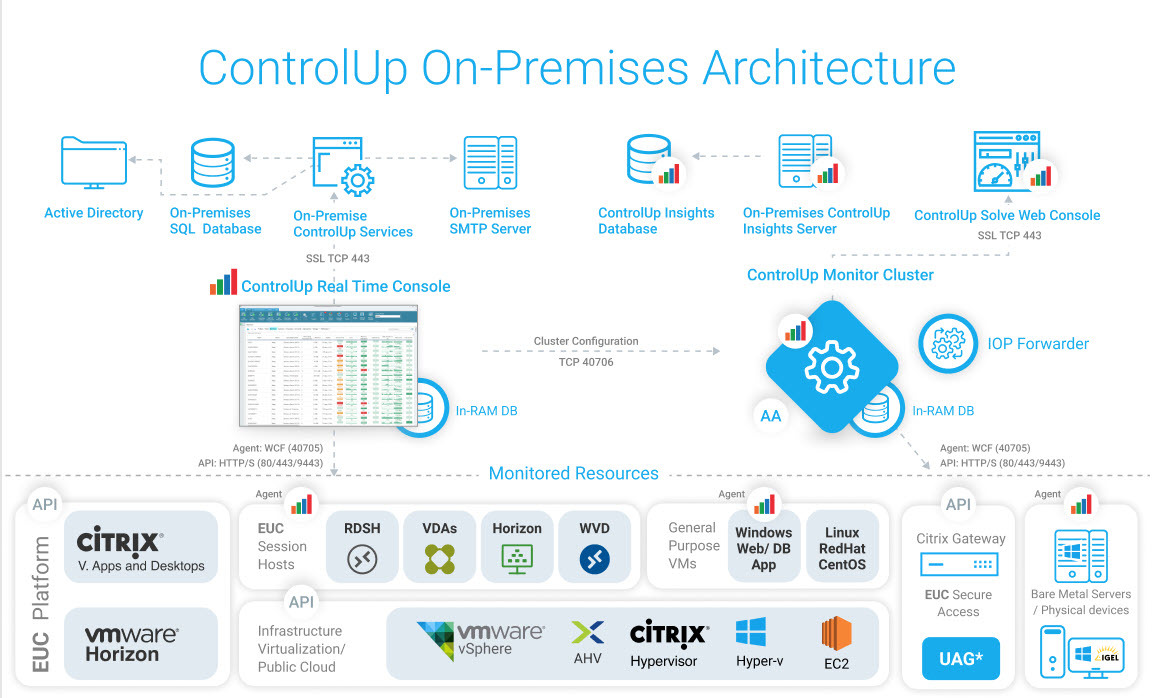
The main components of a COP deployment include:
- Active Directory domain controller(s).
- Microsoft SQL Server database (optional).
- Backend services, running on IIS on the COP server.
- SMTP server for sending email, such as alerts or other notifications from ControlUp.
- Insights On-Premises (IOP).
- Solve On-Premises (SOP).
- ControlUp Real-Time Console for real-time data collection.
- ControlUp Monitor. If you install more than one monitor, ControlUp automatically creates a monitor cluster.
- IOP Forwarder to forward metrics to the IOP server.
- Monitored Resources, such as EUC platforms, hypervisors, access gateways, physical devices or cloud connections.
Prerequisites
Verify that your on-premises environment is ready for COP according to the following prerequisites:
Components and Installation Guides
ControlUp On-Premises (COP) Server
The first component that you must install is the COP server. The COP server consists of backend components that build the underlying infrastructure of the on-premises environment.
For more information about installing the COP server, see Installation Guide COP.
ControlUp Real-Time Console
After you install the COP server, you can install the Real-Time Console. The ControlUp Real-Time Console is a desktop application that offers real-time monitoring and altering, remote, and real-time management of your end-user environments.
For more information about installing the Real-Time Console, see Installation Guide Real-Time Console.
Insights On-Premises (IOP) Server
Insights is an analytics and monitoring solution that provides historical data. The web interface shows you real-time and historical-based performance data from your ControlUp environment. The integrated virtual expert offers sizing recommendations for your monitored machines, enabling you to better allocate resources in your environment. The analytics platform collects, stores, indexes, and presents performance logs from any ControlUp resource.
We recommend to install the IOP server after you install the COP server and Real-Time Console. You can install IOP from an Open Virtualization Appliance (OVA) file or on a Linux machine in your environment. Additionally, you must install the IOP Forwarder to forward metrics to your IOP server.
For more information about installing the IOP server from an OVA file, see Installation Guide IOP (appliance-based).
For more information about installing the IOP server on a Linux machine, see Installation Guide IOP (Linux installation).
For more information about installing the IOP Forwarder, see Installation Guide IOP Forwarder.
Solve On-Premises (SOP) Server
Solve is a web-based application that offers current, constantly-updating dashboards that visualize the real-time metrics of your environment. You must purchase a Solve license to install and configure the SOP server.
For more information about installing Solve, see Installation Guide Solve.
For more information about configuring Solve, see Configuration Guide Solve.
Activate Your License
After you purchase a COP license, you receive a COP license email including the license activation link.
Perform the following steps to activate your license:
Prepare Your License File
To prepare your license file:
Logon to the COP server.
Go to Programs and Features > ControlUp Server and click Change.

Click Apply License.
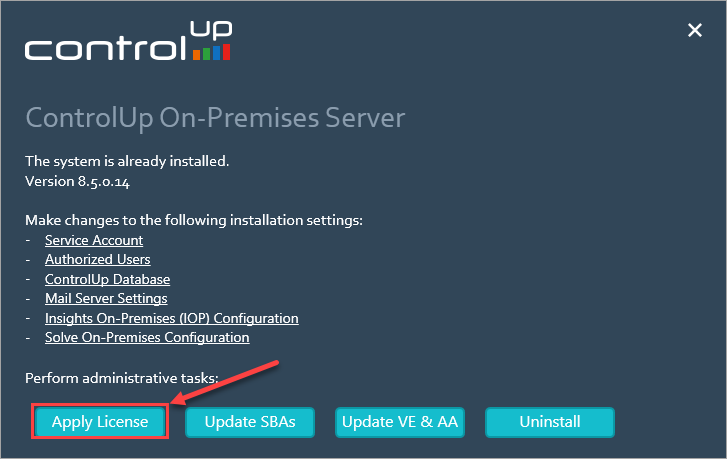
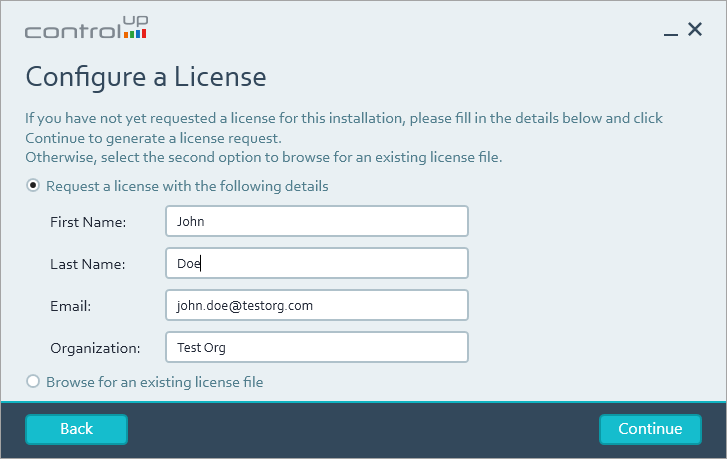
Click the Request a license with the following details checkbox. Leave the fields as is. Click Continue.
On the license request notification, click OK.

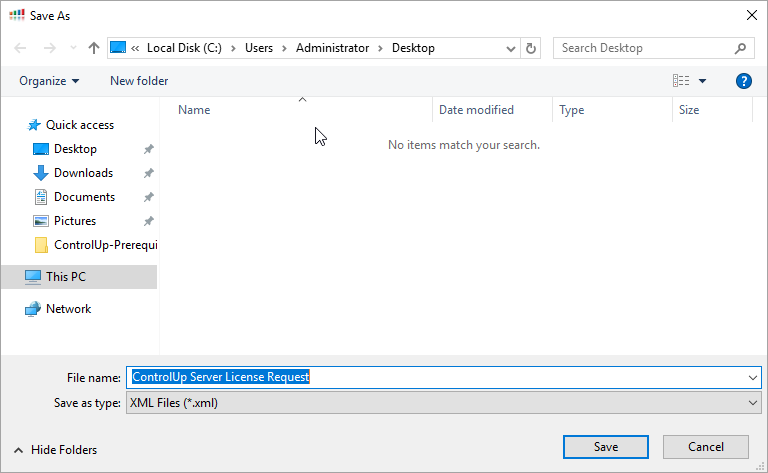
Save the XML request file on the COP server.
In the COP license email you received, click the license activation link to enter the activation portal.

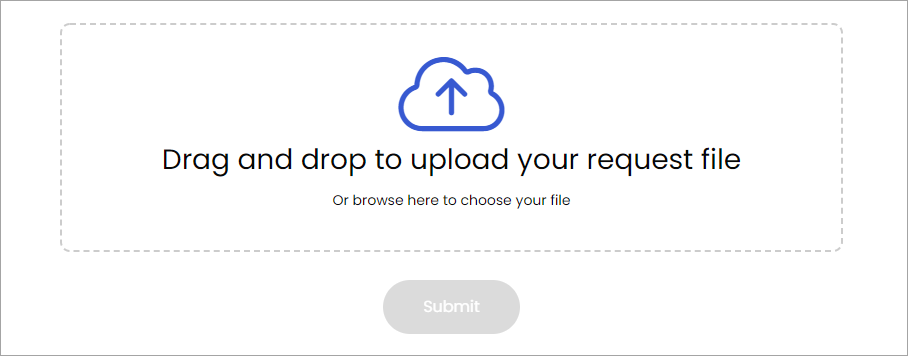
In the activation portal, browse to the ControlUp Server License Request.xml and click Submit. ControlUp creates a PrivateCloudLicenseFile.xml that you must activate on the COP server.
Install Your License
After you prepare your license file, you can install the license on your COP server.
To install your license:
- On the COP server, go to Programs and Features > ControlUp Server and click Change.
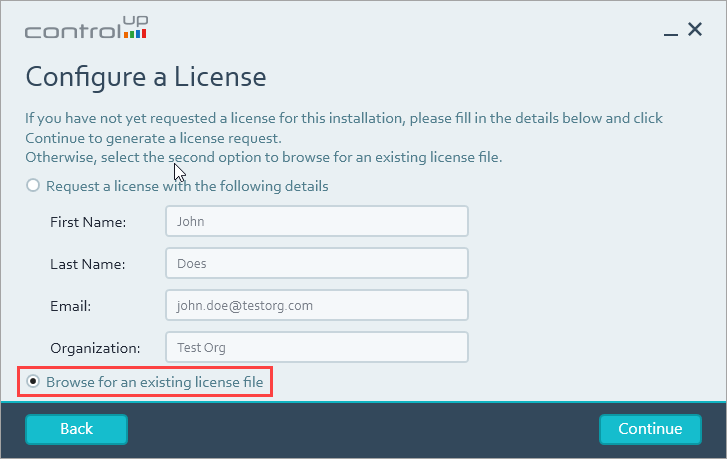
- Click Apply License > Browse for an existing license file.
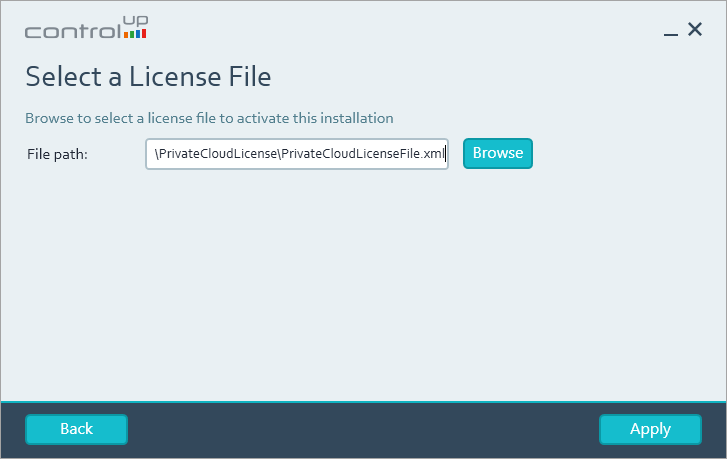
- In the Select a License File wizard, open the PrivateCloudLicenseFile.xml and click Apply.
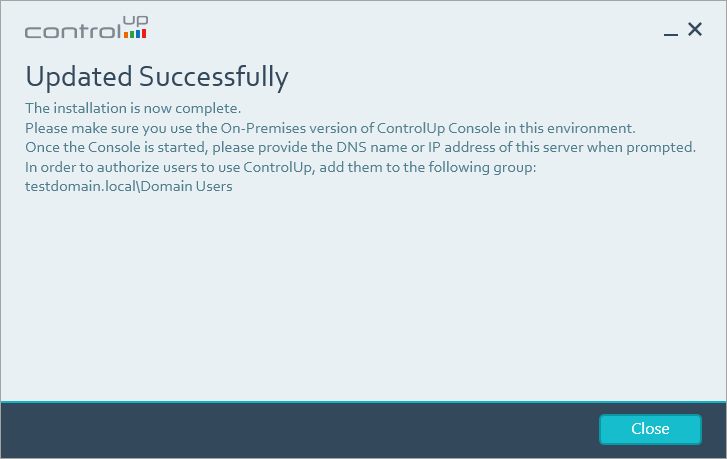
- After the license applies, the Updated Successfully notification shows that your license installation is complete.
Troubleshooting
As explained in the steps above, you must click Apply License to install your COP license. If the settings menu closes after you click Apply License, use the following workaround:
- Logon to the COP server.
- Open Control Panel > Programs and Features.
- Select ControlUp Server > Uninstall.
Don't continue with the uninstallation process.
- After the wizard launches, you are asked to confirm the uninstallation. Click No.
- Reapply the license as described in the Prepare Your License File steps above.
Configure Your Environment
To configure your ControlUp Real-Time Console to start using ControlUp in your environment, perform the following steps:
1. Add Machines
Connect physical and virtual machines to ControlUp by installing the ControlUp Agent on the machines. To learn how to add machines, see ControlUp Agent Installation.
You can create folders in your ControlUp organization tree to organize the machines that you add. To learn how, visit Create Folders.
2. Create Shared Credentials
When any ControlUp component connects to a resource that requires authentication, such as hypervisors, EUC environments, or cloud environments, the same set of credentials must be used by each ControlUp component. We recommend that you add credentials to ControlUp and share them so that all ControlUp users in your organization can use the same credentials.
To learn how to add shared credentials, see Configuring Shared Credentials.
The credentials that you use to connect resources to ControlUp require specific permissions depending on the resource. You should create a service account for each resource with the permissions listed in User Permissions in ControlUp.
3. Add a Monitor
Setting up a monitor allows you to continously monitor your ControlUp environment. You need at least one monitor to be able to access Solve and the VDI view in app.controlup.com
To learn how to install and configure your monitor machines, see ControlUp Monitor.
Make sure you install the ControlUp Agent on each monitor machine.
4. Configure a Dedicated Data Collector
A Data Collector increases the performance capabilities of both your console and monitor when collecting metrics from external sources such as VMware vCenter, Citrix Delivery Controllers, XenServer Pool Masters, AHV Clusters, and ADC appliances.
A Data Collector can be any machine that has the ControlUp Agent installed. To learn more about Data Collectors, see ControlUp Data Collector.
5. Add Hypervisors
Monitor and manage your virtualization infrastructure by connecting to VMware Vsphere, Citrix Hypervisor, Nutanix AHV, or Microsoft Hyper-V.
To learn how to add hypervisors, see Connect to Your Hypervisors.
6. Add EUC Environments
For details on how to add a connection for each type of EUC environment, and what you can monitor, see the following articles:
7. Add Cloud Environments
ControlUp comes with built-in support for Azure and AWS monitoring.
8. Add an ADC Appliance
To learn how to add Citrix ADC to your ControlUp environment, see Add an Application Delivery Controller.
Next Steps
After you set up your ControlUp environment and connect all your resources, follow the next steps to effectively use ControlUp:


