Use Solve actions to fix problems or get more information when viewing metrics in your environment. You can now run actions directly from the Solve web interface to interact with entities in the various layers of your organization.
For example, let’s say that you identify a process causing high CPU usage. To solve this problem, you can perform an action to kill the process, or you might decide to disconnect the user session. Real-time monitoring combined with a range of available actions lets you make the best decisions for your organization and users.
Prerequisites
To use Solve actions, you must
- Upgrade your ControlUp Monitors to version 8.7 or higher
- Allow your Monitors to access https://solve.controlup.com/ over TCP port 443.
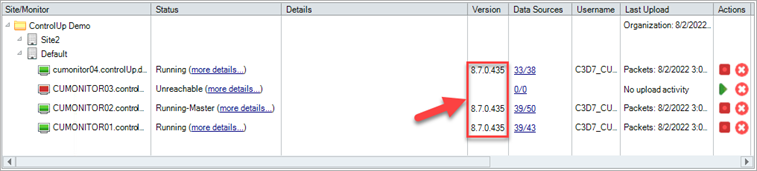
Upgrade Monitors
- Download and run the Real-Time DX Console.
You will be required to enter an OTP (one-time password) from version 8.7 and higher.
- Under Monitor Status, right-click each monitor and select Stop.
- Right-click each monitor and select Upgrade to upgrade the monitor to version 8.7 or higher.
- Start the monitors after the upgrade and verify that each monitor has been upgraded.
Real-Time Console Actions
Actions in Solve are similar to actions in the Real-Time DX Console. If you are used to performing actions in the Console, then you will be comfortable working in Solve.
Not all of the actions in the Console are available in Solve. More actions are available in the Hybrid Cloud VDI App.
Note that unlike the Console, Solve has no distinction between built-in actions and script actions (SBA).
Permissions for running Solve actions
You can restrict access to Solve actions by setting permissions in the Security Policy Pane in the Real-Time Console. By default, all Solve users can run actions so if you want to restrict users from running an action, you need to set the Deny to a certain action.
Note that if you have IP restrictions enabled in Solve, users with a restricted IP address can access Solve from the Real-Time Console but they are not allowed to perform actions.
Limitation with the Local Admin role
In the Security Policy Pane, the Local Admin role represents local administrators on remote machines. If a user belongs ONLY to the Local Admin role even if the permission for an action is set to Allow, running the action in Solve fails due to missing permissions.
Setting the permission for the Local Admin user role to Deny on a specific action affects all other user roles. Other users, even those whose permissions are set to Allow, are not allowed to run the Solve action in this case.
Solution
Any user running actions from Solve must belong to more than just the Local Admin role. Ensure that the permission to run the action for both roles is set to Allow.
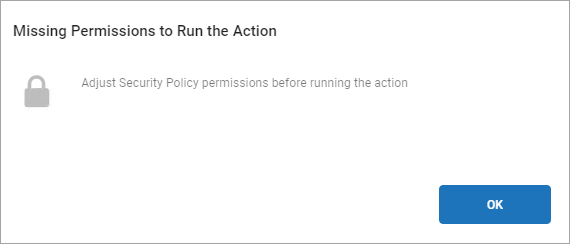
No permission on the selected object
If the user doesn't have permission to run the action on the object, the following error message is displayed:
Partial permissions on selected objects
If the user doesn't have permissions on all selected objects, a "Missing Partial Permissions" error is displayed with the object on which the user is missing permissions. This error appears if the user has permission to run an action on a machine in a specific folder, but not on the other selected machine.
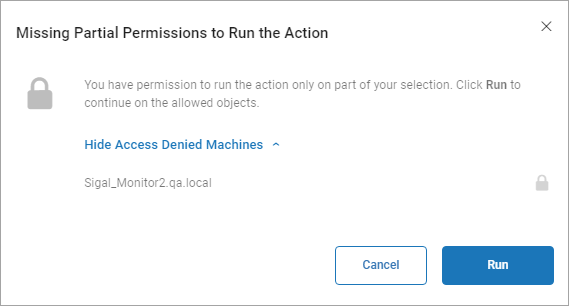
At this stage, you can either click Run or Cancel. To run an action only on objects a user has permission to, click Run.
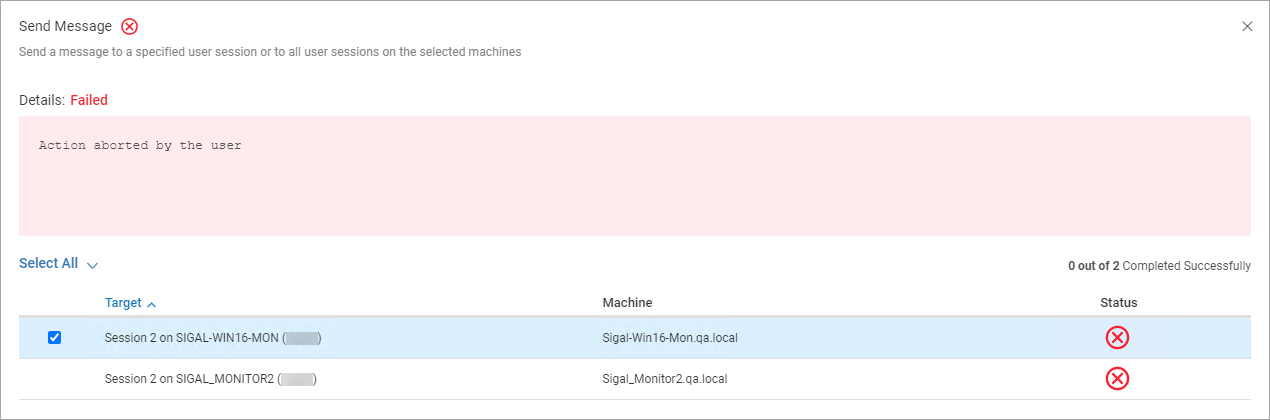
Click Cancel to abort the action. In this case, Action aborted by the user is displayed.
Perform Actions from the Discovery Grid
You can perform actions from the Discovery grid on the Solve Discovery page. Use the topology and drilldown features to navigate to the entity on which you want to perform an action.
Right click an entity in the grid to open the actions menu. All of the available actions for the selected entity are organized into their respective categories.
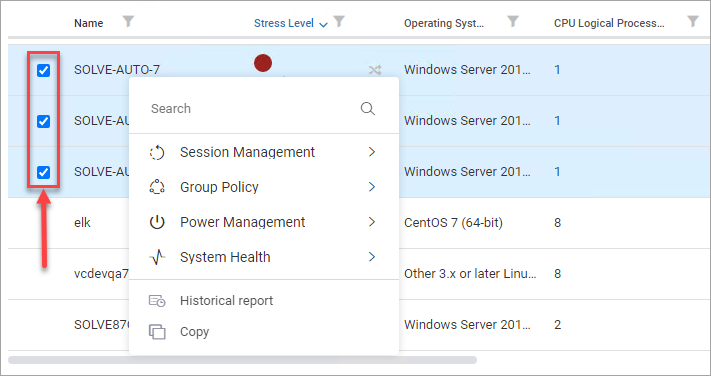
Select an action from the categories to perform the action. You can also use the search bar to search for an action.
Some actions launch right away with no further input required, while others open a window for you to enter more information.
To perform an action on multiple entities, select the entities using the checkboxes next to their names, before right clicking one of the selected entities.
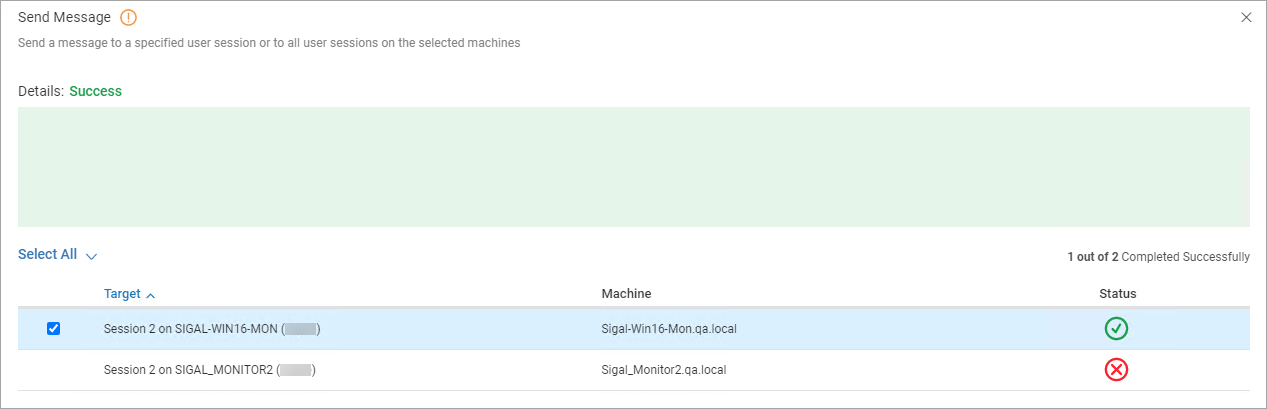
See Action Status and Details
After you perform an action, an overlay appears on the grid to show the status of your action. The status can either be:
-
Success.

-
Failure.

-
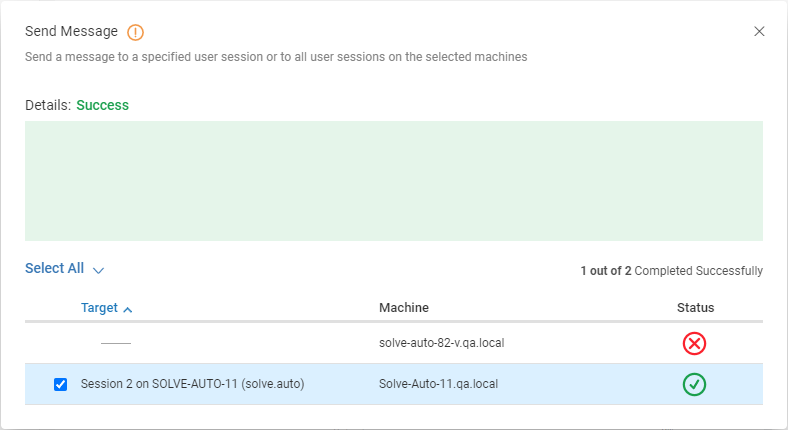
Partial success. This occurs when the action was successful on some targets, but failed on others.

-
Running.

If an action takes a while to run, you don’t have to wait for it to finish. You can continue using Solve, and even launch other actions while waiting for the first action to finish.
Click More Info on the action status overlay to open the action details window, including the results and output for each target of the action. The action details are different for built-in actions and script actions.
Built-in action details
The details window for built-in actions shows you only which targets you performed the action on, and if each action was successful.
Script action details
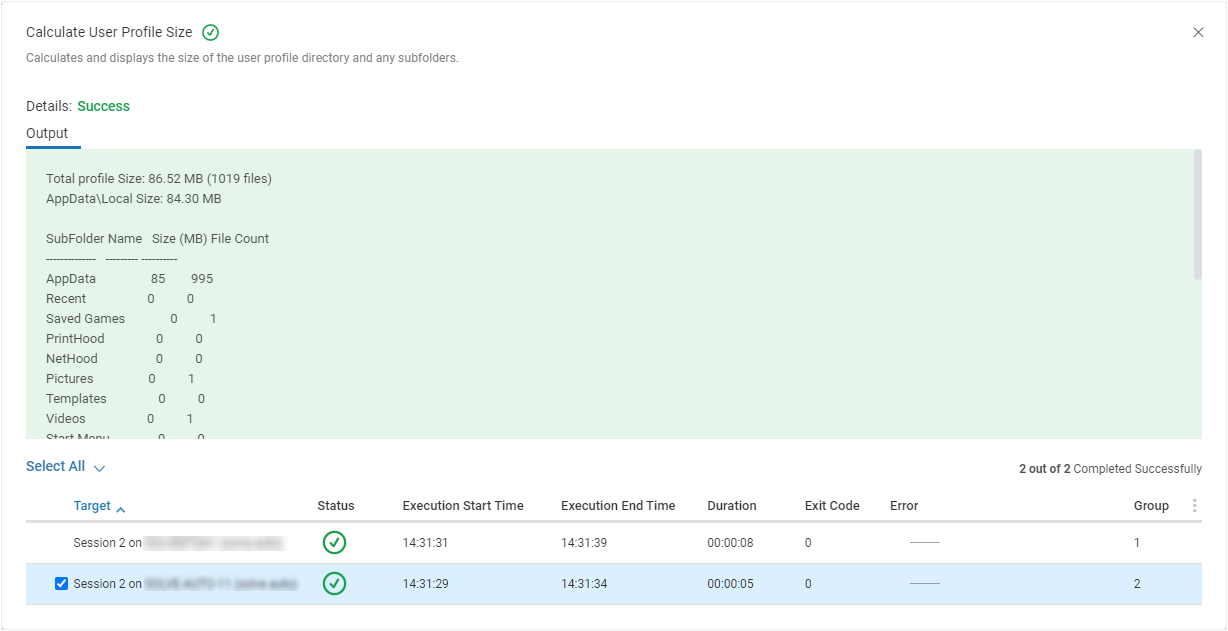
The details window for script actions shows you the output from the script, including any errors, for each target of the action. You can also see details about the script action, such as when it ran, how long it took, and the script exit code.
The Group column indicates groups of targets that have the same output result from the script action. For example, if two targets belong to group 1, then those targets have the same output. You can filter the displayed targets based on their group by selecting the three dots next to the Group column.
A script action might be successful, even if the script output has errors. This means that Solve successfully launched the action, but the script itself returned errors. Errors in launching the action from Solve are displayed in the Error column. Errors from the script are shown in the output box.
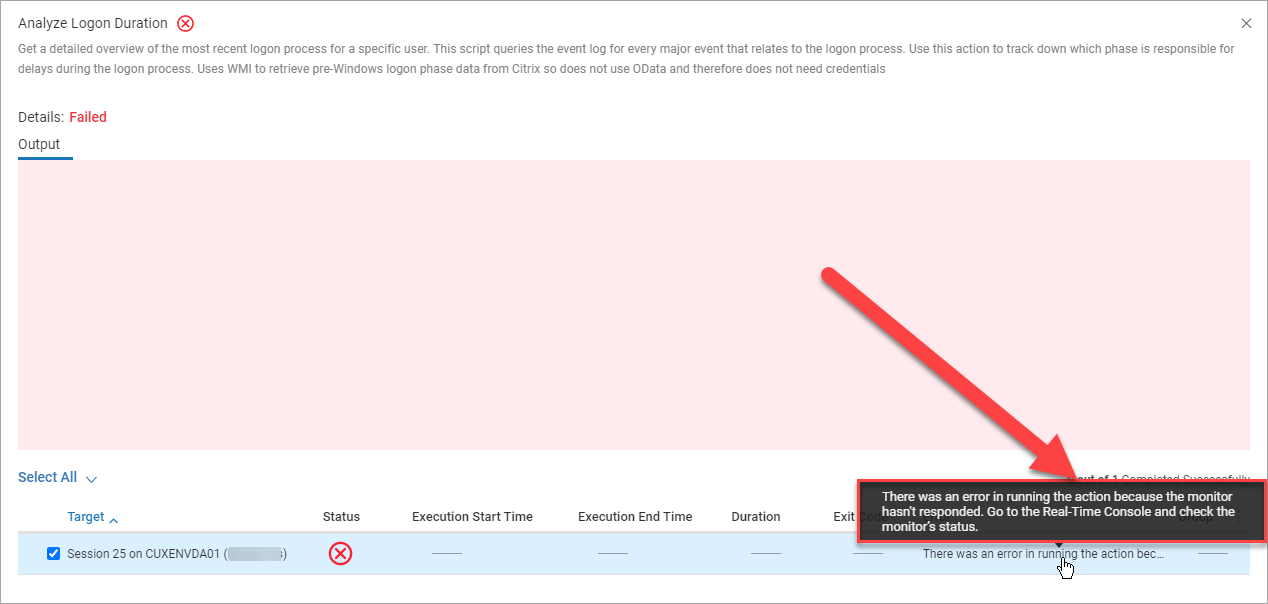
Script timeout
If the monitor does not respond within a minute, the following error is displayed:
For both types of actions, you can select a target from the bottom of the window to see the details for that target.