A template defines all the content within a survey (the questions, branching structure, and appearance). A survey template on it's own does not get sent to anyone until you publish a survey based on the template. A survey template is reusable, and you can publish multiple surveys based on the same template.
All existing templates appear in the Templates tab. To create a new template, click Add New Template.

Create a Survey Template
The configuration options in the survey template creation wizard are described below under the relevant section.
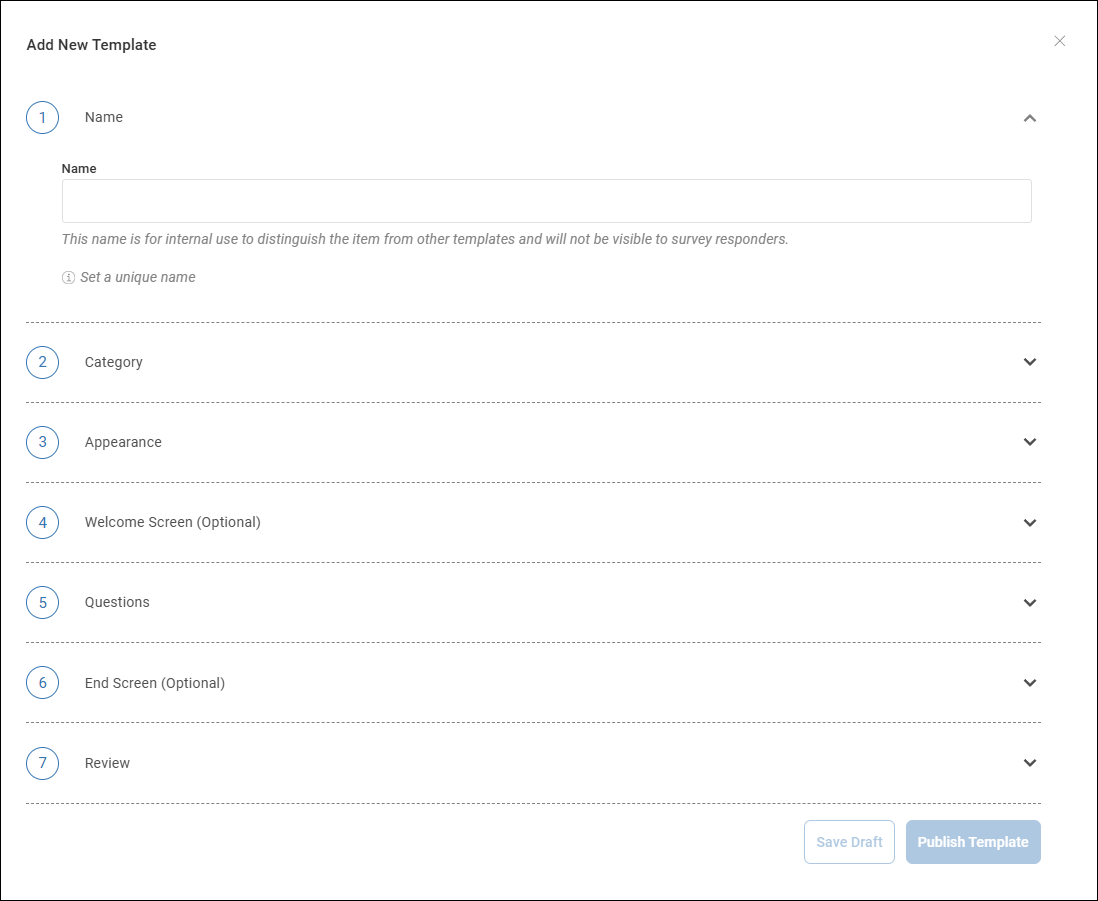
1 - Name the survey template
Enter a name for the template. Note that the name you enter here is used only for organizing the templates and is not visible to survery responders.
2 - Choose a category
Choose a category for the template. The category is used:
- In the list of templates and published surveys. You can filter the lists based on the Category column.
- When manually sending an On-Demand survey to a device. The list of available surveys is organized by category.
To learn how to customize categories, read User Sentiment Settings.
3 - Appearance
CJK characters such as 河 aren't supported.
In this section, you can customize the apperance of the survey window that is displayed to your survey responders. As you make changes, the Preview updates to show the appearance of the survey.
Title
The Title appears to the survey responder when they receive a notification to complete the survey, and appears at the top of the survey for each question. Note that you can include an image in the title, but the image does not appear in the preview.
Background
You can add a custom Background image for the survey window. For example, can add a background with your company branding and colors. For the best results, use an image that is 600 x 600 pixels (or larger while maintaining a square aspect ratio) or a vector image (.svg).
You can also customize the Background Color and Header/Footer Color (and transparency) of the text box where the survey questions appear.
Font
In the Font Family dropdown, select which font to use for the survey text:
- If you select System Font, the survey uses the default system font for each device that receives the survey.
- If you select Custom Font, then the survey uses the font that you specify in the User Sentiment Settings page. If a device does not have the custom font installed, then it defaults to the system font.
Use the Font Color picker to choose the color and transparency for the font.
Set the location of the survey question box
You can customize the location of question box within the survey window by either:
- Clicking and dragging the question box in the preview window.
- Using the Offset X and Offset Y options.
4 - Welcome Screen
If you include a welcome screen, then the welcome screen is displayed with the text that you enter before the survey questions.
If you choose not to include a welcome screen, then the survey immediately starts on question 1.
5 - Create survey questions
In this section, create all of your survey questions.
You can create a question branching structure using the Go to options for each question. For example, if a user responds that they weren't happy with their support from your help desk, you can direct them to another question to explain why they weren't happy. If you set the Go to destination to End Statement, then the survey goes to the End Screen configured in step 6. If you choose not to include an End Screen, then the survey will immediately close.
If you set a question as Required, the survey responder can't skip the question. If a question isn't required, then the survey responder can skip the question. If you set a Net Promoter Score or Single Selection question as not required, then an additional Go to field appears at the bottom of the question to set the destination for responders who choose to skip the question.
You can choose from the following question types:
Net Promoter Score
In this question type, the responder can answer the question with a rank from 1-5. You can set the Go to destination independently for each answer.
The Low Score label appears under score 1 (for example, "Very bad"). The High Score Label appears under score 5 (for example "Very good").
If you enable the option Global Net Promoter Score, then the score will contribute to the overall net promoter score for that particular survey. This is relevant if you have a survey with multiple net promoter score questions, and you want to average the scores of individual questions into a total score.
Single Selection
The responder can answer the question by selecting only one of the preconfigured answers. You can set the Go to destination independently for each answer.
Multiple Selection
The responder can answer the question by selection one or more of the preconfigured answers.
Free Text
The responder can answer the question by entering free text.
6 - End Screen
If you include an end screen, then it is displayed when the responder has finished answering the questions.
If you choose not to include an end screen, then the survey window automatically closes when the responder answers their final question.
Edit, duplicate, or delete a Survey Template
In your list of of Templates, click the three-dots menu to edit, duplicate, or delete the Template.
If you edit a Template, it does not automatically update published Surveys that were created based on the Template. A Survey copies the Template at the time you publish the Survey, and the Survey does not change if you later edit the Template. If a Survey is saved in draft (not published), and you update the Template, then the Survey is updated with the new version of the Template.