Use our Jamf integration to more easily and reliably deploy the ControlUp for Desktops Agent onto your macOS devices.
The integration adds Agent installation scripts to Jamf and creates configuration profiles to allow the Agent to collect device data. The configuration profiles reduce the number of data collection prompts displayed to your end users.
The installation scripts install the Agent Manager, which automatically keeps the Agent version updated according to your version control settings.
Step 1 - Configure the API client in Jamf
For more details, read Jamf's documentation about API roles and clients.
- Sign into Jamf.
- Go to Settings > API Roles and Clients.
- Create a role with the following permissions:
- Read macOS Configuration Profiles
- Update Packages
- Read Categories
- Create macOS Configuration Profiles
- Create Packages
- Read Packages
- Create Categories
- Create Policies
- Read Policies
- Create a new API client and link it to the role you created.
- Generate a client secret from the API client.
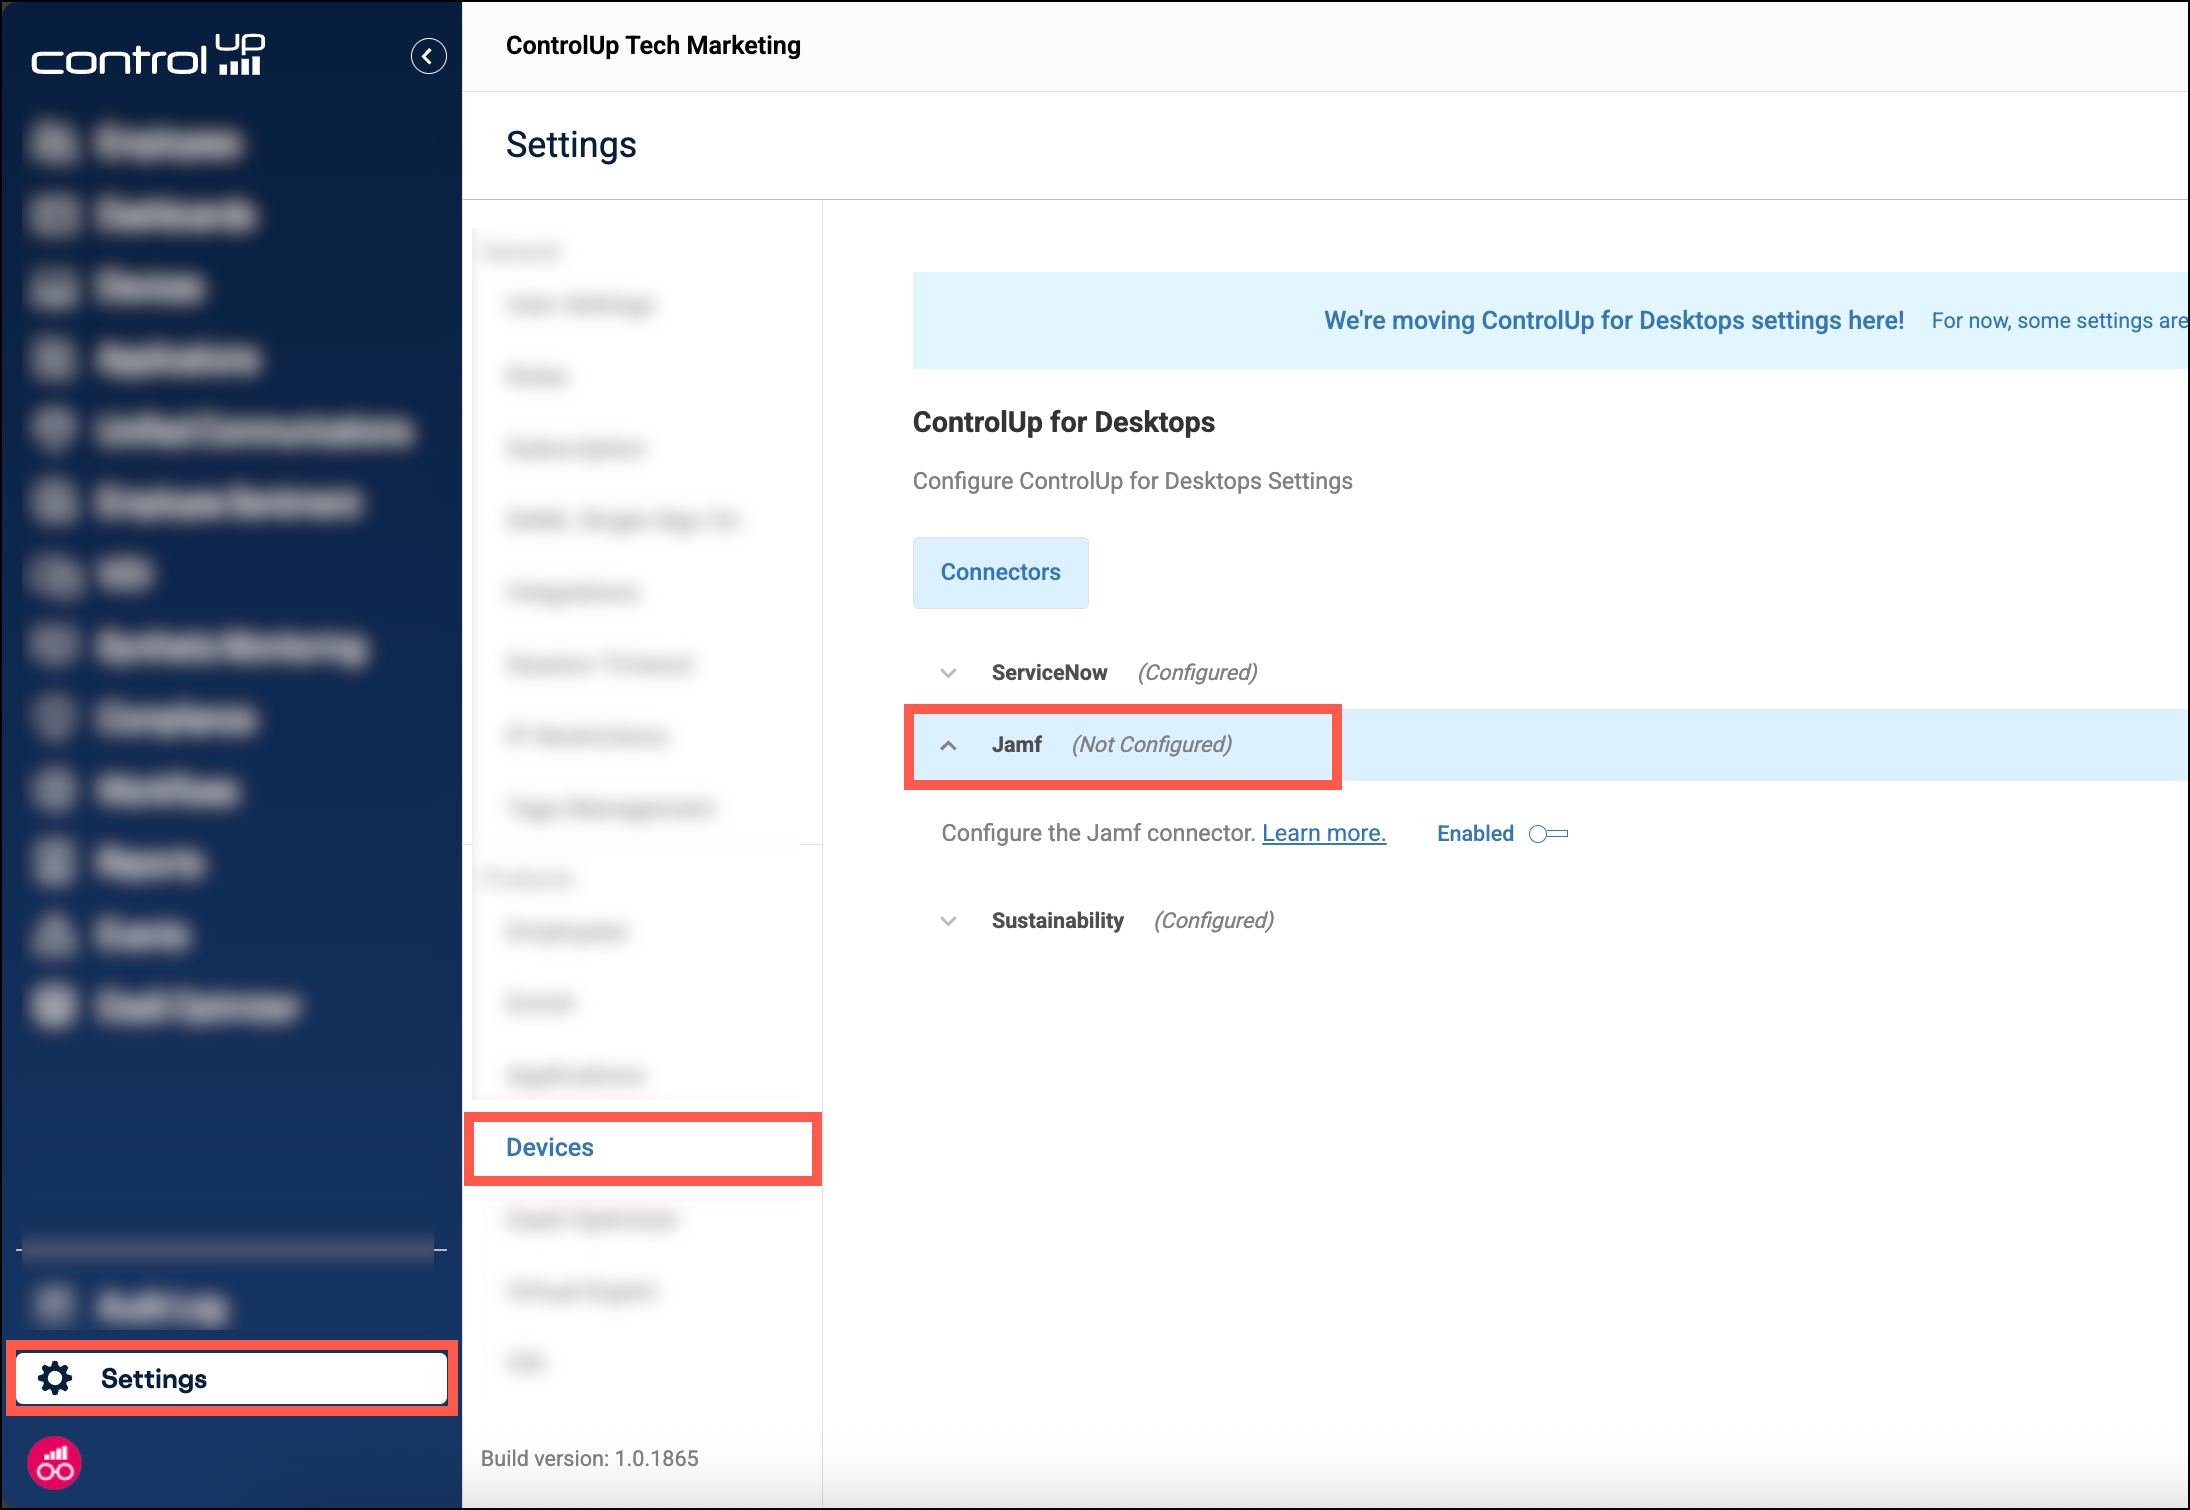
Step 2 - Add the Jamf credential in ControlUp
-
Sign into ControlUp.
-
Go to Settings > Devices > Connectors > Jamf.
-
Enable the connector.
-
Open the Credential dropdown and click Add new credential.
-
Enter a Name. This name is used only to help you manage your credentials in ControlUp.
-
Enter the API client ID and client secret that you created in Jamf in Step 1.
-
In the Endpoint field, enter the base URL of your Jamf instance in the format
https://yourcompany.jamfcloud.com.
Note: Jamf might display a longer URL that includes/api/oauth/tokenwhen you create your client secret. Do not include this extra path. Enter only the base URL.
After you save the Jamf connector, it appears in your central integrations list (Settings > Integrations). You can also set up the Jamf connector from the Integrations page under MDM Provider.
Step 3 - Add installation scripts and configuration profiles
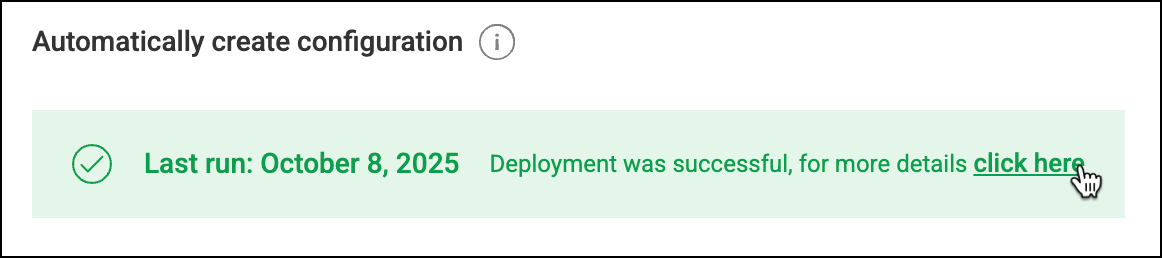
In ControlUp, under Automatically create configuration, click Deploy. This uses the selected credential to create a Jamf package with Agent installation scripts, and configuration profiles to allow data collection.
To see the what the integration created in your Jamf environment, click the button in the success message:
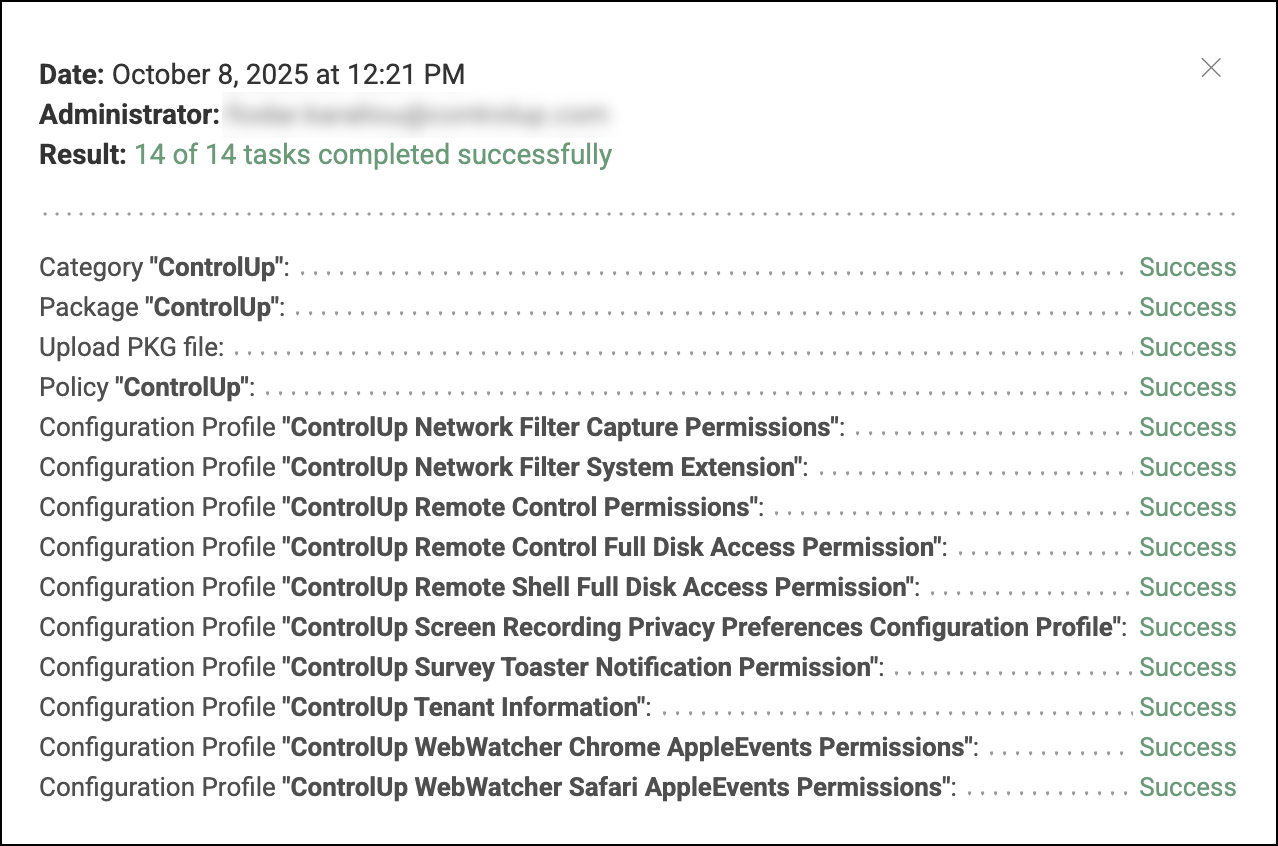
The popup displays the status of each action taken by the integration:
Step 4 - Deploy package and configuration profiles
It's up to you how you configure Jamf to deploy the Agent installation package and configuration profiles to your devices. When the installation scripts run, the Agent installs and you'll start seeing device data in ControlUp.
How to update configuration profiles
In some cases, a new Agent version might include features that require updated configuration profiles. We will advise you to redeploy the Jamf profiles to make sure you get the latest updates. To do this, go to the Jamf connector settings in ControlUp and click Redeploy.