This article describes ControlUp integrations with identity providers (IdP).
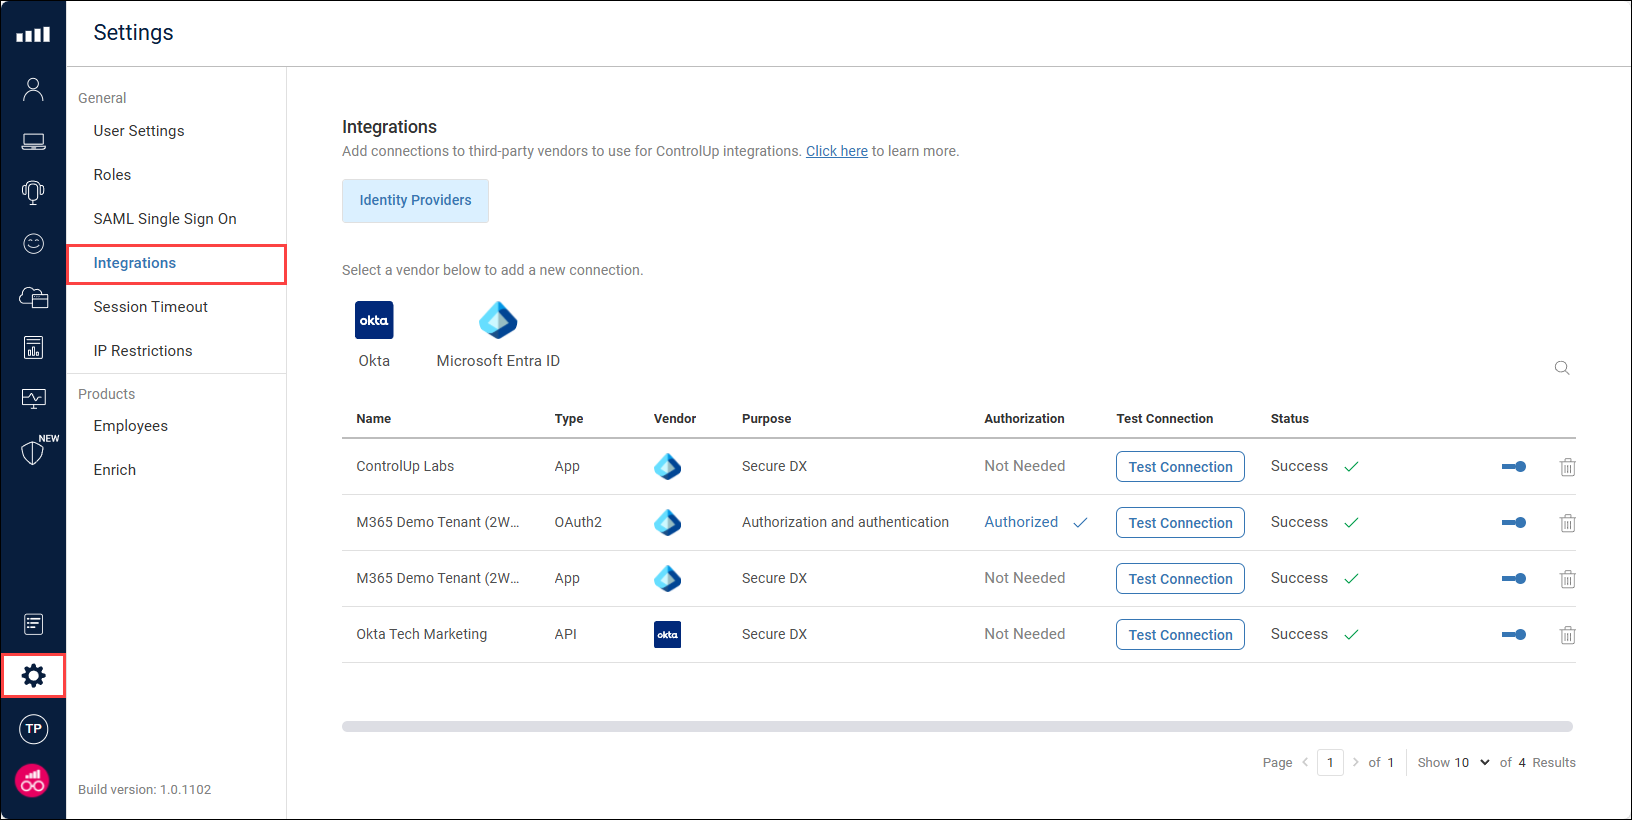
Integrations require you to set up a connection between ControlUp and your IdP. To view your existing connections or to create a new one, go to Settings > Integrations.

When you add an IdP connection, you must select a Purpose for the connection. This determines how the connection is used, what data is collected, and which permissions are required. Note that some purposes aren't supported on all IdPs.
Read the rest of this article to learn how you can use IdP integrations.
Authentication and authorization
(This feature is supported only for Entra ID)
Integrating your IdP for authentication and authorization lets you assign IdP user groups to ControlUp roles. When a user signs into ControlUp, the integration searches your IdP for a matching email address and gets a list of that user's IdP groups. If the IdP groups are assigned to ControlUp roles, then the user is automatically assigned those roles.
This feature lets you manage ControlUp users directly from your IdP. For example, lets say you have an IdP group for level 2 help desk employees. You can assign the IdP group to a ControlUp role with the relevant permissions. Any user in the IdP group is automatically assigned the role when they sign in.
After setting up the integration, you can automatically set up SAML SSO for Entra ID with just one click. Learn more.
Note about using the SSO groups feature
The SSO groups feature is another method of assigning ControlUp roles based on IdP group membership by sending custom SAML attributes. We recommend that you don't use this integration in combination with the SSO groups feature for the same IdP to avoid confusion caused by using two different methods to assign IdP groups to ControlUp roles.
To use this feature:
Add a connection to Entra ID. The Purpose for the connection must be set to Authentication and authorization, and you must assign the relevant permissions in Entra ID.
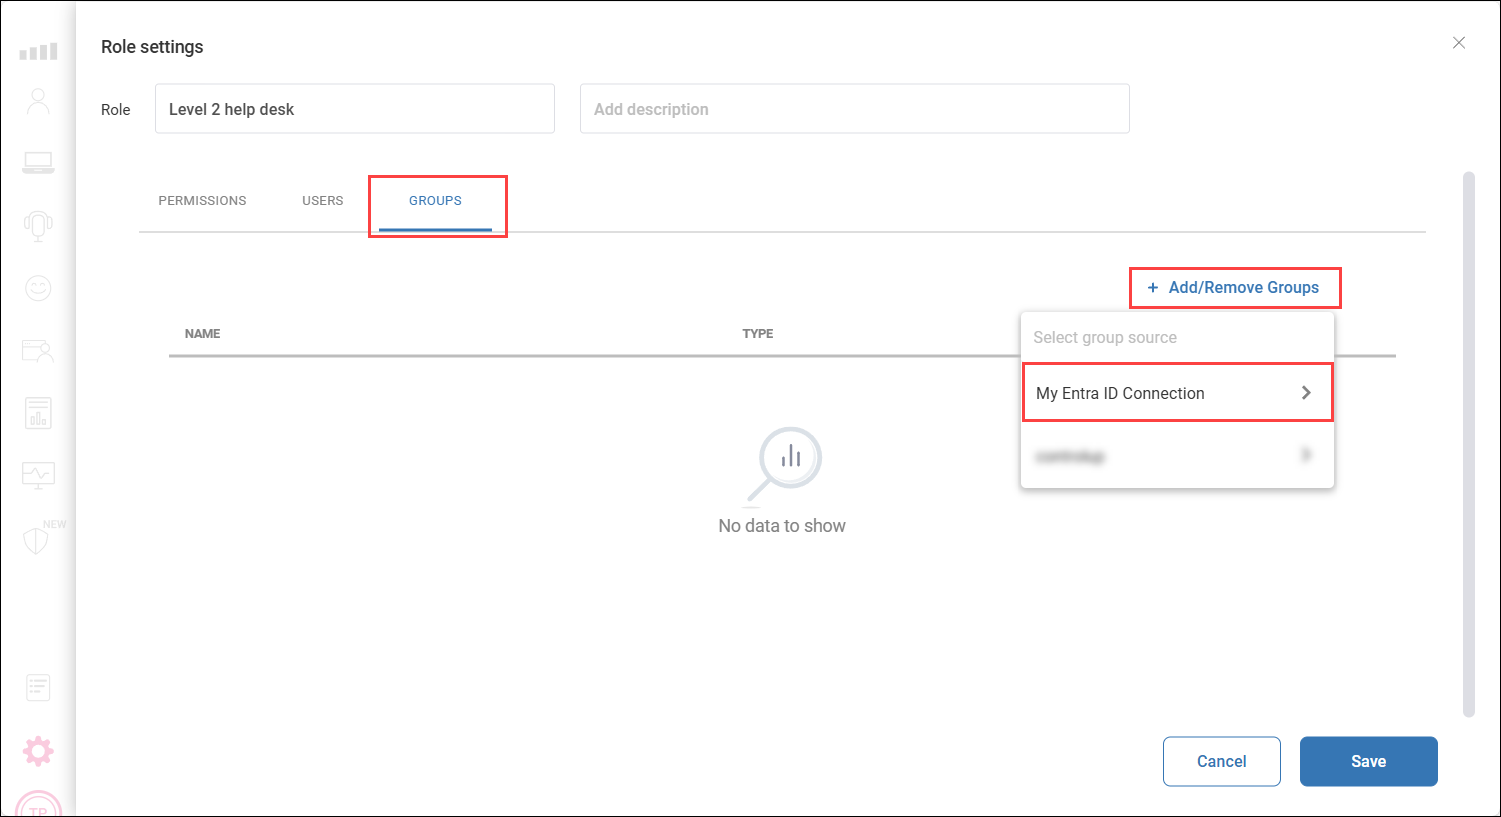
Go to a ControlUp user role.
Click the Groups tab.
Click Add Groups and select the IdP connection you created in step 1. A list of all groups in the IdP appears.

Select the IdP group to add to the user role and click Apply.
Save your changes to the role
The IdP group is now assigned to the ControlUp role. Any user in the IdP group is assigned the role the next time they sign in. You can add an IdP group to multiple ControlUp roles, or you can assign multiple IdP groups to the same ControlUp role.
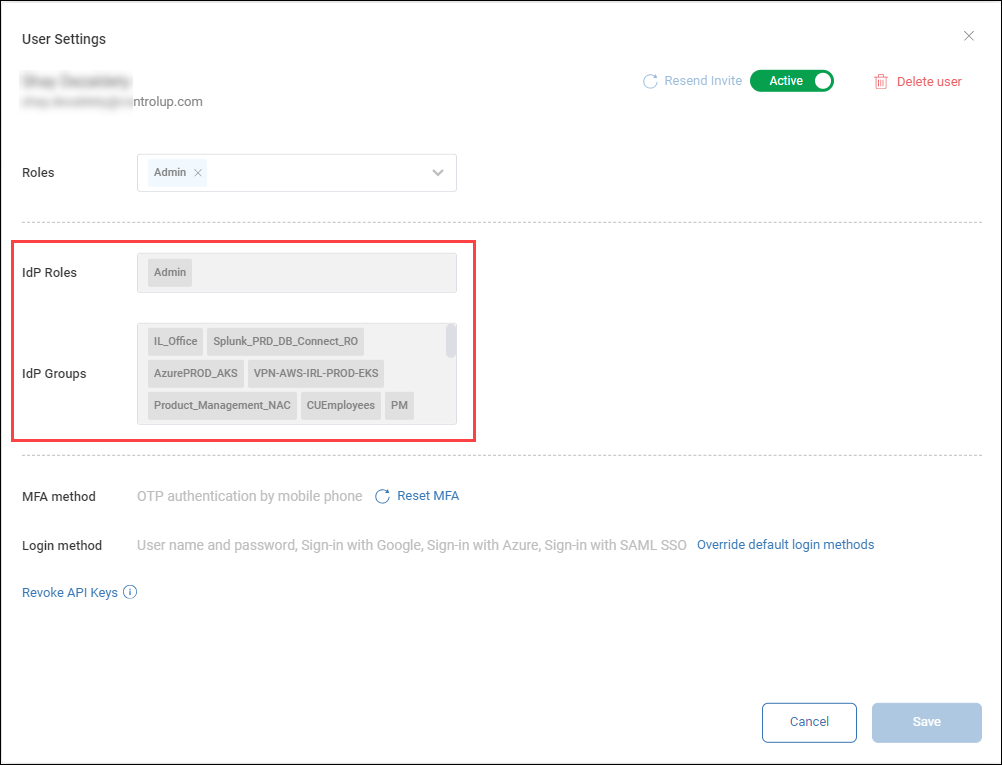
When you go to your ControlUp user settings and click on a specific user, you can see the user's IdP groups and roles assigned to those IdP groups, in addition to roles assigned to the user directly.

Assign IdP groups to roles in the Real-Time DX Console Security Policy
You can also assign IdP groups to roles in the Real-Time DX Console Security Policy to control what a user is allowed to do in the VDI & DaaS web interface. To assign an IdP group to a role in the Security Policy:
In the Real-Time Console, go to Security Policy > Manage Roles.
Select a role and click Edit > Add Users/Groups.
Set Provider to the name of the IdP connection you added to ControlUp.
Set Search Options to Groups.
Click Search. All groups from the selected IdP connection appear in the list.
Select which groups you want to add to the role and click OK.
ControlUp for Compliance (Formerly Secure DX)
This feature supports Entra ID (requires Entra ID P1 or above) and Okta.
Integrating your IdP for ControlUp for Compliance lets you monitor SaaS application login risk. Read this article to learn how to set up and use this feature.