This article describes how to add a Microsoft Entra ID connection so you can integrate Entra ID with ControlUp. Read IdP integration overview to learn how you can use IdP integrations with ControlUp.
ControlUp supports two methods for authorizing Entra ID connections:
Prerequisite permission
To set up an Entra ID connection, your ControlUp account must have the Manage Integrations permission.
Method 1 - OAuth
-
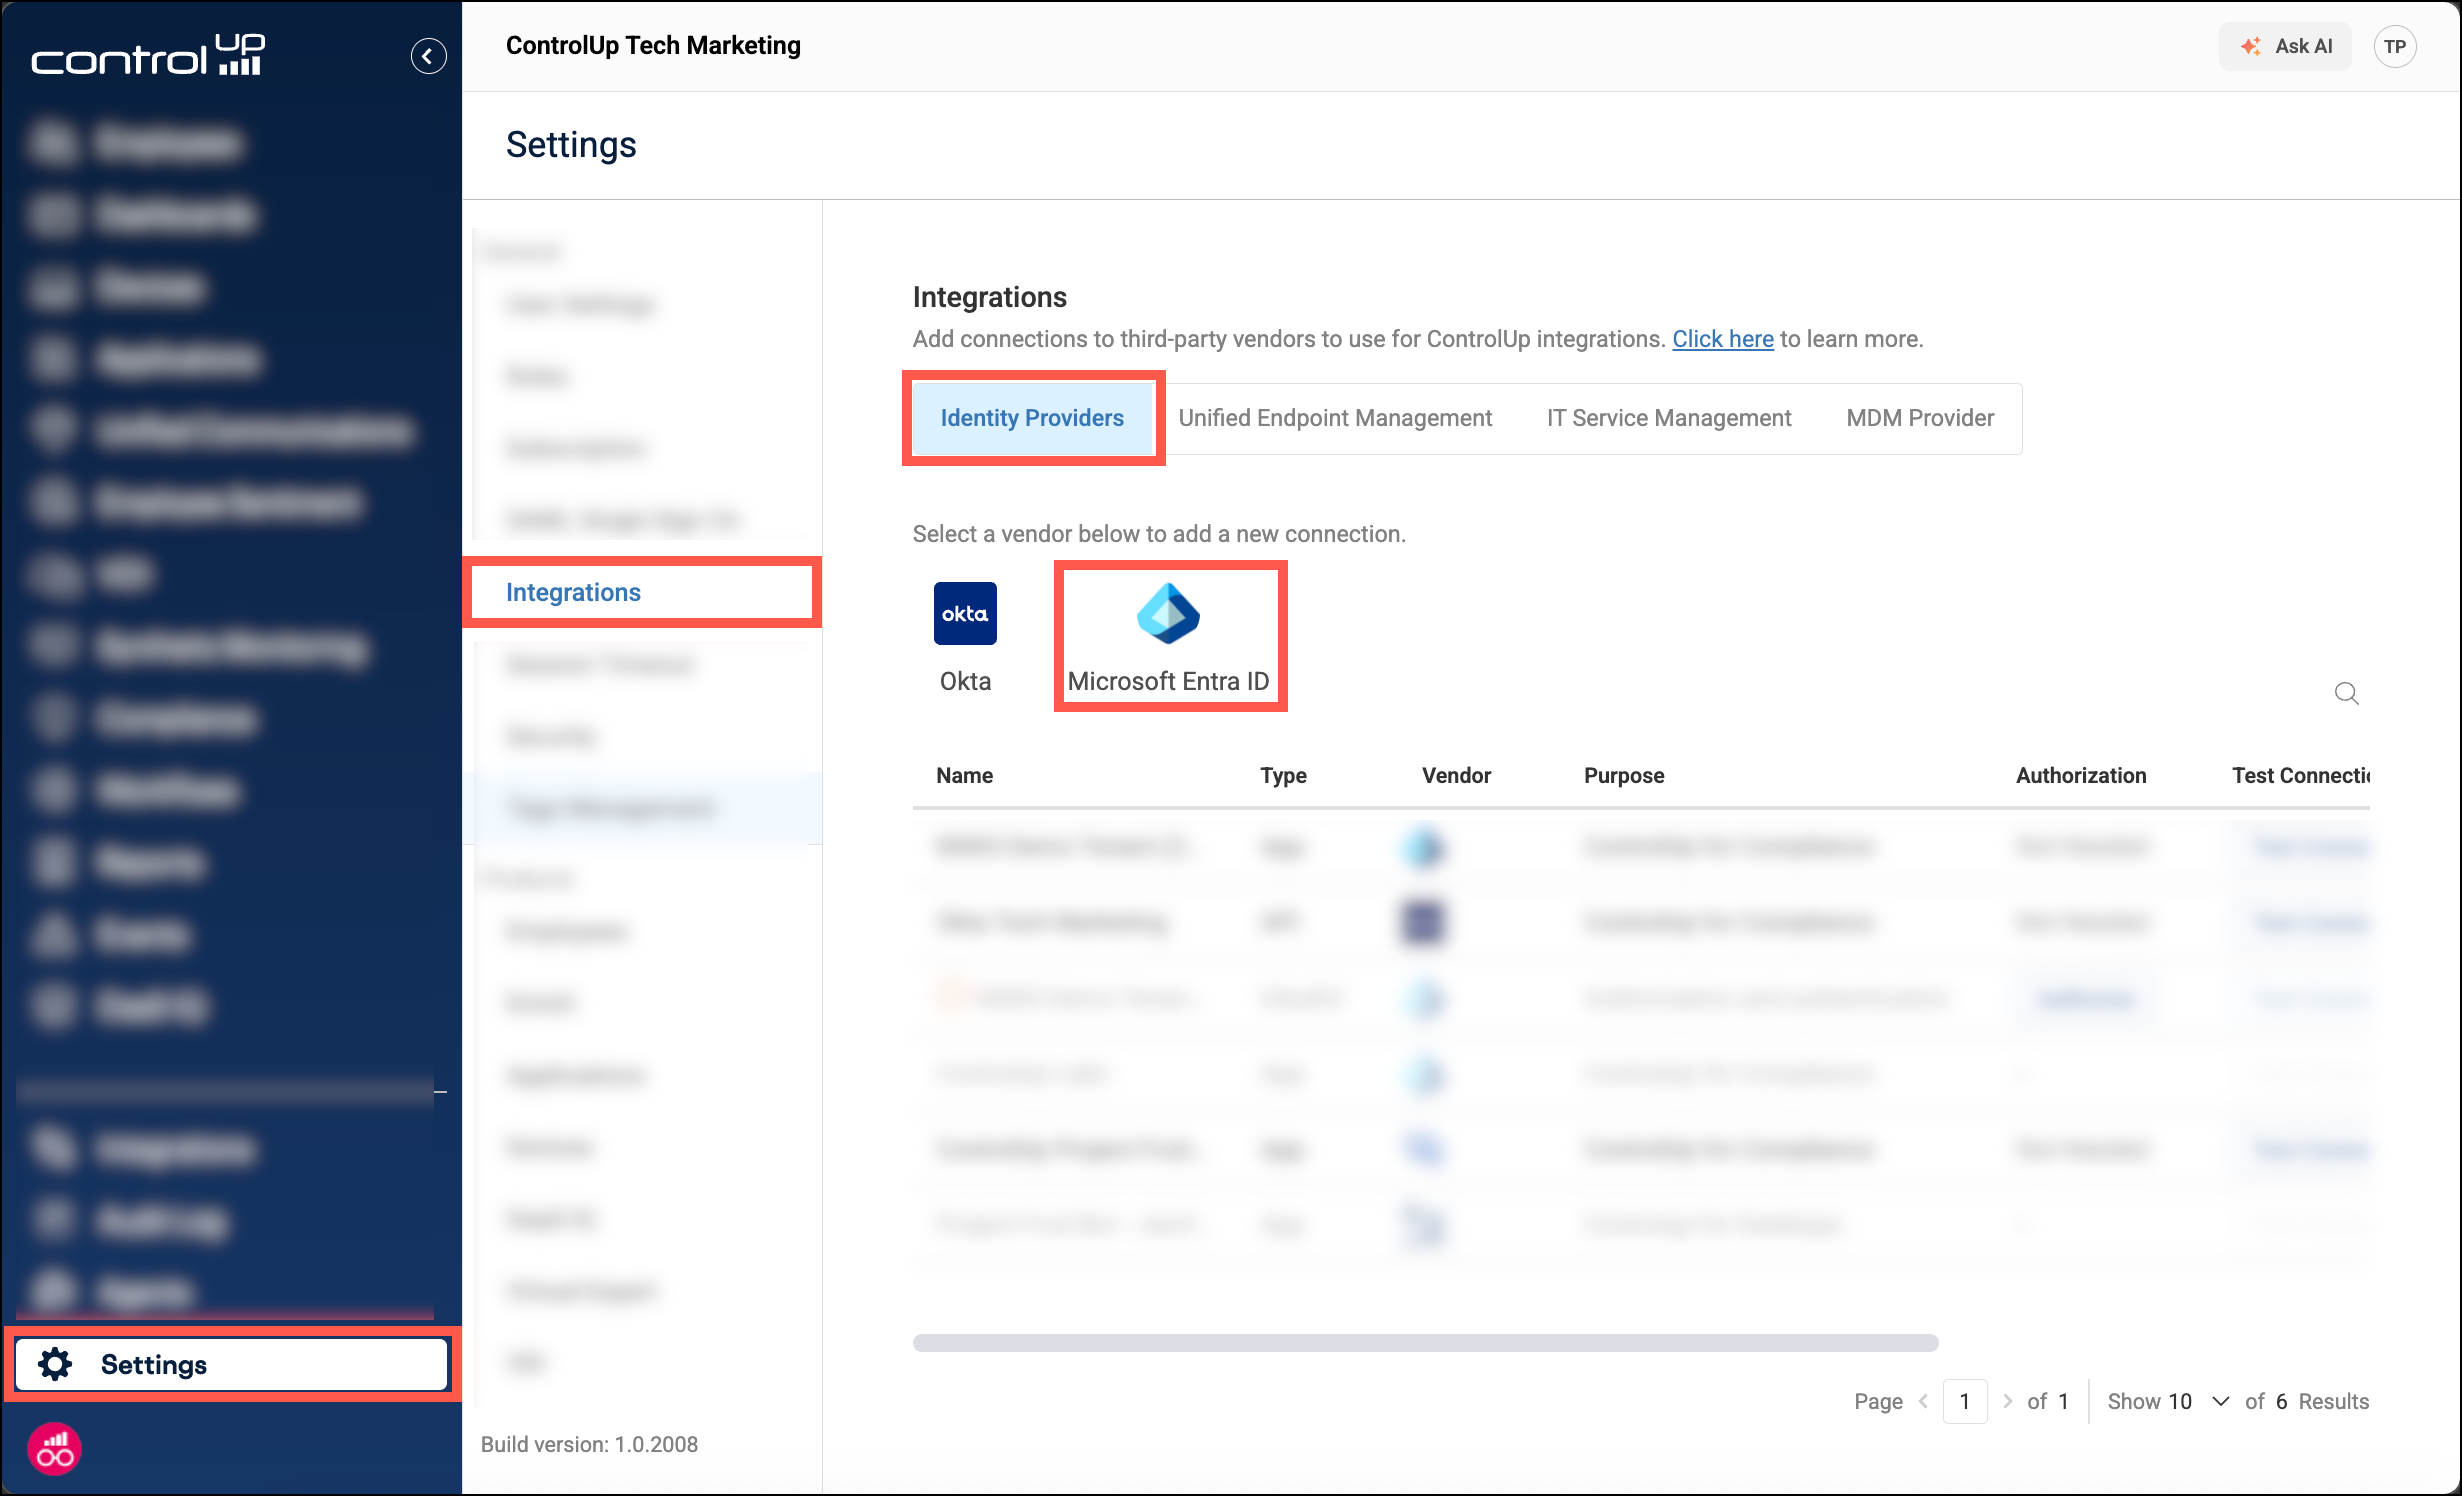
In ControlUp, go to Settings > Integrations > Identity Providers and click the Microsoft Entra ID logo to start adding a new Entra ID integration.
-
Under Authorization method, select OAuth 2.0.
-
Select the Purpose for the connection. This determines how ControlUp uses the connection and the required permissions in Entra ID.
-
Enter a Name of your choice. Note that you can't see the connection's configuration after you create it, so you should choose an informative name, especially if you have multiple Entra ID tenants.
-
In the Instance Name field, enter your Entra ID tenant name. Read Microsoft's documentation to learn how to get your tenant name.
-
In the Admin Email field, enter the email address of the Entra ID user you want to use to perform the OAuth authentication.
-
Click Add connection.
-
Click Authorize and sign in using the admin email account you entered in step 6. You must accept the requested permissions.
-
Click Test connection to test and finalize the connection. This is a mandatory step.
Method 2 - Application registration
Step 1 - Register an application in Entra ID
- In Entra ID, go to App registrations > New registration.
- In the Register an application form, enter the following details:
- Enter a Name for the application.
- Select the Supported account types.
- Click Register.
- Take note of the following values because you'll need to add them into ControlUp's settings.
- Application (client) ID
- Object ID
- Directory (tenant) ID
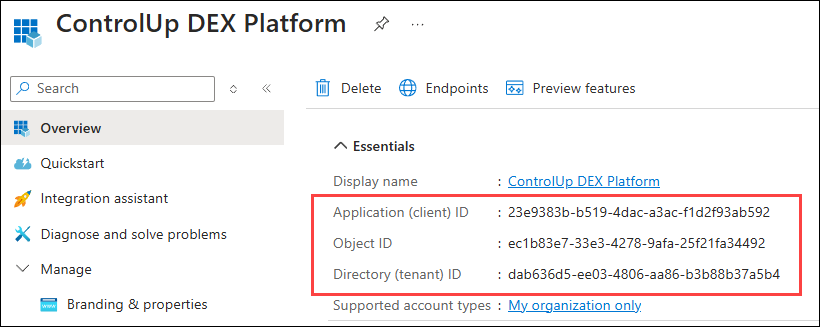
This image is taken from Microsoft and may not reflect the latest changes that may be made to the software over time. However, the settings and values should appear as described.
Step 2 - Add permissions to the application
-
In Entra ID, go to API permissions > Add a permission.
-
Select Microsoft Graph.
-
Select Application permissions.
-
Add the required permissions based on which ControlUp module uses the connection:
- For Authentication and authorization, add the following permissions:
- User.Read.All
- Group.Read.All
- Application.ReadWrite.All (required only for automatic SAML setup)
- Policy.ReadWrite.ApplicationConfiguration (required only for automatic SAML setup)
- For Secure DX, add the following permissions:
- User.Read.All
- AuditLog.Read.All
- For Authentication and authorization, add the following permissions:
-
After adding the permissions, click Grant admin consent for Default Directory.
Step 3 - Create a client secret
- In Entra ID, go to Certificates & secrets > New client secret.
- Enter a name and expiration date for the client secret. If the client secret expires and is not replaced with a new one, then ControlUp can't use the connection.
- Take note of the client secret Value because you'll need to add it to ControlUp's settings. You must copy the value and save it somewhere safe now because you won't be able to view it again.

Step 4 - Set up the connection in ControlUp
-
In ControlUp, go to Settings > Integrations > Identity Providers and click the Microsoft Entra ID logo to start adding a new Entra ID connection.
-
Under Authorization method, select Application Registration.
-
Select the Purpose for the connection. This determines how ControlUp uses the connection and the required permissions in Entra ID.
-
Enter a Name of your choice. Note that can't see the connection's configuration after you create it, so you should choose an informative name, especially if you have multiple Entra ID tenants.
-
Add the following values you got from Step 1 - Register an application in Entra ID:
- Application (client) ID
- Object ID
- Directory (tenant) ID
-
Add the client secret value you got from Step 3 - Create a client secret.
-
Click Add connection.
-
Locate the connection you added in the list and click Test Connection to test and finalize the connection. This is a mandatory step.