Insights On-Premises (IOP) provides powerful administration functionalities that make your day-to-day administration activities easier. Instead of using the command line, you can use our GUI-based interface to:
Expand the disk size of data nodes.Change the IOP password for your admin account.Manage IOP servicesManage IOP licenses.
Prerequisites
Insights On-Premises. The new administration menu is not available for Hybrid versions of ControlUp.IOP must be an OVA installation. Linux-based deployments are not supported.Admin user credentials to access the administration menu.
Access the Administration UI
- Access the web interface of your IOP installation. To log in, use the admin user (cuadmin, prior to IOP 8.8) and the password that you defined in the OVA deployment.

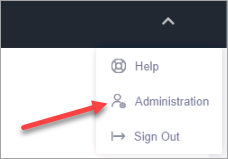
- Select Administration from the home menu by clicking the arrow at the top right.
- Log in again with the power user account in the admin menu.

- Once you are logged in, you can see 3 menu options on the left side:
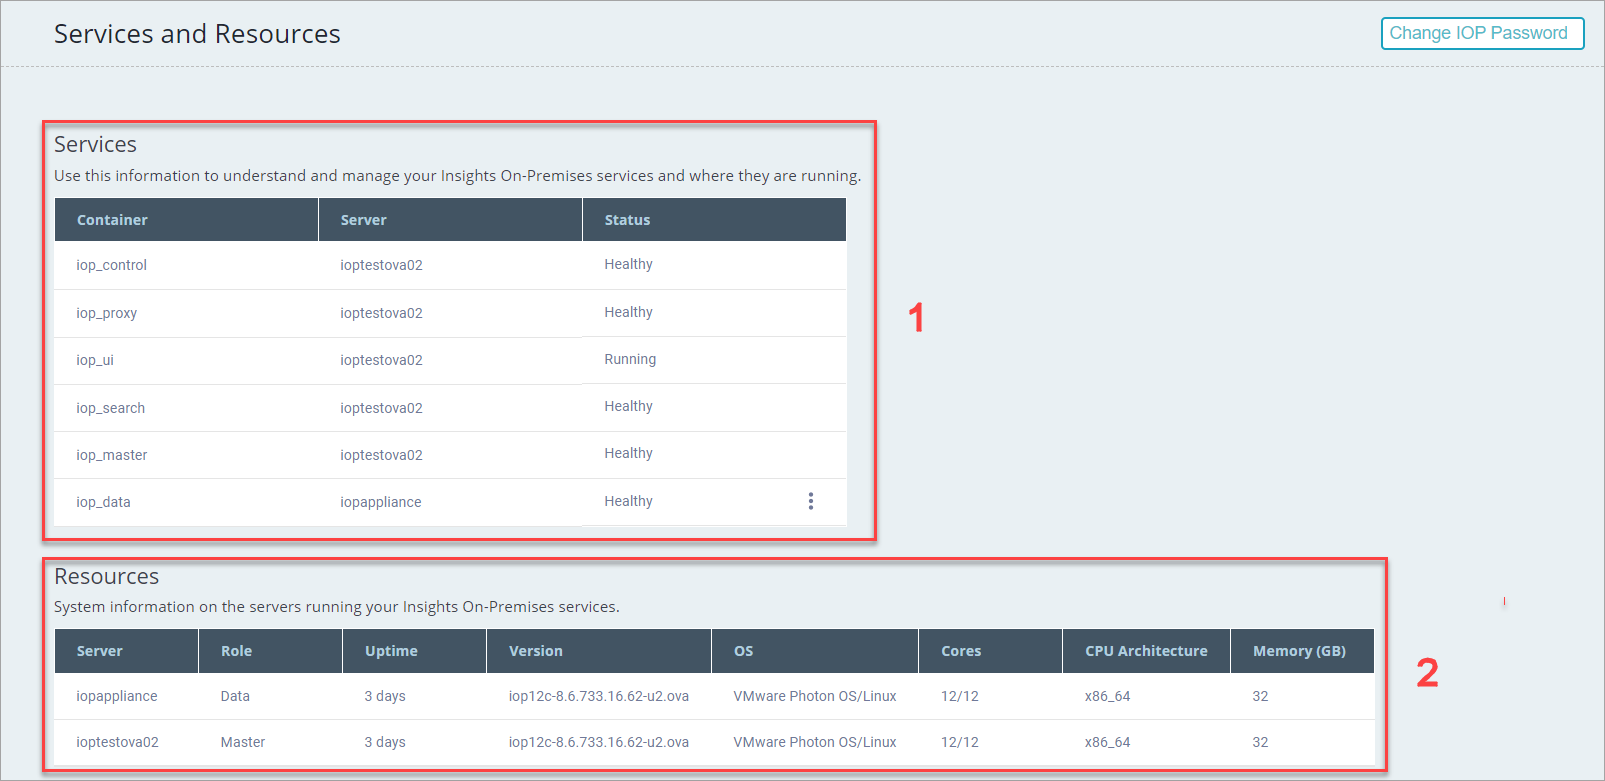
Services and Resources
[1] The Services table provides an overview of the running IOP services, the machine on which the services run, and their status.
[2] The Resources table shows the IOP servers, their roles, and system information.
Services
Containers
| Container Name | Listening Port |
|---|---|
| iop_control | 8777 |
| iop_proxy | 80 (HTTP port) 443 (HTTPS port) |
| iop_ui | 3000 (UI port) |
| iop_search | 8000 (UI port) 8089 (Management port) 8088 (HEC port) 9997 (Forwarder port) |
| iop_master | 8089 (Management port) 8080 (UI port) |
| iop_data | 8000 (UI port) 8089 (Management port) 8088 (HEC port) 9997 (Forwarder port) 9887 (Replication port) |
Container health status
| Container Status | Description | Allowed Actions |
|---|---|---|
| Healthy | The container has entered a healthy state | Restart Stop |
| Unhealthy | The container has entered an unhealthy state | Restart Stop |
| Stopped | The container exited and is in a stopped state | Start |
| Running | The container is running | - |
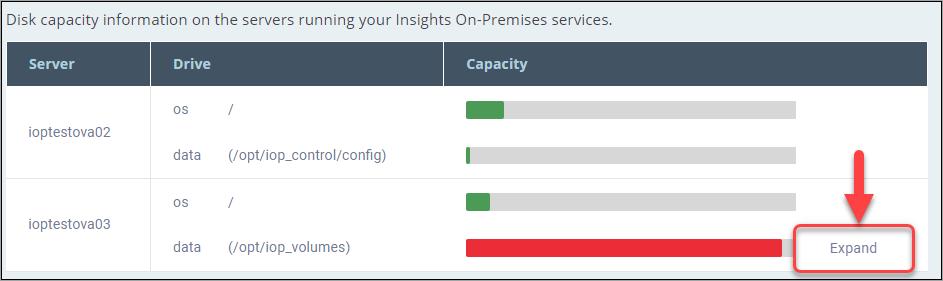
Disk Details
The Disk Details table shows you capacity of the disks attached to your IOP servers. When you deployed the virtual appliances for installing IOP in your environment, you configured 2 disks. One for the operating system (by default 100GB) and a partition for the IOP data. The partition for the operating system is shown as "os" while the data partition is displayed as "data". The data partition is the partition where IOP stores its data.
Disk Alerts
You can now send an email when the free disk space of a data node falls below 10% or 50GB (the first to match). To use this feature, make sure you have set up an SMTP server under Settings > Mail Server Settings.
Expand Disk
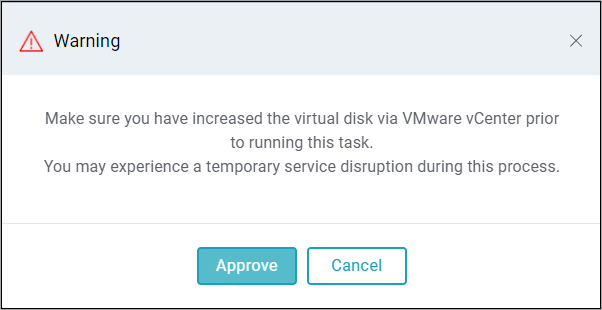
You can expand the disk of your data nodes. This requires some preliminary action in your vCenter Client as you first need to expand the disk size of your virtual appliance.
In a standalone environment, where you only use one IOP server,
To expand the disk of a data node:
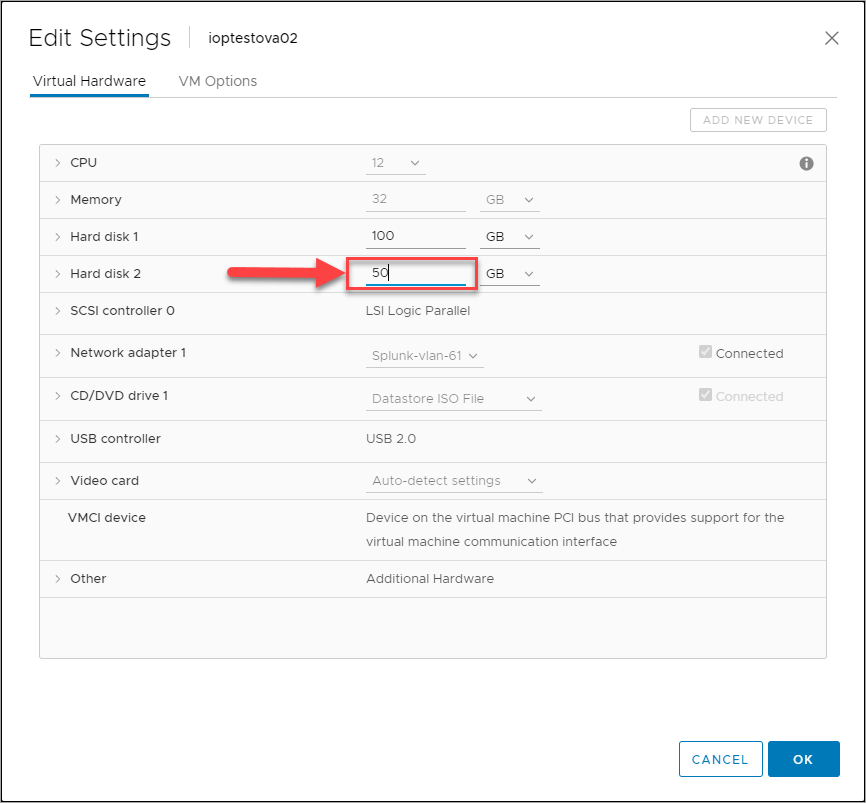
- Log into your vCenter Client and browse to your IOP virtual machine.
- Click Actions and select Edit Settings...
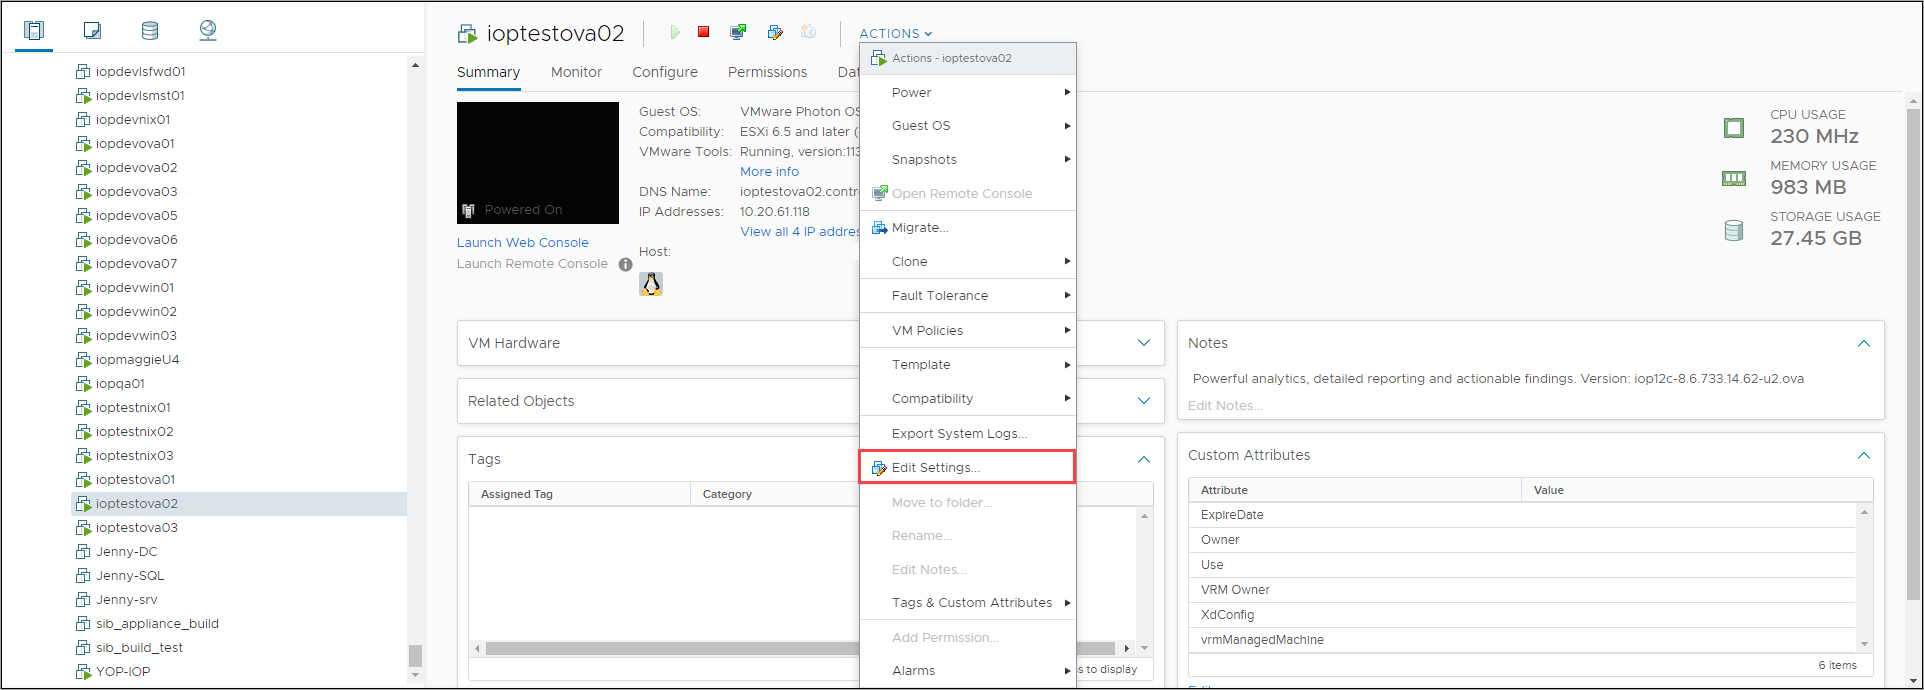
- In the Edit Settings screen, change the size of Hard disk 2 to a higher value. For example from 50 GB to 80 GB.
- In the Admin UI of your IOP appliance, click the three dots next to your data node and select Expand.
- Confirm the warning popup by clicking Approve.
Change IOP Password
The password of your admin user may need to be changed in some cases. You can change the password for both admin accounts, the cuadmin user which connects to the IOP appliance via SSH, and the admin user which accesses the graphical user interface:
To change the IOP password:
- In the Admin menu, make sure that Services and Resources is selected.
- Click the Change IOP Password button in the top-right corner.
- In the Change IOP Password wizard, choose the node on which you want to reset the admin password.
When you use more than one IOP node in a clustered environment, you must reset the passwords on all nodes.
If you are using a clustered environment with one master and one data node, you must first reset the password on the master and then on the data node.
- Under Current Password, enter the current password of your admin account.
- In the New Password field, enter the new password and confirm it.
The password must be at least 8 alphanumeric characters in length and contain at least one of the following special characters: ~ @ % ^ - _ =
- Click Modify Password to save the changes and confirm the warning message:
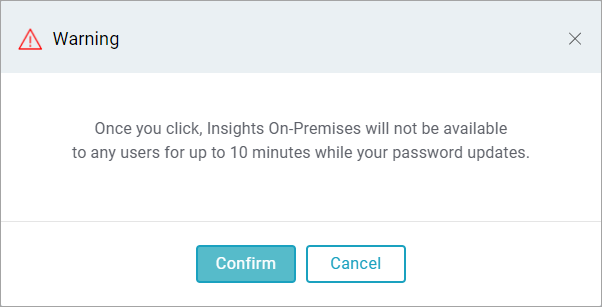
- The progress icon appears while the password is being changed. It will take several minutes for the new password to be applied to the IOP server. This causes a short downtime, so the IOP server is not accessible for a few minutes.
- If the password was successfully changed, the following message appears:

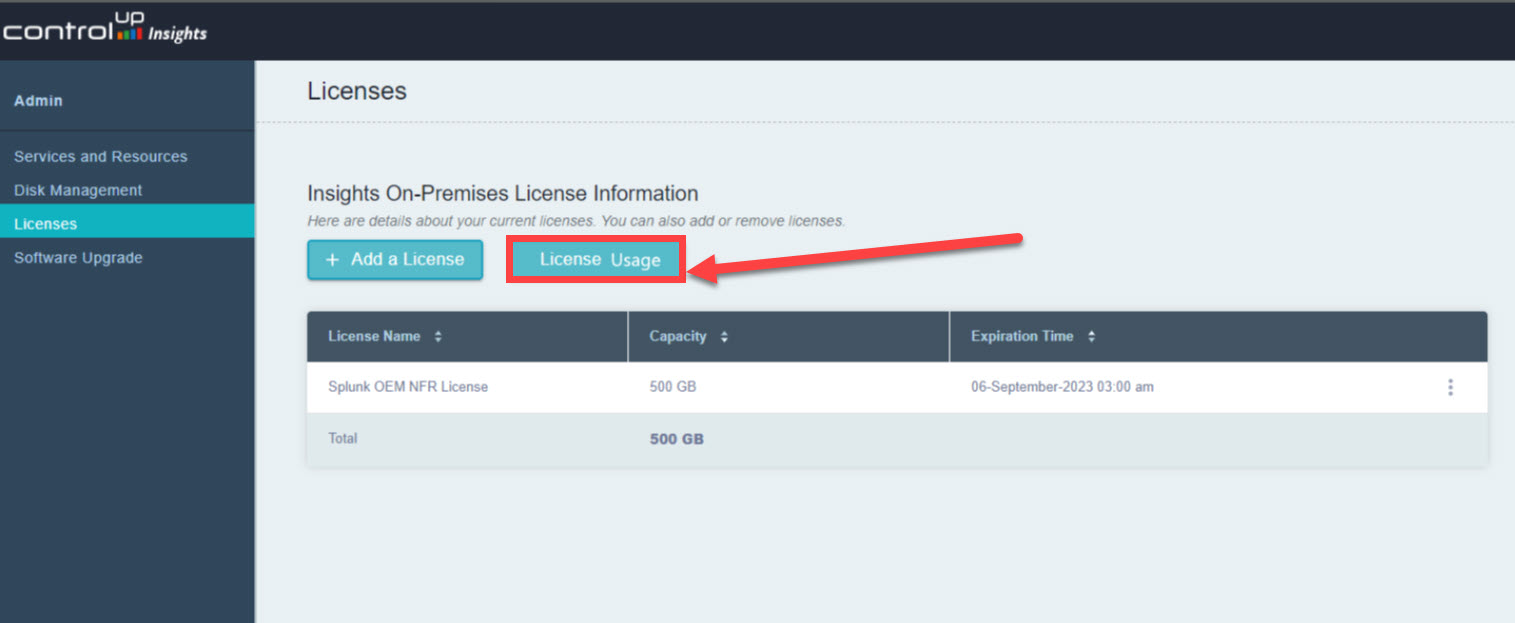
Licenses
For license management, IOP uses a software technology called Splunk. When you input data in Splunk, the indexer stores data on the disk and indexes the data. This operation requires a valid license which mainly determines the maximum amount of data you can input.
From IOP 8.8 and higher, you can click the License Usage button to open the license usage report in Splunk.
License Actions
The Licenses menu allows you to add and delete licenses.
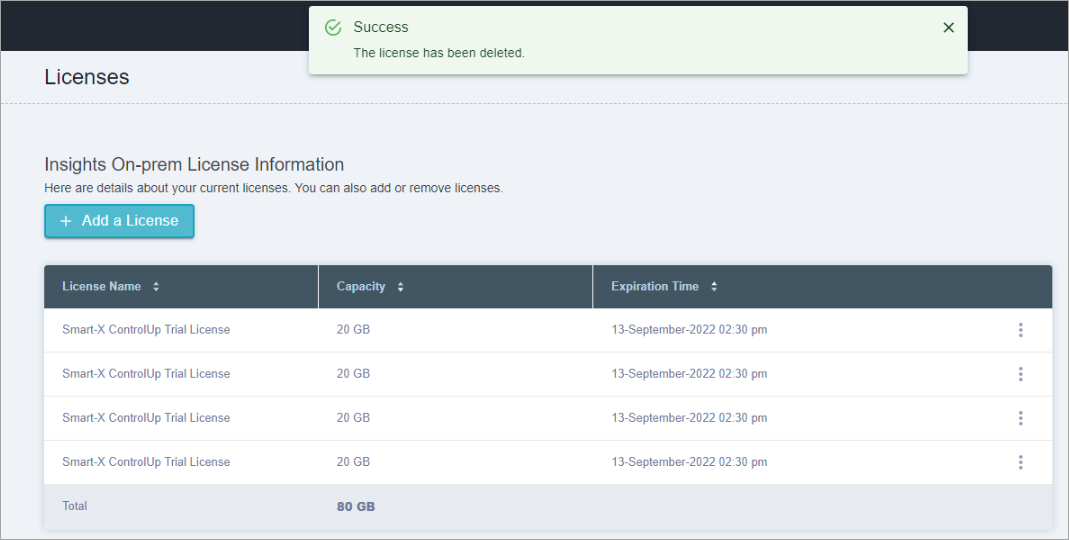
Add Licenses
To add licenses is very important for long-term implementation of your IOP environment.
To add a license:
- Click the + Add a License button at the top of the license table.
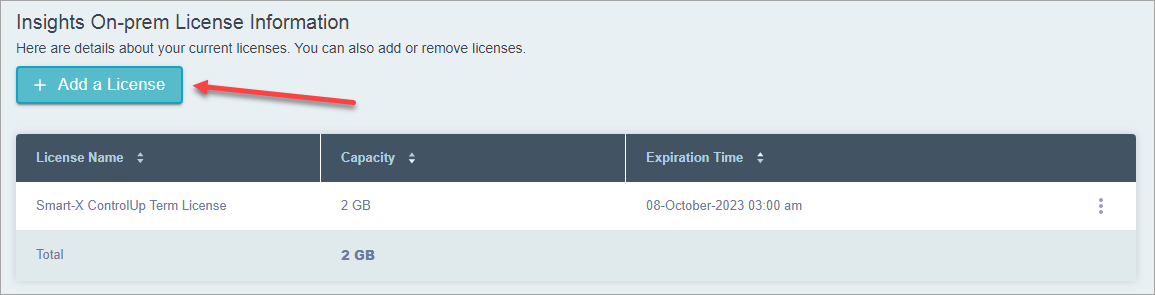
- Browse your local computer and open the license file.
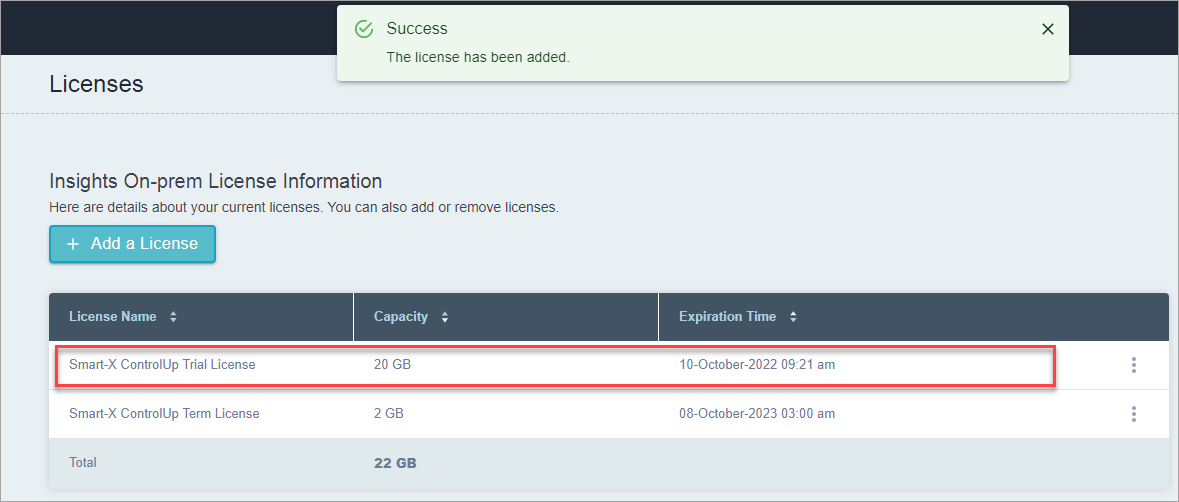
- The license is added and a success message is displayed.
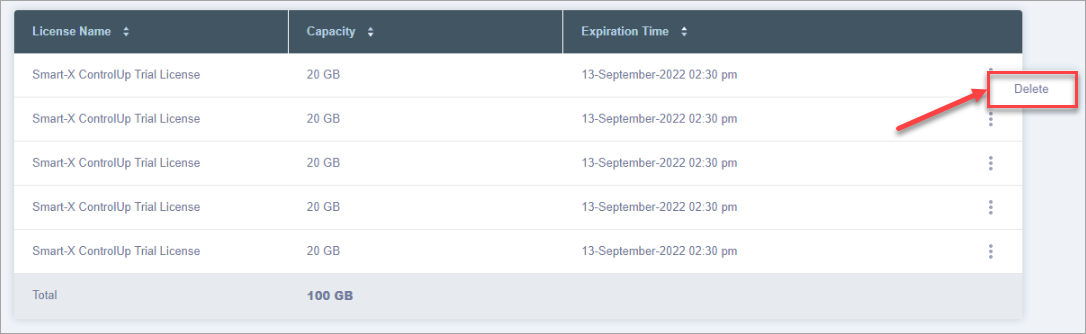
Delete Licenses
You can delete licenses from the Licenses menu at any time you want. Be aware that you can not delete your only license, so deleting licenses is only possible when you have more than one license available.
To delete a license:
- Click the three dots for a license and select Delete.
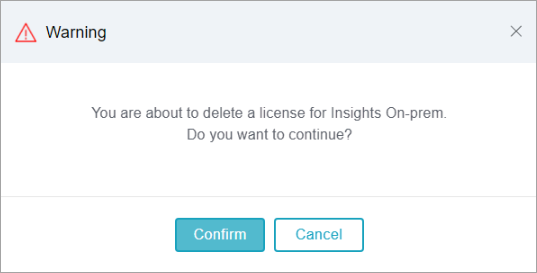
- Confirm the message by clicking Confirm
- The license is removed from the table and a success message is displayed.
Apply Security Patches
As a system administrator, ensuring the security of your servers through regular patching is a crucial task. Versions 8.7 and higher include an upgrade feature to address the challenge of updating your IOP servers with the latest security patches.
In the following section, we guide you through the process of updating your IOP servers with the most recent security patches.
Prerequisites
- IOP version 8.7 or higher
- Only OVA-deployed IOP instances are supported as the Administration UI is not available for Linux-based installation
Download the Upgrade Packages
Our support team provides the upgrade packages.
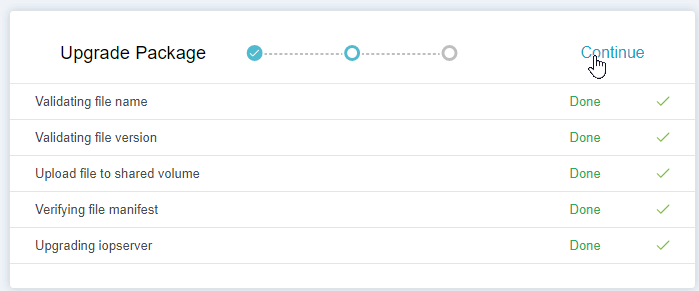
How to Apply Security Patches
- In the Admin UI, log in with an IOP admin account
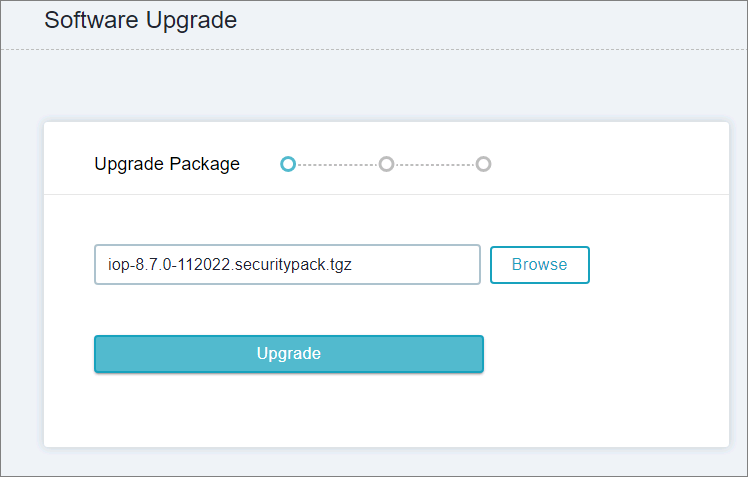
- Click Software Upgrade on the left-side bar
- Browse the tgz file that you downloaded from your Download Center and click Upgrade
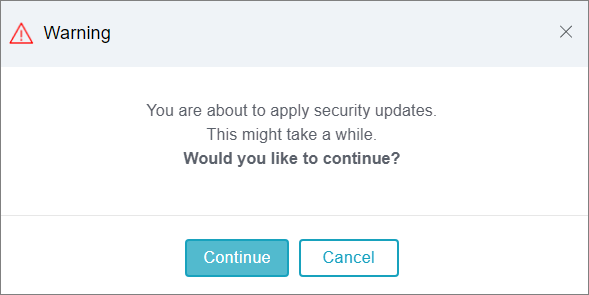
- Click Continue to confirm the warning
- Once the updating process is completed, click Continue > Close