This integration is currently in beta
Integrating Microsoft Intune with ControlUp for Compliance lets you:
- Patch applications using Intune's application deployment system instead of using the ControlUp for Compliance Agent to deploy application patches. OS patches are not currently supported. This is useful if you want to use only a single tool (Intune) for patching applications.
- Target devices for scanning and remediation using Entra ID device groups. This is useful if you have already organized your devices into Entra ID groups, and you want to use those groups to target devices for ControlUp for Compliance Templates
How to set up the integration with Intune
There are two ways to set up the integration with Intune:
To set up the integration, your ControlUp account must have the following permissions:
Manage Integrations (under the "Access Control" permission category)
- At least one permission under the Secure DX Management > Settings permission category.
Method 1 - OAuth
- In ControlUp, go to Settings > Integrations > Unified Endpoint Management and click Microsoft Intune.
- Under Authorization method, select OAuth 2.0.
- Set the Purpose to ControlUp for Compliance.
- Enter a Name of your choice. Note that you can't see the connection's configuration after you create it, so you should choose an informative name, especially if you have multiple Entra ID tenants.
- In the Instance Name field, enter your Entra ID tenant name. Read Microsoft's documentation to learn how to get your tenant name.
- In the Admin Email field, enter the email address of the Entra ID user you want to use to perform the OAuth authentication.
- Click Add connection.
- Click Authorize and sign in using the email account you entered in step 6. You must consent to the requested permissions. See Required OAuth permissions below for details.
- Click Test connection to test and finalize the connection. This is a mandatory step.
Required OAuth permissions
Integration permissions:
| Permission | Purpose |
|---|---|
Group.ReadWrite.All |
Creates and deletes the Entra ID group that scopes each deployment |
GroupMember.ReadWrite.All |
Adds targeted devices to the group before deployment; removes them during cleanup |
Device.ReadWrite.All |
Looks up devices in Entra by Azure Device ID so they can be added as group members |
DeviceManagementApps.ReadWrite.All |
Creates the Win32 app, uploads the installer, assigns it to the group, tracks install status, and deletes it when done |
DeviceManagementManagedDevices.ReadWrite.All |
Reads Intune device records to match them against Entra directory entries during targeting |
Standard OAuth permissions
| Permission | Purpose |
|---|---|
profile |
Identifies the admin who authorized the integration |
openid |
Required by OpenID Connect to issue an identity token |
offline_access |
Issues a refresh token so background remediations work without re-authentication |
Method 2 - Application registration
Step 1 - Register an application in Entra ID
- In Entra ID, go to App registrations > New registration.
- In the Register an application form, enter the following details:
- Enter a Name for the application.
- Select the Supported account types.
- Click Register.
- Take note of the following values because you'll need to add them into ControlUp's settings in a later step.
- Application (client) ID
- Object ID
- Directory (tenant) ID
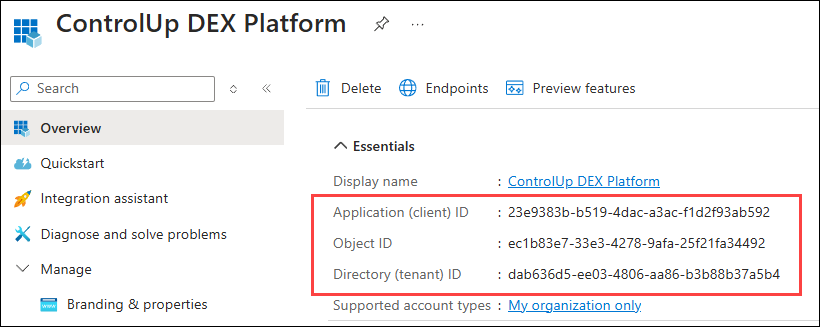
This image is taken from Microsoft and may not reflect the latest changes that may be made to the software over time. However, the settings and values should appear as described.
Step 2 - Add permissions to the application
-
In Entra ID, go to API permissions > Add a permission.
-
Select Microsoft Graph.
-
Select Application permissions.
-
Add the following permissions from the Microsoft Graph API:
- Device.ReadWrite.All
- DeviceManagementApps.ReadWrite.All
- DeviceManagementManagedDevices.ReadWrite.All
- Group.ReadWrite.All
- GroupMember.ReadWrite.All
- User.Read
-
After adding the permissions, click Grant admin consent for Default Directory.
Step 3 - Create a client secret
- In Entra ID, go to Certificates & secrets > New client secret.
- Enter a name and expiration date for the client secret. If the client secret expires and is not replaced with a new one, then ControlUp can't use the connection.
- Take note of the client secret Value because you'll need to add it to ControlUp's settings. You must copy the value and save it somewhere safe now because you won't be able to view it again.

Step 4 - Set up the connection in ControlUp
-
In ControlUp, go to Settings > Integrations > Unified Endpoint Management and click Microsoft Intune.
-
Under Authorization method, select Application Registration.
-
Set the Purpose to ControlUp for Compliance
-
Enter a Name of your choice. Note that can't see the connection's configuration after you create it, so you should choose an informative name, especially if you have multiple Entra ID tenants.
-
Add the following values you got from Step 1 - Register an application in Entra ID.
- Application (client) ID
- Object ID
- Directory (tenant) ID
-
Add the client secret value you got from Step 3 - Create a client secret.
-
Click Add connection.
-
Locate the connection you added in the list and click Test Connection to test and finalize the connection. This is a mandatory step.
Enable the integration in ControlUp
After you set up the integration with Intune using one of the methods above, perform the following steps to enable the integration:
- Open ControlUp for Compliance and go to the settings page.
- Select Integrations.
- Under Microsoft Intune, click Enable
- Select the Intune connection that you created.
How to use the integration
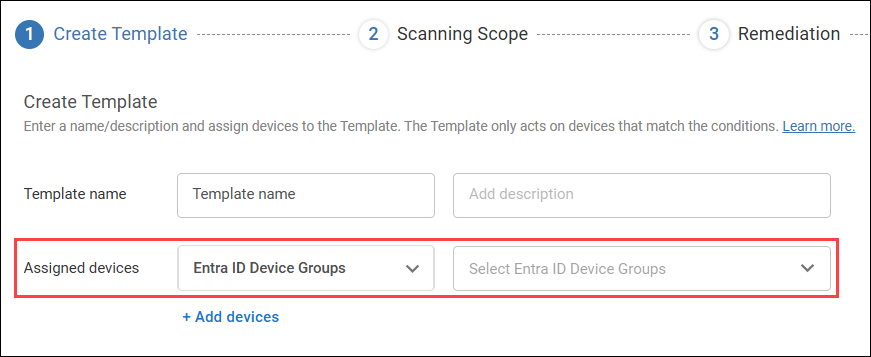
Target devices by Entra ID device groups
When you assign devices to a Template, you can select to assign devices based on Entra ID device groups, and then choose which groups to assign. The Template applies to all devices that are in the selected Entra ID device groups AND have the ControlUp for Compliance Agent installed.
Remediate issues using Intune
When you configure the remediation for a Template, you can set the remediation type to Integration. With this option selected, the remediations are performed by Intune. The option to remediate issues using Intune is available when the Template's scanning scope contains issues from only the Patches and Vulnerabilities categories.

You can also select to remediate an issue using Intune when initiating a manual remediation Job.
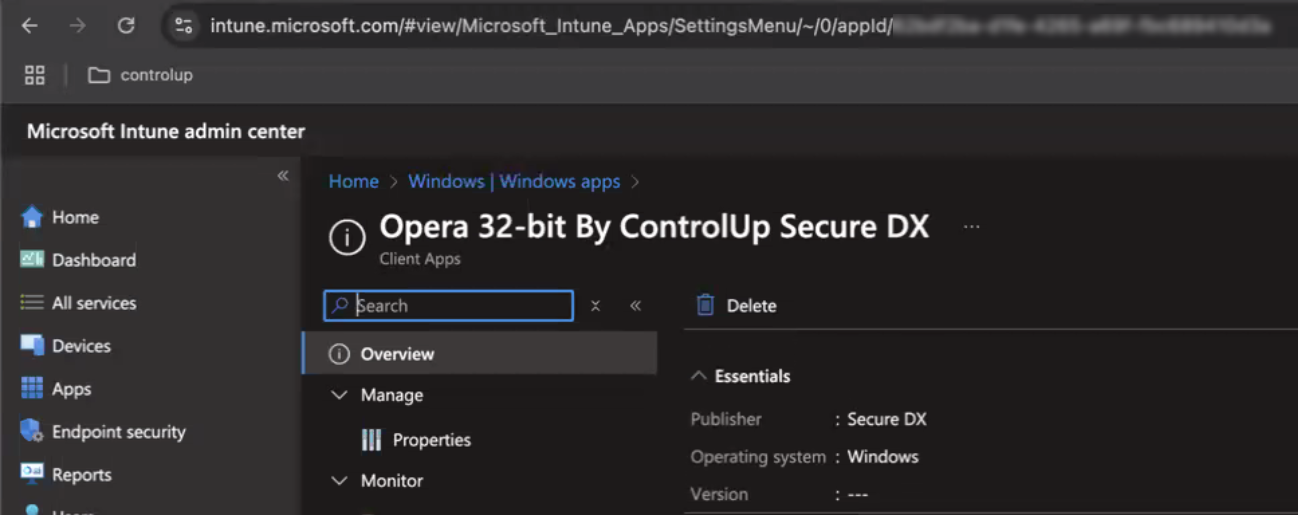
When ControlUp initiates a remediation using Intune, a temporary application is created in Intune with the name <name of the application being patched> By ControlUp Secure DX. The description of the application contains the IDs of all ControlUp Templates and Jobs that have requested the application patch. If more Templates or Jobs request the patch through Intune while the patch deployment in Intune is ongoing, the IDs or those Templates or Jobs are added to the description, instead of creating another temporary application.
A temporary device group is created with the same name and assigned to the application in Intune. The group contains all devices that ControlUp identified as requiring the application patch. If ControlUp identifies more while the patch deployment in Intune is ongoing, they are added to the device group.
The temporary application and device group in Intune are deleted after all devices in the device group have either been successfully patches or failed to update.
You can track the remediation progress and results from ControlUp. After all of the affected devices have been patched, the temporary application is deleted from Intune.