The Microsoft Exchange Scout tests the connectivity to Microsoft's web-based Exchange server.
The following connectivity tests are preconfigured for the Exchange Scout:
- smtp.office365.com over TCP port 25 and 587
- outlook.office365.com over TCP ports 993 and 995
- autodiscover-s.outlook.com
- attachments.office.com
Create a Microsoft Exchange Scout
-
In the Synthetic Monitoring top bar, click Create Scout to open the Add New Scout window.
-
From the Applications tab, select Microsoft Exchange Online as the Scout Type.
-
Select the locations (Hives) from which you want to test the Exchange server.
-
Enter a Name for the Scout.
-
Select how often you want to test the resource using the Run Every slider. You can choose any interval from 5 to 60 minutes, in increments of 5 minutes (5, 10, 15, 20, and so on).
-
Optionally, add Tags to your Scout. Tags are key-value pairs which can be used to organize your Scouts. To learn more about tags, visit Centralized Tags Management.
-
Click Next: Alert Policy to set up alerts and notifications on the Scout before saving it. For more information, visit Alert Policies.
Use Case
To learn how to use Microsoft Exchange Scouts to troubleshoot network latency, use our interactive use cases guide:

Run the First Tests
After configuring the Scout, wait for the first test results. In the Scout overview, the following five widgets for each test are displayed:
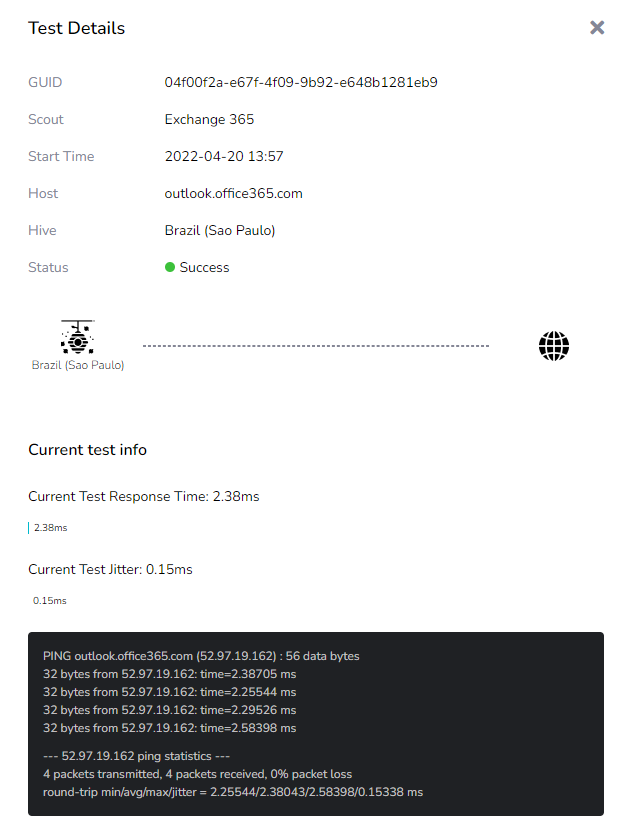
Status Success indicates a successful test. As you can see, we received responses to all four pings with an average response time of 2.38 milliseconds.
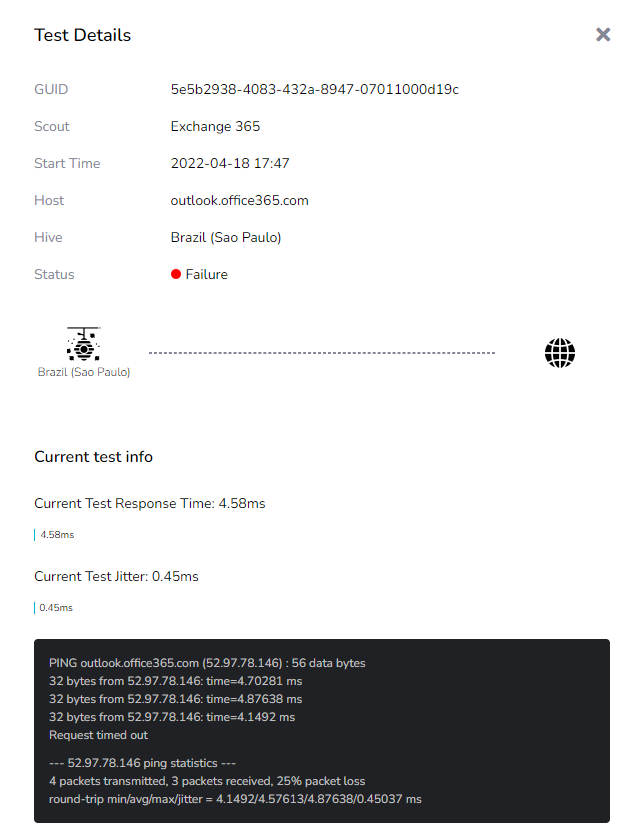
Status Failure indicates a failed test. Our last ping attempt timed out. If only one of the pings runs into a timeout, the entire test is considered a failure.