ControlUp Academy training video
Click here to watch our Academy training video about alerts.
The alert policy of a scout enables you to be notified about a failed test based on the Scout's test results. You can create a different alert policy for each Scout.
An alert policy can be added when creating a scout, or to an existing Scout by selecting Alert Policy in the Scout details window.

Alerts for stopped Scouts
The alert policy you configure here can only send alerts based on a Scout test result. If a Scout is not able to run (for example, if the Custom Hive running the Scout is down), you can receive an email alert. To learn more, visit Alerts for Stopped Scouts.
Create an Alert Policy for a Scout
To create an alert policy, click Alert Policy at the top of the scout’s page, and follow these steps:
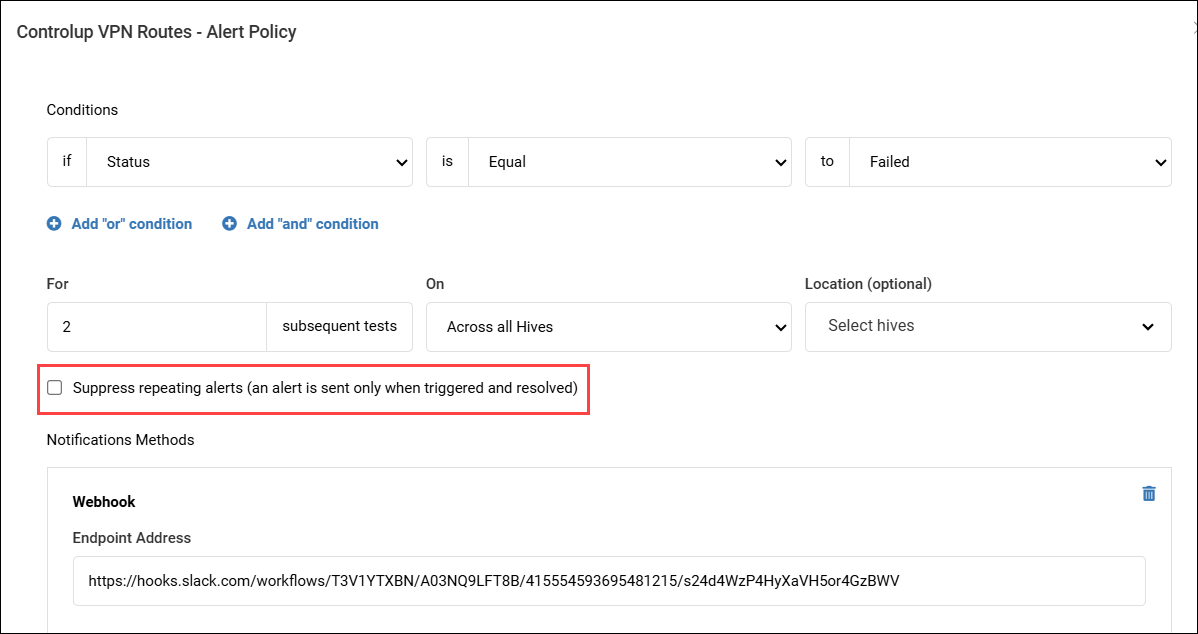
Set the conditions and behavior that trigger the alert.
Set one or more test result Conditions that must be met for the alert to trigger. You can combine multiple conditions with AND or OR statements. The test result variables that you can use are different for each type of Scout.
Set the number of subsequent tests that must meet the alert conditions to trigger the alert. For example, you might want to set this to a higher number so that you are not alerted every time there is a temporary issue that resolves itself.
Set whether you want the alert policy to check that subsequent tests meet the conditions on the same hive or across all hives. This setting only makes a difference if your Scout is running from multiple hives. If you select across all hives, then at least one hive per test run must meet the conditions that you specified, and it can be a different hive for each subsequent test. If you select same hive, then the same hive must meet the conditions that you specified.
Select how you want to be notified when the alert is triggered. You can use any of the following methods:
Email. Add email addresses that will be sent an email when the alert is triggered, and when the alert is no longer triggered. The alert email is sent from
alerts@scoutbees.io.Webhook. Enter HTTP callbacks that are sent when the alert is triggered. Since webhooks use HTTP, they can be integrated into web services without adding new infrastructure. Enter an endpoint and authentication method for the webhook. You can also add custom headers and custom fields with variables that display additional data when the notification is received.
For a detailed explanation about Webhooks for Synthetic Monitoring, visit here.Integration. You can set up an alert policy to notify you through third-party applications. If you have already set up integrations, then you can select them from the dropdown list. To add an integration, view the instructions for Microsoft Teams or ServiceNow.
Do not send a notification. If you select this option, you will not receive any notification when the alert activates. This feature is useful only if you are using the Synthetic Monitoring API to view alert details. The API is the only way to view the alert details if you select this option.
Note
Alert notifications are sent from a cloud server. If the location to which you are sending the alert notification is restricted by a firewall, then you must allow access to the cloud server.
To see the IP addresses you need to allow, visit IP Addresses used for Alerts.
Alert suppression
To prevent being flooded with subsequent notifications after an alert is triggered, you can enable or disable them in the Alert Policy settings. When this option is enabled, you only receive an initial notification when an alert is triggered, and a final notification when the issue is resolved.
For new alert policies, alert suppression is enabled by default.
For existing alert policies, alert suppression is disabled by default, to maintain your current notification behavior.
How to enable or disable alert suppression
In the details screen of the Scout where you want to enable or disable alert suppression, click Alert Policy in the top menu bar.
In the Alert Policy screen that opens, check or uncheck the Suppress repeating alerts box.
Note: Alert suppression is configured per alert policy, not globally.
Shell Output Email Attachments
You can attach Shell diagnostic output to alert emails as a .txt file whenever alert conditions are met and triggered. This puts key diagnostic information directly in your inbox, so you don’t have to log in to another system to retrieve it. The result is faster diagnosis and resolution.
The feature is optional, giving you full control over what data is included in your emails.
To enable this option:
Go to the required Shell scout and click Alert Policy.
In the pop-up screen, under Notification Methods, click Add email method.
Enter your email, and check the Attach shell output to alert emails box.
.png)
After checking the box, a clear security warning is displayed: “May contain sensitive information”. This warning is also included in the alert email.
Note: To ensure email deliverability, any file over 5MB will not be attached. Instead, the alert email will include a clear message: "⚠️ Shell output not attached - file size exceeded 5MB limit."
Update an Alert Policy
To update an alert, click Alert Policy and edit the required details.
Disable an alert
To disable an alert, click Disable at the bottom of the alert policy of the scout.
Delete an Alert Policy
To delete an alert policy, click Remove at the bottom of the alert policy of the scout.