The Information Grid is the primary source of information on the ControlUp Real-Time Console. As such, it is worth spending a few minutes configuring the Information Grid display to your needs.
Selecting Displayed Columns
To add or remove columns, click Columns on the Ribbon Bar. After selecting the desired columns, you can drag and drop the column headers to arrange the data in a way that best suits your needs.
The columns displayed in the Computers View are grouped into presets. By adding or removing columns, you are affecting the currently active preset. See the Column Presets section below for more information on column presets.
Column Presets
The Machines view includes information columns displaying various system data, performance counters, statuses and other important information. Many of these columns are generic and applicable to any type of machine (e.g. CPU utilization or Disk Free Space). However, many of the columns supported by ControlUp are specialized, and are only useful if the displayed machines are running a certain software package.
Column presets allow you to configure which columns will be displayed for every type of resource you are monitoring. Every folder in the organization can be configured with a column preset which will determine which columns will be displayed when computers in this folder are the only ones displayed in the Machines view. You can achieve this result by:
- Focusing on a folder (right-click > Focus in the organization tree). This filters all of ControlUp’s records (Sessions, Processes, Accounts and Executables) to include only those resources that reside in the folder on which you have focused.
- Drilling into a folder (double-click on a folder record in the Folders view). This operation displays machines residing in the folder you double-clicked, but does not filter other ControlUp views (Sessions, Processes, Accounts and Executables).
To change the current column preset in the Machines view, click the Columns Preset dropdown:
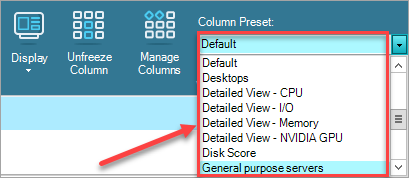
This selection determines the currently displayed columns, but is not saved when you navigate to a different folder or view.
When you create a new child folder, it automatically inherits the column preset from its parent folder. By default, if no other preset is specified, the Default preset is applied to the parent folder and subsequently inherited by any new child folders you create under it.
Configure Folder presets
To configure the presets for a new folder:
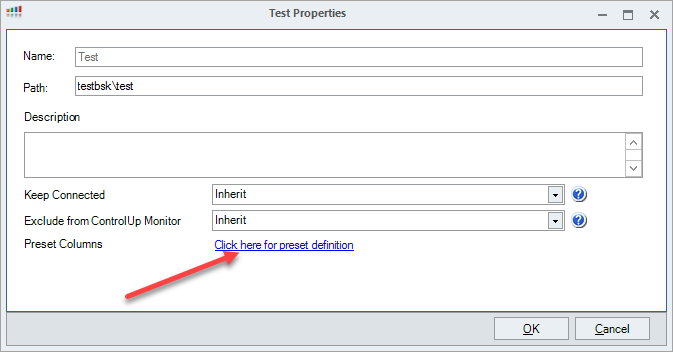
- Right-click the folder and click Properties.
- Optionally, configure whether to keep the folder connected or to exclude it from ControlUp Monitor(s) by selecting options as needed from the Keep Connected or the Exclude from ControlUp Monitor dropdowns.
- Click Click here for preset definition to open the Preset Settings tab.
- Under the Default Column Presets area, configure the folder's default column presets for each view as needed.
- Click Apply > OK.
To create a new preset, click Manage Columns on the Home ribbon. Choose your selected columns as needed and click Save or Save as to set a name for your new preset. From now on, you can select this preset using the Column Preset dropdown or using any folder’s properties.
Customize Column Visibility within Presets
Column presets reside in your organization’s public configuration. This means that by changing a column preset you are affecting all other ControlUp users in your organization. However, note that the order and size of displayed columns is still a private preference.
If different users in your organization need to view varying columns within the same preset, simply add all necessary columns to that single preset. Each user can then individually arrange and hide columns to display only the ones relevant to their work.
Sorting the Information Grid
The data in the Information Grid can be sorted by any displayed column. Click a column’s header to sort the Information Grid by that column. Click again to change the sorting order. The information grid can also be sorted by multiple columns. To do so, press and hold the Ctrl button while clicking the column headers.
Searching the Information Grid
You can search the Information Grid using the Search text box on the right side of the Navigation Bar. The Information Grid will be filtered automatically as you type your search term. It is important to understand that the Search text box looks for the search terms only in a single column, depending on your current view. For example, if you type “Steve” in the Search box while in the Sessions view, the Information Grid will display only those sessions where the User field contains “Steve” as a substring.
Multiple search terms can be entered, separated by the pipe symbol, ( | ), which serves as a logical OR operator. For instance, when typed in the search text box in the Sessions View, “Steve|John|Mark” will filter the sessions table to include all sessions owned by users with either “Steve”, “John” or “Mark” in their names. (Read more here ). When finished searching, click the X in the Search box to clear the filter. If not cleared manually, the Search box remembers the search terms for each of ControlUp’s views.
Column Grouping
In order to obtain an even more convenient display of your resources, you should try grouping the data in the Information Grid by different columns. To do so, turn on the “Enable Grouping” checkbox on the Display Settings menu of the Home Ribbon. Now you can drag any column to the grouping bar that appears between the Information Grid and the Navigation bar. This can be useful for distinguishing between servers from different vendors or separating active user sessions from disconnected ones. Grouping settings are discarded when you close the console.
Exporting Data from the Information Grid
ControlUp console allows you to export the data currently displayed in the Information Grid by clicking the Export button in the Ribbon Bar. The supported export format is XLS (Microsoft Excel). Your column settings and grouping configurations will be preserved in the exported document.
Scheduled Export
From version 9.1, the Export Schedule has been deprecated from Settings in the Real-Time DX Console. To configure export rules, use the Export-CUQuery cmdlet.
Using ControlUp, you can schedule a periodic automatic export of data from the information grid to a CSV file. To configure your automatic export settings, go to the Settings Window using the File Menu or the Settings ribbon and select Export Schedule. Configure your export settings by adding an export configuration and selecting the source view, time interval and destination to the target file. Take into account the size of the views you are exporting when planning storage capacity for the export folder.