Use the scripting engine in ControlUp for Desktops to distribute and run scripts on devices in your environment. Use scripts to perform IT administration tasks, collect data from devices, and more. To view your scripts, go to ControlUp for Desktops > Configuration > Scripts.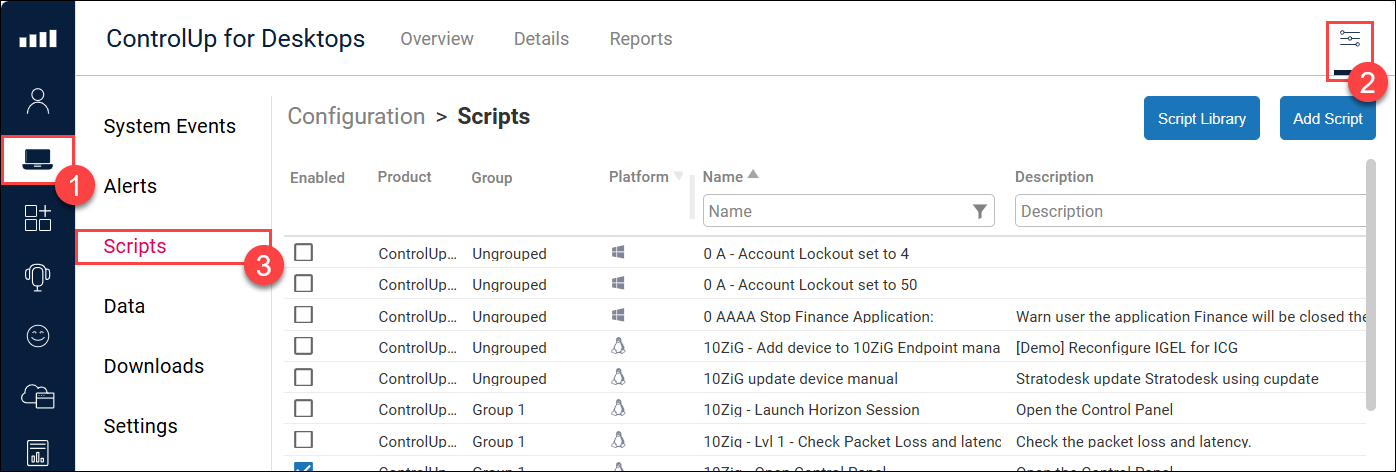
Note
The terms SIP and SIP Agent in the UI, scripts, and script logs refer to ControlUp for Desktops.
Script permissions
To view the scripts in your environment, you need the permission View Scripts.
To make changes to the scripts in your environment, you need the permission View, Create, Edit and Delete Scripts. You should grant this permission only to senior administrators.
Control who can run scripts and on which devices
You might not want to allow a junior helpdesk employee to run all of the same scripts that a senior administrator can run. You can give a user permission to only run scripts belonging to a specific permission group. For example, you can add low-risk scripts to Permission Group 1 and give your junior helpdesk employees the permission Run Group 1 Scripts.
Additionally, you might not want to allow a helpdesk employee to run scripts on devices that they are not responsible for managing. You can give a user permission to run scripts only on specific devices by targeting device groups and tags. Learn how to configure permissions.
Add a script
Add scripts from the Script Library
The Script Library is a collection of useful scripts compiled by ControlUp. Learn how to import scripts from the Script Library.
To add a new script:
Click Add Script.
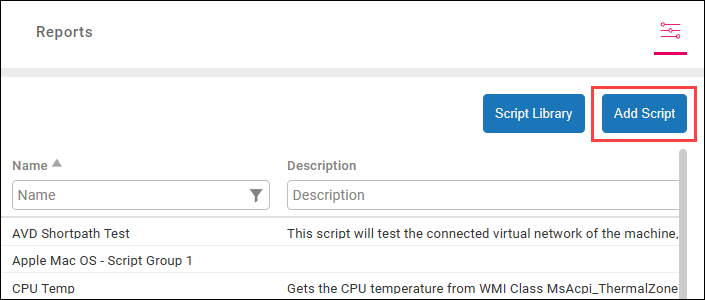
Fill out the script's parameters.
Click Create Script
To add a new script using an existing script as a template:
Click on an existing script that you want to use as a template to open the script editor.
Make your changes to the script's parameters.
Click Save to New Script. The edited script is saved and the original script used as a template is not changed.
Script parameters
The following table describes how to use all of the script parameters. Some parameters are explained in more detail later in the article.
Parameter name | Description |
|---|---|
Name | Enter a name for the script. |
Description | Describe what the script does and how to use it. |
Content | The content of the script itself. You can click Import From File to import a script, or copy and paste a script from a script editor. You can also click Save To File to export the script content to a file. |
Platform | Select the OS platform (Windows, macOS, or Linux) that the script runs on. The script can run only on the platform that you select. |
Language / Interpreter | Select the language / interpreter for the script. The script is saved as a local file in a secured folder, and then passed to the selected interpreter on a command line and run in a separate process. The available options depend on the selected OS Platform. |
Trigger | Set what causes the trigger to run. The available options depend on the selected OS Platform. |
Permission Group | Sets the permission group for the script. A user is allowed to run the script as a custom action only if they have permission to run scripts in the relevant group. See Script permissions for more details |
Device Tag | If device tags are set, script execution is limited only to devices with at least one matching device tags. This is particularly useful for scripts with automatic trigger types such as Once per day. This setting allows you to define on which device the script automatically runs. |
Timeout | An amount of time in seconds allowed for the process that runs the script to execute, before it is timed out. |
Enable Script | Select Script Enabled if you want the script to run when the script's trigger is met. Note that this option appears only if a Trigger is selected. See Enable and disable scripts for more details. |
Send Events | Click Add "Send Events" code block to your script to create an event with text from stdout and save it to the System Events log when the script runs. |
Additional Options | Optionally, select whether you want to limit when the script can run. If you select Run Only When Online, the script will not run on a device if the device isn't actively connected to ControlUp. If this option is not selected, the script can run on an offline device and save the data to a local cache until it reconnects to your environment. Note that this option doesn't affect scripts that are triggered by a Custom Action because a Custom Action can be performed only on online devices. |
Triggers
Setting the script's trigger determines when the script runs. Select from:
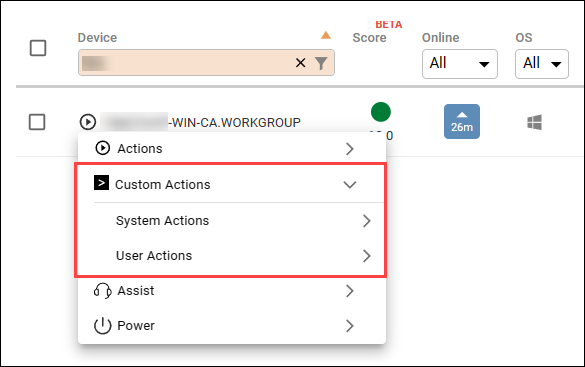
Custom Actions
A script with a Custom Action trigger can be manually run on a device by performing an action on the device. Choose between Custom Action - User and Custom Action - System to determine whether the script executes in the user context or system context.
A script with a Custom Action trigger can also be triggered by an alert activating on a device. Learn more about alerts.
Time-based triggers
Select from the following script triggers to run the script at regular intervals:
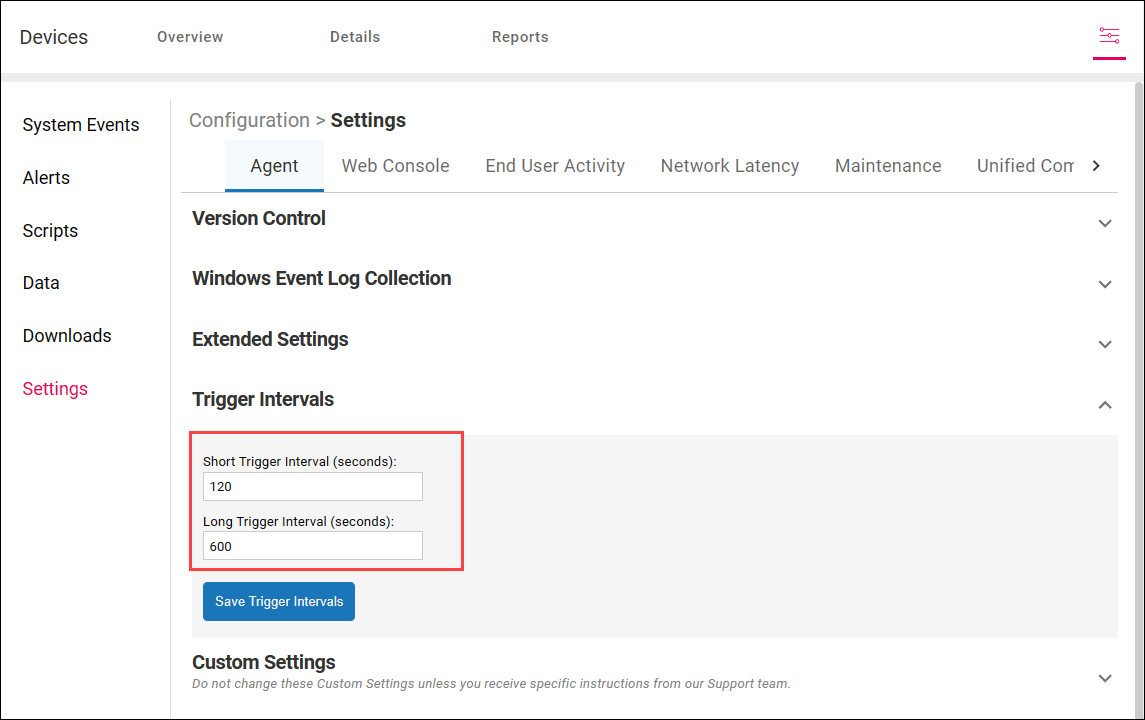
Short/Long Interval Timer - Runs the script at the interval duration that you specify in Configuration > Settings > Agent > Trigger Intervals.
Once Per Day - Every 15 minutes, the Agent checks if the script has run in the last 24 hours. If the script hasn't run, then the Agent runs the script.
Device event triggers
Select from the following script triggers to run the script on a device after the specified event occurs on the device.
Device Event Trigger type | Trigger Details |
|---|---|
SIP Service Start | The script runs whenever the ControlUp for Desktops Agent service starts or restarts. The service automatically starts when the Operating System is booted. The script runs as soon as the agent starts, using scripts cached previously. It does not attempt to download or update scripts first. |
SIP Service Stop | The script runs whenever the ControlUp for Desktops Agent service stops, which occurs when it is upgraded, the device is shut down or rebooted, or when it is manually stopped. Devices have up to 5 seconds to send data or events to the service before the agent exits. Any script process still running continues, but output from the script is lost after 5 seconds. |
Network Change | The script runs whenever the network interface changes, which can happen due to power events, network outages, changes of the WiFi Access Point, move from LAN to WLAN, etc. Often there are multiple network change events close together, and so the Agent waits for a second to ensure that only the last network change event triggers the script. |
Process Started (Windows only) | The script runs when a designated process starts. Designate the process in the Process Name field which opens when you select the Process Started trigger from the Trigger menu. The format for the Process Name is application.exe, e.g. notepad.exe. |
Logon Complete (Windows only) | The script runs 15-20 seconds after userinit.exe exits, which occurs at the end of the Windows logon process. |
Logon - New Session (Windows only) | The script runs first in the logon process, immediately after the session is created. |
Logon - Explorer Started (Windows only) | The script runs as soon as explorer.exe is started during the Windows logon process. |
Logoff (Windows only) | The script runs right before the user logs off and there are approximately 4 seconds for the script to complete before the session closes. |
Session Lock - Explorer Started (Windows only) | The script runs when the session display is locked. |
Session Unlock - Explorer Started (Windows only) | The script runs when the session display is unlocked. |
Session Disconnect - Explorer Started (Windows only) | The script runs when a session is disconnected (except at logoff). |
Session Reconnect - Explorer Started (Windows only) | The script runs when an existing session is reconnected. |
Data Collection
Writing to a data index
If you want your script to collect data from a device and write it to a data index, select Sends Data and then select the data index. You can write data only to custom data indices, not to any of the built-in ones. To write to a new custom data index, enter the name for the new data index. The index will be automatically created when your script runs.
Selecting Overwrite Existing Data means your script will replace any previously collected data for a device. Consequently, the data index will contain only a single row per device, updated with the latest information each time the script runs on that device. Note that this option is unavailable if the script trigger is set to a short or long interval timer. Choose Overwrite Existing Data when you want an index that always reflects the most recent status of a device. Do not select this option if you need to maintain a historical log of device activity.
If the Sends Data option is selected and the script completes before the timeout with no errors (empty stderr), then the stdout is inspected for a section having the format:
### SIP DATA BEGINS ###
[{"column1": "value1", "column2": "value2"}]
### SIP DATA ENDS ###
The data between the “### SIP DATA BEGINS/ENDS ###” lines is a JSON-formatted array of dictionaries that contains rows for the selected index. To see examples of how to create this output in real scripts, you can view scripts in the script library that write to a data index (such as "Get Device Install Date" or "Get GPO Policies Applied").
If you don't see data in the data index after running the script on a device, you can drill down into the device and select the Device Events tab to see if there are any reported errors.
When adding data to a custom index, we strongly recommend using only integer and not floating-point values. For example: It is better to store milliseconds as 375ms, than as 0.375 seconds. This avoids issues which can occur with data that spans multiple time periods.
Writing to the System Events log
Whether or not the Sends Data option is selected, the stdout from the script is also inspected for a section having the format:
### SIP EVENT BEGINS ###
Memory block size: 134217728 Total online memory: 8589934592 Total offline memory: 0
### SIP EVENT ENDS ###
If the stdout from the script contains a section in the above format, then a System Event is created with the script Name as the System Event Title and the System Event Description containing the output. Uploading data to the System Events log using SIP EVENT BEGINS has a limit of 4000 characters. To see examples of how to create this output in real scripts, you can view scripts in the script library that write events (such as "Find hardware device problems" or "Enable RDP Connection"). Learn how to view system events.
Enable and disable scripts
A script can run only if it is Enabled. If you disable a script then it will not run even if the script's trigger condition is met, and the script won't be available to run as a Custom Action.
To see which scripts are enabled, go to your scripts settings and look at the Enabled column:

To enable or disable a script, click the Enabled checkboxes. You can also enable or disable a script by editing the script and selecting the Script Enabled checkbox.
Delete a script
To delete a script, view your list of scripts and click the Delete icon on the right side of the table.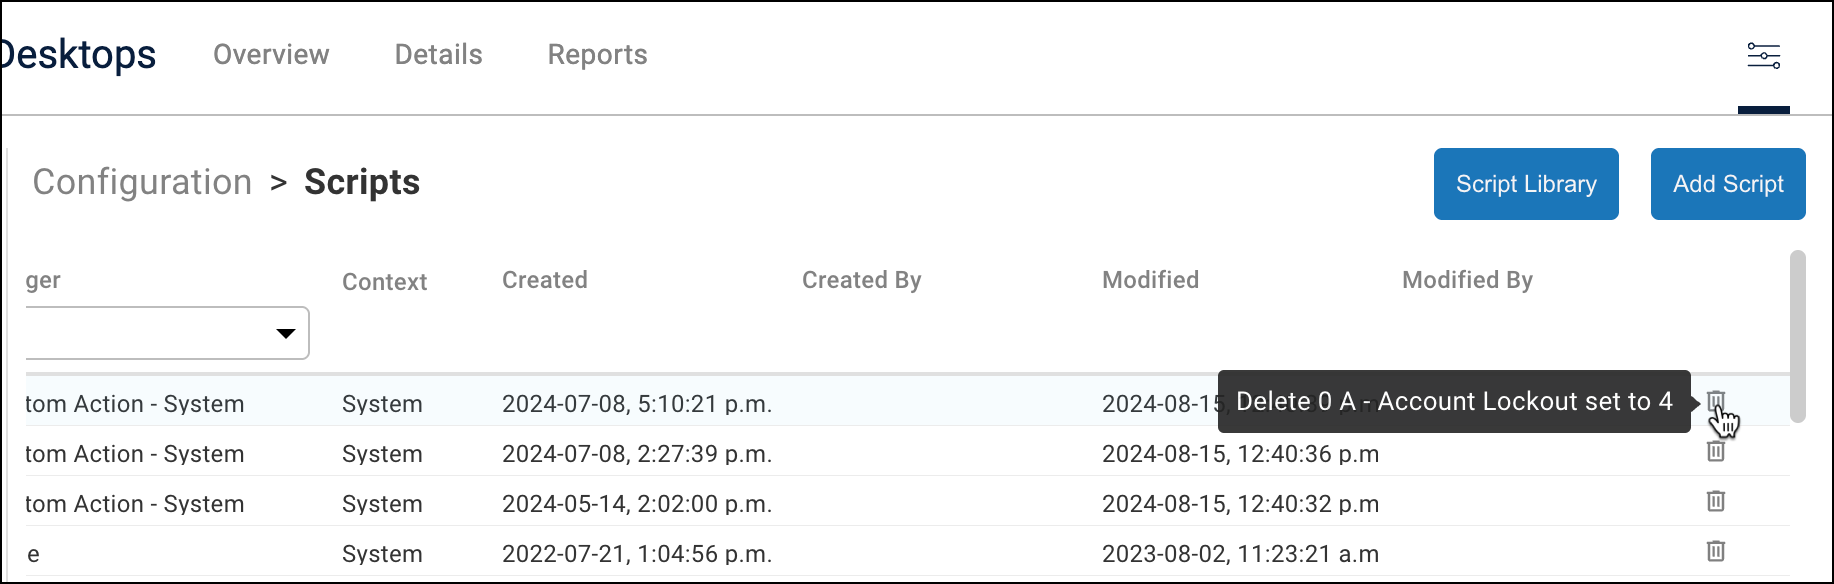
Run Context
Scripts run in the context of the System , except on Windows where some triggers have the option of running as User.
System context means NT AUTHORITY\SYSTEM (i.e. LocalSystem) on Windows, and sudo (i.e. root) on Linux and Mac. On Windows the User SID and LogonID are provided as command line parameters on some triggers, so that scripts that run as System can still carry out operations on specific user data. The User SID is provided in SDDL format (for example: “S-1-5-21-368573210-3773030013-3569538123-1001”). Logon ID is a 64-bit hex string (for example: “0x00092c61”). See the Tips and Tricks section for information on how to use these.
On Windows the User context means the user who performed the action, for example, the user that started the process or logged on to the desktop. User scripts are copied to a temporary (secured) location, the user is given permissions to execute them, and then they are deleted when complete.
Scripts - Tips and Tricks
Targeting a Script at a Specific Device
To ensure a script only runs on certain devices, you can add a line at the start of the script, for example, in PowerShell:
if ($env:COMPUTERNAME -ne "DESKTOP-BVD8EN4") { return; }
You can also filter by device group with the SIPDEVICEGROUP environment variable.
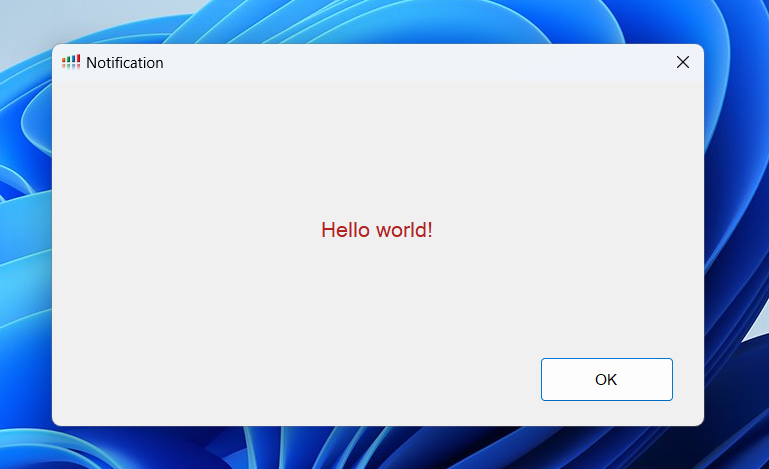
Display a Dialog to a User (Windows)
Use the UserPrompt.exe executable included with the Agent on Windows to display a dialog to the user. Note that UserPrompt.exe must be run in the User context (the Trigger field in the script editor window must be set to Custom Action - User or one of the User Triggers).
Example for cmd.exe Script
Use a line like the example shown below for a cmd.exe script. Note the start /b at the beginning means that the script immediately returns after launching UserPrompt.exe, and so you will not get timeout errors if the user does not acknowledge the dialog for a long time. However, you will still get an error if the command line fails.
start /b "" "C:\program files\Avacee\sip_agent\UserPrompt.exe" "Hello world!"
Example for PowerShell
The following example is for PowerShell:
Start-Process (“C:\program files\Avacee\sip_agent\UserPrompt.exe") -ArgumentList """Hello world!"""
Creating JSON Formatted Output
If you want to send data that can be viewed in a report then you need to format it as data. On Windows this is easily done in PowerShell using a Hashtable (which is very much like a Dictionary):
$MyData = @{} # initialize a hashtable

$MyData["field_1"] = 20
$MyData["field_2"] = 100

Write-Output("### SIP DATA BEGINS ###")
Write-Output(ConvertTo-Json $MyData -Compress)
Write-Output("### SIP DATA ENDS ###")
Every time this script runs it will send a row for that device with two fields and a value for each, which appear as columns in the table report.
If you want to send multiple rows from each device in a single data upload, you can use a .NET List collection like this:
$MyDataList = New-Object 'System.Collections.Generic.List[psobject]'

foreach ($i in $MyDataCollection)
{
$MyData = @{} # initialize a hashtable

$MyData["field_1"] = 20
$MyData["field_2"] = $i.Property

$MyDataList.Add($MyData)

}

Write-Output("### SIP DATA BEGINS ###")
Write-Output(ConvertTo-Json $MyDataList -Compress)
Write-Output("### SIP DATA ENDS ###")
This will iterate through $MyDataCollection adding a Hashtable to the List for each entry, which will appear as rows for each device in the report table.
Choosing cmd.exe or VBScript over PowerShell
PowerShell is very powerful, but it consumes far more resources than cmd.exe and can be slow when iterating through large amounts of data, especially with complete Where-Object queries. Whenever possible, use cmd.exe or VBScript.
Sending data to the Events Log using cmd.exe is very simple. For example:
@echo off
echo ### SIP EVENT BEGINS ###
ping www.google.com
echo ### SIP EVENT ENDS ###
Using the User SID and Logon ID Parameters in Scripts
In the example shown below, a PowerShell script running as System in response to a User Event (e.g. a Logon) can look in the User’s HKEY_CURRENT_USER registry hive by opening a path under HKEY_USERS using the User SID, which was passed to the script as the first parameter:
param ( $UserSID, $LogonID ) # this needs to be the first line

$hku = [Microsoft.Win32.RegistryKey]::OpenBaseKey([Microsoft.Win32.RegistryHive]::Users, 0)
$hkcuRunKey = $hku.OpenSubKey(($UserSID + '\SOFTWARE\Microsoft\Windows\CurrentVersion\Run'), $false)
Avoiding Unicode Problems in Script Data Output
Add the line shown below to PowerShell scripts so that all text output is passed and uploaded to the database using Unicode, which allows all international characters and can be searched with all international characters:
[Console]::OutputEncoding = [System.Text.Encoding]::UTF8
Without this line, PowerShell will sometimes try and convert international characters to their closest ASCII equivalent, which can cause havoc with data formatting.
Script Use Case
This section describes how The following is a step-by-step guide to creating a script to get the CPU temperature from Microsoft Windows machines using a script. You can then create a Custom Report to display the temperature data.
Create the following script:
Script Template Field | Input |
|---|---|
Name | Get CPU Data |
Description | (optional) |
Platform | Microsoft Windows |
Language / Interpreter | PowerShell |
Trigger | Short Interval Timer |
Timeout (s) | 60 |
Data Collection: Sends Data | Enabled |
Data Index | cpu_temperature |
Content | Since the script is going to gather data, include Write-Output. |
The Data Index field defines a new location or table for the data to be pushed into. Once created, the Data Index cpu_temperature can be found under Configuration > Data:
When you complete the script fields, click Create Script or Save to New Script /Update Script.
Now that the data in stored in a data index, you can create a Custom Report showing CPU temperature for your devices. Click here for details on how to create a Custom Report.
To learn how to get alerts about a temperature report and other alert types, read Alerts.
Troubleshooting / FAQ
Can I write a script that uses the Device Group? (Not the AD groups, the CPE one) - Yes, use the SIPDEVICEGROUP environment variable.
Why is CarbonBlack or other security software blocking PowerShell? - If PowerShell is blocked by any security software, the sipagent.exe process may need to be whitelisted so that it can run PowerShell. Most scripts run as system, but we recommend allowing the user context if you are creating or running scripts as a user account.
Why do certain characters in script output cause problems? - By default PowerShell output is in ASCII (aka UTF-7) and Unicode characters are converted to something which looks similar in the ASCII character set, which can cause chaos with JSON formatted data. The simple fix is to add the following before writing any output to stdout:
[Console]::OutputEncoding = [System.Text.Encoding]::UTF8In a script, how do I filter by the Device Group set in the Devices page? - Use the Device Group environment variable SIPDEVICEGROUP. The agent updates this every time it does a config refresh.
Why does data output from my scripts get rounded to an integer? - To avoid problems with mixed FLOAT and LONG records in ElasticSearch, which cause searching and sorting to fail. If you want to store something like milliseconds, multiply by 1000 before you output the value.
Why don’t I see events from the SIP Service Start trigger? - Device Events are not cached locally and so will not be sent if the device is offline. The SIP Service Start trigger will always run at agent start but you won’t see an event if the device is offline.
Note
Any device data from a script run on the SIP Service Start trigger will be cached.
In other words, anything between ### SIP DATA BEGINS ### and ### SIP DATA ENDS ### will be cached and sent when the device is online.
Anything between ### SIP EVENT BEGINS ### and ### SIP EVENT ENDS ### will not.
However, this does not apply to Windows Event Log data. If you are capturing Windows Event Log IDs, those will always be cached and sent when the device is online.