This article covers how to install Remote Clients (formerly Remote DX) onto IGEL OS devices.
Remote Clients supports devices running IGEL OS 11 and OS 12 connecting to Citrix, AVD, Windows 365, and Omnissa (formerly VMware) virtual environments.
Install Remote Clients
Select your IGEL OS version below:
Install the IGEL Ready Certified Remote Clients application on IGEL OS 12 devices through IGEL UMS.
Configure the application in IGEL UMS
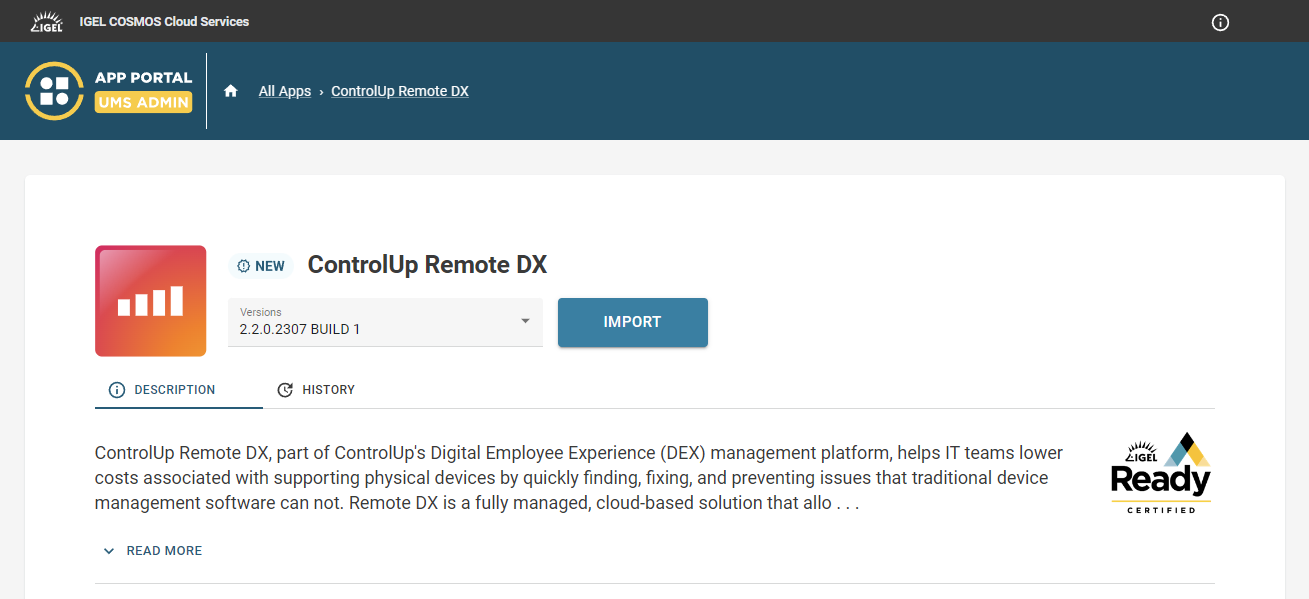
Open the IGEL App Portal and import ControlUp Remote DX.
In IGEL UMS, add the ControlUp Remote DX application to a profile used for device deployment. Visit the IGEL documentation to learn more about this step.
Open the configuration for the ControlUp Remote DX application.
Depending on whether you are using the IGEL device to connect to a Citrix or Omnissa environment, enable Remote DX for either Citrix or Omnissa.
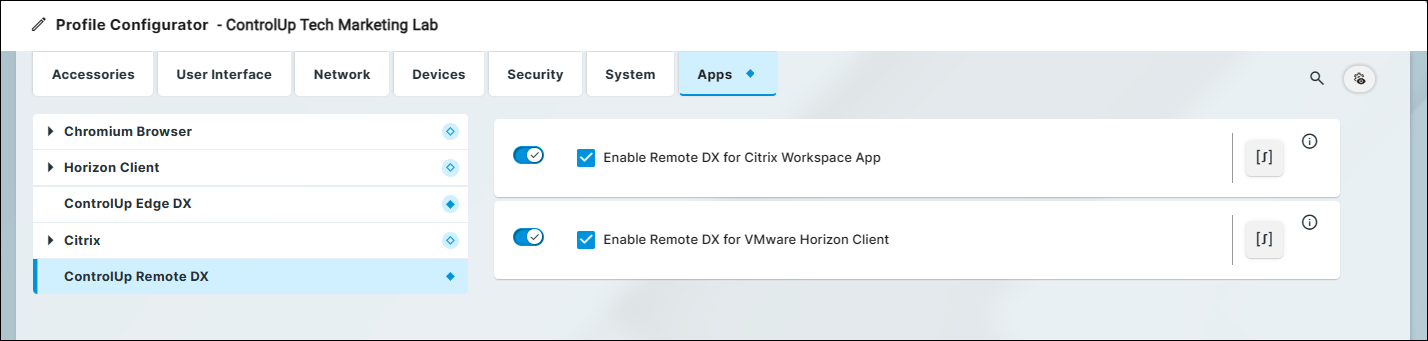
Click Save and Close to save your changes to the application configuration.
Devices that are configured to run the ControlUp Remote DX application automatically install the Remote Clients plugin. You will be able to see client metrics from the IGEL devices while they are connected to your virtual environment.
Update Remote Clients
When a new Remote Clients version is available for IGEL, the ControlUp Remote Clients application will be updated in the IGEL App Portal. You can update Remote Clients through IGEL UMS.
Video walkthrough
Click here to watch a video walkthrough for installing Remote Clients on IGEL OS 11 devices.
There are two methods to install Remote Clients on IGEL OS 11 devices, depending on whether the devices have access to the internet.
Before you begin
Depending on whether you use Citrix or Omnissa Horizon, download the relevant Remote Clients plugin below:
AVD / Windows 365 Deployment
Remote Clients supports IGEL OS 11 devices connecting to Microsoft AVD and Windows 365 virtual environments.
To deploy the AVD Remote Clients plugin onto IGEL OS 11 devices:
Create the necessary file (libcuepux-client.so).
Create or edit the AVD Session Profile with the necessary registry item.
Apply the file and AVD Session (with the registry setting) to the desired devices.
Step 1: Create the File Configuration Object
Retrieve the IGEL OS 11 AVD/Windows 365 Remote Clients plugin library file from:
https://partnerspace.blob.core.windows.net/share/RmtDX-IgelOS11-AVD/libcuepux-client.so
Upload the library using the Files Configuration Object:
Make sure to change the Owner to Root and allow Read and Execute permissions to Others.


It's recommended that you leave the file in the /wfs (Writable File System) folder. The registry setting configured in Step 2 will reference the file at this location.
Step 2: Create or Edit the AVD Session Profile with the Necessary Registry Item
A registry setting must be applied to the desired AVD Sessions.
Create or edit a Profile containing the desired AVD/Windows 365 Session.

After configuring the AVD/Windows 365 session, go to the registry settings for that specific AVD session (the path includes wvd and a number) and add the following registry entry:
--dvc2 /wfs/libcuepux-client.so


Step 3: Apply the File and AVD Session to the Desired Devices
Apply both the File Configuration and the updated AVD Session Profile (with the registry setting) to the target devices.
Reboot the device after applying the profiles to ensure the file and registry setting are applied.
IGEL OS 11 online deployment
To deploy the Remote Clients plugin onto IGEL OS 11 devices that can access the internet:
Open UMS on your machine.
From the upper menu, select System > Import > Import Profiles.
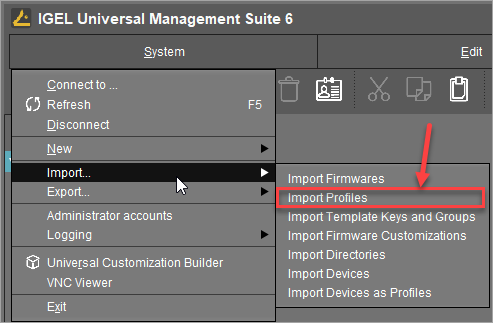
Select the Remote Clients plugin zip file that you downloaded from the ControlUp Download Center and click Open.
In the Import Profiles window, click Ok to finish the import process.
Wait until the import process is complete.
When the import process is complete, click Ok.
Click the machine on which you want to install Remote Clients.
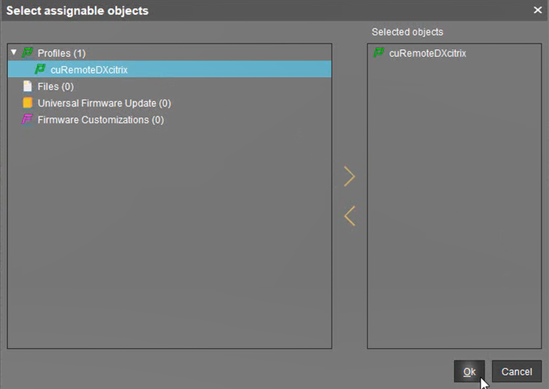
Click on the plus icon to assign as object to the machine and expand the Profiles list.
Select the uploaded profile and add it to the Selected objects list and click Ok.
In the Update time window, select Now and click Ok.
The State column shows Finished when the upload is complete.

IGEL OS 11 offline deployment
To deploy the Remote Clients plugin onto IGEL OS 11 devices that do not have access to the internet:
Follow all of the instructions in steps in the online deployment instructions above.
Download the relevant plugin for the IGEL Offline installation and place the file on your UMS server:
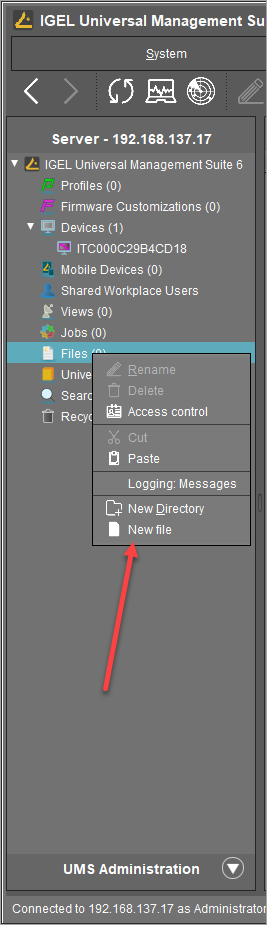
Right-click Files and select New File.
Add a new file by clicking the three dots next to the Local file field.
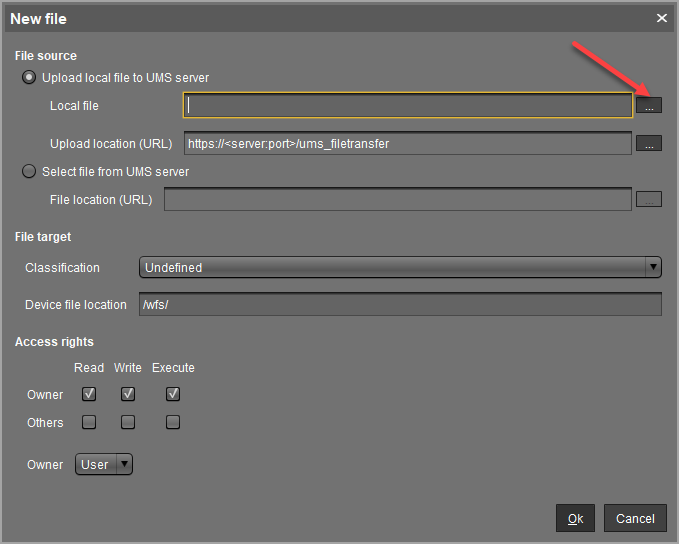
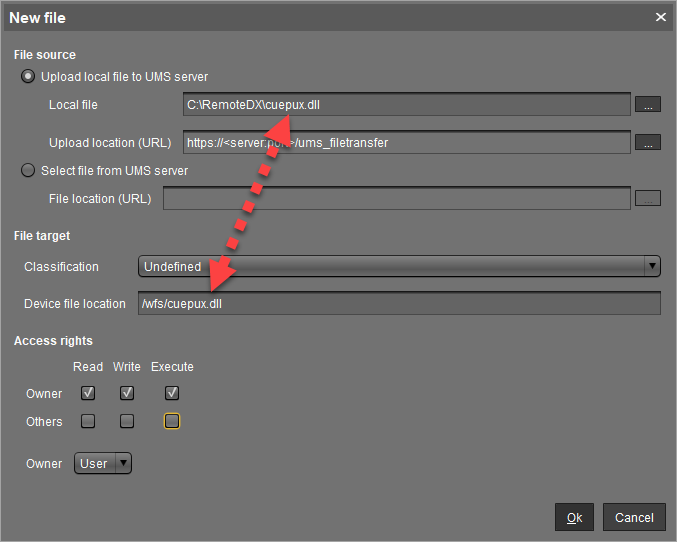
Browse to the cuepux.dll file you downloaded in step 2, select the file, and click Open.
Copy and paste the name of the file after the /wfs/ on the Devices file location field.
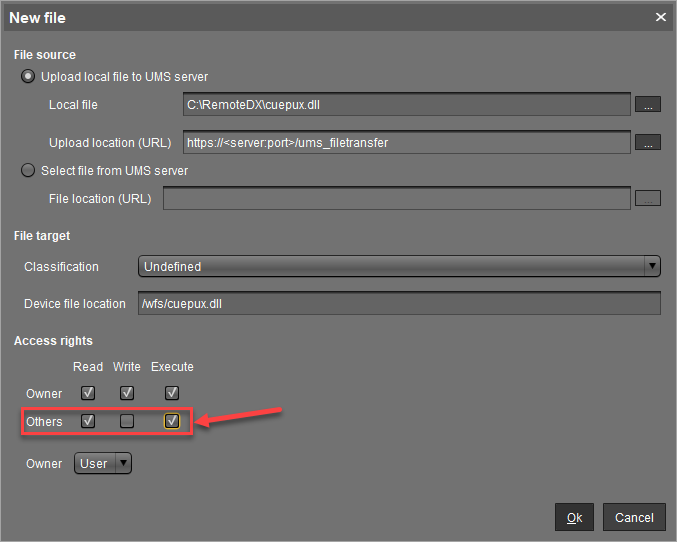
Set the Access Rights of Others to Read and Execute. Click Ok to upload the cuepux.dll file to the UMS server.
Click on the machine on which you want to install Remote Clients.
Click the plus icon to assign an object to the machine and expand the File list.
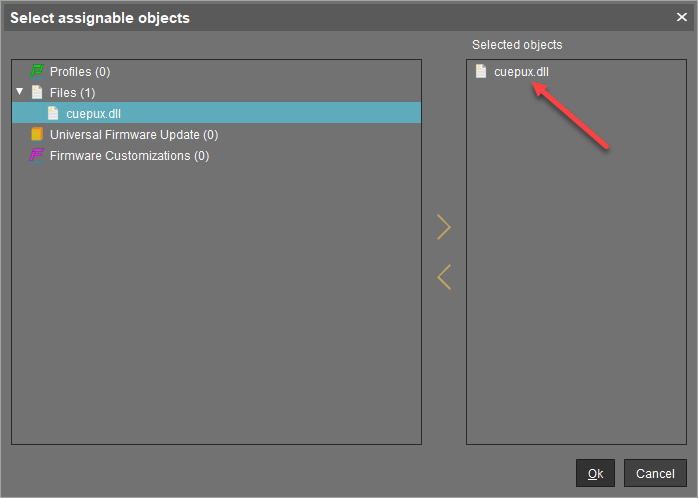
In the Select assignable objects window, select the cuepux.dll file and click the > button to move the file to the Selected objects list. Click Ok to upload the file onto the IGEL device.
In the Update time window, select Now and click Ok.
The State column shows Finished when the upload is complete.
