ControlUp Academy training video
Click here to watch our Academy training video about Custom Hives.
This article describes how to add, install, and configure a Custom Hive.
For information on Silent Install for custom hives, see Silent Install for Custom Hives
For information on upgrading your custom hives, see Upgrade Custom Hives
Install a Custom Hive
In the Hives tab, click Add Hive.

In the Add Hive window, name the Custom Hive.
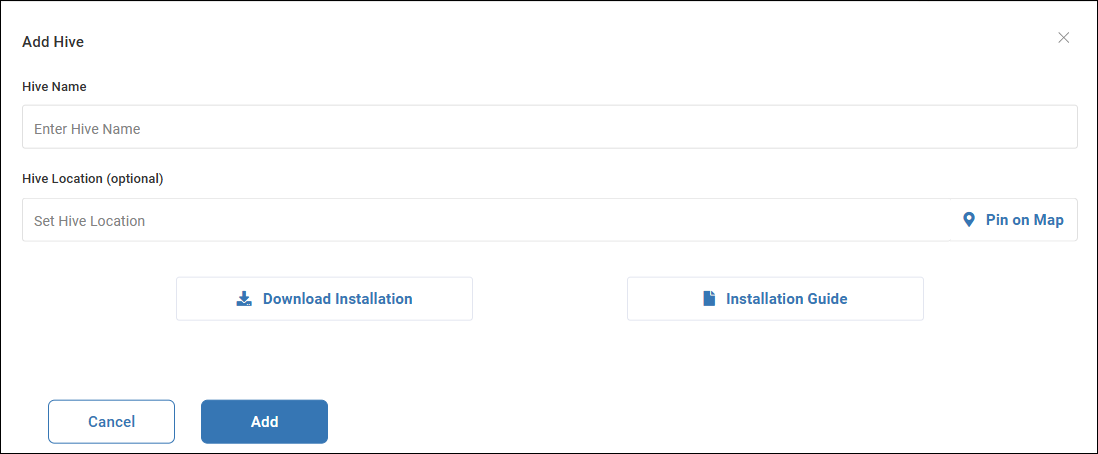
Optionally, provide the physical Hive Location. You can pin the location on the map, or click Enter manually to enter coordinates. Setting the Hive location lets you see test results overlaid on a map so that you can visually identify which regions are experiencing problems.
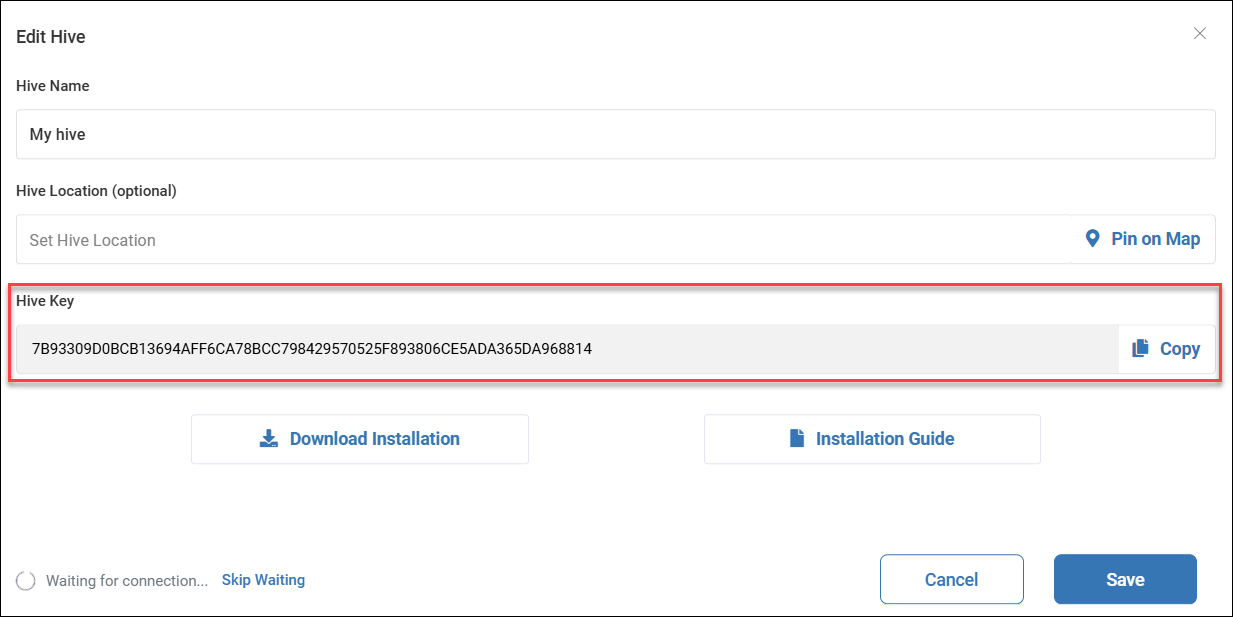
Click Add. A unique Hive key is created. Copy it, because it will be required when you install the Custom Hive on a machine. Synthetic Monitoring waits for a successful connection to the Custom Hive. Keep this window open and continue following the steps.
Click on Download Installation to download the Custom Hive installation file.
Alternatively, you can click on Download Custom Hive directly from the Hives tab without having to start the Hive creation process.
Installation
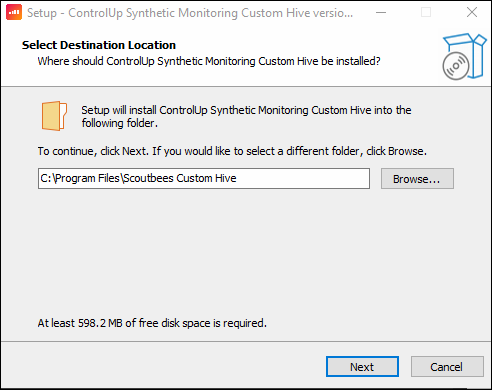
Run the Custom Hive installation file. The Setup wizard is displayed.
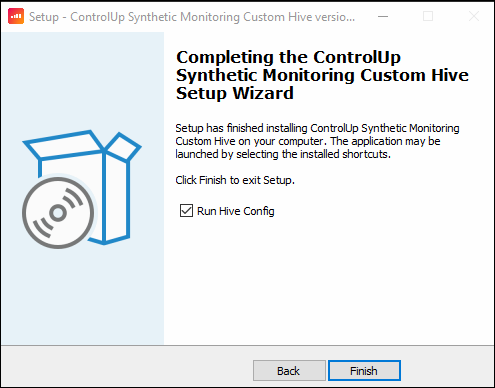
At the end of the installation, check the Run Hive Config check-box, and click on Finish.
When the Hive configuration window appears, paste the Hive key of your new Hive into the Hive API Key field and select the Hive Region.
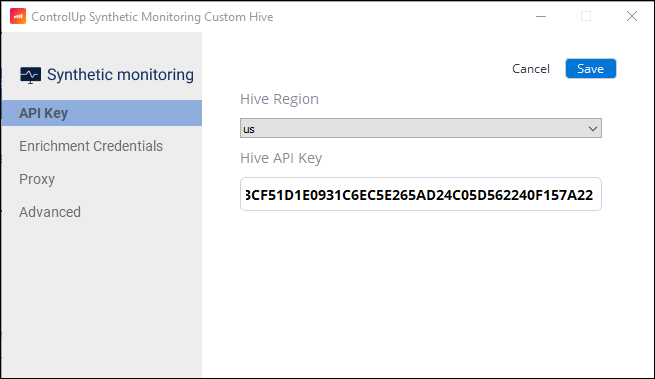
Click Save, and the Hive is ready to use. Confirm that the Custom Hive status changes to Connected.
Configuration
There are several configuration options for Custom Hives that you can adjust in the Synthetic Monitoring Custom Hive application.
Enrichment Credentials
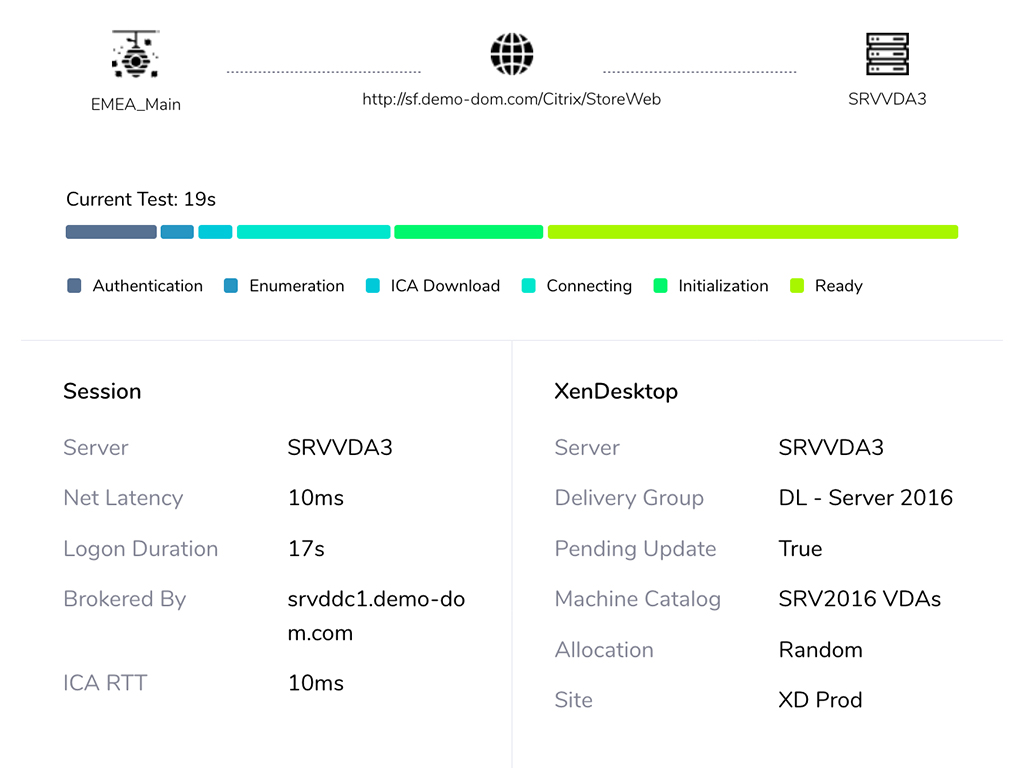
Configure data enrichment options in the Enrichment Credentials tab. A Custom Hive can collect enrichment data from two locations:
The server on which the session has been opened. The Custom Hive can perform a remote WMI query to get network latency and ICA RTT of the session.
The CVAD broker for the session. The Custom Hive can perform an OData query to the CVAD broker to get the actual Windows logon duration and information about the VDA.
In the Enrichment Credentials tab, enter credentials for Remote WMI and the CVAD (XenDesktop). The remote WMI credentials need permissions to perform remote WMI queries. The CVAD credentials need read permissions on the XenDesktop site.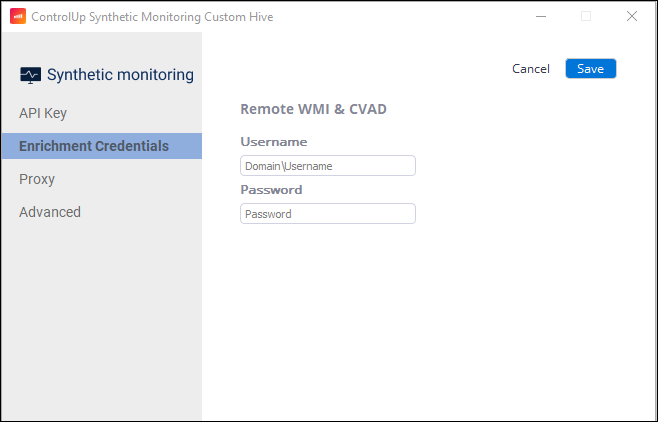
Proxy
If the machine on which the Custom Hive is installed accesses the internet with NTLM based proxy, then go to the Proxy tab and select Use Proxy. Enter the proxy server information, and AD credentials for authentication.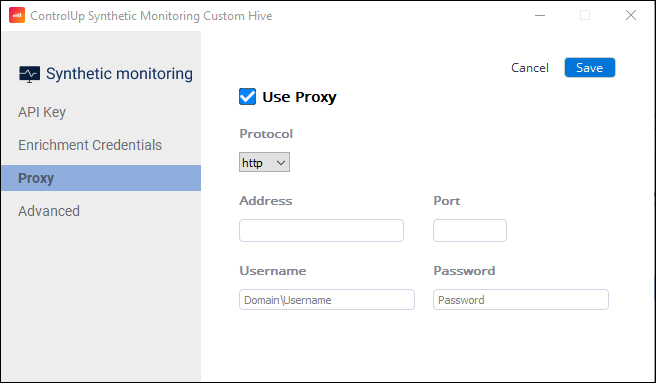
Advanced
The Advanced tab contains the following options:
Event log. If selected, the Custom Hive will report events to the Windows Event log.
Debug mode. If selected, debugging logs will be created in the installation directory \ Synthetic Monitoring Custom Hive\logs
SSL verify. If selected, the Custom Hive will check if SSL certificates are verified.
Interactive logon - activate OK button. If selected, Scouts accessing EUC sessions will "OK" an interactive window that opens during the connection process. For example, a legal requirement that needs to be accepted.
Use Citrix Workspace app. If selected, all Citrix based EUC Scouts will open sessions using the Citrix Workspace application.
Omnissa Horizon (formerly VMware Horizon) dynamic flow. If selected, all VMware EUC Scouts running from this Custom Hive use a form-based browser login method instead of the broker API. You can try enabling this option if your Scouts are having authentication problems. You can enable this option on individual Scouts in the Scout configuration.
Citrix dynamic flow. If selected, all Citrix EUC Scouts running from this Custom Hive use a form-based browser login method instead of the broker API. You can try enabling this option if your Scouts are having authentication problems. You can enable this option on individual Scouts in the Scout configuration.
Use proxy for internal requests. If selected, the Custom Hive will use the proxy set up in the Proxy tab for all requests, even to an internal network.
Allow shell execution scouts. If selected, the Custom Hive will be able to run Shell Execution Scouts. This is required if you want to run this type of Scout from the Hive.
Delete Custom Hives
To delete custom hives, select the required one(s) from the hive list and click Delete Hives.
Antivirus Exceptions
If you are experiencing problems with your Custom Hive, you might need to add the following antivirus exclusions:
C:\Program Files\Scoutbees Custom Hive\sb-config.exe
C:\Program Files\Scoutbees Custom Hive\sb-hive.exe
C:\Program Files\Scoutbees Custom Hive\bin\ICARunner.exe
C:\Program Files\Scoutbees Custom Hive\bin\pngquant.exe
C:\Program Files\Scoutbees Custom Hive\bin\chromium\chrome.exe
C:\Program Files\Scoutbees Custom Hive\bin\chromium\chromedriver.exe
C:\Program Files\Scoutbees Custom Hive\bin\chromium\chrome_proxy.exe
C:\Program Files\Scoutbees Custom Hive\bin\chromium\chrome_pwa_launcher.exe
C:\Program Files\Scoutbees Custom Hive\bin\chromium\elevation_service.exe
C:\Program Files\Scoutbees Custom Hive\bin\chromium\notification_helper.exe
C:\Program Files\Scoutbees Custom Hive\sb-runner\sb-runner.exe