The Templates section in ControlUp Workflows provides a library of pre-designed flows for common IT and service desk automation tasks. These templates offer a head start in building your automations, as they come with the basic structure and logic already in place. You can select a template and then configure it to use your specific integrations.
Explore the Templates Library
The Templates page displays a collection of available workflows, each represented by a card with a descriptive name and a brief overview of its functionality. Icons indicate the primary integrations involved in the template.
By default, the Templates page opens the ControlUp Templates tab displaying our built-in, official templates. Toggle to the Organization Templates tab to view user-generated, shared templates. To build your own template, see below.
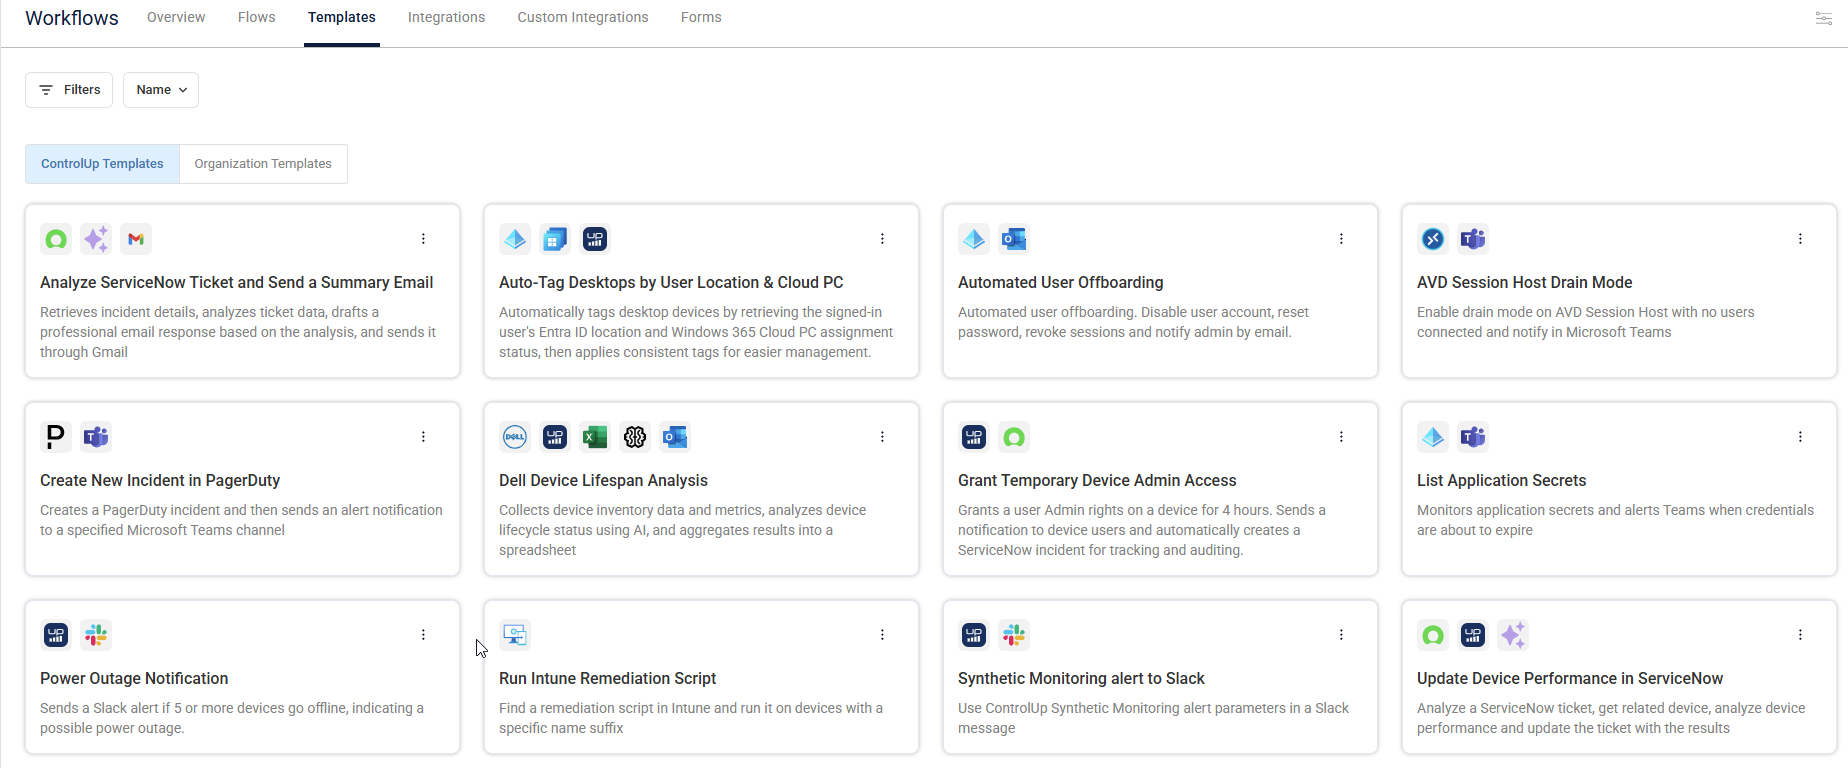
The templates cover a range of use cases, such as:
User Lifecycle Management: Automating onboarding and offboarding processes, for example creating/disabling accounts, sending welcome/farewell emails, and more.
Incident Management: Creating new incidents in ITSM systems like PagerDuty or ServiceNow based on specific triggers.
Device Management: Analyzing device health, performing remote actions, or managing device lifecycles.
Alert Handling: Analyzing alerts and triggering appropriate remediation steps or notifications.
Reporting: Generating automated reports based on system data.
Create a Flow from a Template
To create a workflow using a template:
Navigate to the Templates tab and browse the available templates. Read the descriptions to find a template that aligns with your automation requirements. Click a template to select it.
When you click a template, the flow builder canvas opens. The basic structure of the flow is already laid out with interconnected nodes. However, nodes that interact with external systems (integrations) are only placeholders and you must select your specific integration.
Click Use Template at the top right of the screen to enable configuring the template as your own flow.
For each integration node, click the node and a configuration panel opens in the right sidebar with the name of the action and a description with the 3rd party app highlighted:

Under Select integration config, click the dropdown and select an existing integration that you have already configured in the Integrations tab.
Customize the parameters for the integration’s action node. These fields are dynamically populated based on the integration’s action node selected.
Optionally add a filter if the integration’s action includes multiple items.
Review and adjust the entire flow to understand its logic and ensure it meets your requirements. You can add, remove, or modify nodes as needed, just as you would with a flow built from scratch.
Once you've configured the integrations and customized the flow to your satisfaction, click Save on the top right.
For scheduled or API-triggered workflows, click Enable Workflow to activate it.
By leveraging templates, you can deploy automations for common IT tasks, saving you time and effort. The pre-built structure provides a foundation that you can then tailor to your specific environment by connecting your integrations.
Build a Template
To build a new template:
From the builder canvas of a flow, or from the Flows tab, click the actions menu
 > Generate template.
The Create template builder opens.
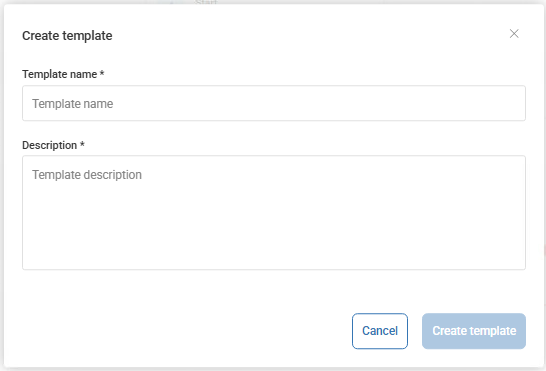
Under Template name, enter a template name.
Optionally, under Description, enter a description for the template.
Click Create template. Your new template is now listed under the Organization Templates tab.