Use this integration to automatically install and configure the ControlUp Agent on Microsoft Entra ID machines (previously known as Azure Virtual Desktop or AVD) deployed and managed from Nerdio Manager for Enterprise (released in version 4.5).
Follow the steps below to configure the integration in Nerdio Manager, and start monitoring your Nerdio-deployed machines in ControlUp.
If you are having trouble setting up the integration, contact Nerdio Support.
Prerequisites
Before you set up the integration, make sure you have the following:
- A ControlUp Real-Time DX environment with a configured Azure integration. To learn more, click here.
- At least one ControlUp Monitor hosted in Azure. To learn more, click here.
- The Azure resource groups containing your ControlUp Monitors are linked to Nerdio Manager. To learn more, click here.
- The option Deploy Agents Automatically is not selected in the Agents settings window in the ControlUp Console. Note that from version 9.0, this option doesn't apply to monitors. If you select this option, the console still automatically deploys the agents.
Step 1 - Link your ControlUp Monitors to Nerdio Manager
Nerdio Manager requires access to a ControlUp Monitor to pull data (sites, folders, etc.) from your environment. This data is refreshed every 15 minutes as a background task.
To link a ControlUp Monitor to Nerdio:
-
Open Nerdio Manager for Enterprise.
-
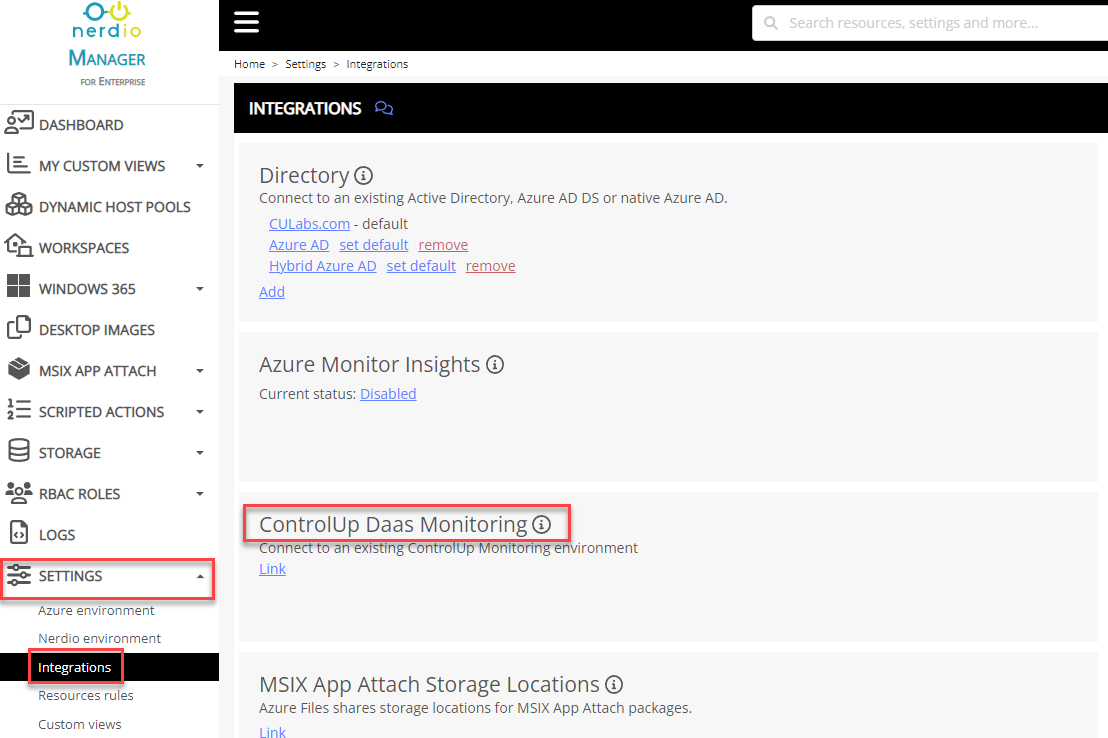
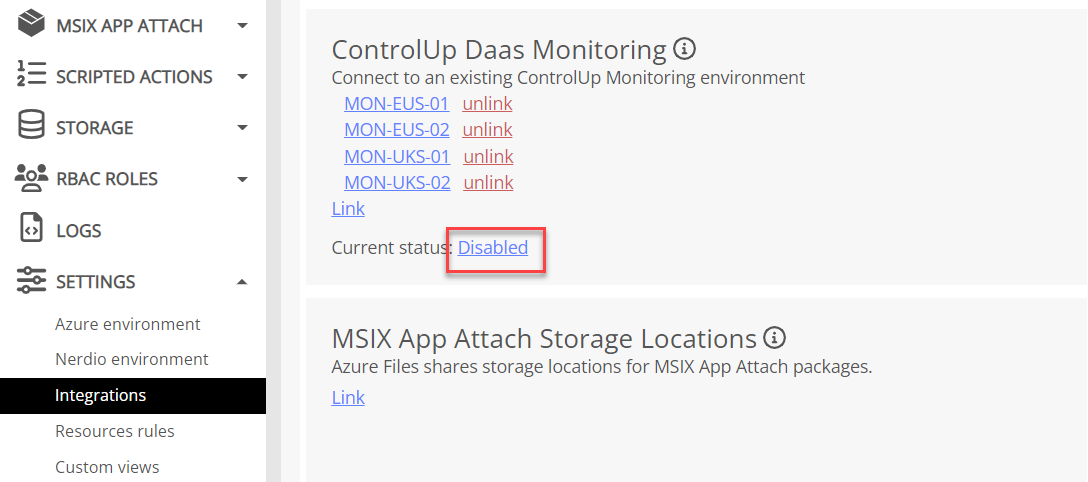
Go to Settings > Integrations > ControlUp Daas Monitoring.
-
Click Link to open the Add ControlUp Monitor window.
-
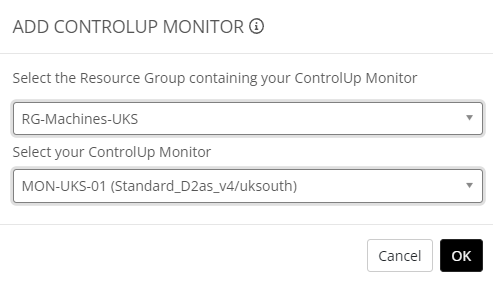
Select the resource group that contains the Monitor you want to add.
-
Select the Monitor.
-
Click OK.
After you click OK, Nerdio Manager performs a first-time discovery on the ControlUp Monitor. This process might take up to 10 minutes. You can track the status of this process in the log. The task is named Explore ControlUp Monitor. Wait for this task to complete before you connect additional monitors.

After your first ControlUp Monitor has completed linking, you can add the rest of your monitors simultaneously. Make sure the Explore ControlUp Monitor task is complete for all of your ControlUp Monitors before proceeding to the step 2.
Step 2 - Configure the ControlUp Integration Settings
After you have linked your ControlUp Monitors, follow these steps to enable the ControlUp integration and configure the default settings.
The default settings that you configure here can be overwritten in the host pool configuration.
-
On the Nerdio integrations settings page, go to ControlUp Daas Monitoring and click Disabled to open the ControlUp Monitoring Configuration window.
-
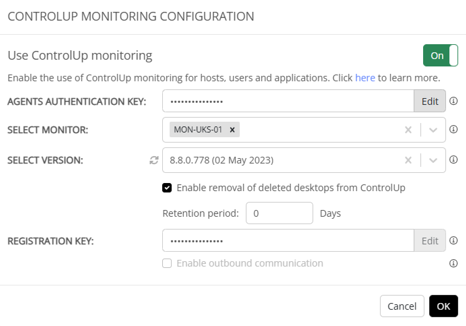
Select the Use ControlUp Monitoring toggle.
-
Enter the Agents Authentication Key. This key is used to connect the ControlUp Agents installed by Nerdio Manager to your environment. To learn how to get your Agent authentication key, click here.
-
Select all Monitors linked to Nerdio Manager.
-
Select the default version of the ControlUp Agent that Nerdio Manager installs on machines. You can't select an Agent version newer than your ControlUp Monitor version. To select a newer version, you must first upgrade all linked Monitors to the newer version.
-
If you want Nerdio to be able to remove machines from ControlUp's records, select Enable removal of deleted desktops from ControlUp. It is recommended that you enable this option and set the data Retention period to 0 days so that the ControlUp Console stays up-to-date.
-
Optionally, from version 9.0, you can enter the Registration Key and select Enable outbound communication to use the agent outbound communication feature. Click OK.
Your ControlUp integration settings are now configured, and you must now enable integration to your host pools.
Step 3 - Enable the Integration on a Host Pool
To enable the ControlUp integration:
-
In Nerdio Manager, navigate to your host pools.
-
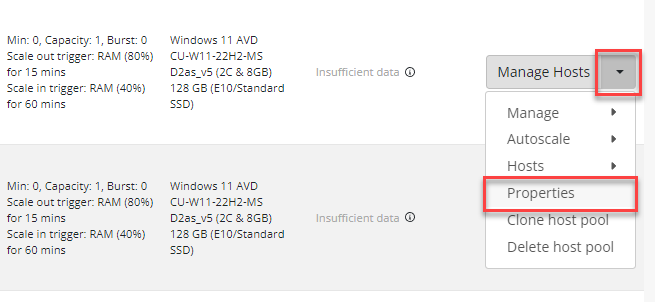
For each host pool, go to the host pool Properties.
-
Click on the ControlUp tab, and select the toggle to turn on the integration.
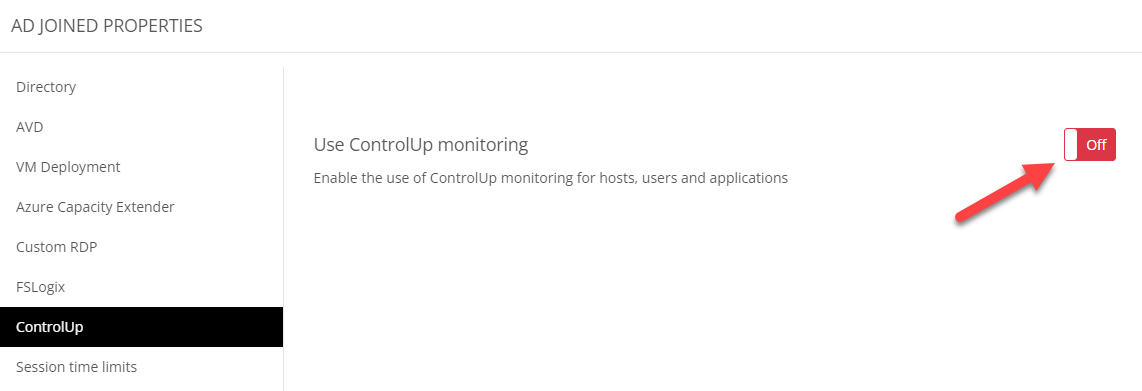
The ControlUp tab only appears after you have configured the default settings on the integrations page.
-
If you want to change the default integration settings, deselect Use default. You can also select Use custom to use a different Agent authentication key for the host pool.
-
Select the ControlUp Site that the host pool machines use.
-
Select the ControlUp Folder where you want the machines added by Nerdio Manager to be located. You can create folders from the Real-Time DX Console.
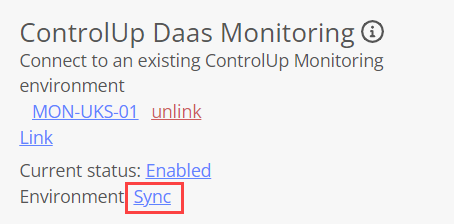
Folders are refreshed every 24 hours. To manually refresh, click sync on the integrations page and select any linked Monitor in your ControlUp environment.
- If the host pool is set up to join machines to Azure AD, then you need to enter the DNS Zone where the Monitor is located. You also need to create a DNS record for each machine. To learn more, click here.
- Click Save & close.

Nerdio Manager now installs the Agent on each machine in the host pool. Stopped machines are powered on to install the Agent, and are stopped again once completed. The Agent is automatically installed on any new machine created in the host pool. You can track the status of the task in the log. The task is named Install ControlUp Agent.

Step 4 - Monitor the Machines in ControlUp
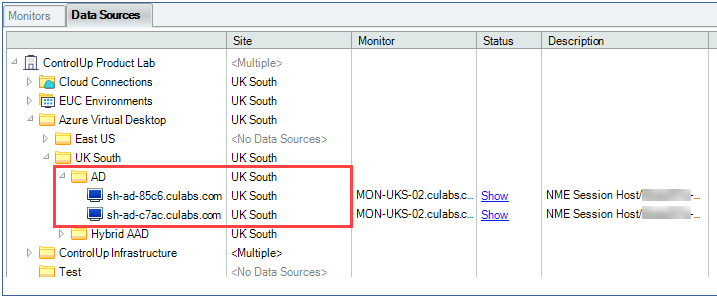
After Nerdio Manager installs the ControlUp Agent on a machine, you can monitor the machine in your ControlUp Console using your existing Azure integration. Note that it can take up to 15 minutes before the machine appears in the Console.
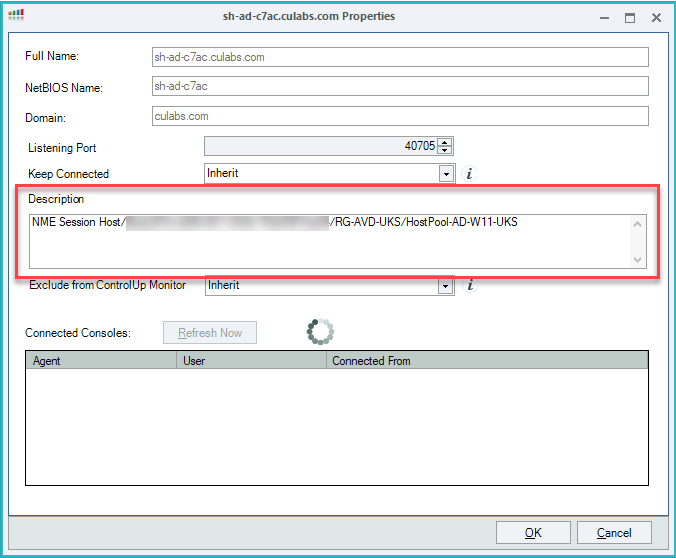
In this example, we can see the host pool machine in ControlUp after we enabled the integration. The machine is located in the site and folder that we specified.