You can configure your DaaS IQ environment’s session hosts on the Host Pools page. DaaS IQ uses the Session Host Configuration to define how new Azure Virtual Desktop (AVD) session hosts are deployed for each host pool.
Host Pools Page
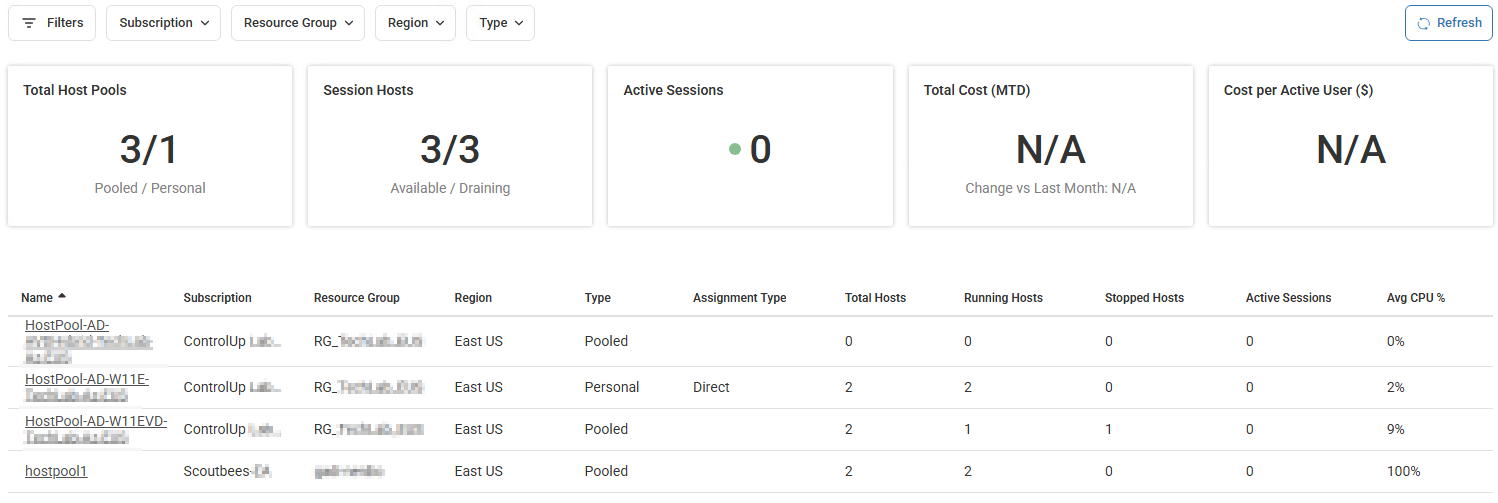
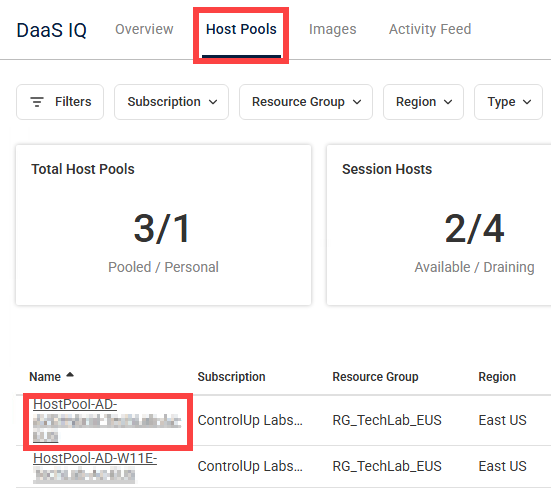
The Host Pools page displays host pool states and operational performance. It provides a unified command center to monitor the health, scale, and cost-efficiency of your environment, tracking:
Total Host Pools
Session Hosts availability status
Current Active Sessions
Financial metrics Total Cost (MTD) and Cost per Active User ($)
Below these insights, the data grid allows for granular management across the following fields:
Name
Subscription
Resource Group
Region
Type
Assignment Type
Total Hosts
Running Hosts
Stopped Hosts
Active Sessions
Avg CPU %
You can filter the grid using the basic Filters at the top of the page, or switch to query filters according to conditions you specify. You can also use the following default filters: Subscription, Resource Group, Region, Type.
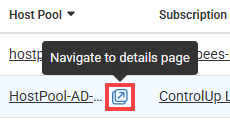
To view the details of a specific host pool, click the name of the host pool in the grid.
You can also jump straight to a host pool's details page from the Overview page Host Pools view by clicking its row:
Host Pool Details Page
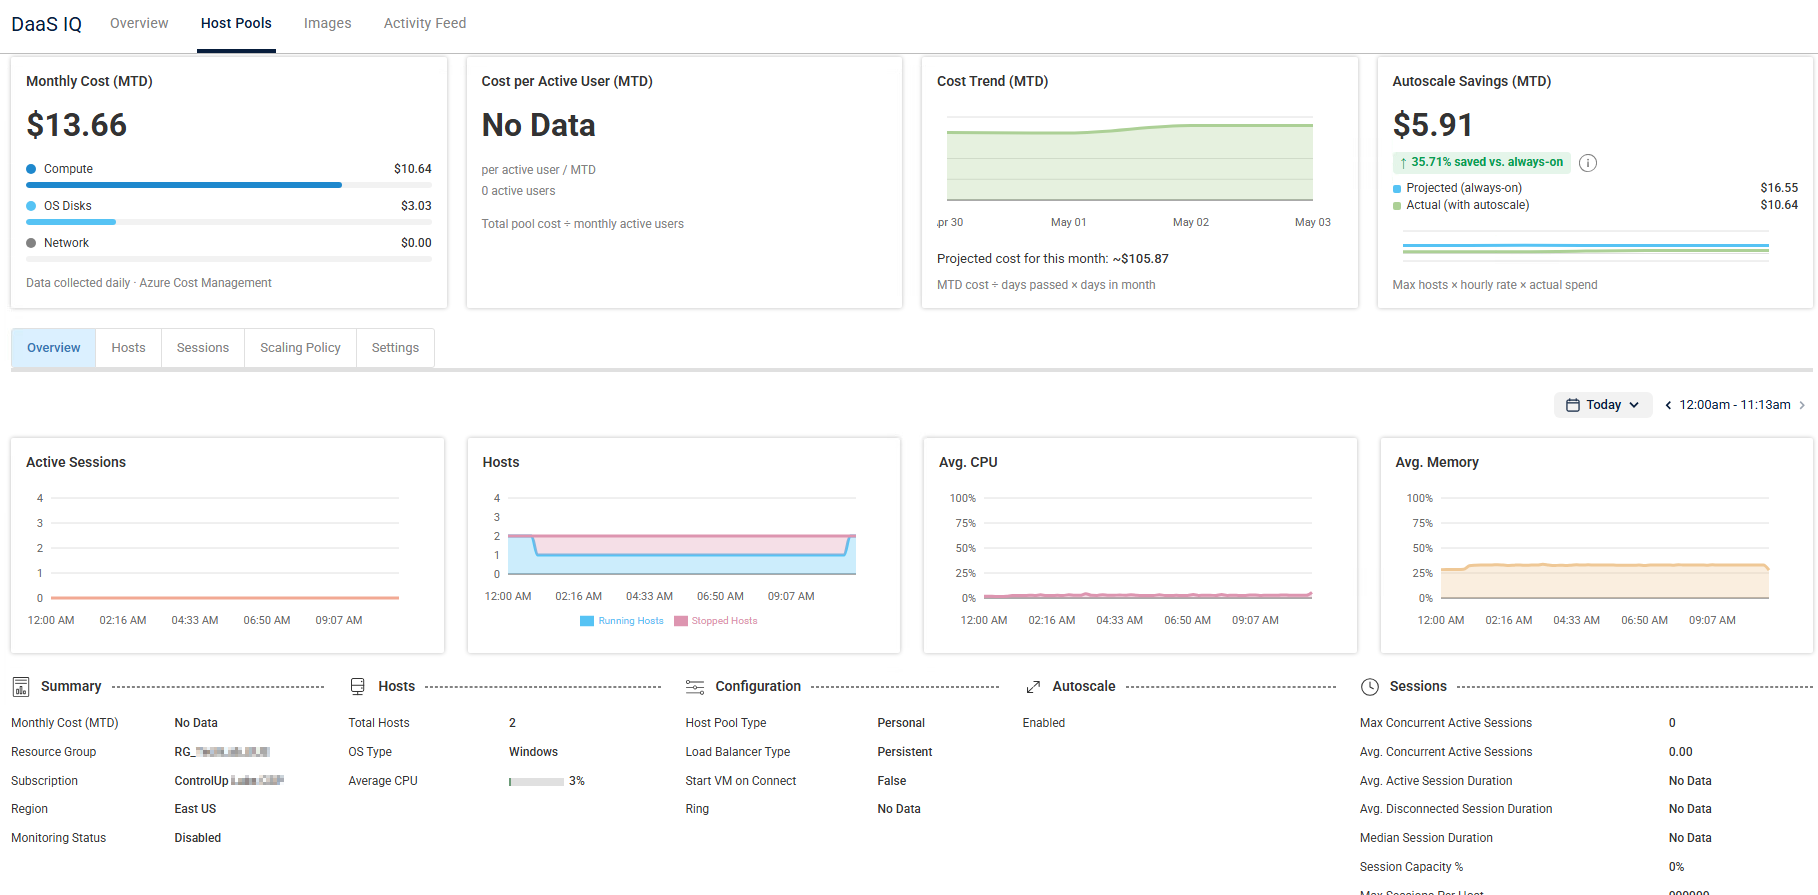
The Host Pool Details page provides an in-depth analysis of a specific host pool’s financial performance and operational health. The top section includes the FinOps Month-to-Date (MTD) cost-tracking widgets:
Monthly Cost (MTD): Total monthly compute spend, cost breakdown by resource category (Compute, OS Disks, Network).
Cost per Active User (MTD): Tracks cost efficiency as a ratio of spend to active users.
Cost Trend (MTD): Tracks spending trends over time.
Autoscale Savings (MTD): Compares projected compute cost to actual savings with autoscale. Quantifies the financial impact by comparing projected always-on costs to actual spend.
Performance is tracked through the following charts, displaying a timeline of resource demand:
Active Sessions
Hosts (Running vs. Stopped)
Avg. CPU
Avg. Memory
Below the charts, essential host pool metadata is displayed for: Summary, Hosts, Configuration, Autoscale, and Sessions, providing a comprehensive snapshot of the environment's settings and historical session metrics.
Configure Host Pool Settings
Configure a host pool’s settings according to the following steps:
Step 1: Basics
From the DaaS IQ Overview page, click the Host Pools tab.
Click the name of the host pool you want to configure settings for.
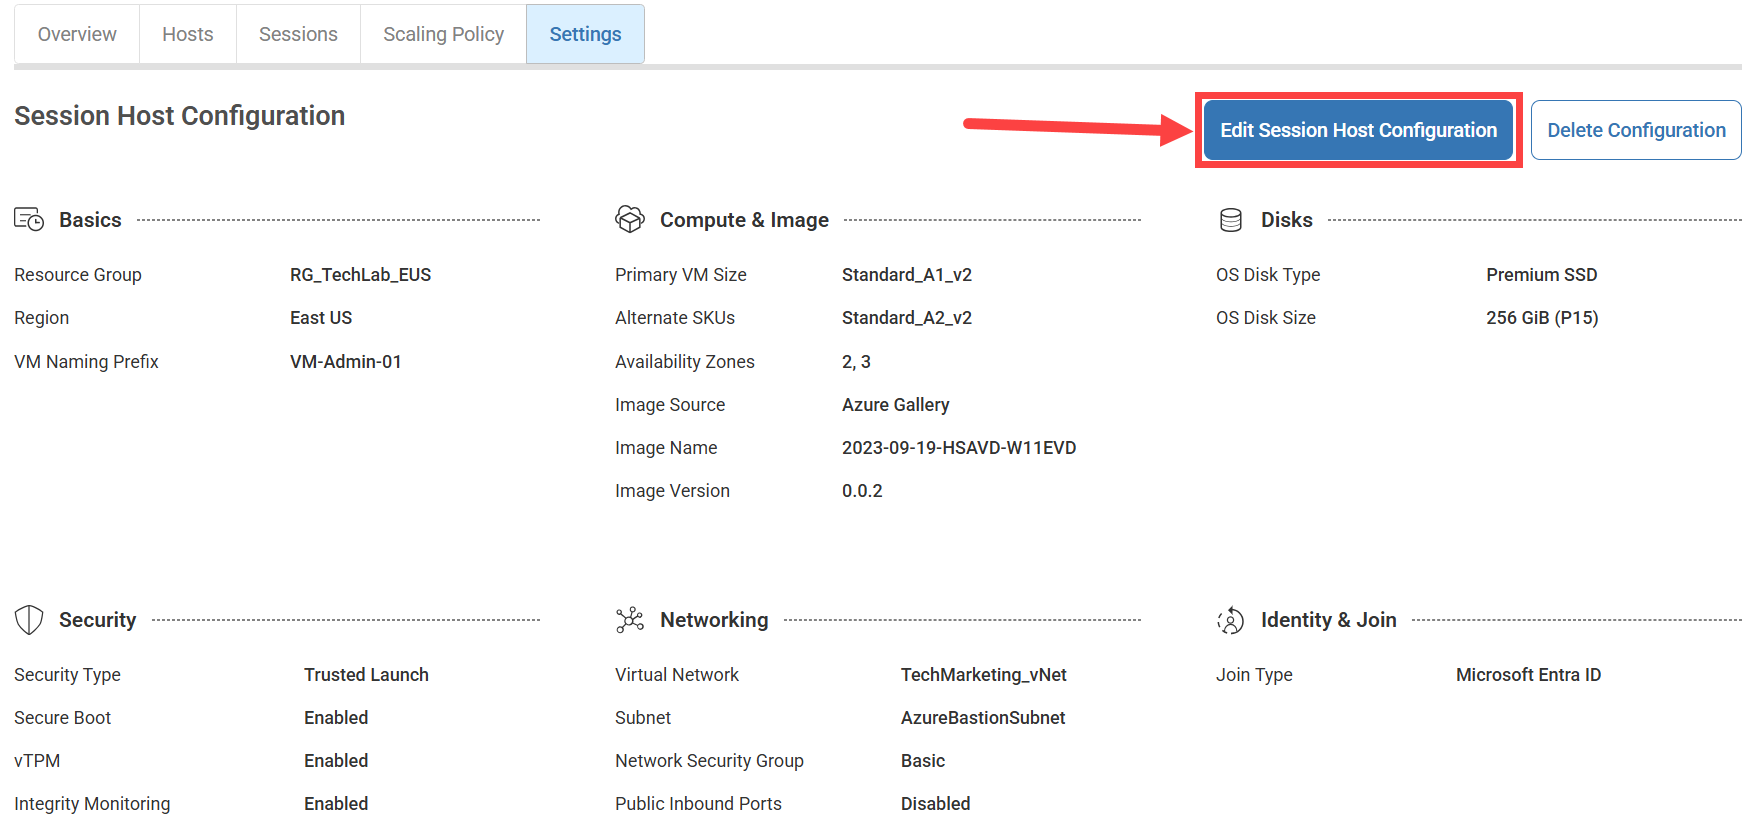
From the Host Pool Details Overview tab, click Settings.
Click Configure. The Create Session Host Configuration popup opens.
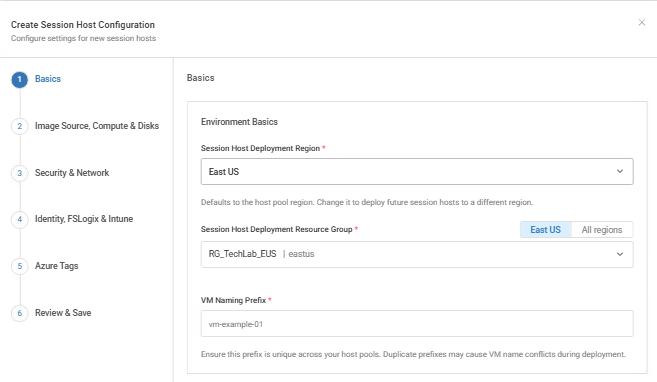
From the Session Host Deployment Region dropdown, select a deployment region.
From the Session Host Deployment Resource Group dropdown, select a deployment resource group.
In the VM Naming Prefix field, enter a naming prefix for the VM. This prefix must be unique across your host pools to avoid VM name conflicts during deployment.
Click Next.
Step 2: Image Source, Compute & Disks
From the Image Resource Group dropdown, select an image resource group.
From the Image Definition dropdown, select an image definition. An Image Gallery is automatically populated.
From the Image Version dropdown, select an image version.
Optionally, from the Availability Zones dropdown, select availability zones as needed.
From the Primary VM Size dropdown, select a primary VM size.
From the Alternative VM Size dropdown, select an alternative VM size. Note that the Alternative VM Size must be different from the Primary VM Size.
From the OS Disk Type dropdown, select a disk type.
From the OS Disk Size dropdown, select a disk size.
Click Next.
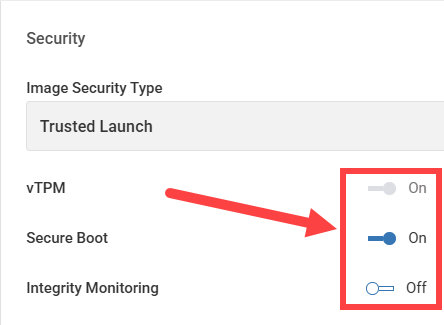
Step 3: Security & Network
Optionally, toggle on or off the Secure Boot, vTPM, and/or Integrity Monitoring. By default, these security settings are automatically set based on the Image Definition you selected. You can’t select incompatible security combinations.
From the Network Resource Group dropdown, select a resource group.
From the Virtual Network dropdown, select a network.
From the Subnet dropdown, select a subnet.
From the Network Security Group dropdown, select a security group.
Click Next.
Step 4: Identity, FSLogix & Intune
Select a Join Type. The following steps will update based on your selection:
Active Directory:
In the AD Domain field, enter a domain.
In the Domain Join UPN field, enter a UPN.
In the Password field, enter a password.
Optionally, use the Specify OU toggle to Show or Hide the AD Organizational Unit (OU) path. In the OU path field, enter a path. By default, the path is hidden.
Microsoft Entra ID: The Entra ID will be used for the join type.
In the FSLogix Profile Storage Path field, enter a profile storage path where FSLogix user profile containers will be stored.
Optionally, select the Enroll in Intune checkbox to automatically enroll your session host in Microsoft Intune.
In the Username field, enter a username.
In the Password field, enter a password. It must be at least 12 characters long and include lowercase, uppercase, digits, and symbols.
In the Confirm Password field, copy the password to verify.
Click Next.
Step 5: Azure Tags (Optional)
In the Key field, enter a tag key.
In the Value field, enter a tag value.
Click Add > Next.
Step 6: Review & Save
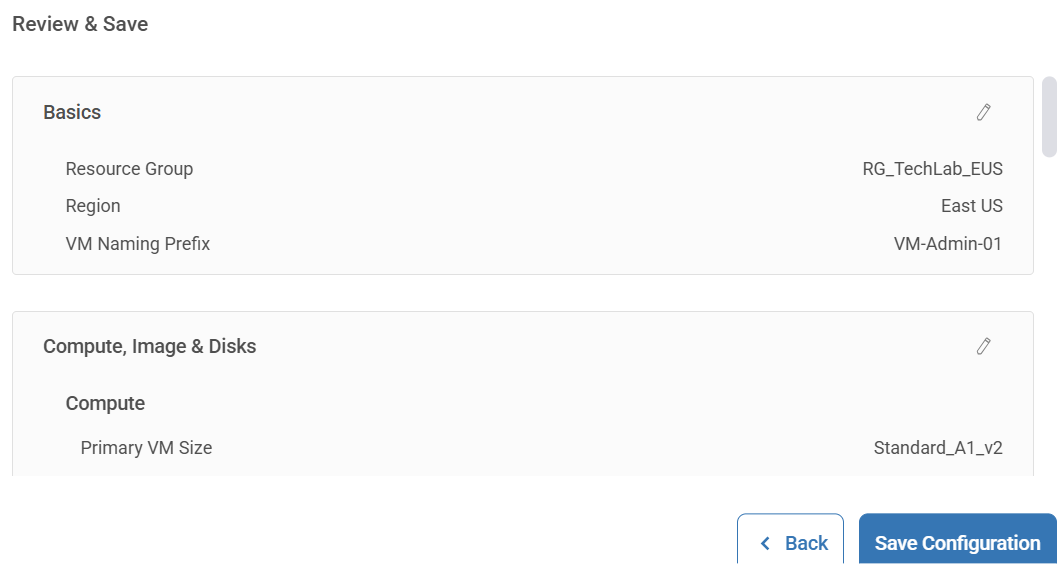
Review the configuration details. If needed, click the edit icon
 to edit specific steps.
Click Save Configuration. The new Session Host Configuration you created now appears in the Settings tab of the configured host pool.
To edit a Session Host Configuration, click Edit Session Host Configuration to open the Edit Session Host Configuration popup, edit the settings as needed, and click Save.