Use the Mail Application Scout to test if your mail servers are working correctly. The Scout can alert you if a mail server is down or taking longer than expected to transmit emails. Currently, the Scout supports testing Microsoft Exchange Online mail servers.
The Scout can perform two types of tests:
Incoming mail: The Scout sends an email from a Synthetic Monitoring server to your mail server, your mail server is accessed from the location (Hive) running the Scout to validate the email was received successfully.
Outgoing mail: The Scout sends an email to a recipient mail server (using their SMTP servers). Your mail server is accessed from the location (Hive) running the Scout to send the email, and the Synthetic Monitoring server validates that the email was received successfully.
After both types of tests, the sent or received test email is deleted to save storage. To best monitor a mail server's performance, you should create two Scouts to test both incoming and outgoing emails.
Prerequisites for creating a Mail Application Scout
Before creating a Mail application Scout, make sure you've met the following prerequisites:
Created a user for the Scout (see "How to create a user for the Scout" below).
Obtained the Admin's approval for the app and its required permissions (appears as ControlUp in Azure).
The Scout uses the ControlUp app to interact with the mail service, by fetching the customer’s access token and refresh token. Once we have these tokens, we trigger a process using these credentials to access the user’s email, through Microsoft Graph API.
ControlUp's required permissions
Here are the permissions that ControlUp requires, and the reasons we request them.
Note:
If these prerequisites are not met, you will not be able to register the app and will be directed to the Admin for approval.
How to create a user for the scout
When you configure a Scout for either type of test, you must authenticate to your mail server with a user that has an authenticated mailbox.
When setting up a user, note the following:
We recommend creating a dedicated user specifically for running this Scout. For optimal security, this user should be authorized exclusively for the mail service.
If you choose to create a user with access to multiple services, and your identity management system supports multiple mail services, ensure that the Exchange server tested by this Scout is set as the primary server.
To ensure the Mail Scout works properly, mark the scoutbees.io and eu.scoutbees.io domains as trusted in all email policies. Synthetic Monitoring emails may be flagged as spam due to their repetitive, templated nature, risking delivery issues.
You can run the Scout from one of the preconfigured Cloud Hives locations, or you can install a Custom Hive on-premises to run the Scout from a custom location.
Create a Mail Application Scout
Click Create Scout.
Select the Applications tab and set the Scout Type to Mail Application.
Select the Hives to run the Scout. This is the location that accesses your mail server to either send or receive a test email, depending on the Direction you select in step 7.
In the Mail Service field, select the type of mail service to test. Currently, only Microsoft Exchange Online is supported.
Enter a Name for the Scout.
Select how often you want to test the resource using the Run Every slider. You can choose any interval from 5 to 60 minutes, in increments of 5 minutes (5, 10, 15, 20, and so on).
Set the Direction. Read above for details about each direction.
Click Sign with Microsoft and use an authorized Entra ID email address (this is the only IdP that we support for this scout).
There are three possible scenarios when signing in. See the "Sign in scenarios" section below.Note:
Temporary Access Pass (TAP) sign-in is not supported.
Optionally, add Tags to your Scout. Tags are key-value pairs which can be used to organize your Scouts. To learn more about tags, visit Centralized Tags Management.
Click Show additional parameters if you want to change the Timeout duration. A test is considered a failure if the email is not successfully sent and received before the timeout duration has been reached. You can set the timeout duration between 5 seconds and 180 seconds.
Click Next: Alert Policy to set up alerts and notifications before saving the Scout. For more information, see Alert Policies.
Sign in scenarios
When you try to sign in, you'll encounter one of the following screens. Note that the first two screens below appear only if you haven’t fulfilled the necessary prerequisites.
Your organization doesn’t allow registration to third-party applications
In this case, a ‘Need admin approval’ screen is displayed, directing you to your administrator to approve the app.
(1).png)
Your organization requires Admin consent for third-party applications
Attempting to register the ControlUp app with Microsoft Entra ID will display an "Approval required" screen. This screen will prompt your Admin for consent to the requested permissions.
Note: you'll need to fill in your justification for requesting this app on the designated line.
Once your Admin delivers your request, they need to follow the permissions and approve it. For details on why each permission is requested, they can see ControlUp's required permissions above.
(1).png)
Your organization approves registration to third-party apps at the organization level
A Permissions requested screen is displayed with a list of the requested permissions, and all you need to do is approve them. For details on why each permission is requested, see ControlUp's required permissions above.
(1).png)
Approval by the Admin
The Admin receives the consent requests by email (if so configured), and can approve them in one of the following ways:
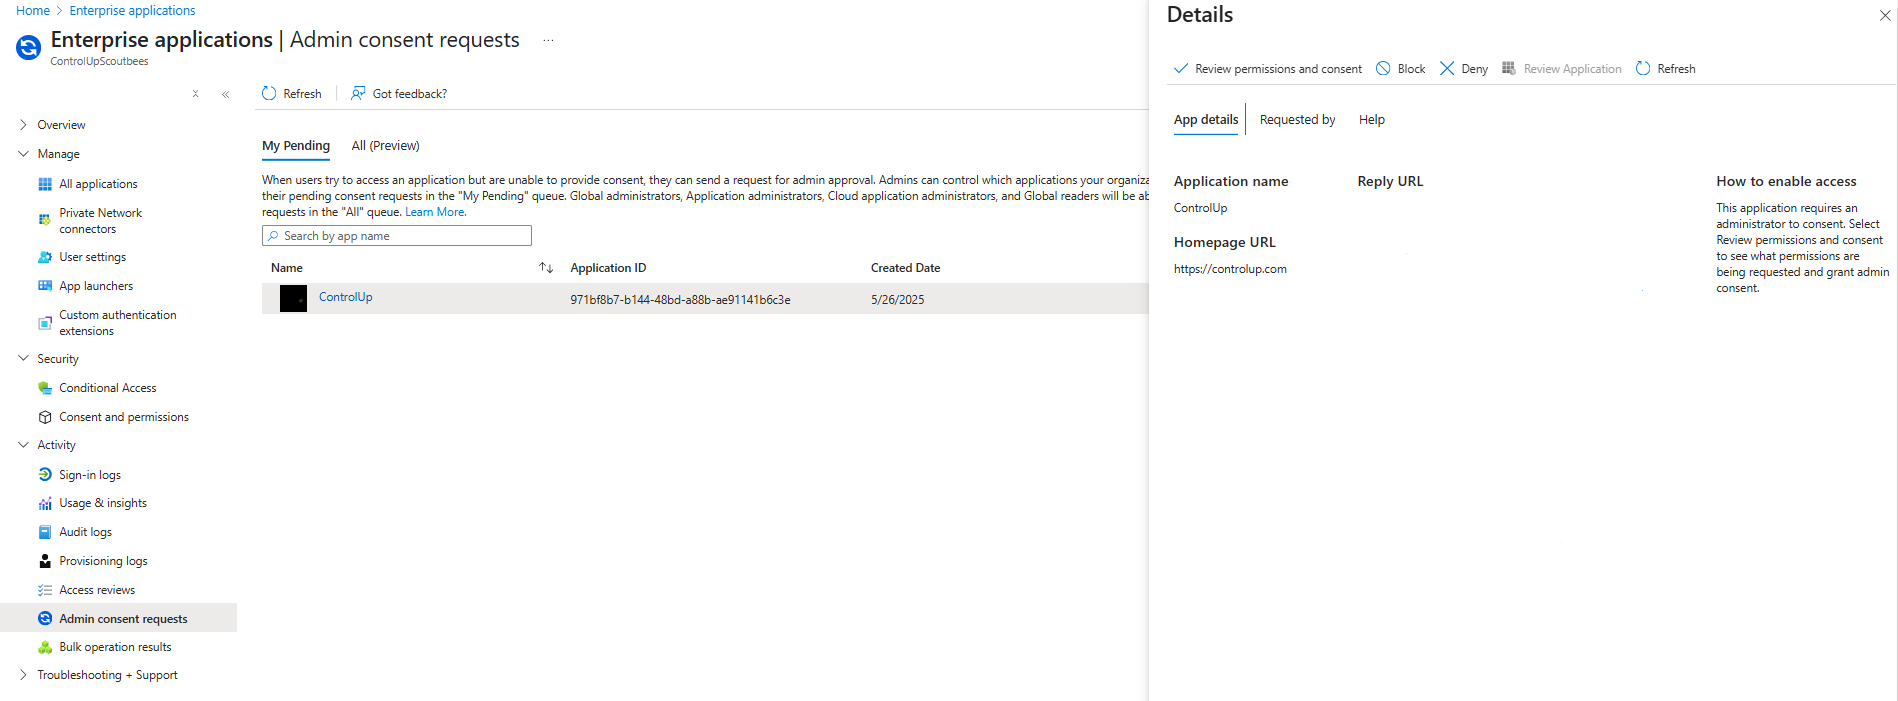
From the email: clicking ‘Review Request’ will lead the Admin to the Admin consent requests page in Enterprise Applications.
Direct approval in the Azure Portal: Navigating to Azure Active Directory > Enterprise Applications > Admin consent requests > My pending.
There the Admin can see the consent request for ControlUp and approve it.
Test Results
Incoming and outgoing tests both record the total delivery duration of the mail, but incoming tests break it down into the total delivery duration across all hops and the server processing time.
Test metrics
The metrics in the table below are collected for each test result.
Metric name | Description | |
|---|---|---|
Delivery Duration to Mail Server (incoming mail) | The time it takes an email to pass all hops from the Synthetic Monitoring server until one hop before the last one (pre-last hop), which is your mail server. | |
Server Processing Duration (incoming mail) | The time it takes your mail server to process the email. | |
Client to Server Duration (outgoing mail) | The time it takes an email to pass from a client stimulated by the hive to your mail server. | |
Server Processing Duration (outgoing mail) | The time it takes your mail server to process the email. | |
Server to Final Destination Duration (outgoing mail) | The time it takes an email passing from your mail server to the final destination, which is the Synthetic Monitoring server. |
Test examples
Incoming mail
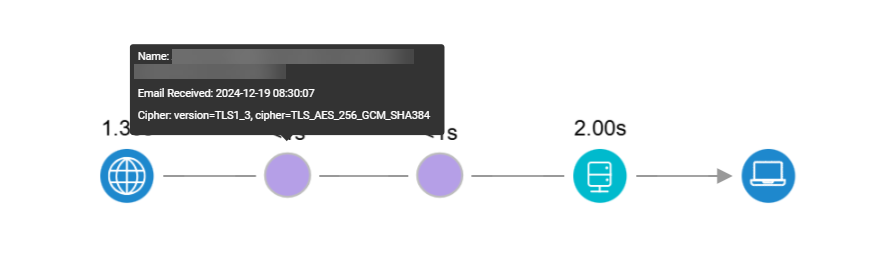
The screenshot below shows the Scout details page for an incoming test. The chart on the left shows the total mail delivery duration, while the chart on the right shows the duration for each phase in the process.

Click on the results of an individual test to see more details.
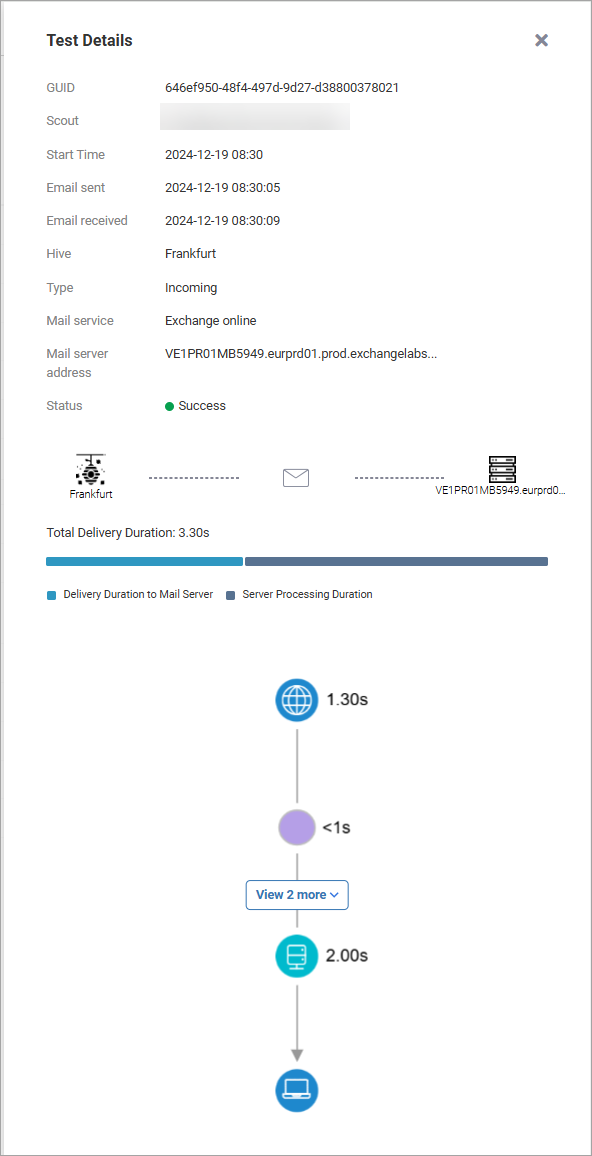
To see all of the hops, click View more. Hover over a hop for additional information. Note that the time for each hop is accurate only to the nearest whole second.
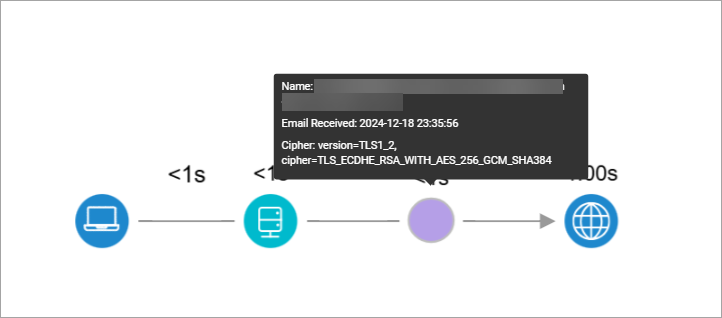
Outgoing mail
The screenshot below shows the Scout details page for an outgoing test. The chart on the left shows the total mail delivery duration, while the chart on the right shows the duration for each phase in the process.

Click on an the results of an individual test to see more details.
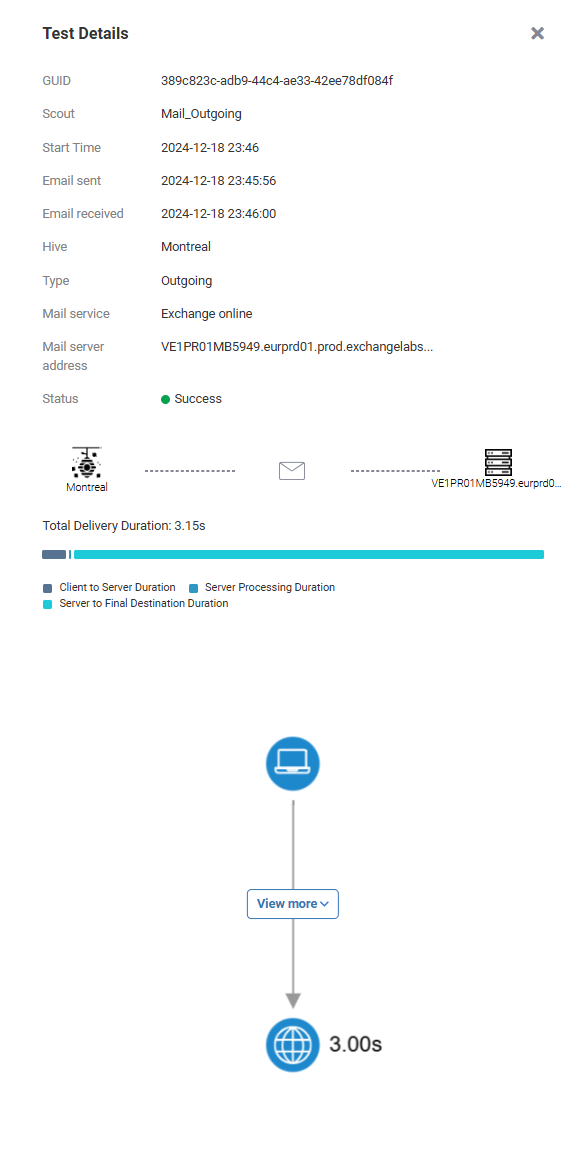
To see all of the hops, click View more. Hover over a hop for additional information.
Note that the time for each hop is accurate only to the nearest whole second.