This article covers how you can manage your Scouts.
Disable and Enable Scouts
If you disable a Scout, then it does not run any tests or collect any data. The Scout's configuration and past test result data are saved. You can enable the Scout again at any time. The credits used by the Scout are returned to your account. Enabling the Scout again uses credits.
Note that a Scout's alert policy is automatically activated when you enable a Scout.
Disable or enable a single Scout
On the Synthetic Monitoring Home page, select a Scout to open the Scout details page. You can tell if a Scout is disabled if it appears dimmed or has a Disabled tag (only in the widget view).
On the Scout details page, select Disable Scout (or Enable Scout if it’s disabled).
.png)
Disable or enable multiple Scouts
To disable or enable multiple Scouts:
On the Synthetic Monitoring Home page, select the list view to view your Scouts in a list.
.png)
Select the Scouts you want to disable or enable with the checkboxes next to their name. You can tell if a Scout is disabled if it appears dimmed.
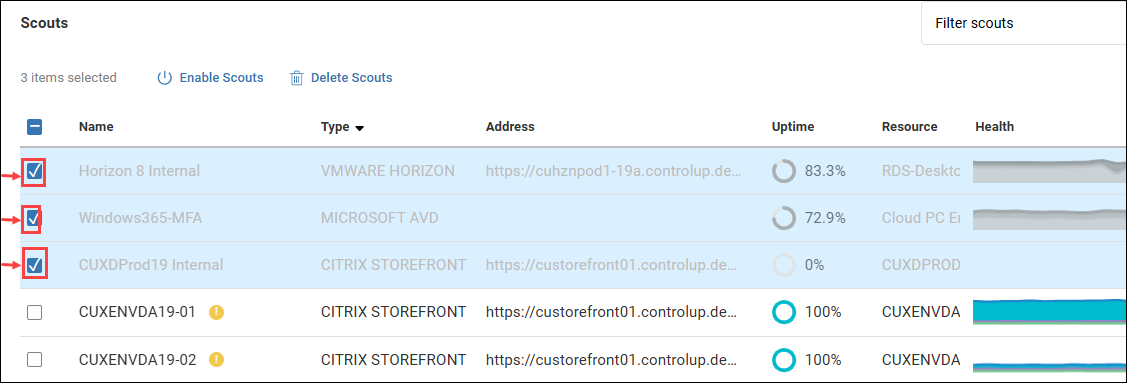
Select Disable Scouts or Enable Scouts.
Disable or enable a group of Scouts
To disable or enable a group of Scouts:
On the Synthetic Monitoring Home page, select the list view to view your Scouts in a list.
.png)
Filter the list of Scouts so that only the Scouts you want to disable or enable are displayed. You can use the Scout category selector at the top of the page, and the Filter scouts box. You can apply multiple filters. For more information about filtering Scouts, see Filter your Scouts.
You can group Scouts with any combination of the following properties:Scout category (EUC, Infrastructure, or Applications)
Scout type
Address that the Scout tests
Hive that initiates the Scout
Resource that the Scout tests through an EUC gateway
Tags applied to Scouts
Select the checkbox at the top of the list to select all of the Scouts displayed on the page. Note that you can change the number of Scouts displayed per page at the bottom of the list.
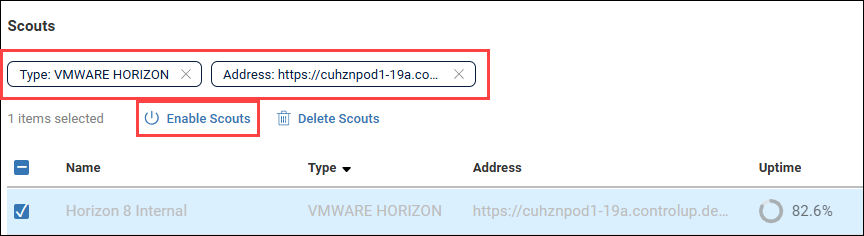
Select Disable Scouts or Enable Scouts.
Disable Scouts on a schedule
You can schedule a time and duration to disable Scouts using maintenance windows. Use this feature if you have scheduled maintenance on a tested resource and do not want your Scouts to test the resource during the maintenance.
For details on how to set up a maintenance window, see Maintenance Window.
Edit Scouts
Edit a Scout
To edit the configuration of a single Scout:
On the Synthetic Monitoring Home page, select a Scout to open the Scout details window.
On the Scout details page, select Edit Scout to open the Scout configuration window.
After you edit the Scout, click Save. When editing a Scout, you can select only Hives in your Read Hive permission scope.
Delete Scouts
Deleting a Scout permanently removes it, including all of its past test result data. The credits used by the Scout are returned to your account.
Delete a single Scout
To delete a single Scout:
On the Synthetic Monitoring Home page, select a Scout to open the Scout details window.
On the Scout details page, select Delete Scout.
.png)
Delete multiple Scouts
To delete multiple Scouts:
On the Synthetic Monitoring Home page, select the list view to view your Scouts in a list.
.png)
Select the Scouts you want to delete with the checkboxes next to their name.
.png)
Click Delete Scouts.
Delete a group of Scouts
To delete a group of Scouts:
On the Synthetic Monitoring Home page, select the list view to view your Scouts in a list.
.png)
Filter the list of Scouts so that only the Scouts you want to delete are displayed. You can use the Scout category selector at the top of the page, and the Filter scouts box. You can apply multiple filters. For more information about filtering Scouts, see Filter your Scouts.
You can group Scouts with any combination of the following properties:Scout category (EUC, Infrastructure, or Applications)
Scout type
Address that the Scout tests
Hive that initiates the Scout
Resource that the Scout tests through an EUC gateway
Tags applied to Scouts
Select the checkbox at the top of the list to select all of the Scouts displayed in the list. Note that you can change the number of Scouts displayed per page at the bottom of the list.
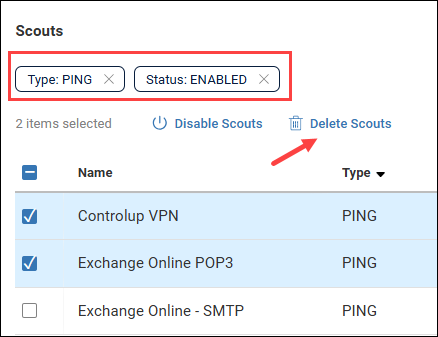
Select Delete Scouts.
Add Tags to Scouts
Apply tags to Scouts to organize and filter Scout lists, and to make Scouts available for tag-based permission scoping. For more details, see Centralized Tags Management.
.png)
Control Access to Scouts with Tags
In some environments, different teams are responsible for different Scouts. For example, one team might manage EUC Scouts, while another team manages network checks, application checks, office locations, or specific environments.
Tags help separate Scout management by operational scope. Users can filter the Scout list by tag to focus on the Scouts relevant to their work. Admins can also use tags in custom roles to control which Scouts users can see, edit, or delete.
This helps reduce noise for users and lowers the risk of unintended changes to Scouts managed by another team.
For more information about creating tags, applying tags to Scouts, and scoping permissions by tag, see Centralized Tags Management.