ControlUp Workflows includes a wide selection of potential integrations, allowing you to create Workflows that connect with many IT tools and services. Here is an overview of how to manage and use these integrations when building your automated workflows.
For a list of all current integrations, the actions you can add to your flows from those integrations, the required fields to connect to the integration, and API or other scoped information, see Current Integrations.
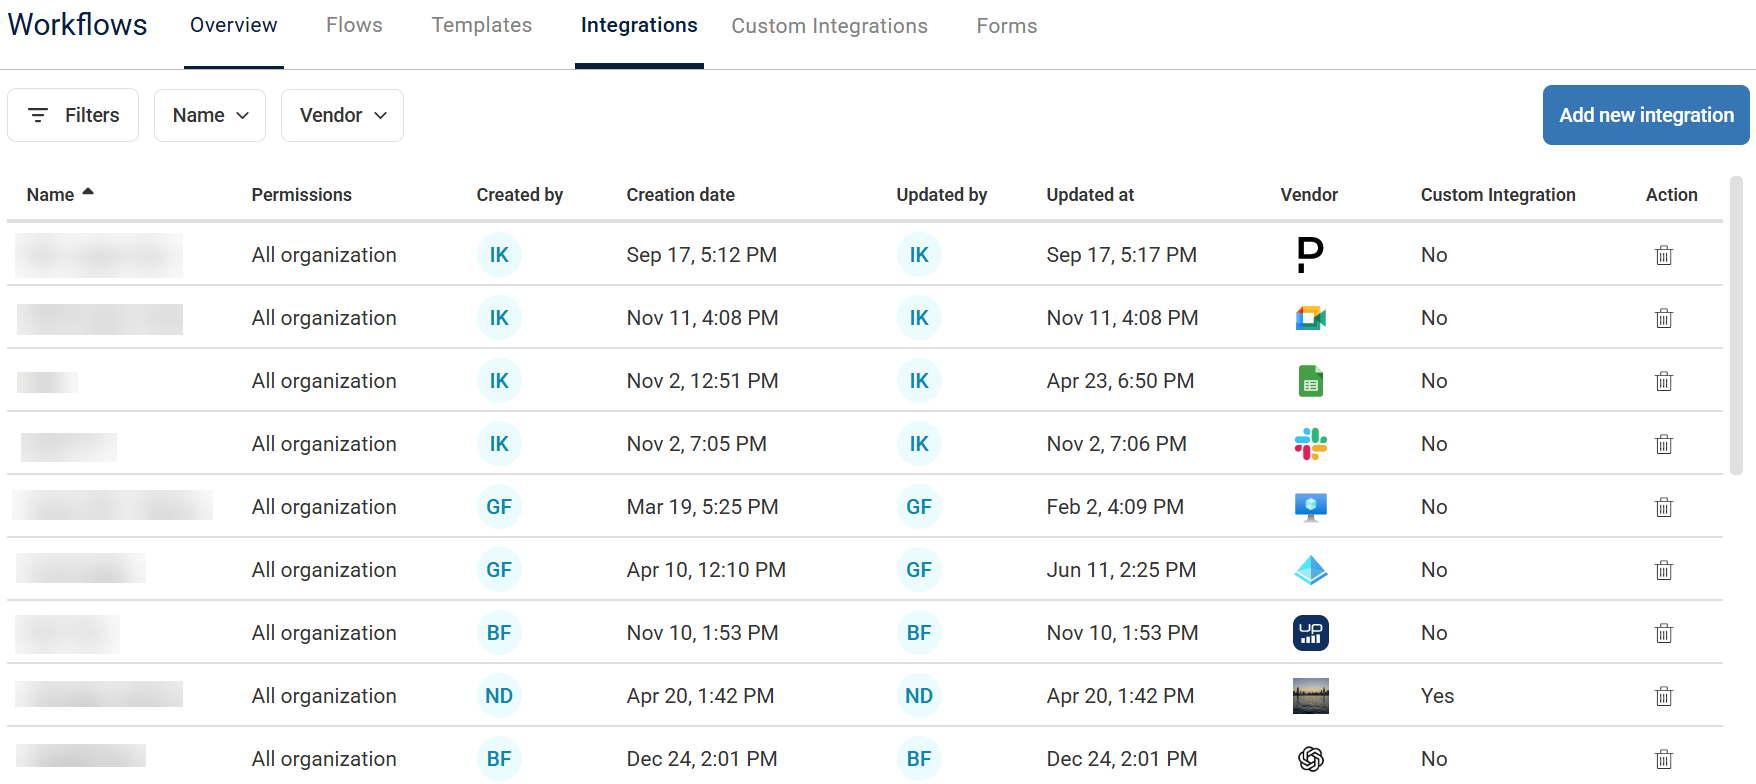
The Integrations page provides a detailed list of all currently configured integrations within your Workflow environment. This table offers an overview of your connected services that have already been added and configured as integrations. You can see the following:
Name: A user-defined name for the integration, making it easily identifiable.
Permissions: Indicates the level of access that was granted to this integration to determine who can use this integration when creating flows.
Information regarding who and when the integration was created/updated:
Created by, Creation date, Updated by, Updated at
Vendor: The name and often a logo of the external service or application this integration connects to, for example Microsoft Excel, Azure DevOps, ServiceNow. This helps you quickly identify and understand the integration's purpose.
Custom Integration: Indicates if the integration was created by a user or provided by Workflows.
Action: Trash icon that gives the option to delete an integration.
This detailed view enables you to view and manage the connected and configured integrations within Workflows. The search bar located at the top right allows you to quickly find specific integrations by name or vendor.
Integration Actions
For details on each integration and its related actions, in the Flows tab click Create Flow and open the dropdown for the integration in the list of nodes you can add while creating a Flow. This view gives you details on the actions for each integration so you can plan which integrations to add for use in your flows.
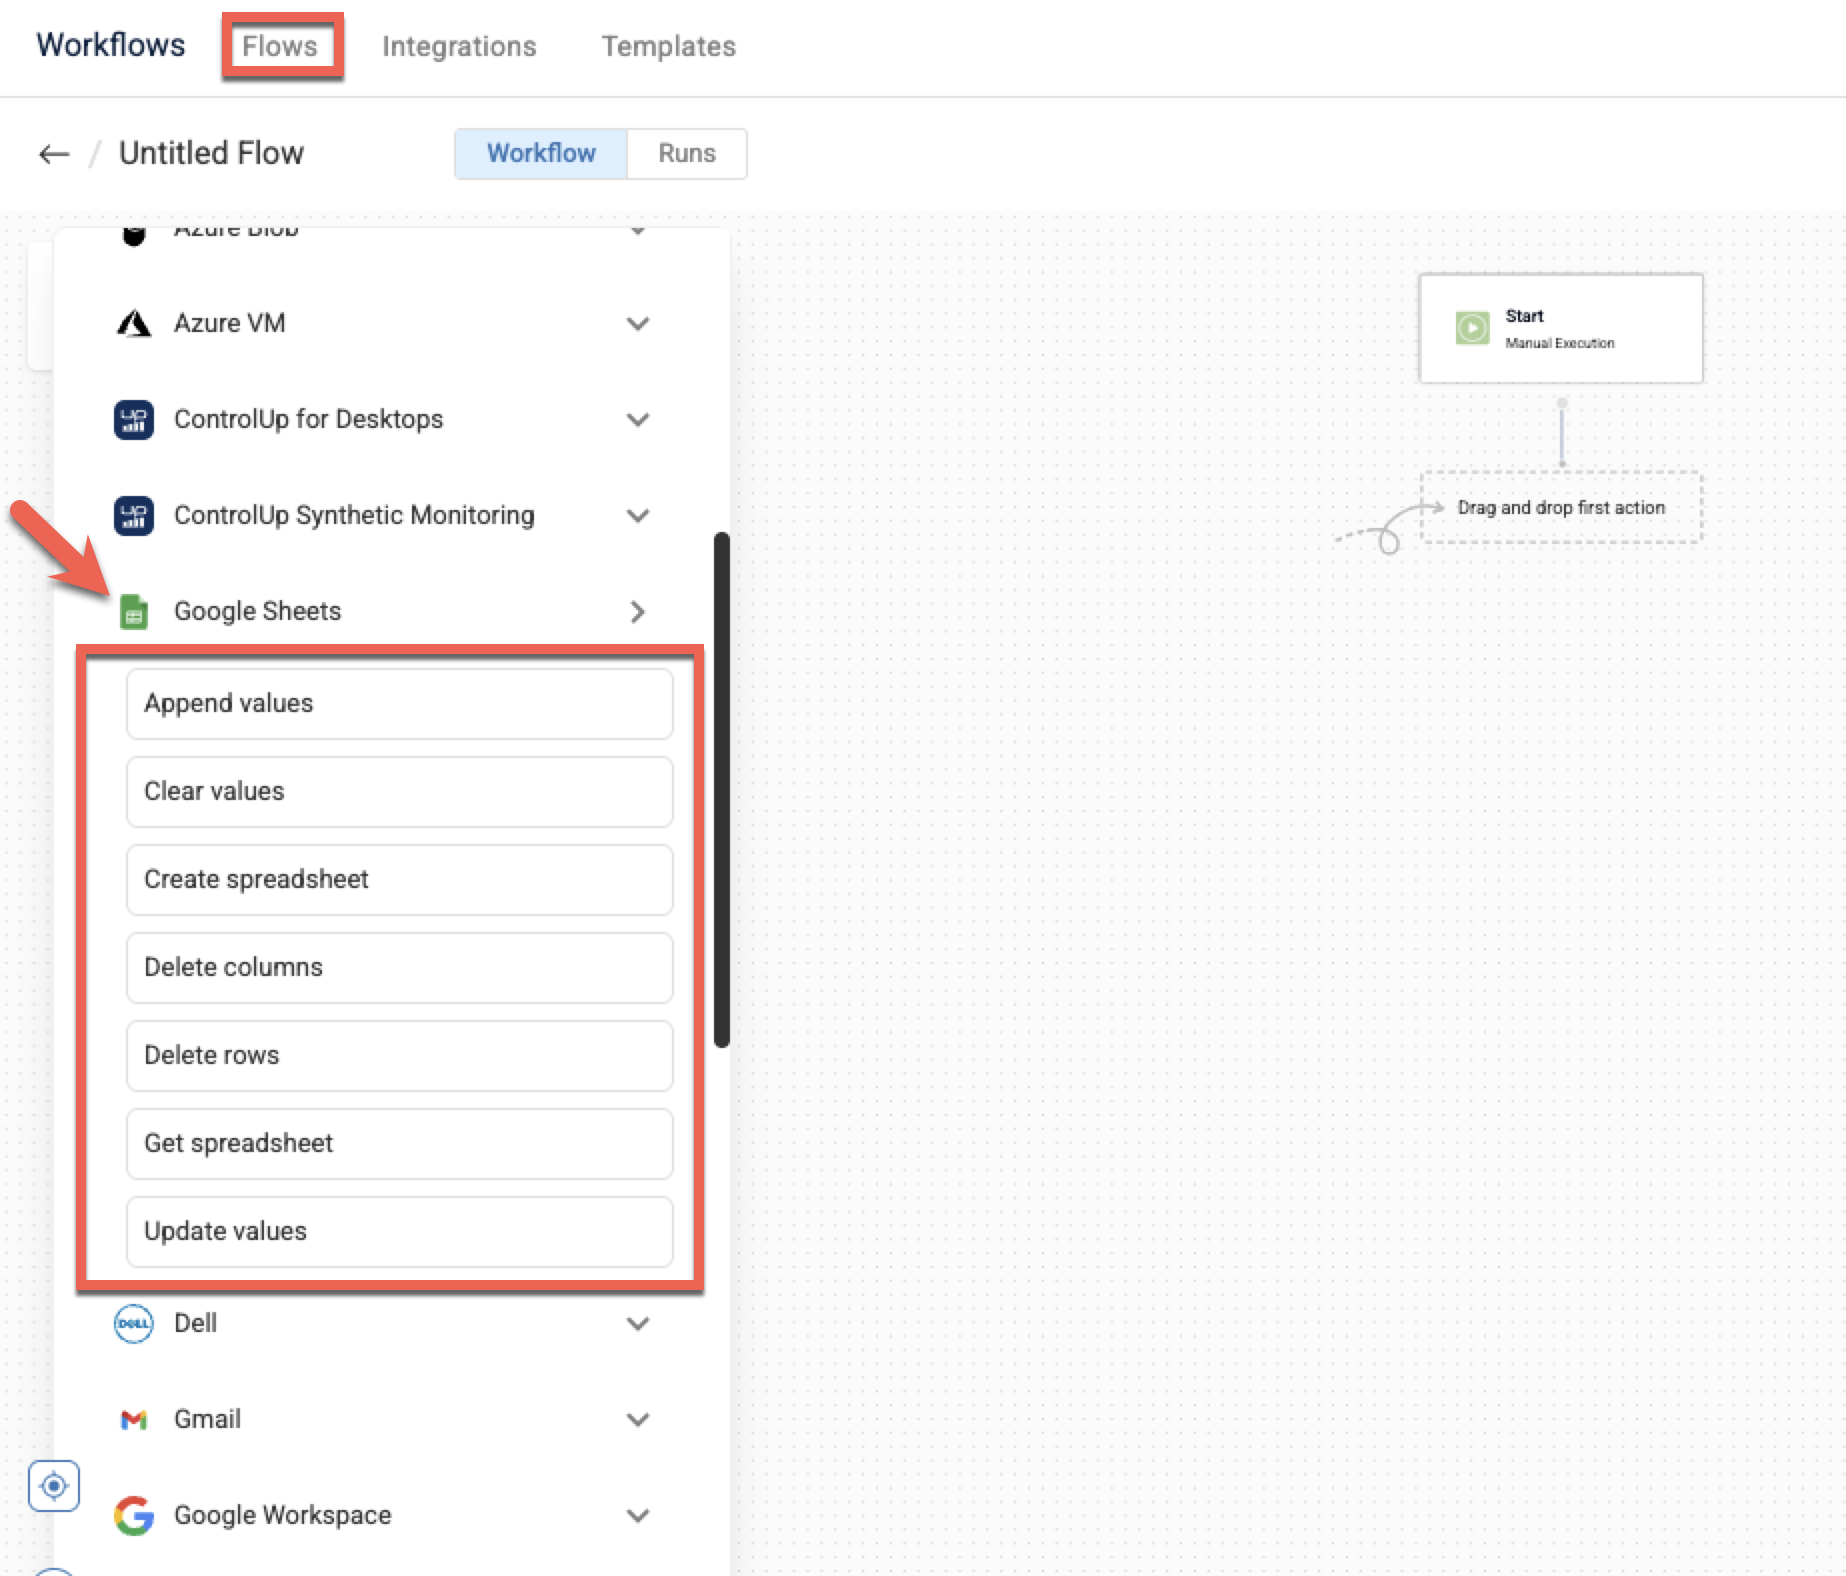
For example, the Google Sheets integrations includes actions like Create spreadsheet, Append values, Clear values, Delete columns & rows, Get spreadsheet, and Update values.
Add New Integration
To create a Workflow with an external service, you have to add the integration and configure its connection parameters.
In the Integrations page, click Add new integration located in the top right corner.
Click the dropdown Select integration you want to connect to view a list of available integrations. You can use the search bar at the top of the dropdown to quickly find the service by name or vendor.
Once you locate the service in the list, click it and the fields dynamically update to display the specific configuration details required for that particular integration.
Provide an Integration name that is easily recognizable and intuitive for you and anyone else creating Workflows.
Enter all the necessary information as prompted. This might include fields for API keys, usernames, passwords, URLs, or other authentication credentials. Or the configuration may require only to Connect to the tool like for Google or Slack apps.
Set the Permissions for this integration. The options are:
All organization: Everyone in your organization can access and use this integration.
Specific users: When selected a list opens of all users in the organization and you can select by name. Only those users are able to use this integration when creating a flow.
Just me: Use this for integrations that only you can access, for example integrations that use your email or other account IDs that are specifically for you.
Click Add Integration to enable this integration for your Workflow. The integration now appears under the Integrations list.
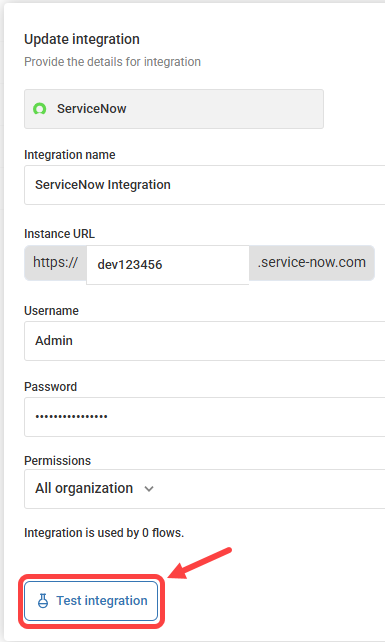
Optionally, to test your new integration’s connection, select the integration under the list and click the Test integration icon. The icon will indicate if the integration connects successfully or fails.
Once an integration is added, it becomes available as a set of nodes within the Workflow builder. When designing a Flow, you can drag and drop the relevant actions for these integration nodes onto the canvas. For details, see Create a Flow.
Each integration includes a list of actions that are specific for that application.
Create Custom Integration
You can build, publish, and share your own custom integrations. To create a custom integration with an external service, you have to build the integration and configure its authentication methods and actions.
Step 1: Basic information
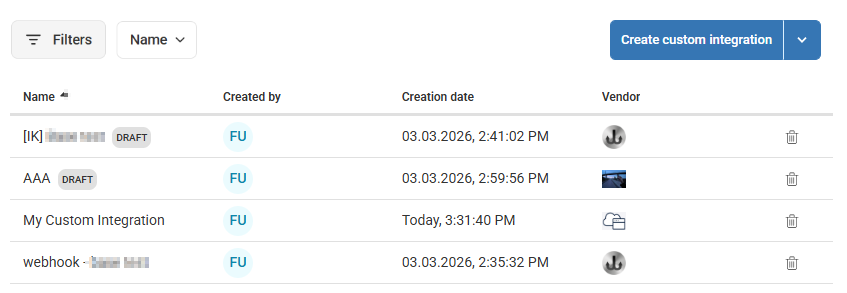
From the top bar, click the Custom Integrations tab.
In the Custom Integrations page, click Create custom integration > Start from scratch.
Enter an Integration name for your custom integration.
Optionally, enter a Description of what this integration does.
Enter a Base URL for all API endpoints in this integration, for example: https://api.example.com.
Upload an image or Paste image URL for this integration’s logo.
If you are connecting to a trusted on-premises service that uses a custom SSL certificate, turn on Ignore SSL certificate. This allows the integration to connect without validating the certificate. Use this setting only when necessary, because disabling certificate validation makes the connection less secure.
Click Next.
Step 2: Authentication
Select an authentication type. The following steps will update based on your selection:
API Key:
From the Send API key as dropdown, select Header or Query Parameter.
Enter a Key name, for example: “X-API-Key”.
Optionally, provide Instructions for users on how to obtain an API key from the target service.
Bearer Token: The token will be automatically added to every request. Optionally, provide Instructions for users on how to obtain credentials from the token, or login/password.
Basic Authentication: Login and password will be used for authentication. Optionally, provide Instructions for users on how to obtain credentials from the token, or login/password.
Optionally, click + Add header as needed to define default headers that will be automatically sent with every request. These are fixed values and won't be editable by users.
Click Next.
Step 3: Actions
Each action defines an API operation that can be used in workflows. Action 1 is added by default. You can duplicate, delete, or collapse actions as needed.
In Action 1, enter an Action name.
Optionally, enter a Description of what this action does.
Under HTTP request definition, select an HTTP method. The available request fields update based on the selected method.
Enter a URL, for example:
/api/v1/users.Optionally, expand URL parameters, Headers, or Query parameters, and define the values as needed.
Select the Response Format.
You can define a response schema to make values from the API response available as variables in later flow steps. To add a schema, expand Additional settings and click + Add Response Schema.
To define another action, click + Add action and repeat this section as needed.
Click Next.
Step 4: Review & Publish
Verify that your integration definition is valid and complete before publishing. If needed, click the Edit button to edit specific steps.
Click Update integration.
Your new integration is now listed under the Custom Integrations tab. To create an additional custom integration, click Create custom integration.