Flows are the automated sequences you create to streamline your IT operations. The Flows tab provides a central location to view, manage, and create these flows.
Flows Tab
The Flows tab provides a comprehensive overview of all your created flows. Each flow is listed with its details to help you monitor status and manage your automations.
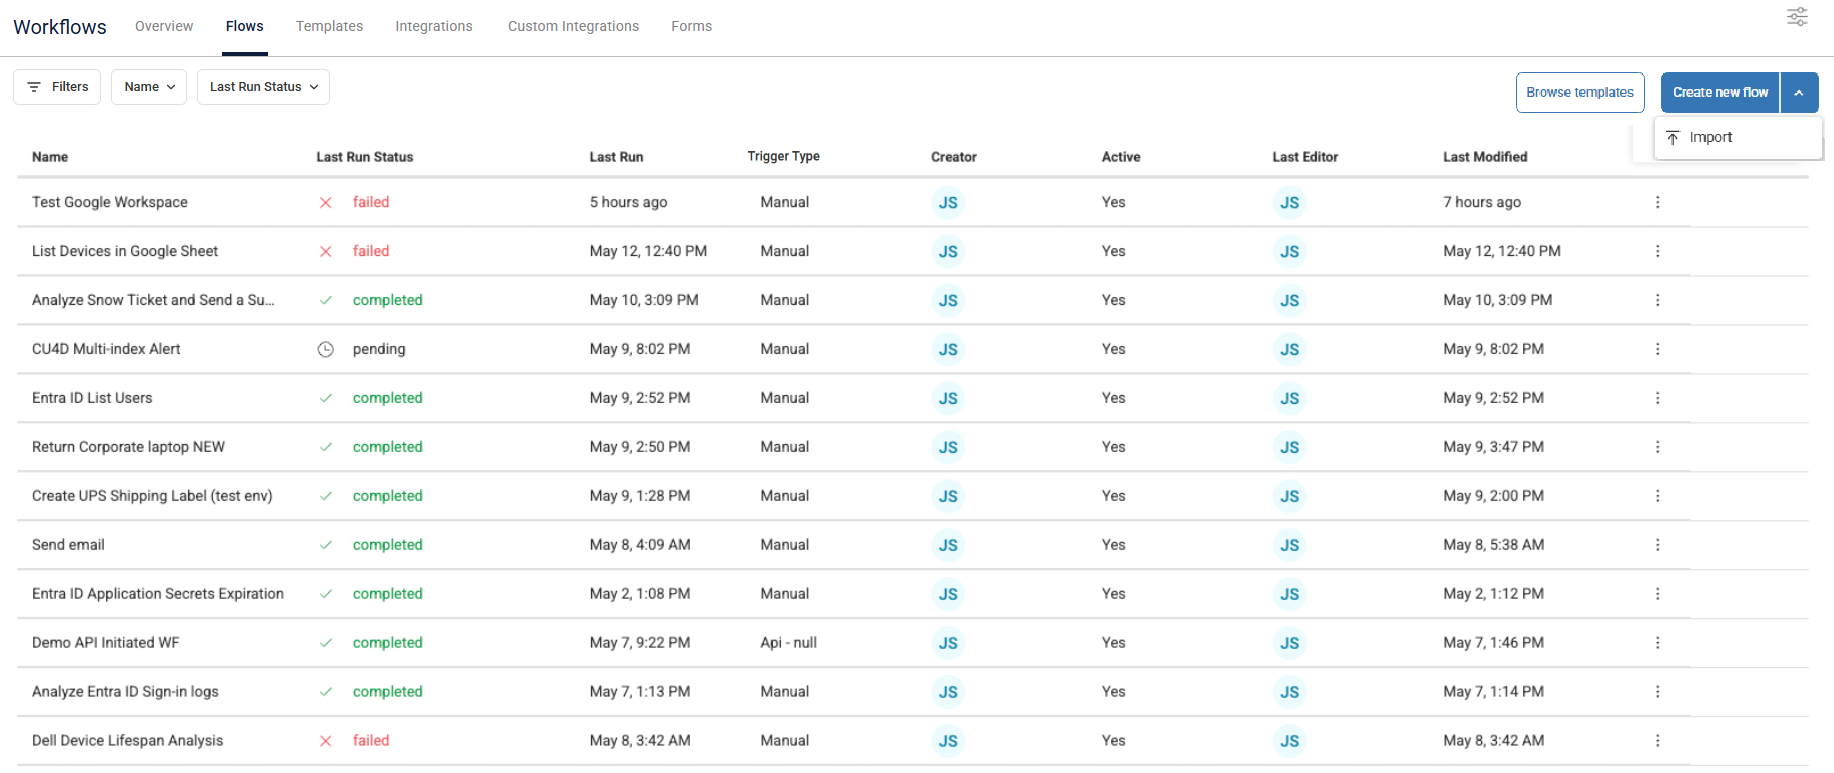
The Flows tab displays the following information for each flow:
Name: A descriptive name you assign to the flow, making it easy to understand its purpose. This name can also be automatically generated using our built-in AI flow name generator after you have finished creating your flow.
Last Run Status: The result of the most recent flow run. The Timed out status means the flow run reached its timeout limit. A single node times out after 60 minutes, and the entire flow after 24 hours.
Last Run: The date and time when the flow was last executed.
Trigger Type: The type of trigger configured to execute the flow.
Creator: The user who initially created the flow.
Active: Indicates whether the flow is currently active and will run according to its schedule or trigger ("Yes"), or if it is currently disabled ("No").
Last Editor: The user who last made changes to the flow.
Last Modified: The date and time when the flow was last updated.
Actions: This column contains a menu represented by three dots that provides the following options to perform on the flow:
Run manually
Disable
Export
Clone
Generate template
Delete
Create Flow
You can create your own flow manually, adding nodes and connecting them as described here, or you can use one of our out-of-the-box flow templates. You can also generate a reusable template to create new flows from existing flows. For details, see Use Templates.
To begin building a new workflow manually follow these steps.
Step 1: Add Flow and Builder Canvas
In the Flows tab, click Create new flow in the top right corner. The flow builder canvas opens. This is where you can visually design your automation sequence by adding and connecting various nodes.
To work on an existing flow, click the arrow icon to the right of the Create new flow button > Import a flow.
Optionally click the string Untitled Flow at the top left to give your flow a name. Use a name that reflects what this flow accomplishes. You can also finish creating your flow and then let our AI-powered Flow name generator give your flow a name reflecting the flow’s contents.
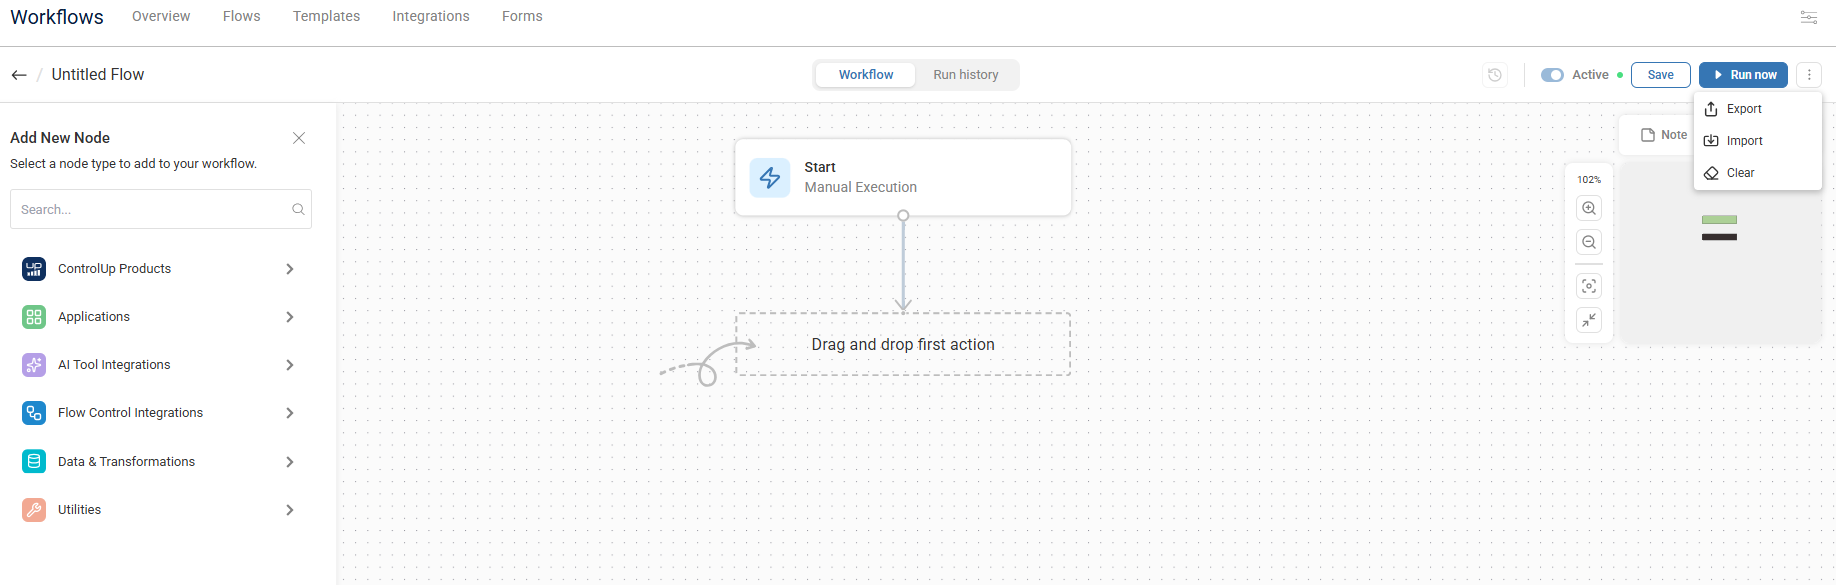
Add New Node: This sidebar on the left provides a categorized library of available nodes that you can add to your workflow. These nodes represent various actions, triggers, logic controls, and integrations with external systems. The sidebar is organized according to node categories, allowing you to easily search and navigate to the nodes you need.
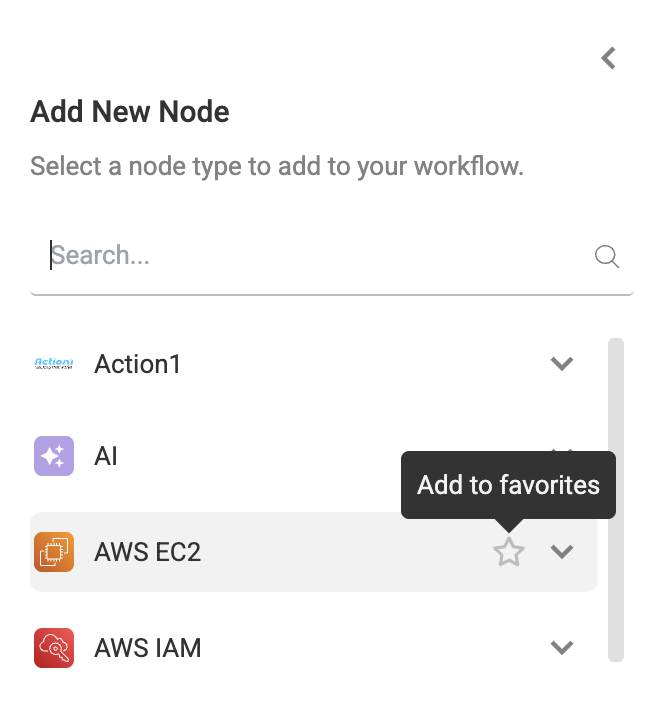
You can set your most frequently used integrations as favorites for easy access on the flow canvas. Favorites will automatically appear at the top of the sidebar, making it faster to locate and add essential tools. To set a node type as a favorite, click the star icon next to the integration name.
Canvas: The large central area is where you visually construct your automation. You drag and drop nodes from the left sidebar onto this canvas and connect them in a sequence to define the flow of your automation.
Workflow/Run history toggle tabs: Allow you to switch between the workflow design view and a view of past executions or real-time runs. The Run history page displays the total count of runs and Successful runs for the flow.
Execution Controls:
Timestamp icon to view the version history of the flow
Run now to execute the live flow
Save to persist your changes
Enable/Disable to activate or deactivate the workflow
More Options (...) to Export, Import, Clone, Clear, Generate template, and Delete
Step 2: Define Flow Initiation: Start Node
Every workflow begins with a Start node. This node defines how your automation is triggered or activated. The Start node offers the following primary options for initiating a workflow:
Schedule
API
Manual
Listener
Form
Click the Start node to open the sidebar on the right. Select how your flow is activated under Trigger type.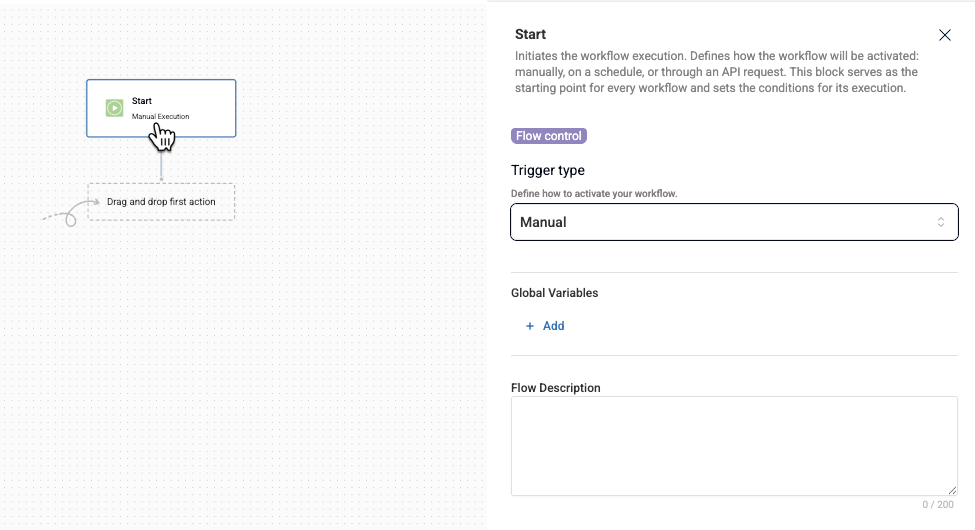
To learn more about trigger types, see here.
Variables and Description
Once you assign a Trigger type, you can also use the start sidebar to:
Add Input Variables to the flow. If your flow requires dynamic inputs to start, provide values here that can be reused in downstream steps of the flow.
Add Global Variables to the flow. Let’s say different steps of your flow need an email address. You can create a global variable for the flow and assign the email address you need to use as the value for the variable.
Use Mask Variables to explicitly conceal sensitive values throughout your flows and the Workflows UI. To mask a value, click the lock icon
 next to the field of Input Variables or Global Variables. You can use Mask Variables in HTTP nodes.
Add Output Variables to the flow. Here you can define what this block should return in downstream steps.
Write an optional Flow Description for what the flow does and how it is activated.
When you enter text into the variable search bar, the system automatically searches across all available fields to instantly find the variable you need.
Step 3: Add an integration node
To build your workflow, you browse the available nodes in the left sidebar, drag the nodes onto the canvas, and then connect them in the logical order you want your automation to follow. You then configure the specific settings and inputs for each node in the workflow.
You can select any of the actions listed under configured integrations from the Add New Node sidebar (for example, Gmail, Azure VM, ServiceNow, etc.) and drag them onto the workflow canvas. Once an integration node’s action is on the canvas, it represents a specific action you can perform within that external system. For example, under Gmail integration, you can drag one of its action nodes onto the canvas, such as Create Draft, List Drafts, or Send Email.
The potential actions are all listed under each integration. To build your flow effectively:
Browse the integrations and their relevant actions to understand what you want to accomplish with each flow. A search bar at the top of the sidebar allows you to quickly find specific nodes by name or function.
Link these integration nodes together to define the sequence of actions in your automation. You visually connect the output of one node to the input of the next, creating a logical flow.
Nodes that are not yet configured as an integration in your flows are indicated with an exclamation mark icon ( ). You can still use the node and add the configuration while you are building your flow. Click the node and in the right-hand configuration panel, a message appears warning that the integration is not configured with a Configure iterations link, that you can click to access the Add Integrations panel.
For details on adding integrations, see Workflow Integrations.
Node-level testing
You can test individual nodes directly on the canvas, with no need to run the entire flow. This makes debugging faster and more efficient. You provide the test data for a node and instantly view the output to validate logic, troubleshoot integrations, and confirm variable values.
You can test nodes that perform data transformations, evaluations, or calculations with well-defined inputs (e.g., conditionals, scripting, mapping).
You can’t test the following:
Start nodes
Nodes that depend on a specific runtime or full-flow context
Nodes that cause irreversible actions (e.g., send email, modify external systems)
To test a node:
On your canvas, configure a testable node in the right-hand configuration panel and click Test.
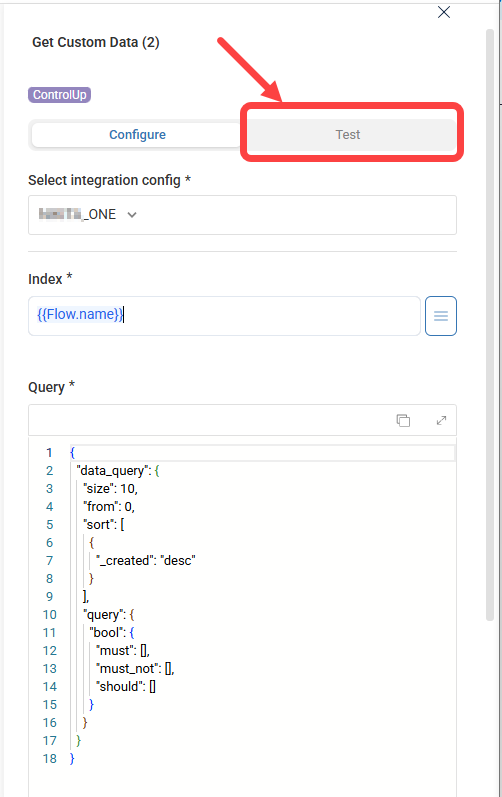
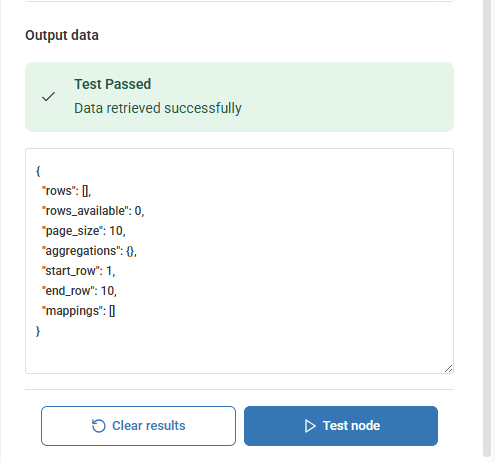
Enter all required values as needed and click Test node.

The Output data shows if the test passed successfully or explains why it failed.
Step 4: Add Function and AI Nodes (optional)
To support and enhance these integrations, the platform provides function nodes organized into these categories:
ControlUp Products
Applications
AI
Flow Control
Data & Transformations
HTTP
You can also add AI actions to your flow, such as Analyze Logs, Create Email, Create Report, Device Lifespan Analysis, and more.
These nodes enable you to define logic, manipulate data, and add intelligent features to your automated processes.
For example:
With Flow Controls, use an If/Else node to send a different email notification based on the status returned by a monitoring integration. Use a Loop node to process a list of users retrieved from a database integration and perform an action on each user using another integration.
You can use the String Manipulations nodes to process data being sent to or received from the integration nodes. For example, you could use Regex Match node to extract specific information from the response received from an API call made through an HTTP Request integration.
The use of Integrations, with functions and AI is what allows you to build complex and highly customized automation flows within the platform.
For details on all the options with examples, see Functions and AI.
Step 5: Connect Nodes in the Workflow
Once you have multiple nodes on the canvas, you must connect them to define the sequence of actions:
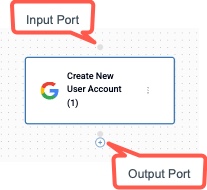
Output Ports: Most nodes will have one or more output ports, typically represented by small circles or connection points on the bottom of the node. These indicate where the data or control flow exits the node after it has executed.
Input Ports: Similarly, most nodes will have one or more input ports, usually on the top, indicating where the node receives data or the signal to execute.
To connect two nodes, on the flow canvas, click the output port of the first node and drag a line to the input port of the second node. Release the mouse button to establish the connection. This visually represents the flow of data or execution from one step to the next.
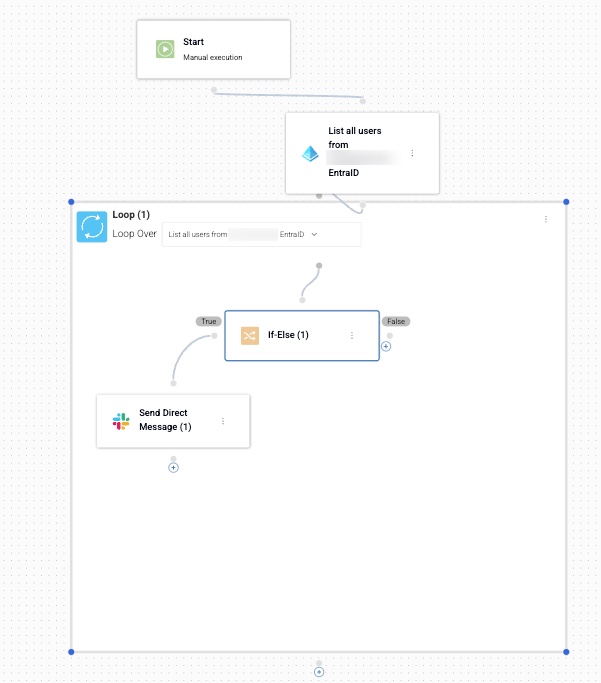
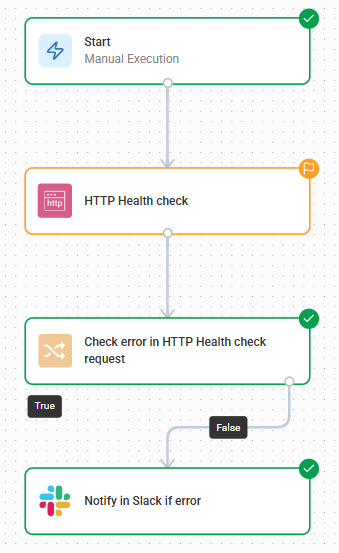
When you add functions, these can serve as container nodes. For example if you add a Loop node, this should serve as a container for the data that is retrieved more than once and where that data is output. The connections for these container nodes and within them provide more flexibility and power to your flow.
Here’s an example of containers and functions working together. The Loop function is a container for an If-Else function. The flow loops through to check a list of Microsoft Entra ID users and if the user is found, sends a Slack message.
Edit Your Flow
Use the flow canvas to build and refine your flow. You can move nodes, connect their input and output ports, and place nodes within flow controls.
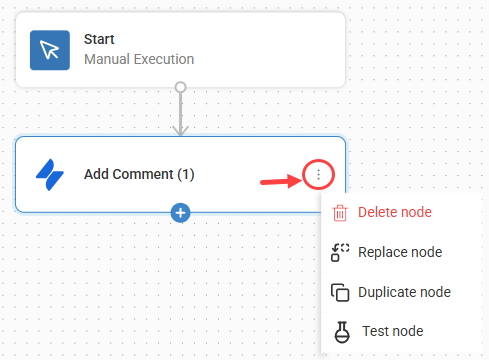
To manage a node, click the ellipsis on the node. The available options include:
Replace node: Replace the selected node with a different node.
Duplicate node: Create a copy of the selected node and its configuration.
Test node: Test the selected node without running the entire flow.
Disable action or Enable action: Temporarily skip the selected node, or restore it, without deleting its configuration or connections.
Disable downstream or Enable downstream: Temporarily skip the nodes that follow the selected node in that branch, or restore them.
Delete node: Remove the selected node from the flow.
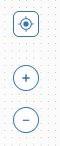
Use the navigation controls in the bottom-left corner of the canvas to focus the view and zoom in or out.
To edit a previously saved version of the flow, click the timestamp icon at the top to browse the version history. For instructions to edit a previous version, see here.
Skip Failed Nodes
If a specific node in your flow fails, you can enable the flow to ignore the error and continue running. To ignore errors, navigate to the Flow logic area in the node details and click the Ignore error toggle.
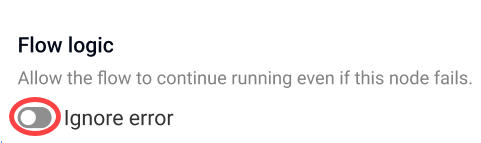
Now, if an error occurs while the node performs an action, the flow will ignore the error and continue to run:
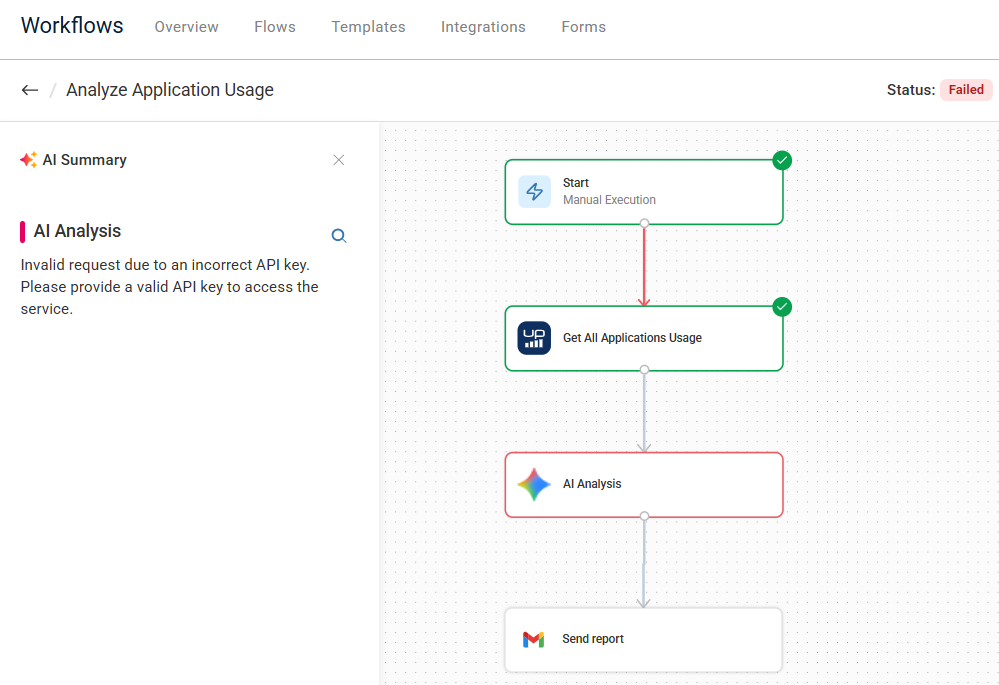
Debug Your Flow with AI
If your flow run fails, you can debug with AI to quickly understand what went wrong, and where. The AI Summary highlights the exact node that failed and explains the issue.
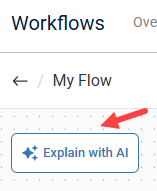
After a failed run, click Explain with AI in the top left corner.
The AI Summary lists the specific node(s) that failed during the last run. When you click a failed node, the AI Summary also appears at the bottom of the node details. It explains which actions you must perform to debug the issue and successfully rerun your flow.
Perform the required actions to fix your flow and click Save. Now, run your debugged flow.