Insights On-Premises is a powerful application that provides a modern UI for analyzing historical data of your monitored machines. IOP stores, captures and indexes the data that is received from activity files created by the ControlUp Monitor. The IOP forwarder, a component used to upload the data from monitor machines to the IOP server(s), must be installed in your environment to provide historical data in Insights.
Although deploying the IOP server from an OVA file is the recommended way, you can also opt for a Linux-based installation. In this case, we provide installation packages for the Insights software and you can install it on your own Linux machine. Refer to the Linux-based installation guide to learn more.
Installation Files
Contact us at support@controlup.com to get the latest OVA file.
Prerequisites
VMware vCenter Server with a vSphere Web Client installed
From version 8.8 MR, vSphere version 7.0.3 or higher is required
OVA file for IOP
Important Information on Root User
The root user for SSH connections is disabled. This increases the security level of your IOP machines by reducing their attack surface.
If you use a version prior to IOP 8.8, use the cuadmin user to access the IOP server via SSH. From version 8.8 and higher, use the admin user.
IOP Modes
You can operate your IOP servers in two different modes - standalone and clustered. We cover the installation of both modes in this article.
Standalone. A single server which is recommended for small environments with fewer than 5000 concurrent sessions.
Clustered. The deployment consists of one master node and one or more data nodes (master/slave model). The number of data nodes that you should deploy depends on the number of sessions in your environment as shown in the sizing examples. The data nodes are the machines where the Insights data is stored.
System Requirements
You can find system requirements for your IOP server(s) here.
Installation Guide
This section guides you through the installation of a standalone IOP server and clustered IOP environment.
Deploy a New Standalone IOP Server
Follow the installation guide in this chapter to deploy a new standalone IOP server with the OVA file. Note that the file you use for the installation may have a different file name.
To install a new standalone IOP server:
Copy the OVA file to your machine on which you access your vCenter Client.
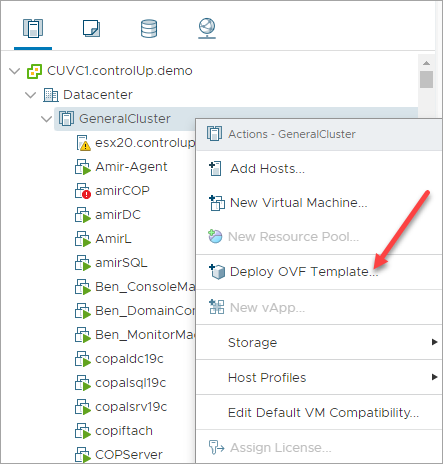
In your vCenter Client, right-click a data center and select Deploy OVF Template.
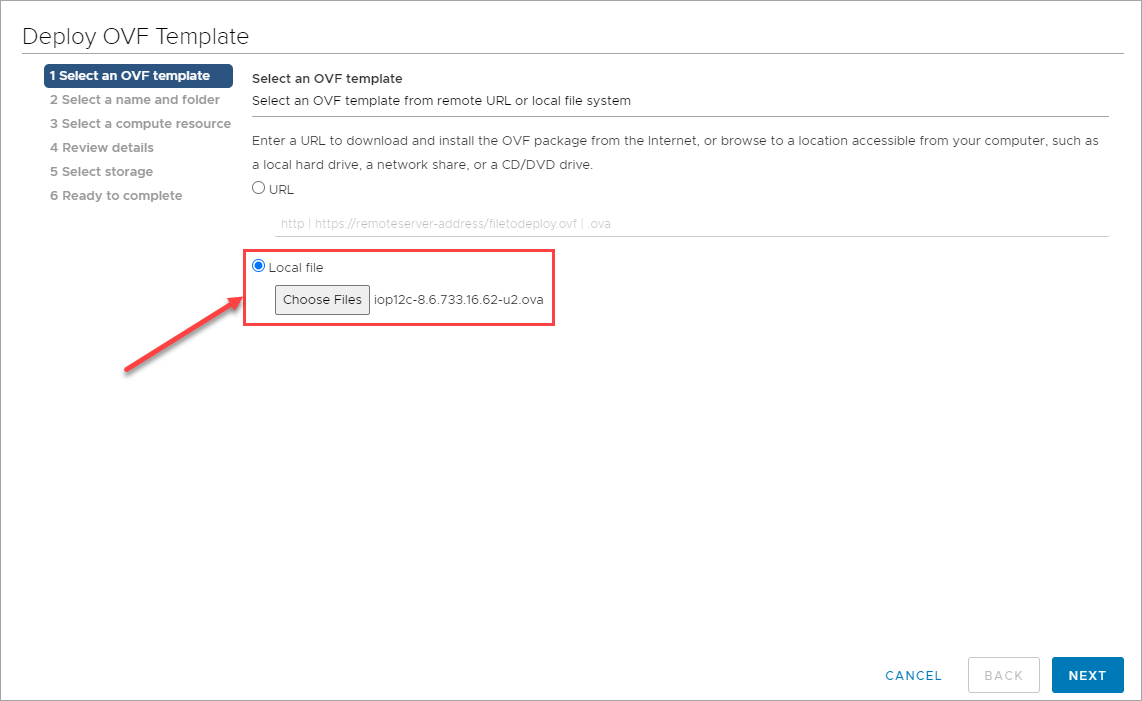
Choose Local file and browse to the OVA file. Click Next to continue with the VM settings.
Under Virtual machine name, provide a unique name for the appliance and select a deployment location. Click Next to select a compute resource.

Note
The VM name that you enter here is not the hostname of the machine, but the displayed name of the VM in vCenter.
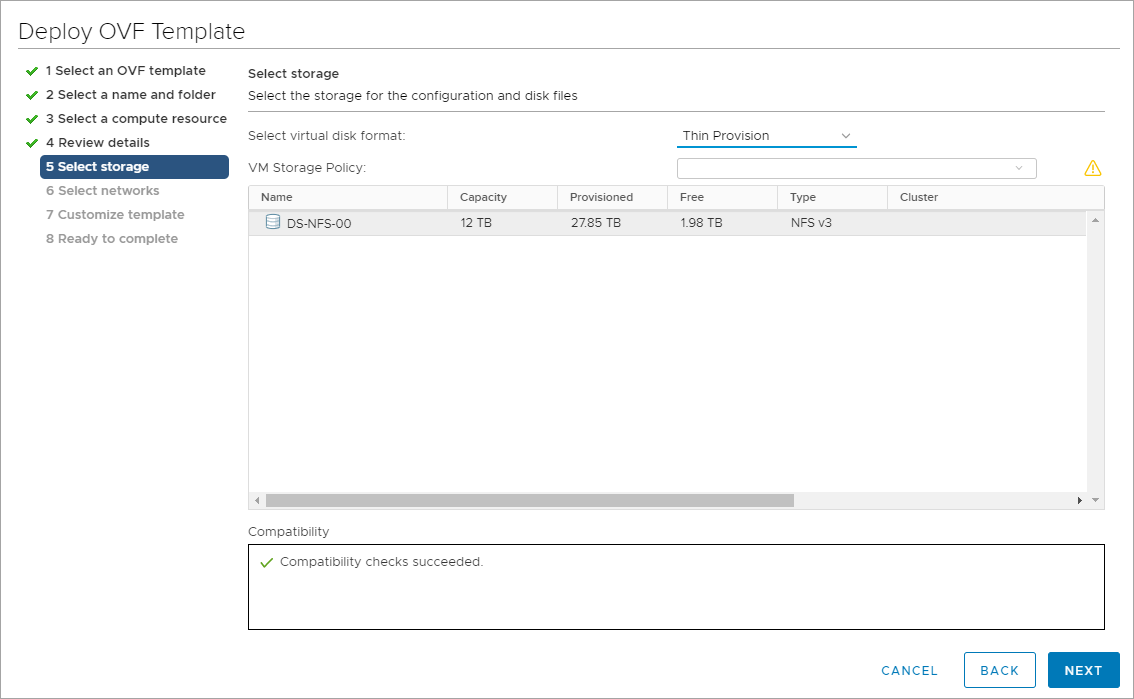
In the Select Storage page, you specify where to save the deployed template files. Click Next to review the deployment settings.
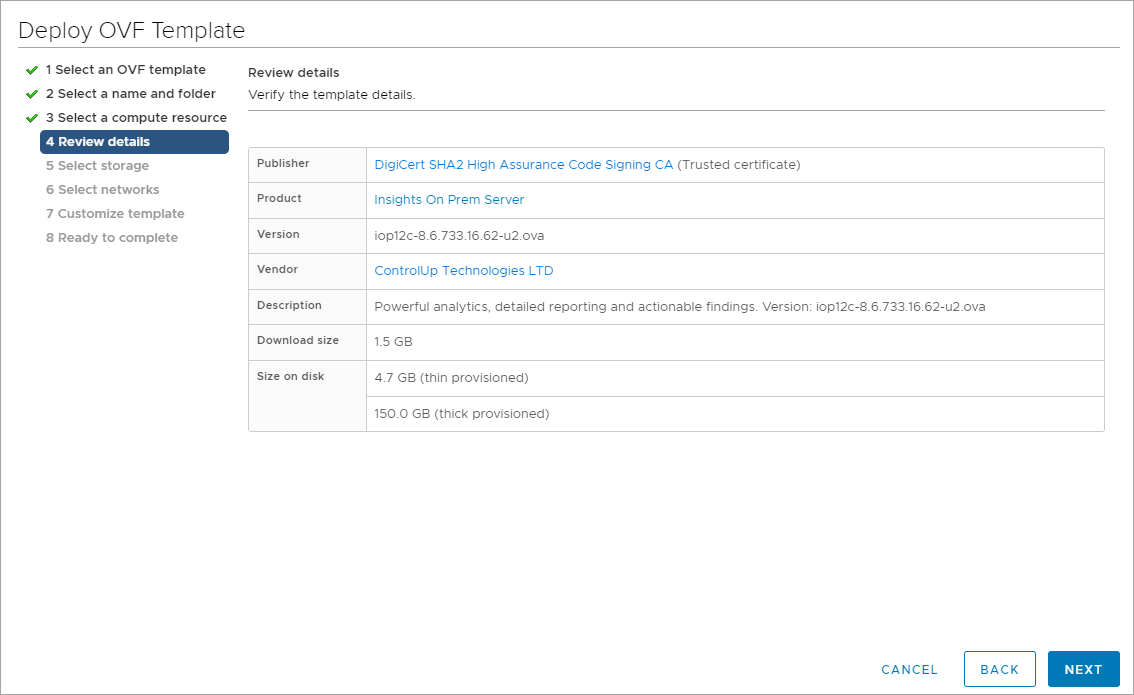
Review the details and click Next to select the storage.
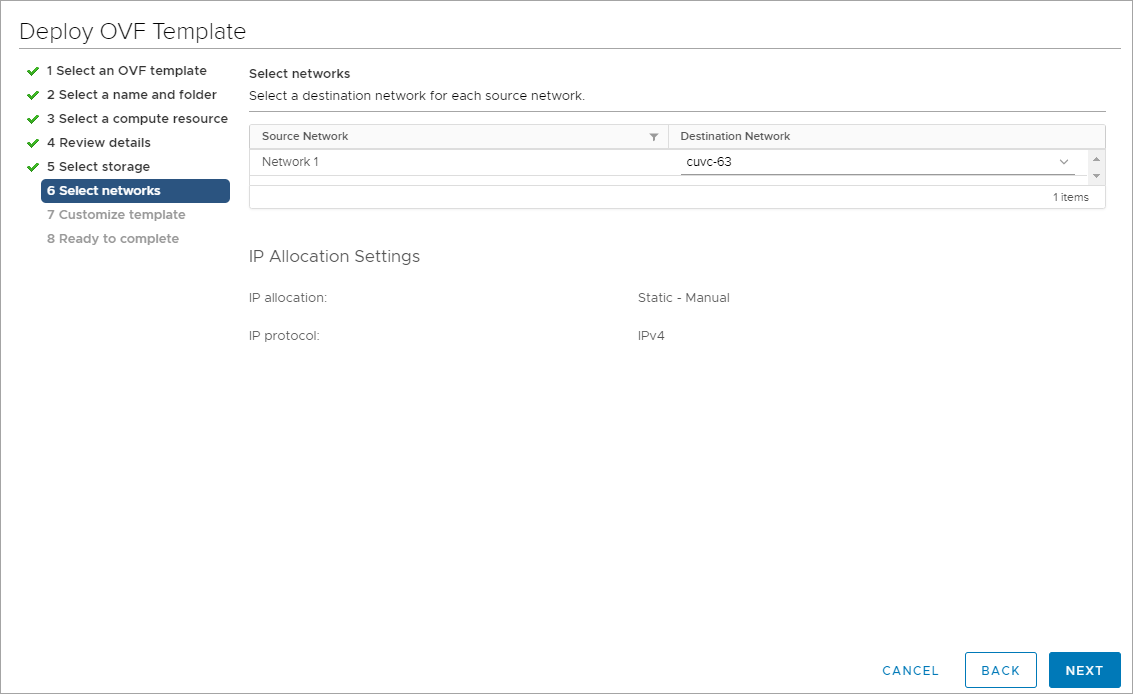
Select a datastore that will hold the virtual disk files and the configuration file. Click Next to configure the network for the virtual machine.
Select the destination network and click Next to customize the template.
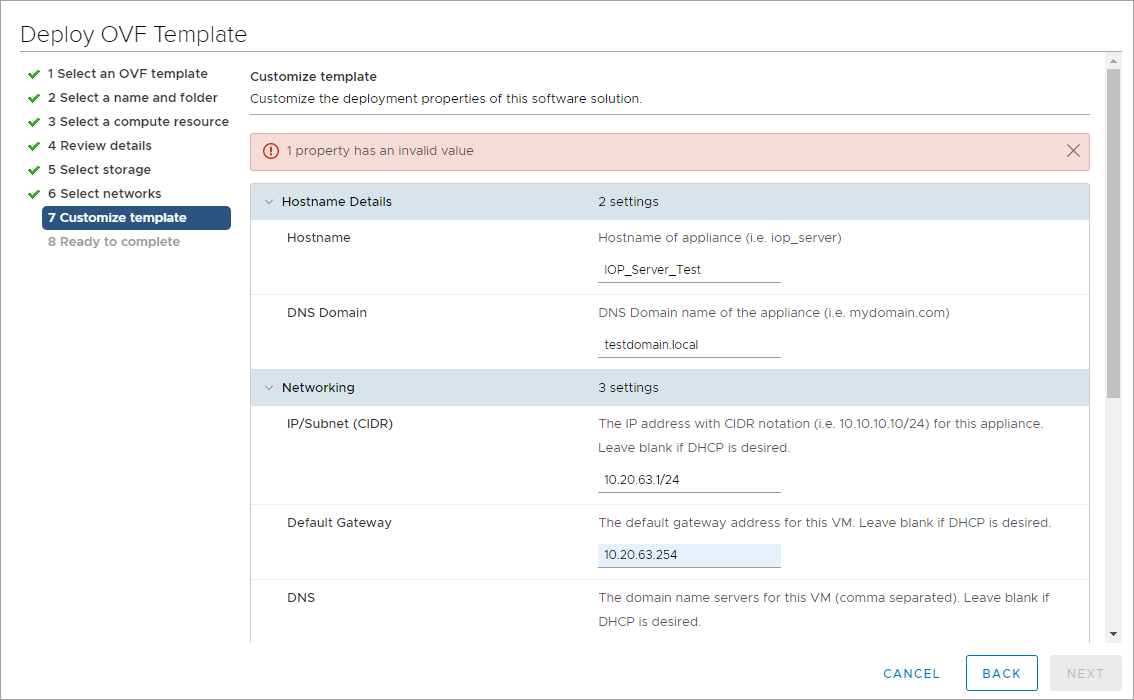
In the customize template wizard, fill the following information. After entering all the required information, click Next.
In the Hostname Details tab:
Hostname. Hostname of the virtual machine.
DNS Domain. Domain under which the virtual machine should run.
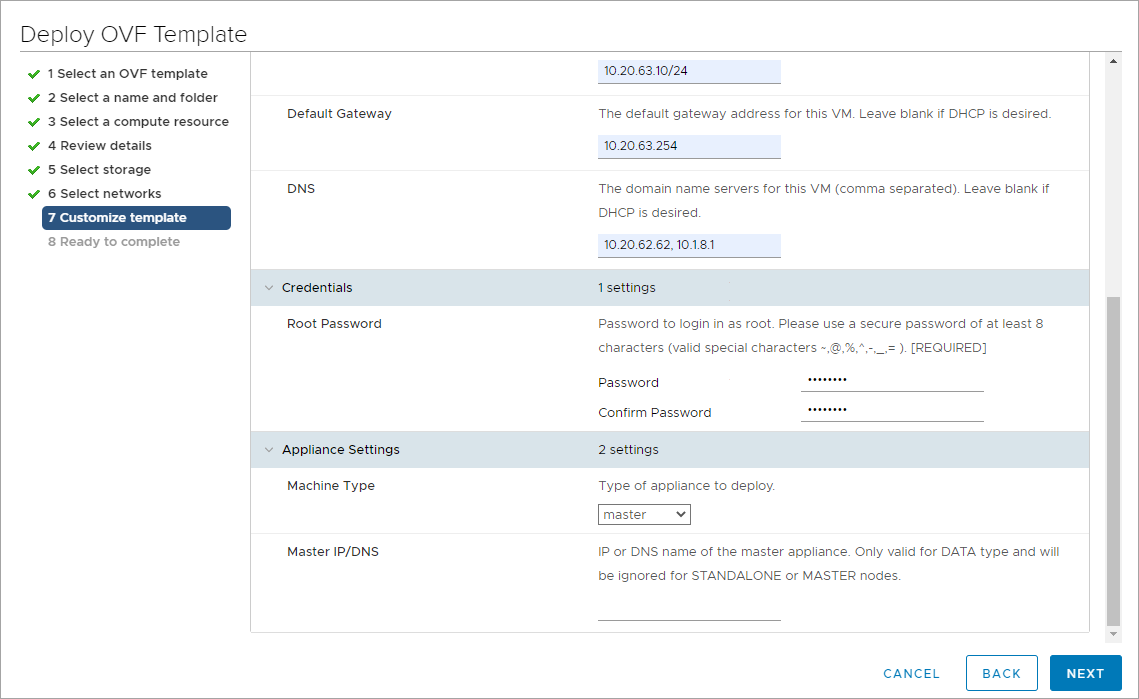
In the Networking tab, add the following fields. If you want to use DHCP, leave these fields empty:
IP/Subnet (CIDR). IP address of the virtual machine and the subnet mask in CIDR notation. When you enter the IP, the Subnet value after the slash (e.g., /24 in 10.20.30.45/24) represents the CIDR prefix length, indicating the number of relevant bits (24) used to define the subnet.
Default Gateway. IP address of the default gateway of the virtual machine.
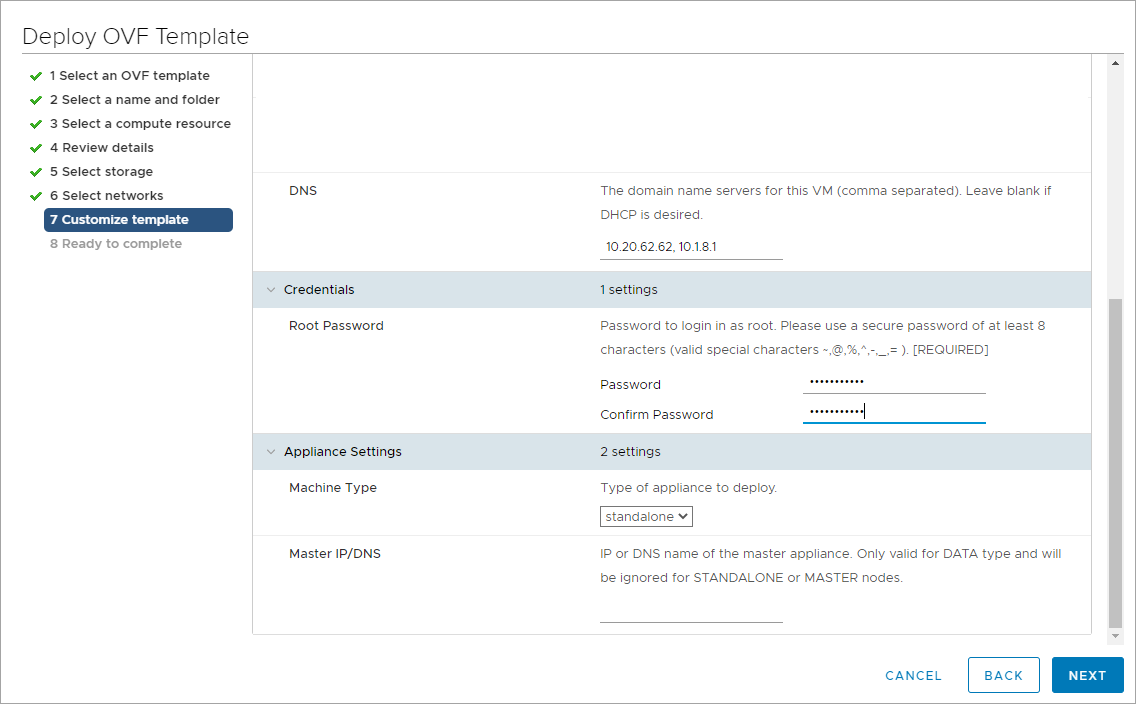
DNS. IP address/es of your DNS servers. If you want to use DHCP, leave this field empty.
In the Credentials tab, provide a strong password for the admin user (cuadmin, prior to IOP 8.8).
The password must be at least 8 alphanumeric characters in length and contain at least one of the following special characters: ~ @ % ^ - _ =
In the Appliance Settings tab:
Machine Type. Choose standalone as the type of the IOP deployment.
Master IP/DNS. Skip this step for the standalone installation.
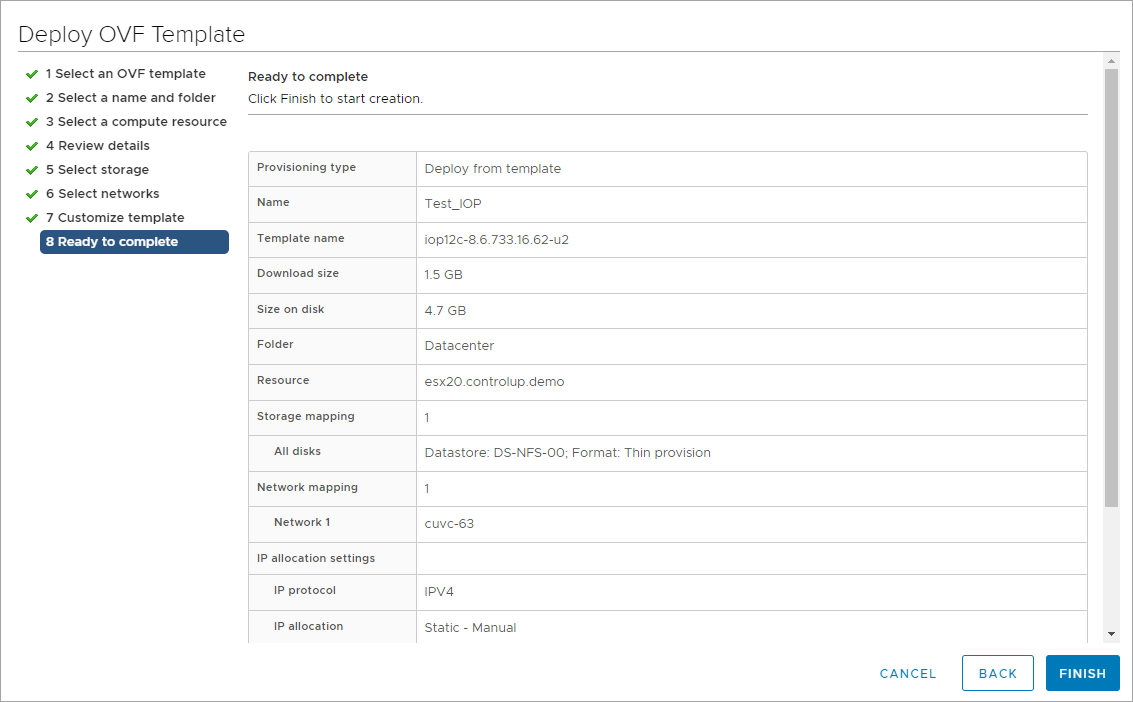
Click FINISH to run the installation of the new IOP server.
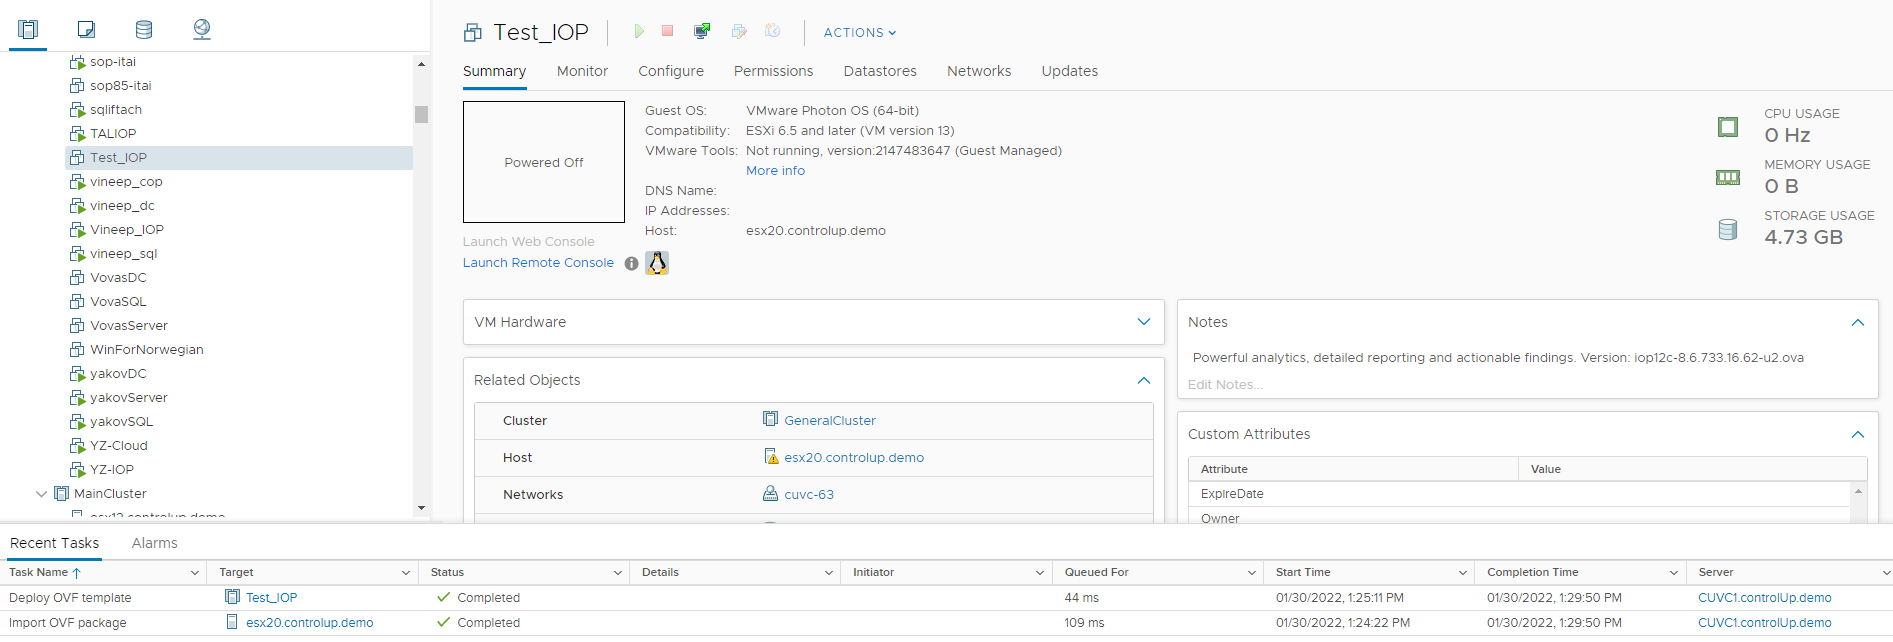
Once the deployment is complete, the IOP server is created in the VM list on the left side.
Deploy IOP Server in a Cluster
If you monitor more than 5000 users in your ControlUp organization, we recommend implementing a distributed IOP environment. A cluster is useful for replicating data among multiple data nodes. When deploying a clustered IOP environment, you first have to create a master node that manages the cluster and then at least one data node. For sizing recommendation, refer to the Insights On-Premises Prerequisites section.
1. Deploy the Master Node
The first step in the installation of a clustered IOP environment is to install a master node.
To install a master node:
Log in to the vCenter Server with a user that is assigned an Administrator role on the vCenter.
In your vCenter client, right-click a data center and select Deploy OVF Template
Select Local file and browse the OVA file. Click Next to continue with the VM settings.
Under Virtual machine name, provide a unique name for the inventory object and select a deployment location. Click Next to select a compute resource.
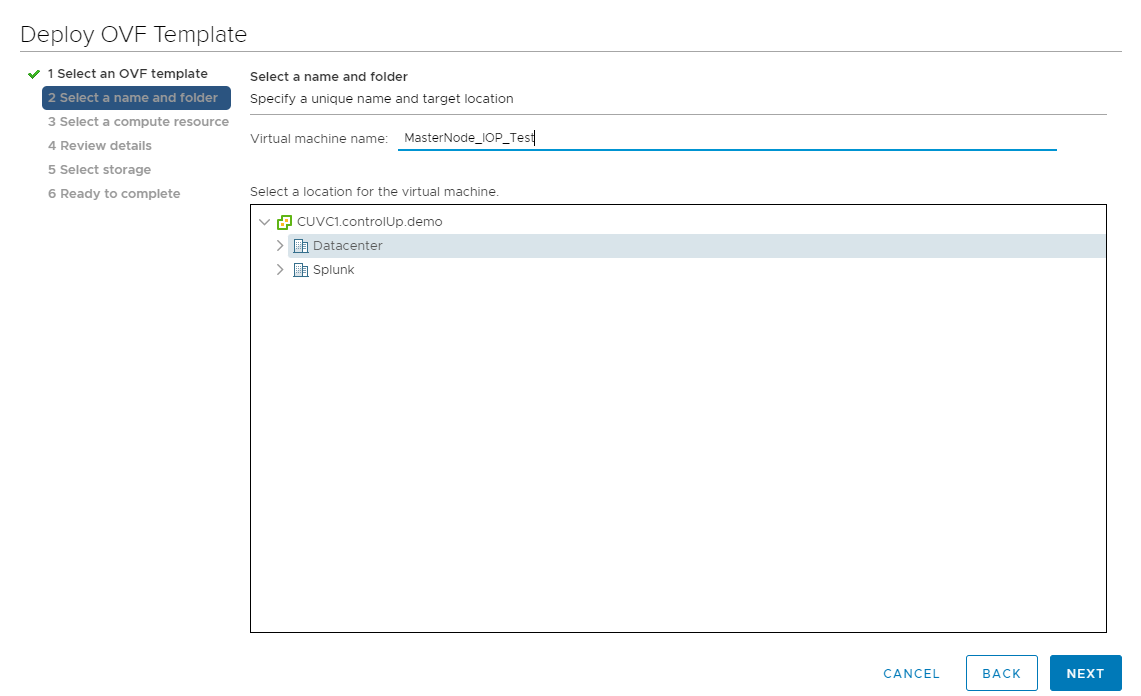
Note
The VM name you enter here is not the hostname of the machine, but the display name of the VM in vCenter.
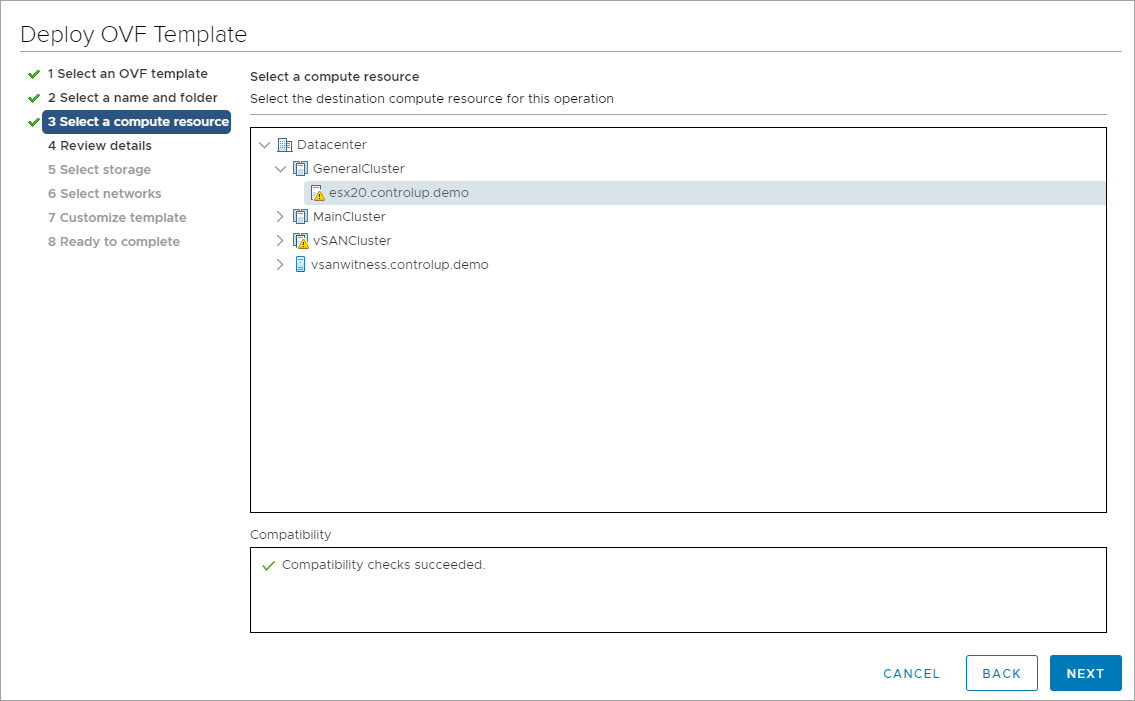
Select the compute resource and click Next.
Review the details and click Next to select the storage.
Select a datastore on which the virtual disk files and the configuration file are saved. Click Next to configure the network for the virtual machine.
Set your preferred destination network and click Next.
Fill out the following information in the customize template wizard. Click Next after entering all the necessary information to create the master node.
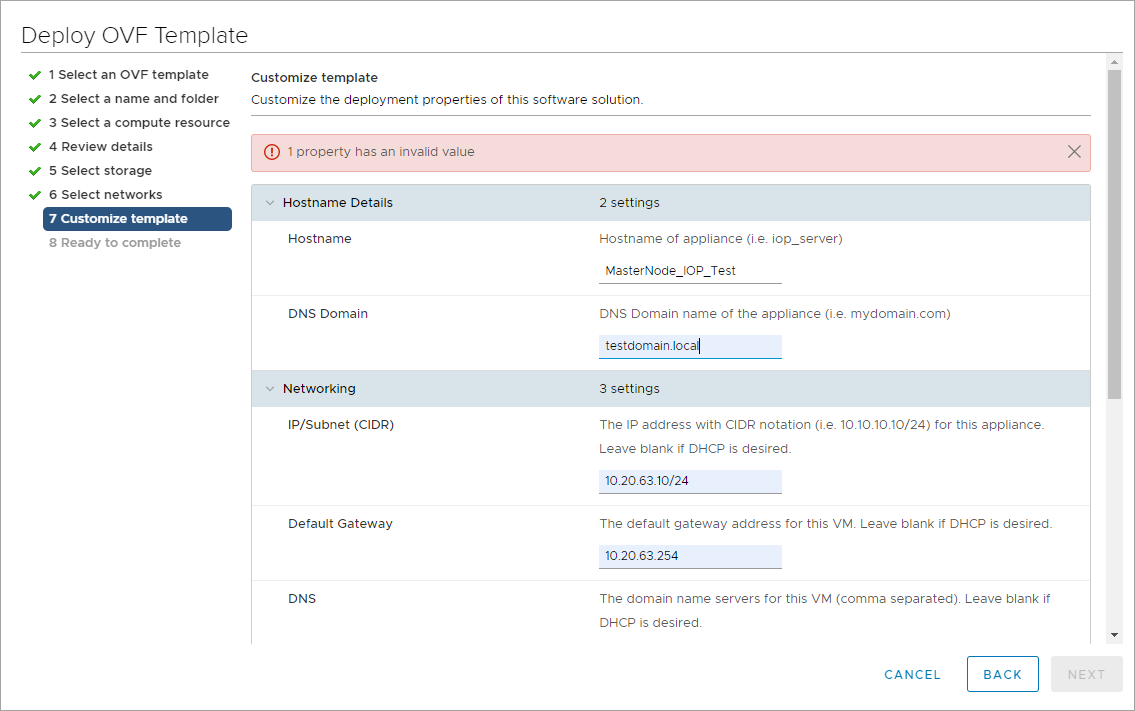
In the Hostname Details tab:
Hostname. The hostname of the virtual machine.
DNS Domain. The domain under which the virtual machine should run.
In the Networking tab:
IP/Subnet (CIDR). The IP address of the virtual machine and the subnet mask in CIDR notation. If you want to use DHCP, leave this field empty.
Default Gateway. The IP address of the default gateway. If you want to use DHCP, leave this field empty.
DNS. The IP address(es) of your DNS servers.
In the Credentials tab, provide a strong password for the root user.
The password must be at least 8 alphanumeric characters in length and contain at least one of the following special characters: ~ @ % ^ - _ =
In the Appliance Settings tab:
Machine Type. Choose master as the type of the IOP deployment.
Master IP/DNS. Skip this step as you currently install the master node.
The next step is to deploy your first data node, explained in the following section.
2. Deploy your First Data Nodes
A clustered IOP environment consists of at least one data node where the historical data is stored. Having master and data nodes provides high availability and disaster recovery through data duplication and searching capabilities.
To deploy a data node:
Repeat steps 1-8 from the deployment of the master node.
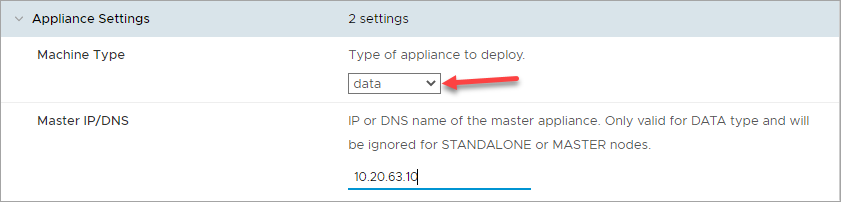
Customize the template as described in step 9. As the Machine Type, choose data. In the Master IP/DNS field, provide the IP or DNS of the master node.
Repeat these steps for all other data nodes you want to deploy.
Post-Installation
Change Disk Size of Data Partition
After completing the installation of the master and data node/s, you need to perform a post-installation configuration in which you need to increase the capacity of your virtual disks. The minimum storage requirements are covered in the Insights On-Premises Prerequisites.
Note
In a clustered IOP environment, perform these steps on the master node and each data node.
To change the hard disk size:
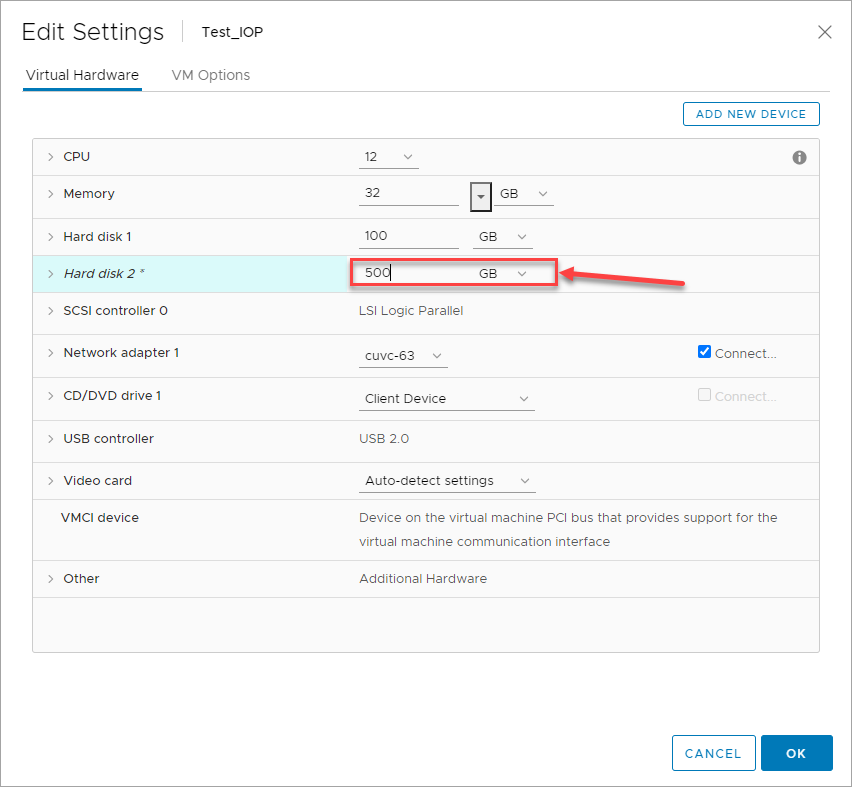
Right-click the new IOP server and select Edit Settings.
Increase the capacity of Hard disk 2, from 50 GB to a higher value, such as 500 GB. In general, the more storage you assign, the better. Click OK to apply the changes.
Verify Connectivity
You can now test the connectivity of your IOP server by following these steps:
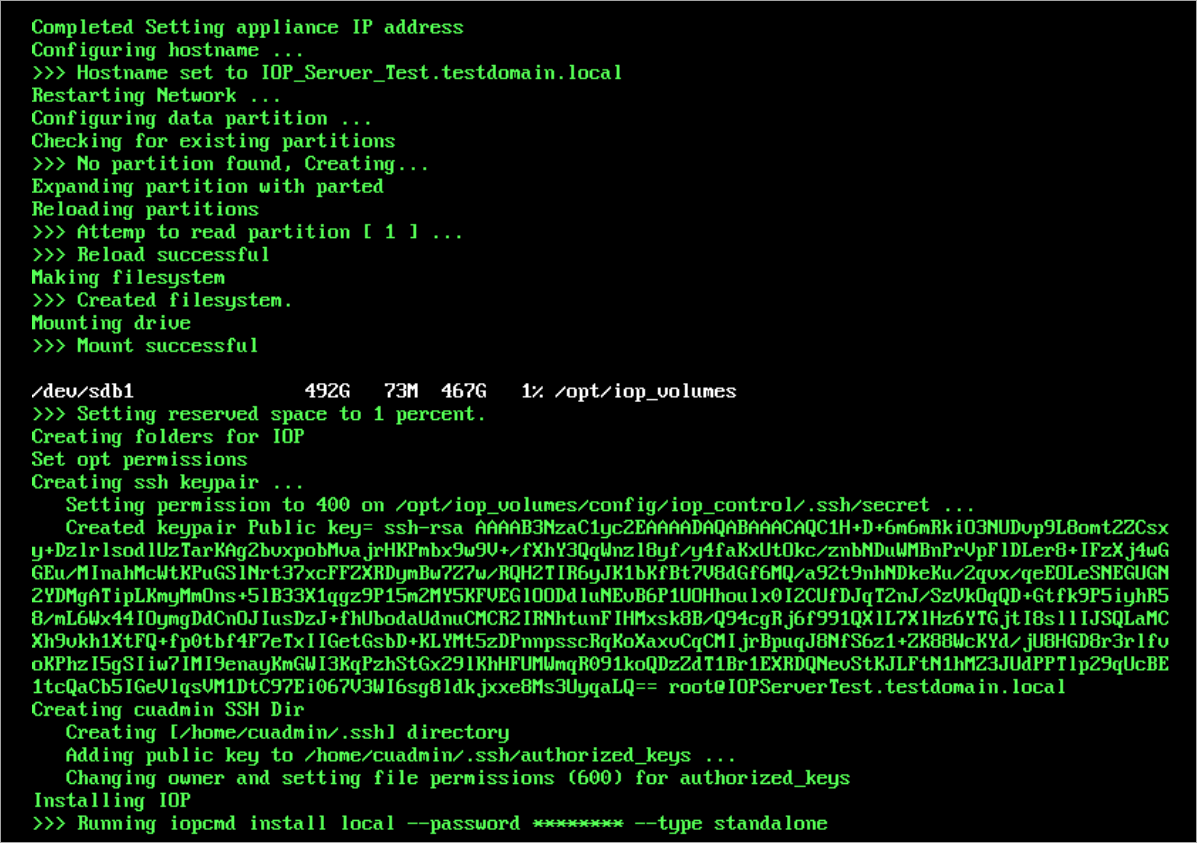
Start the virtual machine and wait until the startup script completes.
Connect to the appliance by using the root user and the password you provided during the OVF deployment.

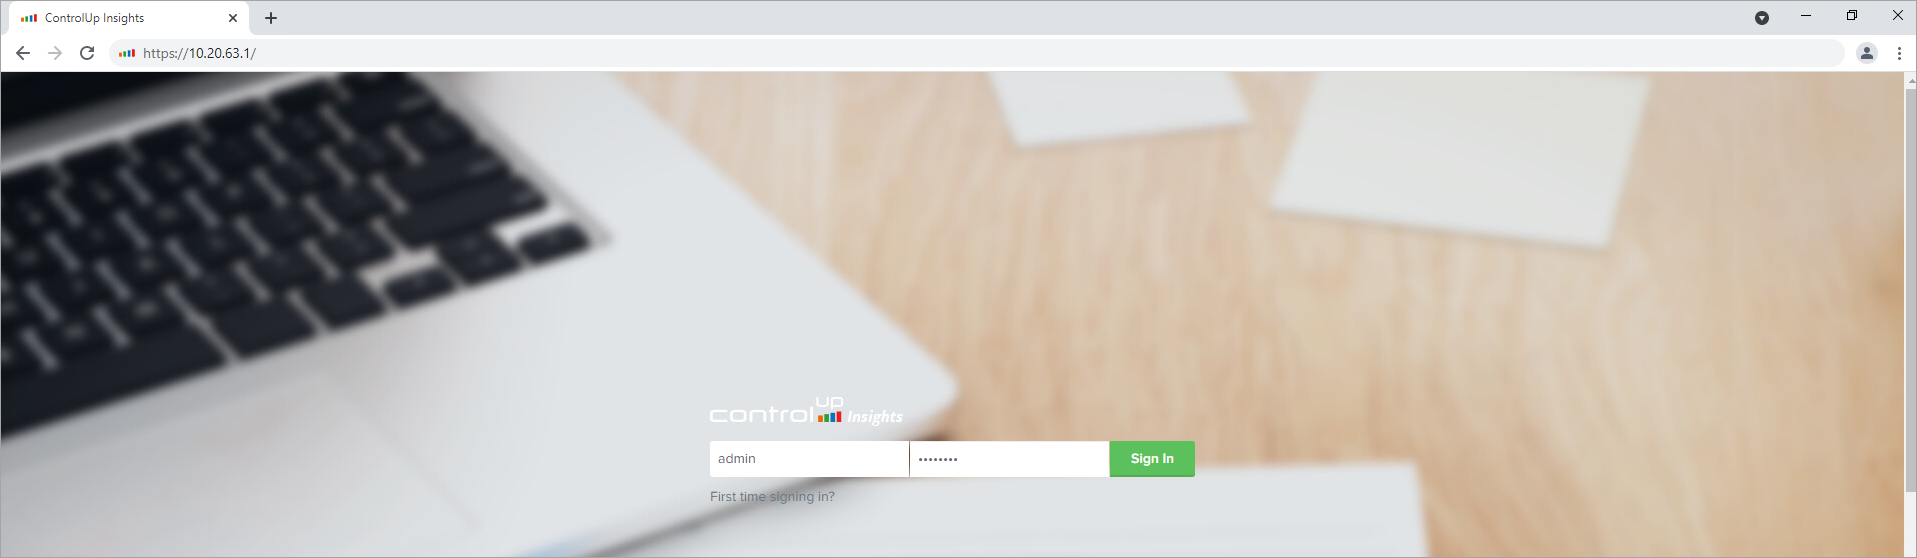
Open a browser window and enter the IP address or hostname of your IOP machine. Log in with the user admin and the password you defined during the OVF deployment. To log in to the IOP backend, click Sign In.
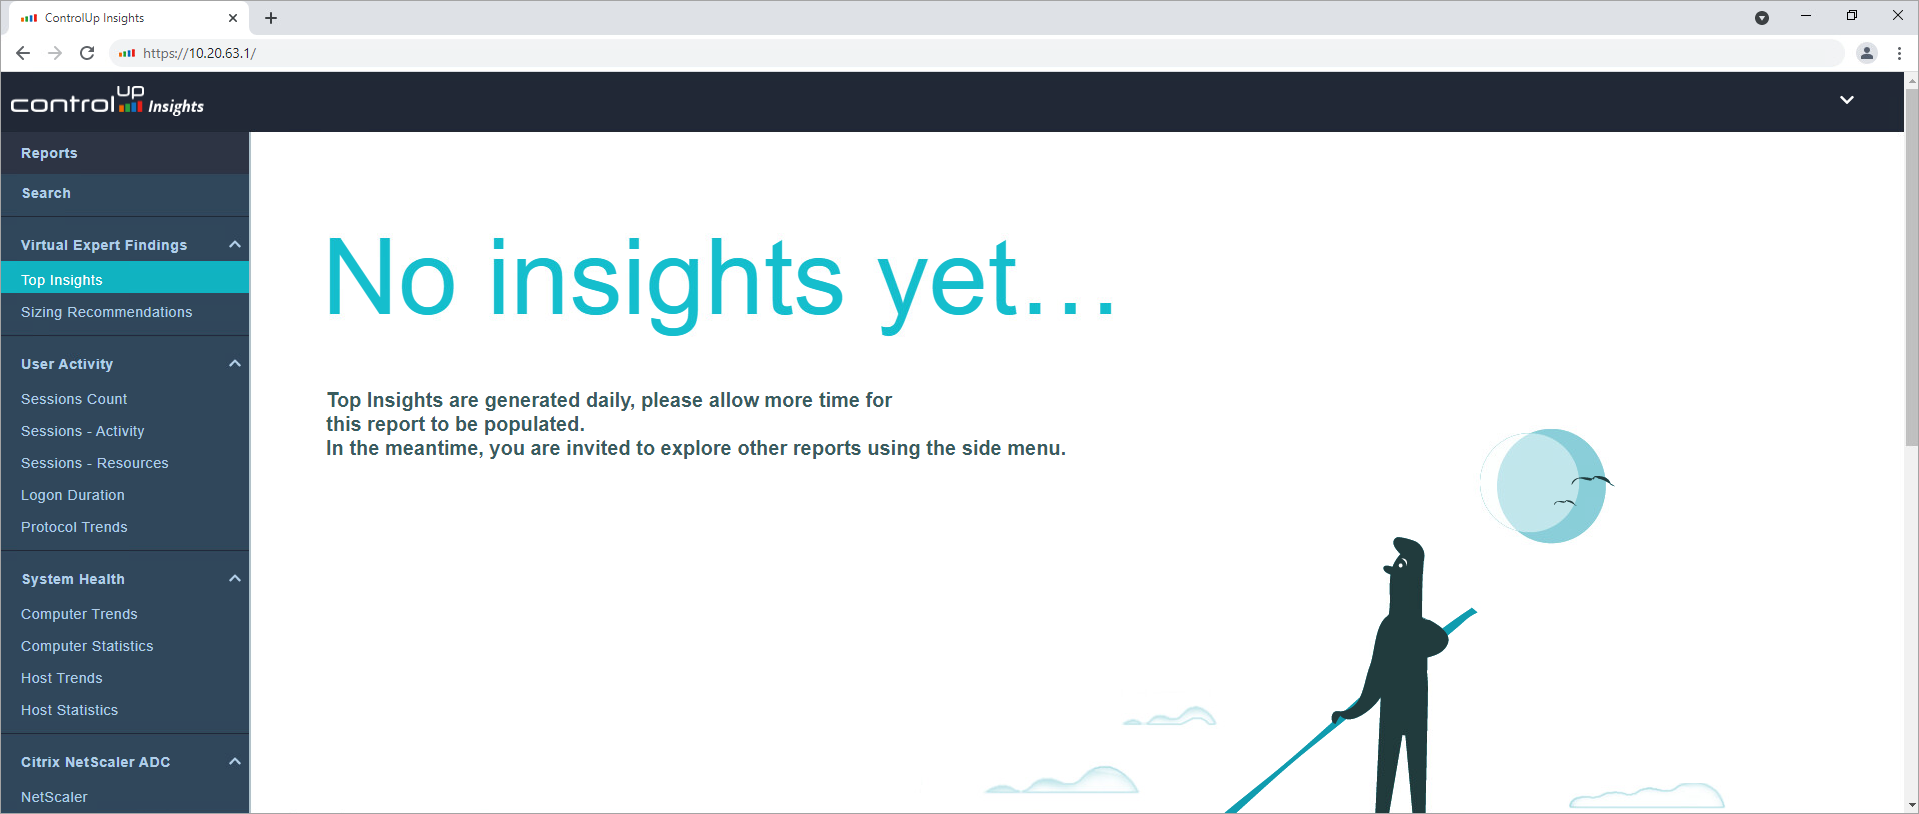
If the login is successful, the main page, the Top Insights report of Insights is displayed.
Make sure that all containers are in "Running" state by entering the Administration UI.
If you want to use your SSL certificate to secure the connection between the IOP and COP server, refer to the Insights On-Premises: Replace Certificate.