Important
This feature is still in Beta. You can join our Beta program here.
Based on the Microsoft migration API, our tool to migrate to Windows 365 automates the process from VM selection to provisioning a new cloud PC. IT teams can realize time savings and potentially lower their costs for the transition.
This article outlines the steps required to prepare your environment and configure Azure permissions for our ControlUp Windows 365 Migration tool. You must complete these prerequisites once per tenant to enable snapshot-based provisioning and Cloud PC creation via the Microsoft Graph API.
After you complete the prerequisites, you can move your organization’s Azure VMs to Windows 365 Cloud PCs. Get started here.
System Requirements
Azure Active Directory role: Global Administrator or Cloud Application Administrator.
Microsoft Azure subscription containing the VMs or AVD Personal Desktops to migrate.
Windows 365 Enterprise license for each target user.
Step 1: Register App in Azure Portal
To register apps in Microsoft Azure Portal:
Open Azure Portal.
In the Search bar, enter “App registrations” and click App registrations.
Click + New registration.

On the Register an application page, provide a name for the app.
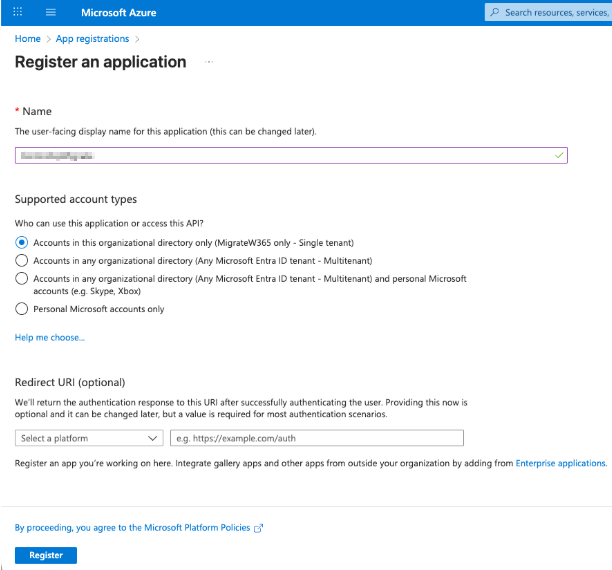
Important: Store the following values for later use during the Windows 365 Migration setup:
Application (client) ID
Directory (tenant) ID
In the app menu under Manage, go to Certificates & secrets and click New client secret.
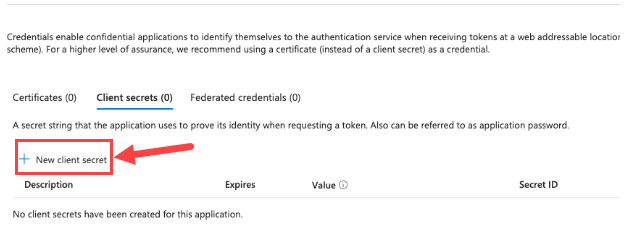
Provide a description and click Save.
Important!
Copy the secret value once it's created. You can’t retrieve it later.
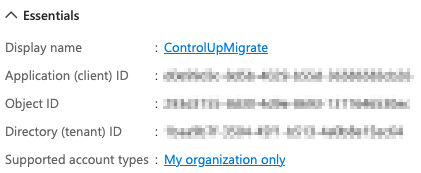
You should now have the following:
Application (client) ID
Directory (tenant) ID
Client Secret
Important!
Keep the client secret secure by storing it in a password vault or Azure Key Vault. Never share or email it in plain text.
Step 2: Grant Microsoft Graph API Permissions
In App registrations, click API permissions > + Add a permission.
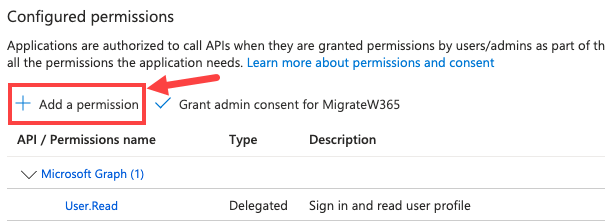
Click Microsoft Graph > Application permissions.
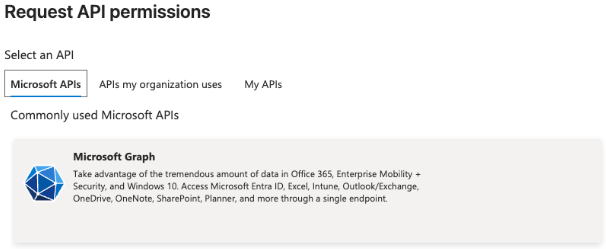
Add the following permissions:
Directory.ReadWrite.All
CloudPC.ReadWrite.All
User.Read.All
Click Add permissions.
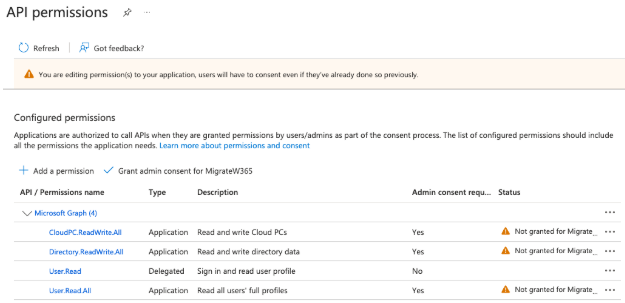
Confirm all permissions are listed under Configured permissions as “Application” type.
Step 3: Grant Admin Consent
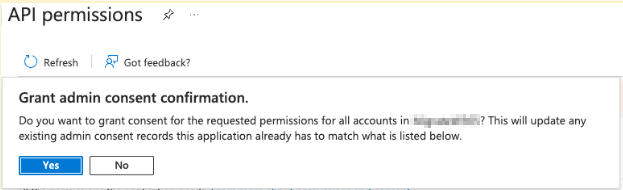
In Application permissions, click Grant admin consent for [Your Organization].
Click Yes.
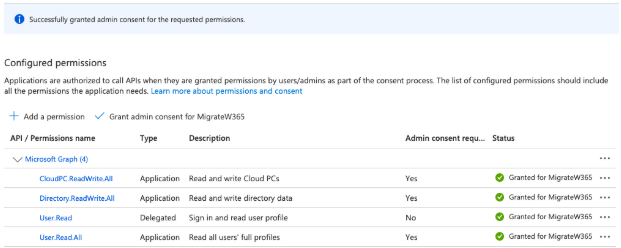
Status updates to ✅ Granted for [Tenant Name].
Important!
The migration tool requires admin consent to access Microsoft Graph API. Without it, snapshot imports and Cloud PC provisioning fail.
Step 4: Add IAM Permissions
Go to Subscriptions and click the subscription that you want to migrate from.
Copy the Subscription ID.
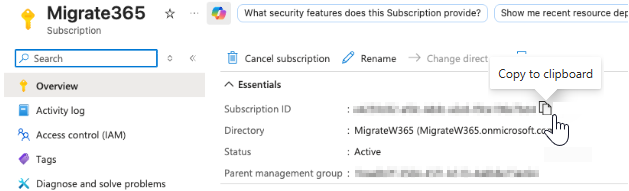
Click Access control (IAM).
Click + Add > Add role assignment.
Add the “Reader” role to the service principal of the app you created in Step 1.
Step 5: Verify Permissions
Verify the following:
Graph permissions list shows all three permissions above with status Granted for [Tenant Name].
Under Enterprise applications, ControlUp Migration for Windows 365 app appears.
Note that the graph might take up to 10 minutes to apply new permissions (no restart needed).
Step 6: Prepare Credentials for Migration Tool
When you log into ControlUp Migration for Windows 365, verify you have the following:
Field | Description |
|---|---|
Tenant ID | Azure Directory ID |
Subscription ID | Azure subscription ID hosting the VMs |
Client ID | Application (client) ID from the registration |
Client Secret | Secret value created earlier |
After entering the above fields, click Verify Permissions to confirm access to Microsoft Graph and Azure Resource Manager.
Final Validation Checklist
Step | Validation |
|---|---|
Register App | App appears under Azure App registrations |
Grant Microsoft Graph API Permissions | Directory.ReadWrite.All, CloudPC.ReadWrite.All, User.Read.All |
Grant Admin Consent | Status = ✅ Granted for [Tenant Name] |
Verify Permissions | "Permissions Verified” message appears |
W365 Enterprise licenses | Each target user licensed |