You can install, inspect, and configure the ControlUp Monitor instances and sites in your organization in the Monitors Settings tab in the Real-Time DX Console.
To open the Monitors section of Settings, click the Monitors icon in the Settings ribbon.
The Monitors tab opens: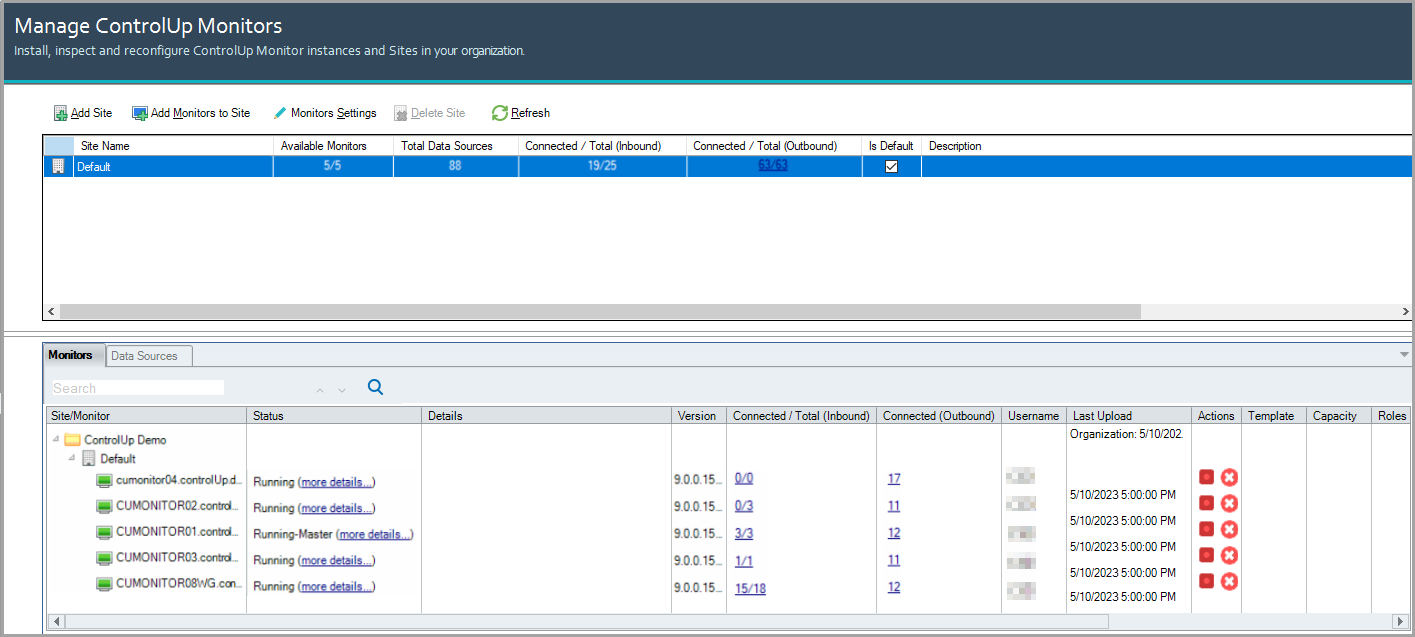
Click the icons at the top of the box to perform the following actions on your ControlUp organization sites and monitors:

Add Site
Add Monitors to Site
Monitors Settings
Delete Site
Refresh
ControlUp Sites
Details about the monitor sites in your organization are displayed in the upper section of the dialog box. Select the checkbox of your default site:
Independent Sites for Large Organizations
Version Compatibility
For the best stability and performance, ensure that all ControlUp Monitor nodes in your environment are running the same Monitor version. This applies whether you use Independent Sites mode or the traditional monitor configuration.
From version 9.1, monitor sites can operate independently from one another, eliminating their reliance on a single Master Monitor. If you monitor a large organization, you can divide your monitor cluster into smaller, self-sufficient clusters that work independently to enhance scalability and fault tolerance.
In versions lower than 9.1, your organization can have multiple monitor sites, but they all require connectivity to a single Master Monitor to delegate tasks between all the other monitors in the cluster. With independent sites, connectivity is no longer required to Master Monitors, as local masters in each site perform the formerly global master role. If you monitor large organizations or MSPs, this feature can significantly improve performance and stability.
With independent sites, you can:
Configure each site with separate, shared credentials and monitor templates.
Update monitor templates with PowerShell cmdlets.
Select a Default Site
If your organization has multiple sites, we recommend that you designate the site which has the highest turnover of addition and removal of machines as the global default site. When you add a machine in the Add Machines dialog box, the site which appears by default in the Select Site field is the default site: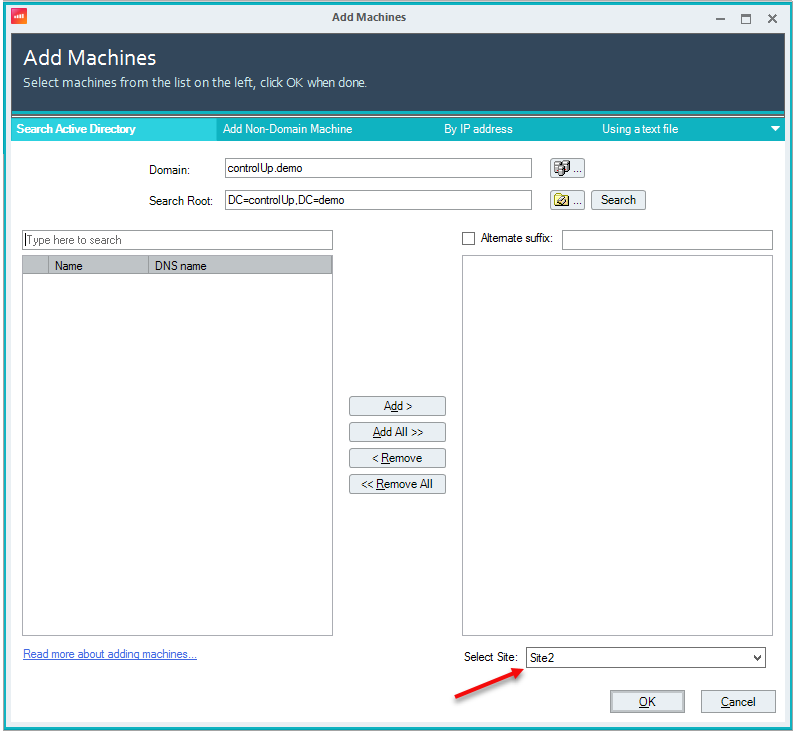
Setting the highest turnover site to appear by default in the Select Site field allows you to skip the step of selecting a site for an added machine for the majority of machine additions. See Add Machines for more information about adding machines to your ControlUp organization.
From version 9.1, if you configure your organization for independent sites, you must select one site as the global site. This default site will contain monitors for management purposes only, not for monitoring.
Configure ControlUp Sites
To change the site that each data source is associated with, click Monitors Settings to open Sites and Monitors - Configuration Wizard > Data Sources :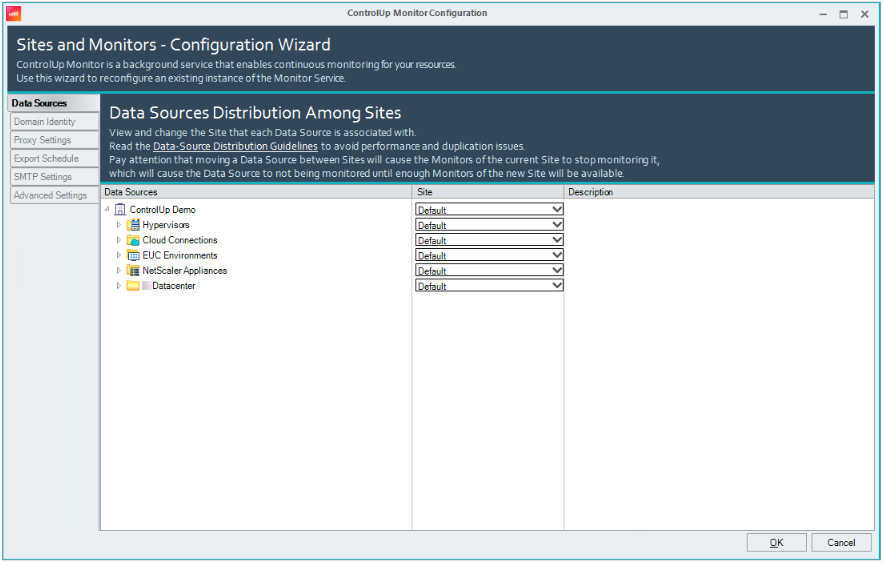
ControlUp Monitors
Details about the monitors in your organization are displayed t the bottom of Monitor Settings. Under the Monitors tab, you can view a list of all ControlUp Monitor instances installed in your organization with their current status displayed: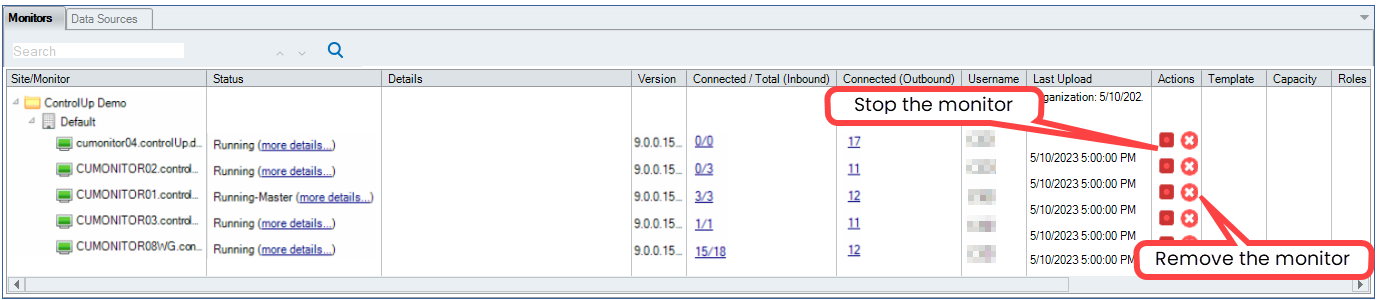
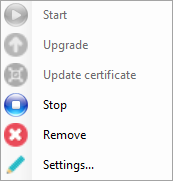
To perform actions on monitors, use the following methods:
Remove or stop a monitor by clicking the buttons, as shown above.
Right-click on a monitor and select one of the options from the menu, as shown below:
Add and Configure a ControlUp Monitor
From version 9.0, you can install the ControlUp Monitor on workgroup machines with PowerShell cmdlets. To learn how, see here.
Click Add Monitors to Site to install a new ControlUp Monitor using the ControlUp Monitor Installation Wizard.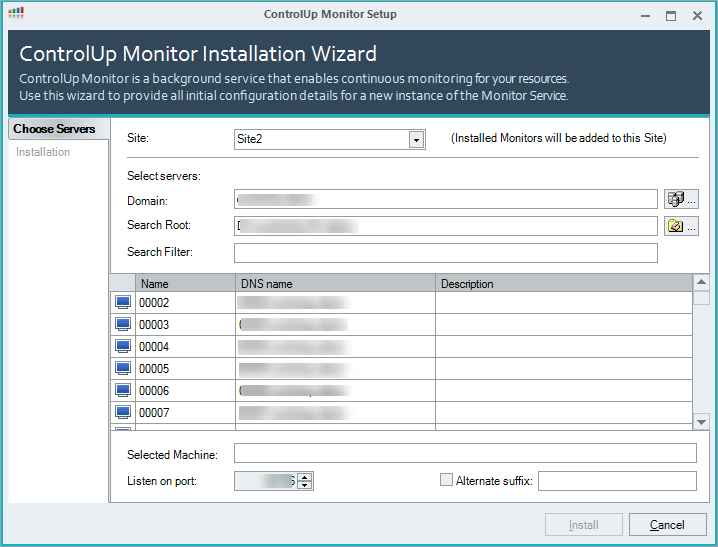
Click Monitors Settings to reconfigure existing monitor instances using the Sites and Monitors - Configuration Wizard.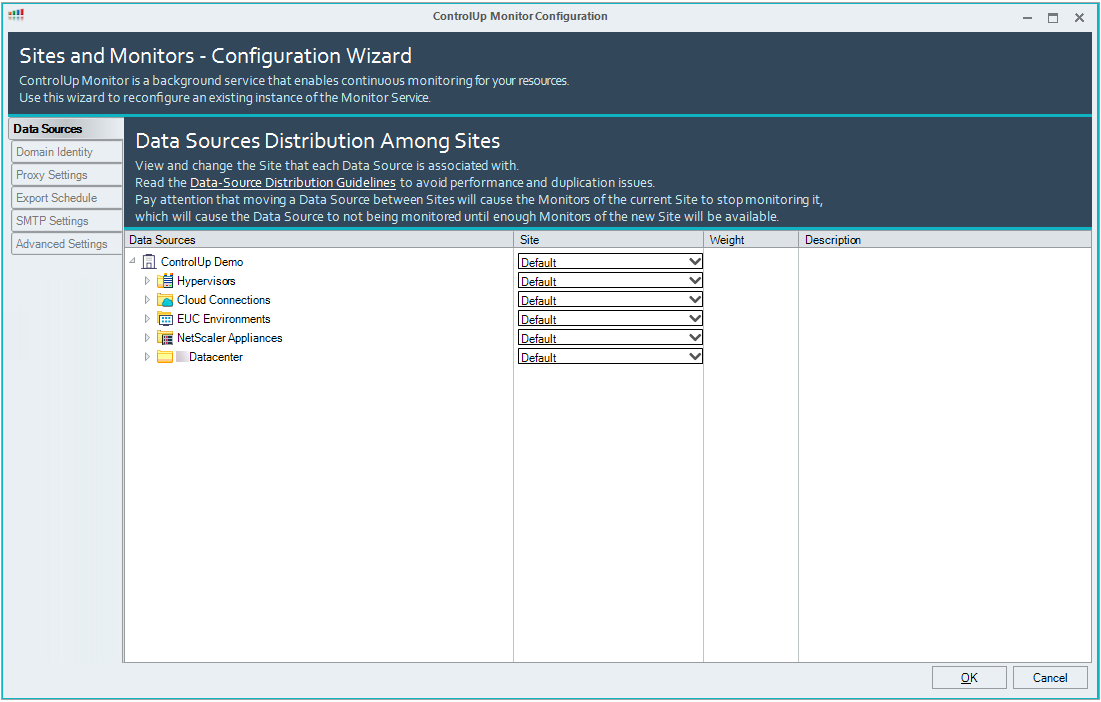
For more information about installing and configuring monitors, see here.
Advanced Settings
To configure performance management options that might help conserve system resources on the machine running the console, use the Advanced Settings tab of the Monitors Settings window: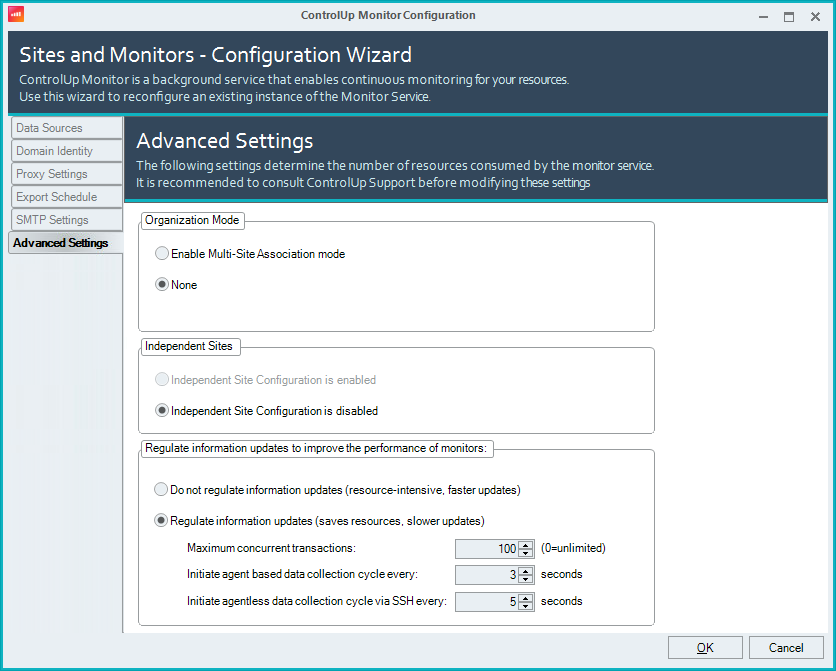
You can configure the following advanced settings:
Organization Mode
For an overview of the following features, see:
ControlUp for Multi-Tenancy Environments. Available for Hybrid Cloud environments only in ControlUp Real-Time DX version 8.8 or 8.8 MR.
Multi-Site Association Feature. Available for Hybrid Cloud environments in versions higher than 8.8.
Independent Sites
You can select to enable Independent Sites mode. Before you enable, you must first assign all current credentials configured under the "All" site to a specific site. To configure Independent Sites mode, see here.
Regulate the rate of performance updates
You can configure ControlUp to pull performance updates from the managed machines instead of receiving push updates. This enables a degree of control over the number of updates received by the console, thus decreasing the amount of CPU cycles and RAM required to process updates.
Note
We recommend you contact our support team before changing this setting. Our support engineers will suggest recommended values for the data collection parameters after assessing the size of your environment and the available resources.
Upgrade a ControlUp Monitor
From version 9.0, you can upgrade the ControlUp Monitor with PowerShell cmdlets. To learn how, see here.
To upgrade a monitor in the GUI, perform the following steps:
From the Monitor Settings window, right-click the monitor that you want to upgrade and select Stop.
Right-click the stopped monitor and select Upgrade.
After the upgrade is finished, right-click the montior and select Start. You can confirm that the monitor version has been upgraded by checking the Version column.