You can use webhooks as Follow-up Actions, as part of ControlUp's Trigger feature. Webhooks provide a way to send real-time notifications to an external system once a trigger is triggered. You can configure triggers with PowerShell cmdlets.
What is a Webhook?
A webhook is a user-defined HTTP(S) callback that you can use to push information or notifications to a configured URL via an HTTP(S) POST call. For example, you might want to notify users in a Slack channel if one of your production machines reaches a critical Stress Level. Webhooks can be used in a number of situations where they prove useful. In this example, we will create a Machine Stress Level trigger that, when activated, will send a message to a Slack channel with machine information: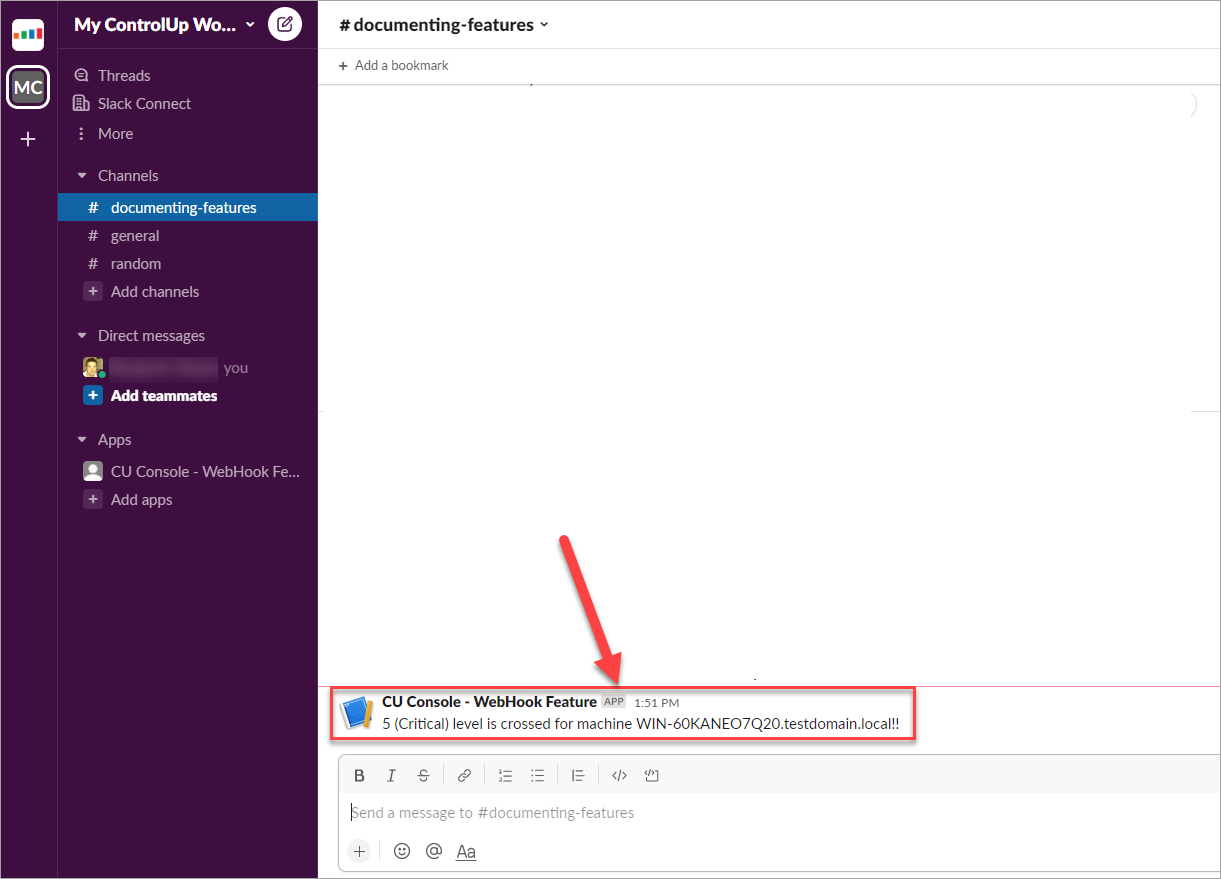
Technical requirements
To follow the instructions in this article, you need to meet the following prerequisites:
At least one ControlUp Monitor installed. This is a general prerequisite for using triggers. Additionally, monitors need internet connectivity to reach the API endpoint.
A ControlUp license with activated Automated Actions. You can check if your license includes the Automated Actions feature in the Real-Time Console by clicking Help > About > Licensing.
Step 1 - Get your Webhook Provider Ready
Before you begin configuring a trigger in your ControlUp environment, make sure that you completed the setup of the webhook for the API provider. We will use the Slack API, click here and follow the instructions to set up and configure a webhook in Slack.
You can use the webhook Follow-up Action with other webhook receivers, such as GitHub, Dropbox or Zendesk.
Step 2 - Optional: Send Test Message
After setting up your service endpoint, you can send test messages from the monitor machine by using an API testing tool of your choice. By testing messages, you can verify outbound and inbound traffic to/from the service endpoint. Add the URI, create a test message in JSON format and send the HTTP(S) PUT request, as shown in the screenshot below.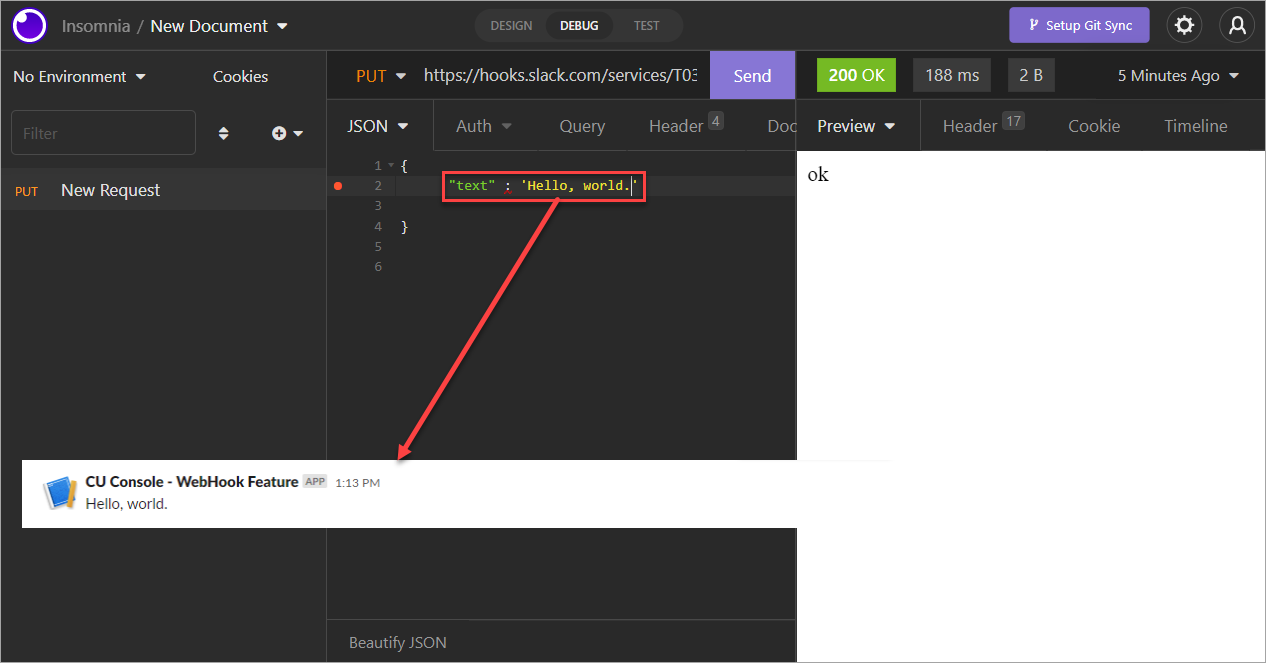
Later, you will see how to test messages within the Real-Time Console. For now, if you received a 200 OK status code, then your service URI is ready to be used.
Step 3 - Use a RESTful API request Webhook as a Trigger Follow-up Action
To create a trigger that uses a webhook as a follow-up action, perform the following steps:
Follow the procedure under Create a Trigger until step 9. After you configure all of the conditions and requirements for the trigger to activate, and are ready to define a follow-up action, continue with these steps.
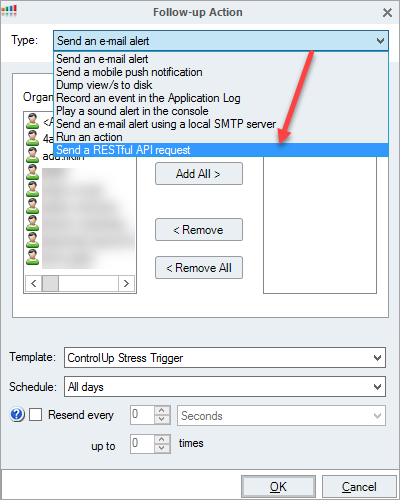
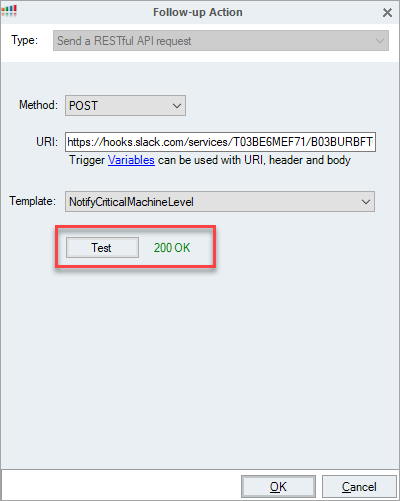
Click Add and select Send a RESTful API request from the Type dropdown to open the webhook configuration page.
Select the HTTP(S) method for the webhook. In this example, we want to POST an HTTP(S) request to the API endpoint of our Slack application (URI).
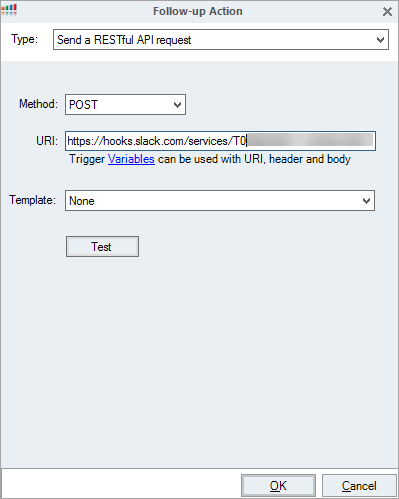
By default, no template is selected so we need to add a new template. From the Template drop-down list, select Add new template to create a new template with Trigger variables that you can use in the HTTP(S) header, body or in the URI of the API endpoint. To learn more about templates and the use of Trigger variables, click here.
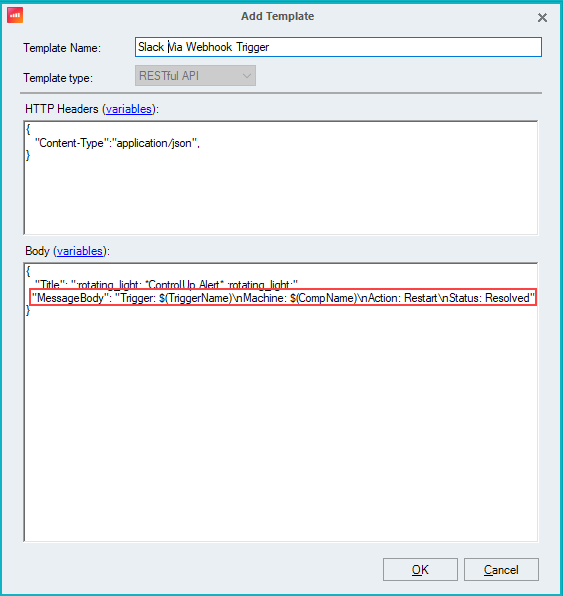
Add a header and body to the template.
Slack Workflow Rules
Note that the follow-up action isn’t sent directly to Slack. Instead, it calls a Slack Workflow, which only supports two fields:
TitleandMessageBody.You must enter all content, emojis, and variables in the
MessageBodyusing the syntax$(TriggerName)and$(CompName).Slack Markdown (bold, line breaks, emojis) is supported in the
MessageBody. Don’t enter Slack-specific fields such asusername,channel,icon_emoji, etc.Example format:
{
  "Title": "ControlUp Alert - $(TriggerName)",
  "MessageBody": ":rotating_light: ControlUp detected an issue.\n*Machine:* $(CompName)\n*Action:* Restart initiated\n*Status:* Resolved"
}
In this example, we define a message displaying a single line of text that informs the Slack channel about a machine that triggered an action:
Click OK to save the template configuration. The new template is automatically selected.
Click the Test button to send the template. The HTTP(S) code indicates whether the message was sent successfully.
If 200 OK displays but no Slack message appears, the issue is with the Workflow or Slack permissions, not with ControlUp. If available, check Slack Workflow logs to verify that the message wasn’t blocked.
Note
The Test button doesn't work for Microsoft Teams. To verify the webhook URL, use Postman or any other API testing tool.
Click OK to close the window and click Finish to save the trigger settings.
Click OK > Finish to save your trigger.
In the Trigger Settings window, make sure that the trigger is enabled.
The trigger is now enabled, and will send the webhook follow-up action when the trigger activates. If no Slack message appears, check the ControlUp logs and the webhook endpoint.