Each of our new ControlUp On-Premises (COP) versions provides bug fixes or adds new features. We recommend to regularly upgrading your on-premises environment as it is important to the security and stabilty of your ControlUp environment.
Contact support@controlup.com to receive the latest installation files for all on-premises components.
When to Use This Guide?
You must complete the on-premises upgrade preparation within 14 days (by default, unless changed) before the date that you complete the following tasks to upgrade your ControlUp environment to the latest version.
Lower Versions
If you upgrade COP Server versions 8.6.5 or lower to 8.8, it fails. You must first upgrade from versions 8.6.5 or lower to 8.7, and then only after to higher versions.
If you run ControlUp Server version 8.1.5.19 or lower, contact our support team at support@controlup.com.
Prerequisites
Complete the following prerequisites before you begin the upgrade:
Make sure to complete the On-Premises Upgrade: Preparation Guide from start to finish, as it includes backup and crucial requirements.
Take a snapshot backup of all your ControlUp Server(s) and Monitors.
Take a snapshot of your Backup Settings for On-Prem Monitor Activity to save the retention settings for your monitor's activity files.
Back Up Your ControlUp Server and Monitors
Take a snapshot of all your COP Server(s) and Monitors for fast recovery, if needed.
Back Up Your ControlUp Database (Optional)
It is best practice to back up the ControlUp database in case the COP installation fails.
To create a database backup in SSMS:
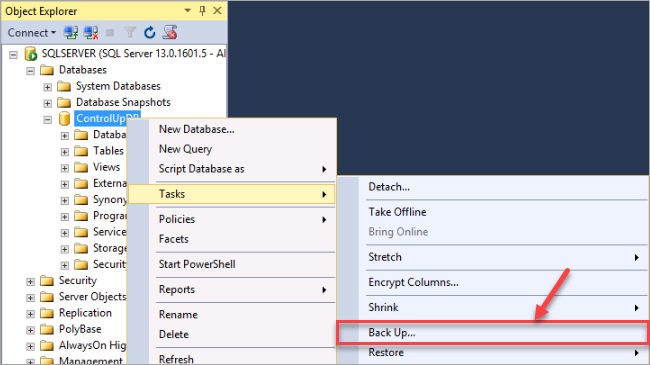
Connect to the instance where the ControlUp Database is stored on the SQL Server Management Studio.
Right-click the database > Tasks > Back Up...
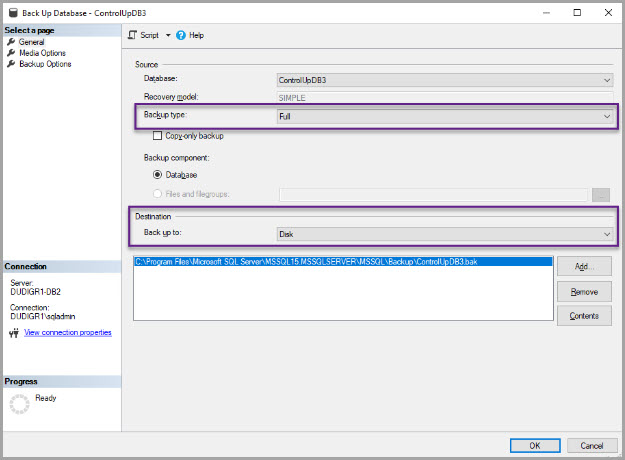
In the Back Up Database dialog box, keep the backup type Full. In the Destination section, specify if you want to back up to Disk or Tape.
Under the Media Options tab, select the checkboxes Overwrite all existing backup sets and Verify backup when finished.
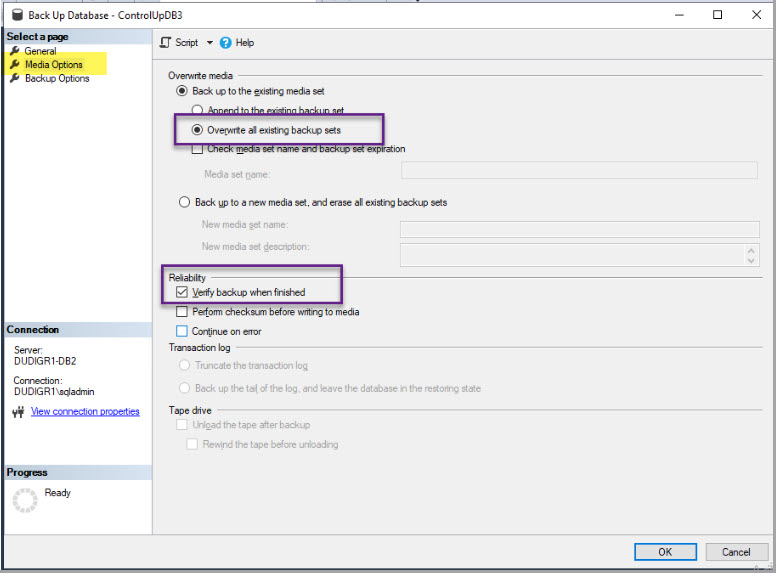
Save the backup file to safe location.
Sanity Test Before Upgrade
Verify that Monitoring Status is green and take a screenshot.
Click Monitoring Status, verify that all monitors are green and take a screenshot.
Verify that the monitors are connected to the Data Sources.
Login to IOP:
Verify that data is displayed in the Top Insights reports and take a screenshot.
Verify that the Session Count report works properly and take a screenshot.
Login to SOP:
Verify that every widget displays data and take a screenshot.
If Custom Dashboards exist, verify that they display data and take a screenshot.
COP Server Backups
Stop All Running ControlUp Monitors
To stop all running monitor services from the console:
Open the Console and click Monitoring Status.
To stop all monitors, right-click the root folder and select Stop.
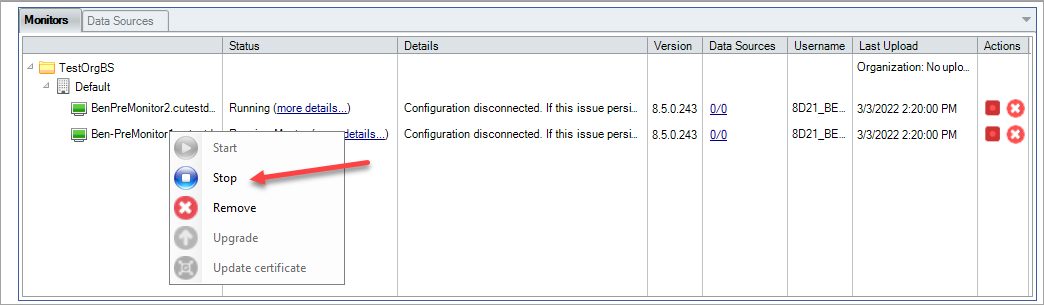
Wait until the status of all monitors changes to Stopped.
Stop the SOP Server.
Note
After you stop the monitors, no activity files will be created.
ControlUp Server Configuration Backup
Make a copy of the ControlUp Server folder and copy to a safe location, as you might need to use it after the upgrade:
If you upgrade from version 8.6 or higher, you can find it under C:\Program Files\ControlUp Inc\
If you upgrade from a lower version, you can find it under C:\Program Files\Smart-X\
In the console, click File > Save Configuration. If successfully saved, the following popup appears:

Backup the roaming configuration folder which contains encrypted COP configuration:
Explore to %Appdata%
Make a copy of the ControlUp folder and save it in a safe place as you might need to use it after the upgrade.
COP Server Upgrade
Perform the following COP Server upgrade instructions according to your COP Server High Availability
To check your ControlUp Server Installation Mode:
Login to your ControlUp Server
Open Program and Features (appwiz.cpl).
Click the ControlUp Server.
Click Change (or Modify).
Click Alternate Server Configuration.
Your failover Server Mode option appears.
ControlUp Server in Light Mode
Light Mode
From the 8.8 Maintenance Release and higher, COP doesn’t support Light Mode deployment as a built-in installation option. If you want to perform a Light Mode installation, you must download and install SQL Server Express, and provide it as a Production Server.
Important
You can't upgrade your ControlUp Server if you're using your ControlUp Database in Light Mode. In this case, you must first Uninstall the ControlUp Server and then Install it from scratch. When you uninstall, all objects (machines, hypervisors, folder structure) are removed from the ControlUp LDS. After you reinstall, you must manually redefine all the objects.
After you Uninstall the ControlUp Server, uninstall all the programs that start with SQL Express and all other SQL Programs (if any exist) from Control Panel > Programs and Features.
Install the latest COP version as an administrator and follow the installation instructions in ControlUp On-Premises Server Installation.
Important
Light Mode isn’t recommended for Production Mode.
Upgrade Instructions for Production Mode (Standalone Server)
Note
The following steps aren’t relevant if you run the ControlUp Server in Failover Mode.
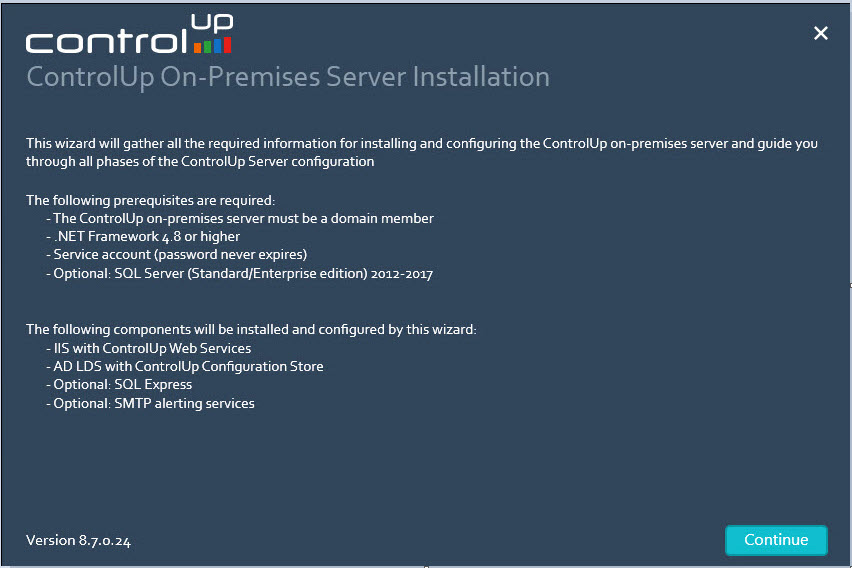
Run the installation file of the new ControlUp Server version as an administrator.
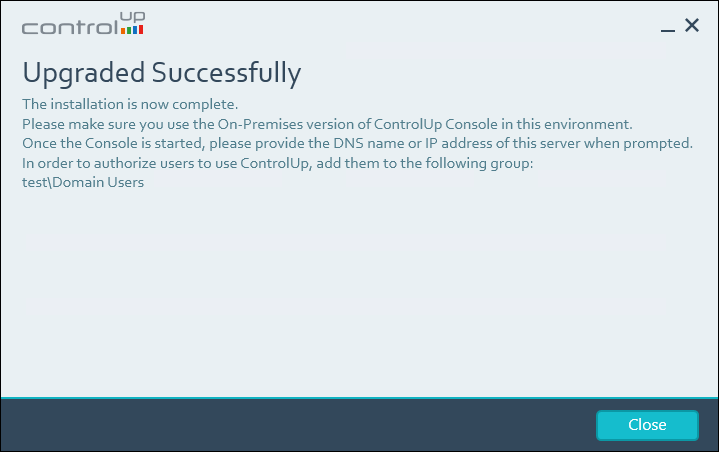
Click Upgrade and wait until the installation is complete and the Upgraded Successfully message appears.
Important
If the upgrade failed, contact our support team at support@controlup.com and provide log files as described in ControlUp On-Premises Installation: Log Files .
Upgrade Instructions for ControlUp Server in Production Mode with a Failover Feature
Secondary Server-2:
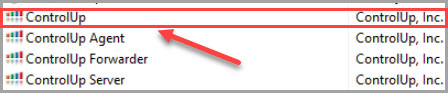
In Control Panel > Programs and Features, uninstall the ControlUp Server, as shown below:
Uninstall AD LDS Instance ControlUp-LDS (if it exists).
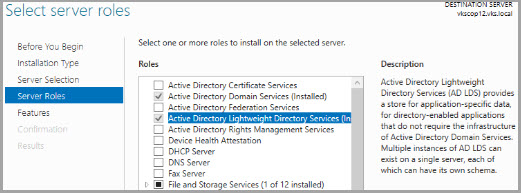
In Server Manager > Add Roles and Features, uninstall Server Role Active Directory Lightweight Directory Services.
Main Server-1, upgrade according to the Production Mode (Standalone Server) steps above.
Secondary Server-2, follow the steps in COP Server High Availability.
ControlUp Real-Time Consoles Upgrade
Note
Before you upgrade the Real-Time Consoles, make sure to successfully complete the ControlUp Server upgrade.
Open Program and Features (appwiz.cpl) and uninstall the current Real-Time Consoles.
Install the new versions following the steps in ControlUp On-Premises Real-Time Console Installation.
ControlUp Monitors Upgrade
In the console, click Monitoring Status to see all monitors configured in your ControlUp organization.
Start all the monitors and wait several minutes until all are in Running status. A version mismatch will appear on each monitor. This is expected until after you complete the monitors upgrade.
Right-click a monitor or site > Upgrade. Repeat this step for all monitors so that no monitor appears with a version mismatch.
After the upgrade is complete, check that the monitors started successfully and the Version column shows the updated version.

Verify that the monitors are connected to the Data Sources.
IOP Forwarder Upgrade
Login to each monitor server machine, then click on the new version IOP Forwarder file to automatically upgrade the IOP Forwarder and Splunk.
If you mistakenly try to upgrade the IOP Forwarder by first performing uninstall, and then perform install, Splunk won't upgrade. In this case, you must then perform the following workaround:
Go to $SPLUNK_HOME/etc/apps/TA_IOP_Forwarder.
Save the TA_IOP_Forwarder application outside of the Splunk directory (i.e., on desktop).
Hold down the Windows key and "R" key, enter the following text in the Run window: appwiz.cpl
Click OK.
Right-click UniversalForwarder and click Uninstall.
Install the new IOP Forwarder via the installation file.
After the installation completes, copy the TA_IOP_Forwarder application from the desktop to the following directory: $SPLUNK_HOME/etc/apps
If the IP of the IOP Server(s) and the master node (clustered mode)/single server (standalone mode) is the same, restart the Splunk service:
Open Task Manager, click Services, right-click on SplunkForwarder and click Restart.
If the IP of the IOP Server(s) and the master node (clustered mode)/single server (standalone mode) is different:
Edit only the IP/DNS in the TA_IOP_Forwarder/local/outputs.txt file, and save.
Open Task Manager, click Services, right-click on SplunkForwarder and click Restart.
To perform uninstall:
Hold down the Windows key and "R" key, and enter the following text in the Run window: appwiz.cpl
Click OK.
Right-click ControlUp Forwarder and click Uninstall.
Right-click UniversalForwarder and click Uninstall.
Change Backup Settings for On-Prem Monitor Activity (Optional)
Optionally, if you want to change the Activity Files retention default value of 14 days:
1. Login to the console.
2. Open Monitoring Status > Monitors Settings > On-Prem Monitor Backup.
3. In the Minimum days before deleting the backed up zipped files field, replace the default value of 14 with a new value.
Upgrade Additional ControlUp Agents
After you complete the upgrade of the ControlUp Server, Consoles and Monitors, upgrade a few additional Agents to verify that all components can be upgraded.
If you are using MSI, use the provided file. Otherwise, perform the following steps:
Right-click the machine and select Agent Control > Upgrade/Install Remote Agent. To upgrade the agent on multiple machines simultaneously, select machines as needed, right-click them and select Agent Control > Upgrade/Install Remote Agent.
MSI Package
If you installed the agent with an MSI package, use this method.
Verify that a version mismatch doesn’t appear for the upgraded agents.
Sanity Test After Upgrade
Verify that the Monitoring Status is green and take a screenshot.
Click Monitoring Status, verify that all monitors are green and take a screenshot.
Verify that the monitors are connected to the Data Sources.
Insights On-Premises Upgrade: OVA-based deployment
- Make sure you have completed the On-Premises Upgrade: Preparation Guide.
- Take a screenshot of your current IOP Licenses page.
- Shutdown the current IOP Server(s):
- Login as admin (cuadmin, prior to IOP 8.8).
- Shut down the machine by running
shutdown -P 0
- Only if you didn't copy disk 2 containing your old IOP data as part of the preparation steps: move disk 2 from the current IOP VM folder to the new IOP OVA VM folder.
Note
This process might take several hours, depending on the size of your data disk(s) and Datastore performance.
Power on the new IOP Server(s).
Use the admin user to login to IOP.
Open Licenses, and make sure that all your IOP licenses are installed by comparing to the state before you switched the IOP.
To reset the default Audit Log size to prevent your OS disk from exceeding maximum capacity (500GB), perform the following steps:
Open Insights as a Manager (port 8000) .
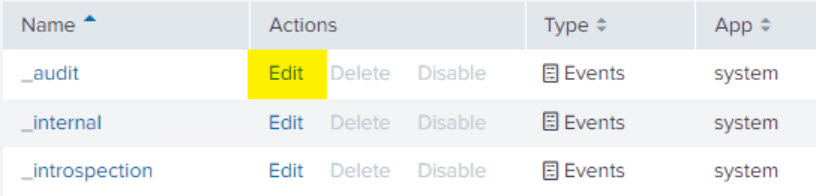
Select Indexes.
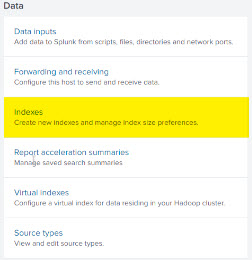
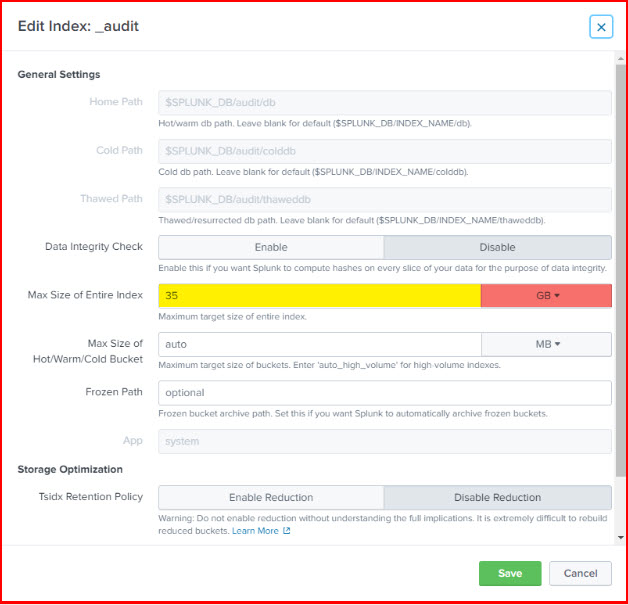
In the _audit row, click Edit.
Set Max Size of Entire Index to 35GB and click Save.
To restore the data from the time you copied disk 2 until the time you powered on the new IOP, perform the Activity Files restore on every monitor:
To find where the Activity Files are stored:
Login to the COP Server.
Open Program and Features (appwiz.cpl).
Select ControlUp Server and click Change.
In the ControlUp On-Premises Server window, click Insights On-Premises (IOP) Configuration.
Note the Activity Files Folder and Backup Files Location, and click Back.
Click X to close the ControlUp On-Premises Server window and click Yes to confirm in the pop-up.
Close Program and Features.
To restore the Activity Files:
Login to the monitor.
Verify (if needed, create) a folder named Restore under the Activity Files Folder you noted in the previous step.
Copy all the relevant Activity Files from the Backup Files Location you noted in the previous step to the Restore folder.
Important!
You must perform these steps on every monitor machine.
Insights On-Premises Upgrade: Linux-based deployment
The steps above cover IOP upgrade instructions for an OVA-based deployment only. For IOP Linux-based deployment upgrade instructions, see Insights On-Premises Upgrade for Linux.
Solve On-Premises Upgrade
Make sure you have completed the On-Premises Upgrade: Preparation Guide.
Shutdown the current SOP Server.
Power on the new machines created from the OVA of the preparation section.
Reload the JSON Web Token (JWT) file to the COP Server Settings. For more details about importing JWT to COP, see COP Security enhancement for Monitor/SOP communication.
From the Console, click Monitoring Status > Monitors, select Start all Monitors.
Sanity Test After SOP Upgrade
Verify that Monitoring Status is green and take a screenshot.
Click Monitoring Status, verify that all monitors are green and take a screenshot.
Verify that the monitors are connected to the Data Sources.
Login to IOP and verify that the Session Count report works properly. Note that the Top Insights reports run once daily at 4:00AM, and are therefore available only on the following day.
Login to SOP:
Verify that every widget displays data.
If Custom Dashboards exist, verify that they display data.
Upgrade All Remaining ControlUp Agents (can perform at a later stage)
We recommend that you upgrade all ControlUp Agents to avoid version mismatches.
Right-click a machine and select Agent Control > Upgrade/Install Remote Agent. To upgrade the agent on multiple machines simultaneously, select machines as needed, right-click them and select Agent Control > Upgrade/Install Remote Agent.
MSI Package
If you installed the agent with an MSI package, use this method.
Verify that a version mismatch doesn’t appear for the upgraded agents.