You must complete the ControlUp On-Premises (COP) upgrade within 14 days after the date that you complete the following preparation tasks.
Prerequisites
On your COP server(s), verify that the following components are installed:
DigiCert Trusted G4 (RSA default) certificate.
Note
The certificate should automatically install when you perform Windows Updates on the COP Server(s). You can also download the certificate and manually install it.
.NET Framework 4.8 on the COP Server(s) and monitor machines.
Note
When you install .NET FW 4.8, the machine(s) might automatically perform or require a manual restart. If a manual restart is required, do so before the ControlUp Support session.
Verify which COP mode is installed:
Light - we recommend you migrate to a SQL database during the installation.
Production
Prepare Real Time Console
Important!
Perform the following preparation on only one of the ControlUp Console machines.
To export all triggers:
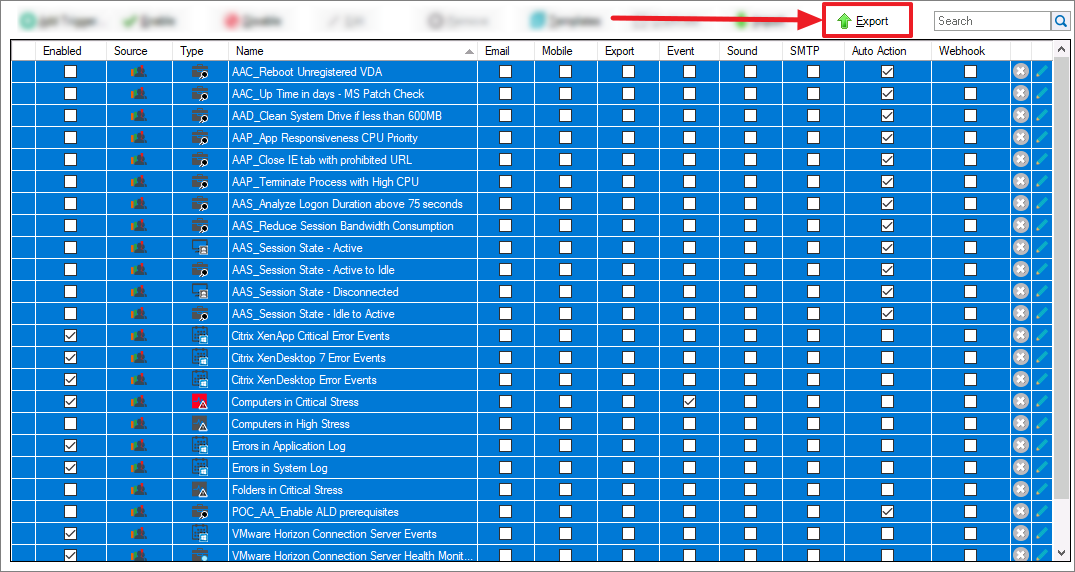
Login to the console and click Triggers.
Select all triggers by pressing CTRL + A and click Export.
Save the JSON file to a location on the machine. After the upgrade, you must import this file.
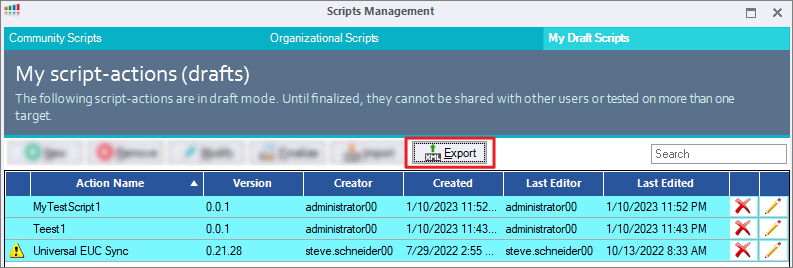
To export all custom scripts:
Login to the console and click Script Actions.
Click the Organizational Scripts tab, select all scripts, click Export, and save the XML file to a location on the machine. After the upgrade, you must import this file.
Repeat step 2 in the My Draft Scripts tab.
Prepare New SOP Server: OVA-based deployment
The following steps cover SOP Server preparation instructions for an OVA-based deployment only.
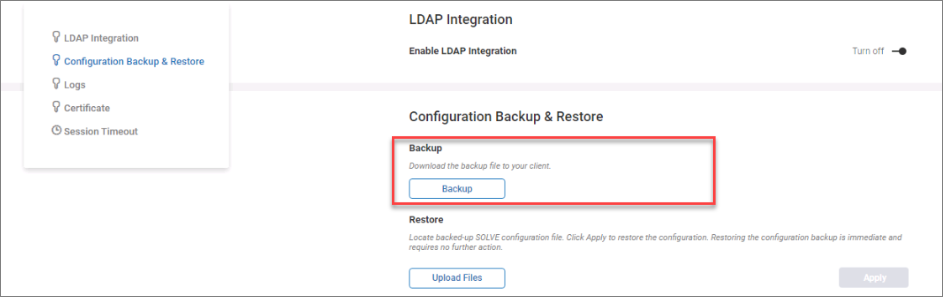
- To back up your current SOP configuration, open Solve, click the Settings icon, and click Backup.
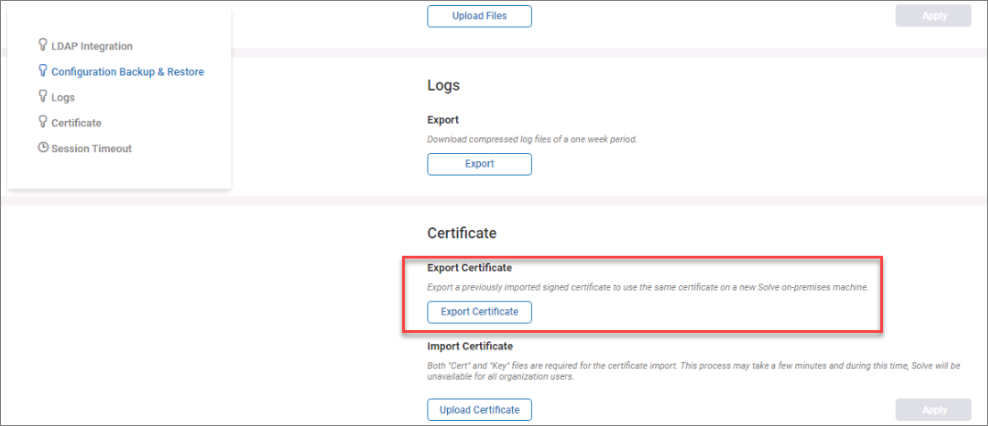
- To back up your SSL certificate, click Export Certificate and save the exported zip file.
- Note the current SOP configuration:
- Login as admin (cuadmin, prior to IOP 8.8).
- cat /opt/cdrom/ovf-env.xml
- Note all the information in this file:
dns ip,domain,gateway,hostname,ipaddress,user_password(which is the admin password).
- Deploy new OVA(s) as required.
When you deploy the new OVA(s), you must use the same dns ip, domain, gateway, hostname, ipaddress, user_password(which is the admin password) as configured in the current SOP.
Important!
Don't power on the machines created from the OVA. Leave them powered off.
Prepare New IOP Servers: OVA-based deployment
The following steps cover IOP Servers preparation instructions for an OVA-based deployment only. For an IOP Linux-based deployment, we recommend taking a snapshot for backup before the upgrade.
- Note the current IOP configuration:
- Login as admin (cuadmin, prior to IOP 8.8).
- cat /opt/cdrom/ovf-env.xml
- Note all the information in this file:
dns ip,domain,gateway,hostname,ipaddress,user_password(which is the admin password).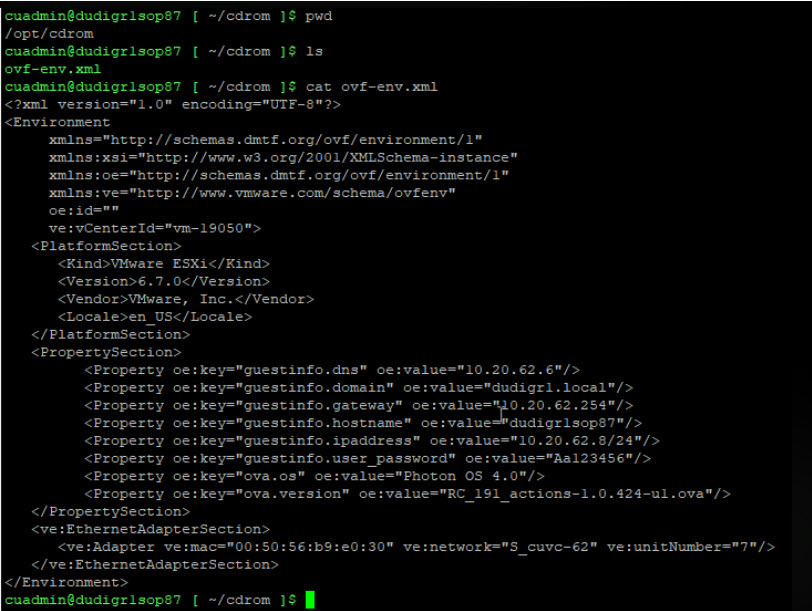
- Deploy new OVA(s) as required:
For standalone mode, a single server.
For clustered mode, one master and one or more data nodes.
When you deploy the new OVA(s), you must use the same dns ip, domain, gateway, hostname, ipaddress, user_password(which is the admin password) as configured in the current SOP.
Important!
Don't power on the machines created from the OVA. Leave them powered off.
Shutdown the current IOP Server(s) and note the date and time (we will restore the IOP data from this time until the new IOP is functional).
Copy the IOP data disk(s) (disk 2) to the respective new IOP machine folder.
Note
This operation might take several hours, depending on the size of your data disk(s) and Datastore performance.
Leave the new IOP Server(s) powered OFF.
Start the current IOP Server(s).
Replace Deployed Disk
To replace disk 2 from the deployed OVA with the disk you copied earlier:
Navigate to the Host and Clusters view in your vCenter client and right-click the new IOP Server > Edit Settings.
Under Hard disk 2, click the delete icon to remove the disk.
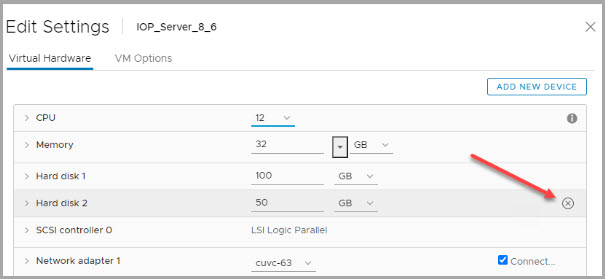
Select the Delete files from the datastore checkbox and click OK.
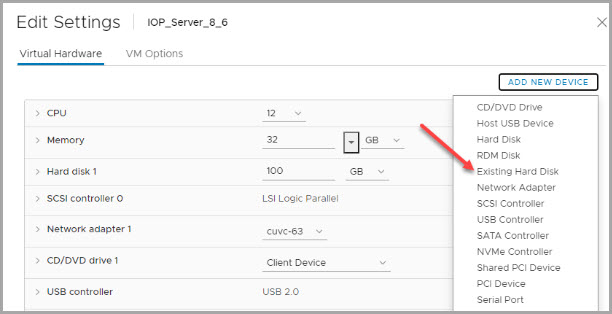
Right-click the new IOP Server and select Edit Settings. Click ADD NEW DEVICE and select Existing Hard Disk.
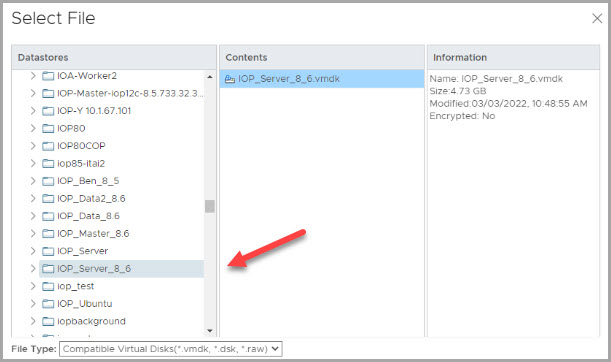
Navigate to the Select File screen, select the vmdk file that you copied when you prepared the new IOP Server(s) (in the same folder where you deployed the OVA), and click OK.
The new hard disk appears under Virtual Hardware. Click OK to confirm and wait until the hard disk is created.
Important!
Don't power on the new IOP. We will power it on only during the upgrade procedure.
Note
You must complete the COP upgrade within 14 days after the date that you complete the preparation tasks.