In COP, you can configure a failover cluster that consists of two COP server nodes. The following article walks you through the installation and configuration of a secondary COP server, and assumes that you have already installed COP on the primary server. If you haven't yet installed COP, see ControlUp On-Premises Server Installation.
Feature Overview
If the primary COP server or the COP web services are offline, the Real-Time Console and ControlUp Monitor automatically connect to the secondary COP server. To learn how to configure the primary and secondary COP servers, see ControlUp On-Premises Real-Time Console Installation.
Supported SQL Server
Note that this configuration does not support SQL Server Express.
Prerequisites
You must meet the following prerequisites in order to use this feature:
COP installed. Hybrid Cloud environments don't require this feature because the backend servers are located in the ControlUp Cloud.
High availability database.
Important!
You must uninstall your current COP server before you can upgrade to higher versions.
Adding a Failover Server
Step 1. Back up license file and log files
Before installing COP on the secondary server, verify that you have your license file and installation log from the primary COP server installation. During the installation of the secondary COP server, you must provide the same input data as you did during the installation of the primary COP server.
On the primary COP server, locate the license file PrivateCloudLicenseFile.xml. If configured the same as during the installation of the primary COP server, this file is located in the folder C:\Smart-X\PrivateCloudLicense.
Back up the installation log from the primary COP server, located in the folder C:\Users\UserName\AppData\Local\Temp. For more details about log files, see ControlUp On-Premises Installation: Log Files .
Open the file and navigate through the data you provided during the installation. For example, the mail address is stored in the LICENSE_EMAIL variable. For a full list of variables, see ControlUp On-Premises Installation: Log file.

Step 2. Install COP on the secondary server
Follow the steps in ControlUp On-Premises Server Installation to run the COP installation on the secondary server. You must provide the same credentials and date as during the installation of the primary COP server. For example, provide the license file from Step 1, and the same user credentials and connection data.
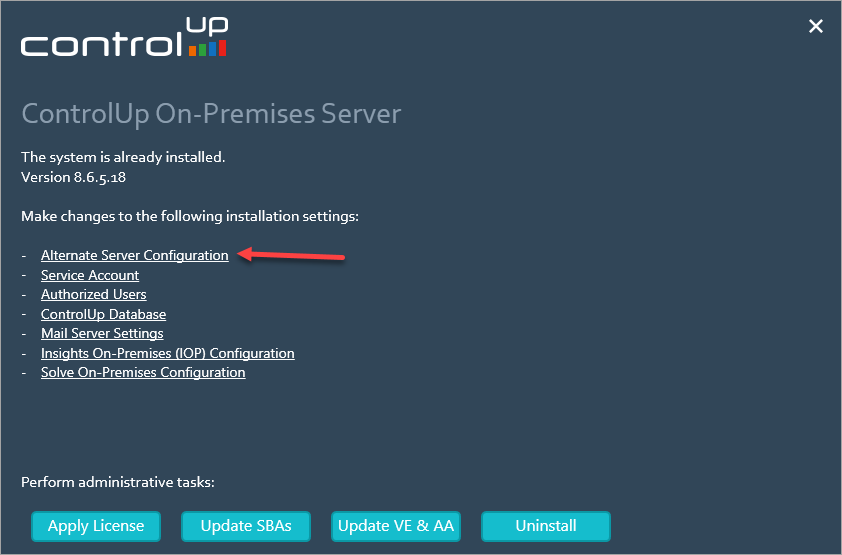
After the installation of the secondary COP server is complete, connect to the primary server, open Start > Control Panel, right-click ControlUp Server, and select Change.
In the Configuration Wizard, click Alternate Server Configuration.
Provide the FQDN of the secondary node. You can choose to use the Browse button or manually enter the FQDN. Click Continue.
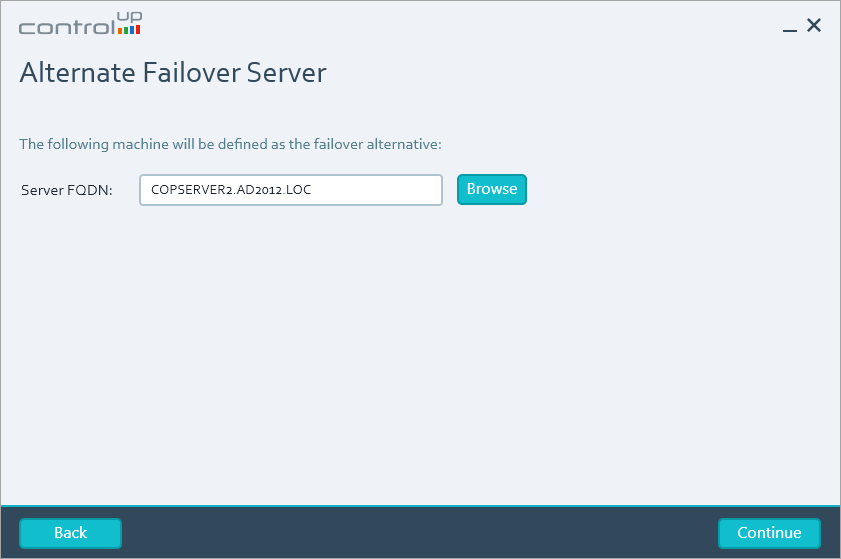
Once the configuration is complete, the next step is to configure the AD LDS instance for ControlUp on the secondary node.
Step 3. Configure AD LDS
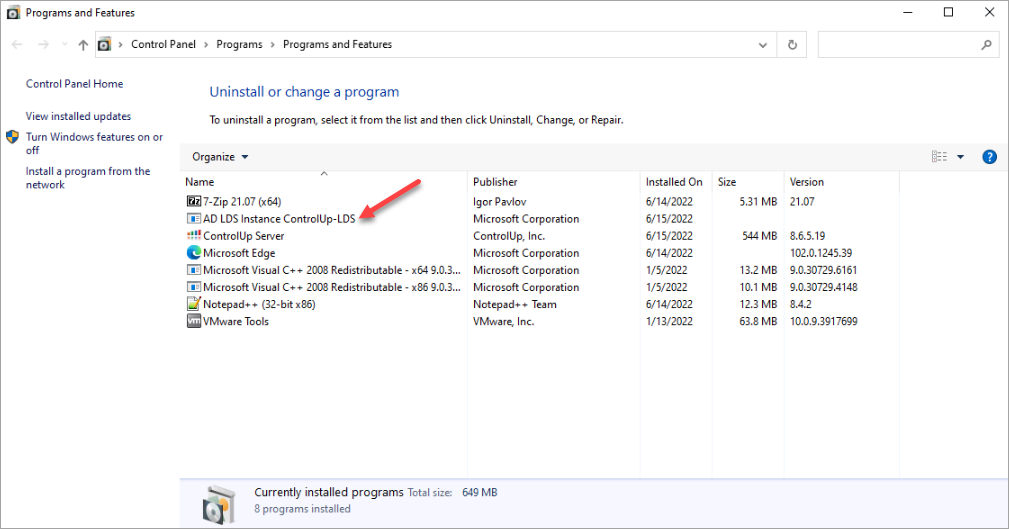
Connect to the secondary COP server and open Control Panel > Programs and Features.
Remove AD LDS Instance ControlUp-LDS.
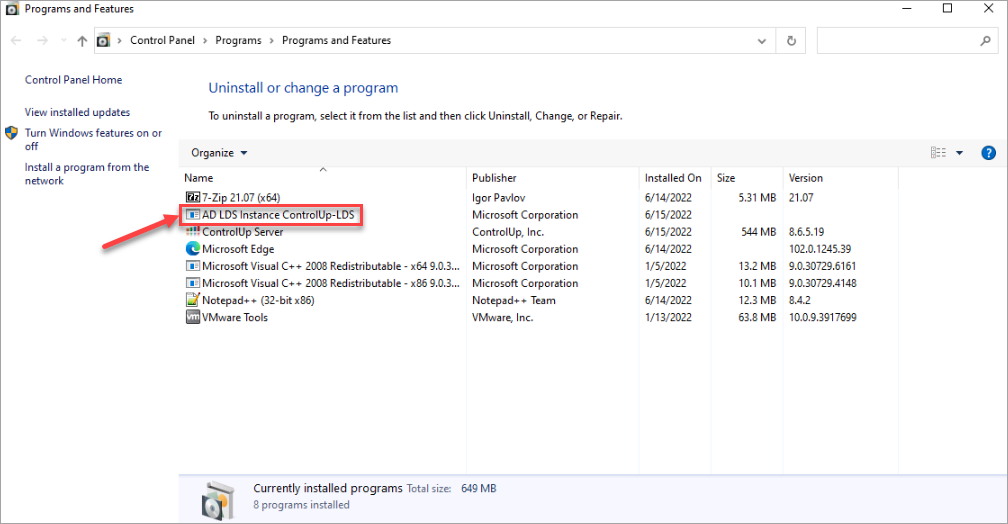
Click Yes to confirm both warning messages.
Open Active Directory Lightweight Directory Services on your secondary COP server.

In the Setup Options windows, select A replica of an existing instance and click Next.
Enter ControlUp-LDS in the Instance name field and click Next. If you don't enter “ControlUp-LDS” correctly, the failover feature fails.

Change LDAP port number to 50500 and SSL port number to 50501, and click Next
In the Server field, enter the FQDN of the primary COP server, and in the LDAP port field, enter 50500 and click Next.
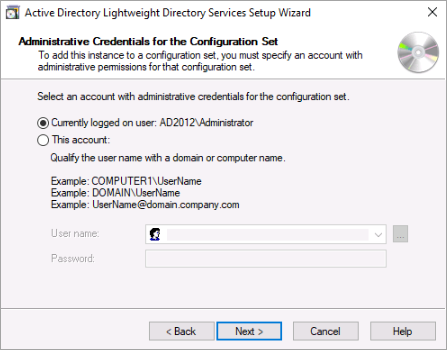
Optionally, if the account you are currently using doesn't have the necessary permissions, select an account that does. Ensure that this user has local administrator permissions on the COP servers. Click Next.
Select the Partition DN checkbox and click Next.
In File Locations, keep the default values as is and click Next.
Select Network service account and click Next.
Select Currently logged on user and click Next.
Review the installation summary and click Next.
After installation completes, click Finish.
To verify if AD LDS was successfully installed, you can view AD LDS in the Control Panel.
Troubleshooting
AdamUnInstall returned error code 1603
The following error message might appear when uninstalling the COP server with failover nodes configured:
CustomAction AdamUninstall (ControlUp-LDS) returned actual error code 1603
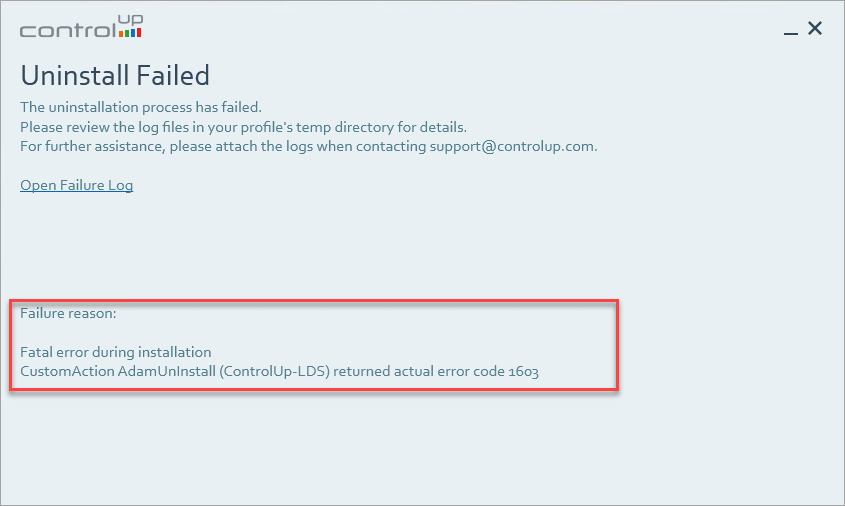
Workaround
To resolve this issue, first uninstall the ControlUp-LDS instance, and then uninstall the COP server.