This article covers how to install the Remote Clients (formerly RemoteDX) plugin on devices running Stratodesk NoTouch versions 3.4.195 and higher. The plugin is supported for Citrix, Omnissa (formerly VMware) and Microsoft AVD.
To upgrade the Remote Clients plugin, see here.
Add Remote Clients binaries
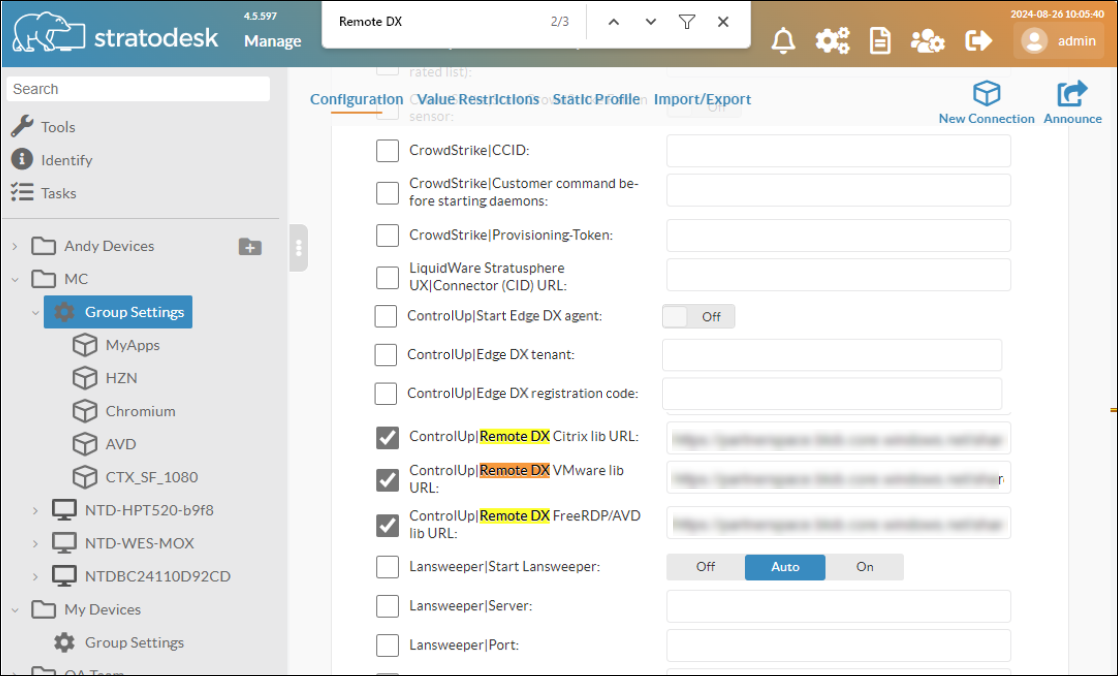
In Stratodesk NoTouch Center, go to Group Settings > Configuration > Services.
In the All tab, search for (CTRL+F) "Remote DX" .
Enable the service relevant service for your virtualization platform and add the binary file for the Remote Clients plugin. You can use the files hosted from the ControlUp Downloads page (listed below), or use your own internal distribution site to host the files.
If you use Citrix, enable ControlUp|Remote DX Citrix lib URL and enter
https://downloads.controlup.com/RemoteDX/citrix/Stratodesk/cuepux.dllIf you use Omnissa, enable ControlUp|Remote DX VMware lib URL and enter
https://downloads.controlup.com/RemoteDX/Omnissa/libcuepux.soIf you use Microsoft AVD, enable ControlUp|Remote DX AVD lib URL and enter
https://downloads.controlup.com/RemoteDX/microsoft/Stratodesk/libcuepux-client.so
To enable Remote Clients in a connection, in Stratodesk NoTouch Center, go to the Configuration for a Connection.
In the All tab, search for (CTRL+F) "Remote DX" .
To enable Remote Clients plugin for sessions initiated from the connection, select the checkbox of the session type you use:
Citrix: Enable ControlUp Remote DX
Omnissa: ControlUp Remote DX
AVD: ControlUp RemoteDX
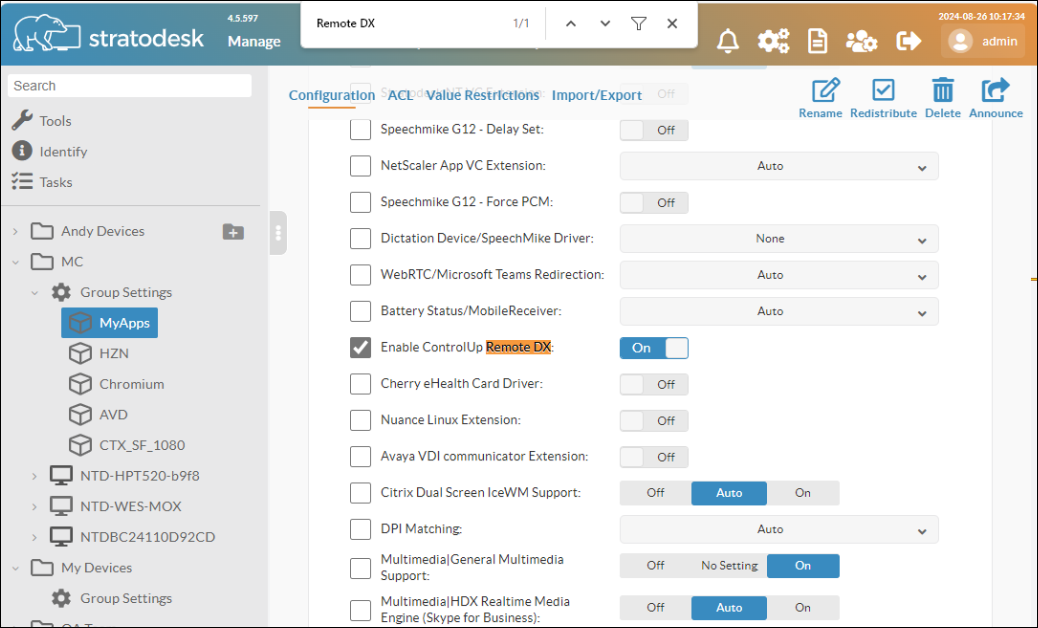
Click Announce to save your changes. It is recommended to reboot the machine after you save.
Upgrade Remote Clients Version
To upgrade an existing Remote Clients version:
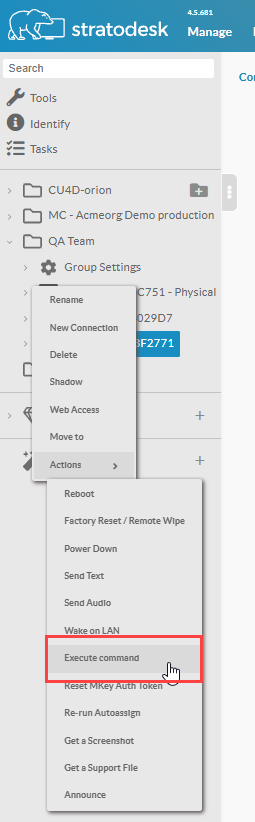
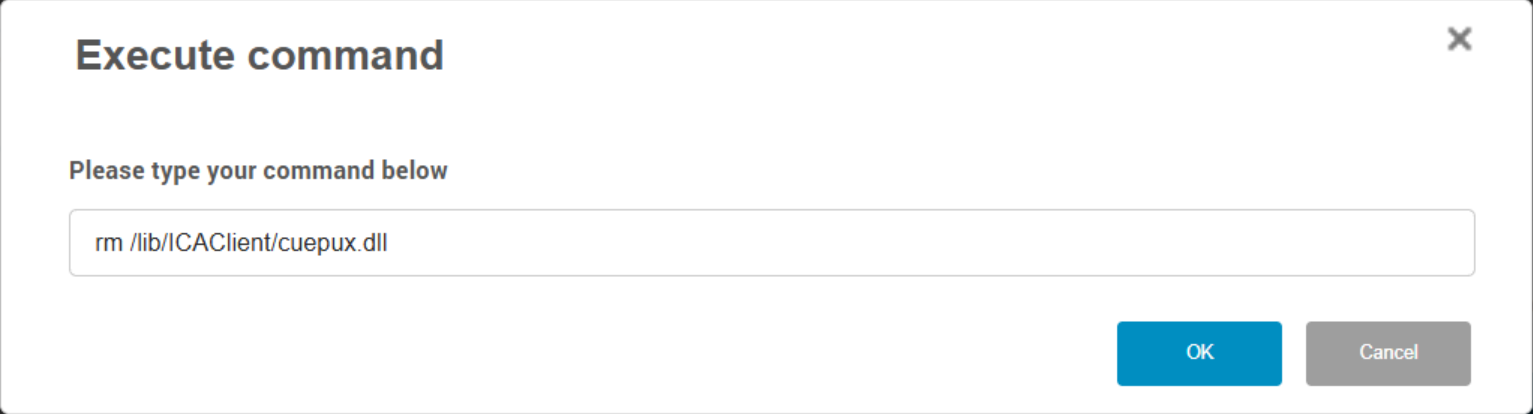
Remove the Remote Clients plugin: Execute the
rmcommand from the NoTouch Center for the specific device or group of the session type you use:Citrix:
/lib/ICAClient/cuepux.dllOmnissa:
/opt/controlup/vmware/libcuepux.soAVD:
/opt/controluprdp/libcuepux-client.so