Remote Clients (formerly Remote DX) has built-in support for Dell Wyse devices with our Dell Wyse plugin. After you deploy the plugin, you will be able to see client device metrics for your Dell Wyse device in the Real-Time DX Console and the VDI App.
You can deploy and distribute the Remote Clients via the WMS (by updating a group policy) or you can manually deploy the plugin on your Dell thin client.
To see more details about the plugin on the Dell website, click here.
Supported Client Software
The plugin is compatible with:
- Citrix Workspace App
- Omnissa Horizon (formerly VMware Horizon)
- Microsoft AVD / Windows 365
Install Remote Clients on the Local Device
You can install Remote Clients locally on your device, without using the Dell Wyse Management Suite (WMS)
To install the plugin locally:
- Download the Remote Clients plugin from Dell's website.
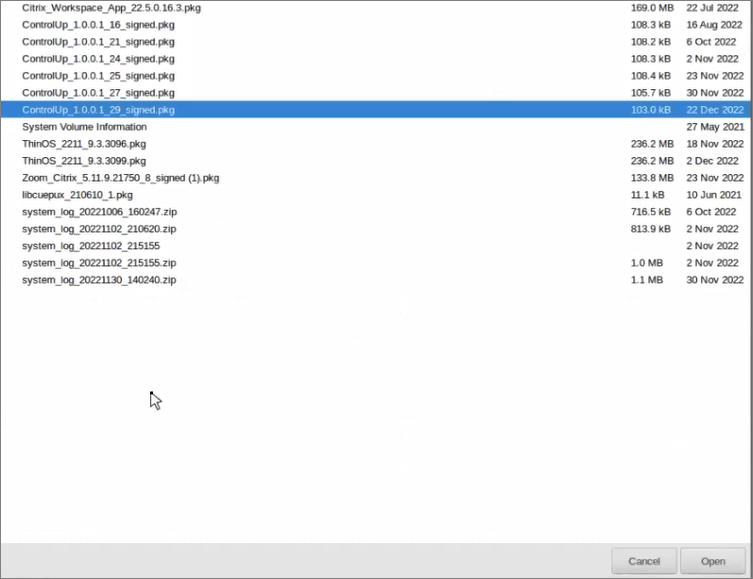
- In the Admin Policy Tool, click Browse and upload the pkg file which you can find in the downloaded zip file.

- Select the package file you want to deploy and click Open.
- Accept the EULA and wait until the package is uploaded.
- Click Save & Publish.
Install Remote Clients from the WMS
If you deploy Remote Clients the first time, you need to upload the Remote Clients package in the Wyse Management Suite (WMS).
- In the WMS, click the Groups & Configs tab.

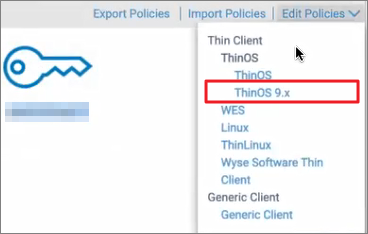
- From the Edit Policies drop-down menu, click ThinOS 9.x.
- In the Configuration Control wizard, click Settings > Advanced.
- Click Firmware > Application Package Updates.
- Click Browse and upload the pkg file that you can find in the downloaded zip file.
- Under Third Party, scroll down to Third Party and you can see ControlUp VDI Agent. Check the box next to the version you want to deploy.

- Click Save & Publish.
Note
After the plugin is installed, the thin client will be restarted.