The following guide walks you through the installation of Solve in your on-premises environment. Use this guide if you have not yet installed a Solve On-Premises (SOP) Server.
Prerequisites
Software
The latest OVA file for deploying the SOP appliance. If you do not have this file yet, contact our support team.
A VMware vSphere client to deploy the OVA file. (From version 8.8 MR and higher, vSphere version 7.0.3 or higher is required.)
At least one running ControlUp Monitor.
A valid license for Solve. Refer to the Solve license section to learn more.
Hardware
Verify that you meet the following requirements for the virtual machine where you install SOP:
2 vCPUs
8 GB RAM
50 GB free disk space
Network
The SOP Server communicates with the ControlUp Monitors over TCP port 443. Verify that this port is open and that the monitors can resolve the SOP Server via DNS. Create the necessary A (Host) and PTR records on your DNS server.
Solve License
To use Solve, you require a valid license. You can try Solve for a 21-day trial if you have a trial license.
To start the trial:
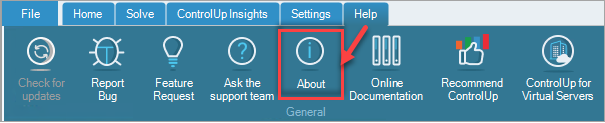
In the Real-Time Console, under the Help ribbon, click About.
In the wizard, click Licensing to open the Licensing window.
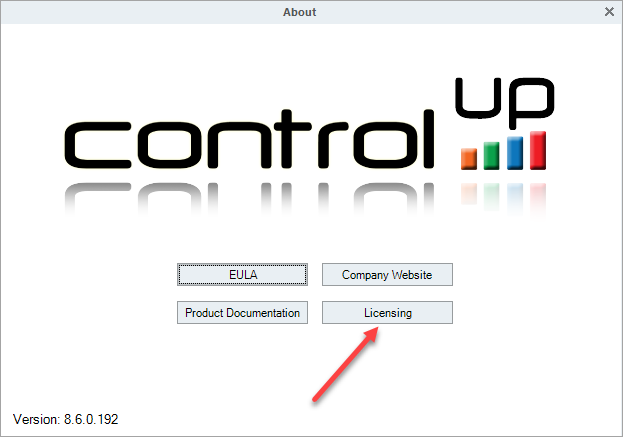
A window opens displaying the details of your ControlUp subscription. Click Start my Free 21-day trial.
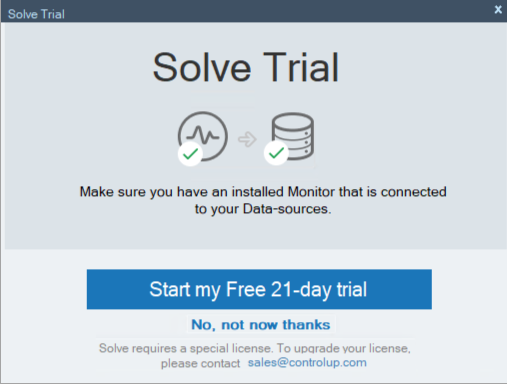
After the 21-day trial, the license expires and you can no longer use Solve. In this case, you need to purchase an appropriate license.
Installation
Download the OVA file to your local machine and open a VMware vSphere client.
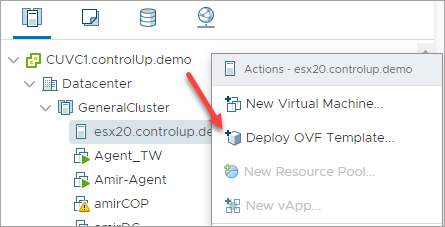
In the vSphere Client, right-click a host and select Deploy OVF Template... The installation wizard opens.
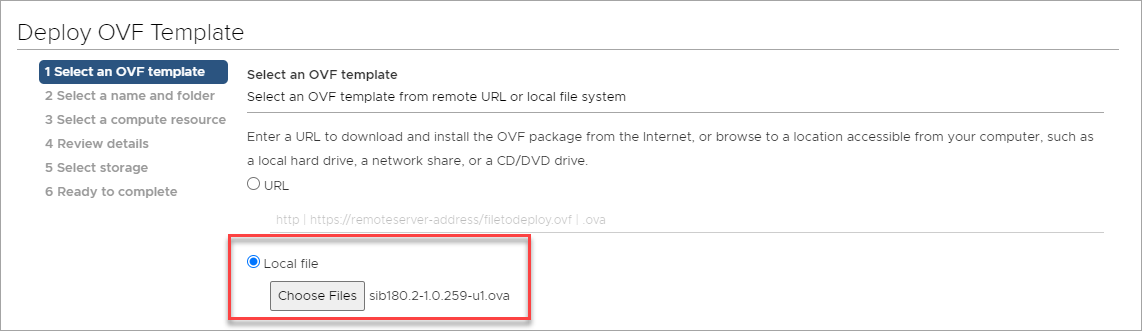
Click Choose Files and select the OVA file that you downloaded to your local machine. Click NEXT to select a location for the virtual machine.
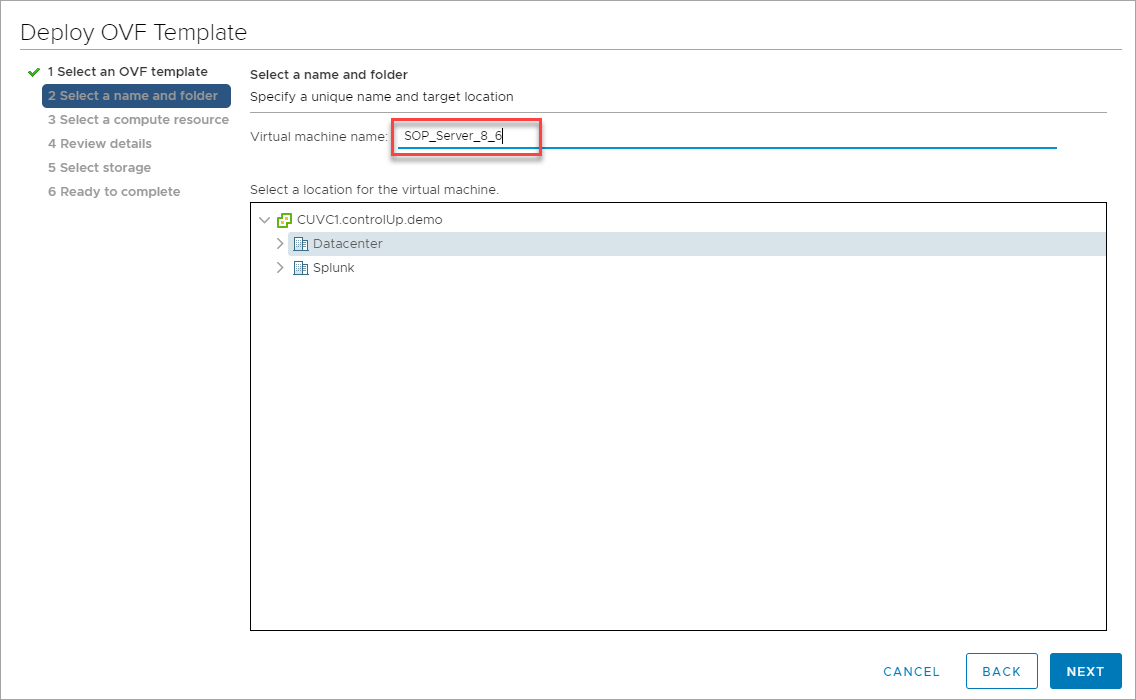
Provide a hostname for the virtual machine and select the folder where you want to store it. Click NEXT.
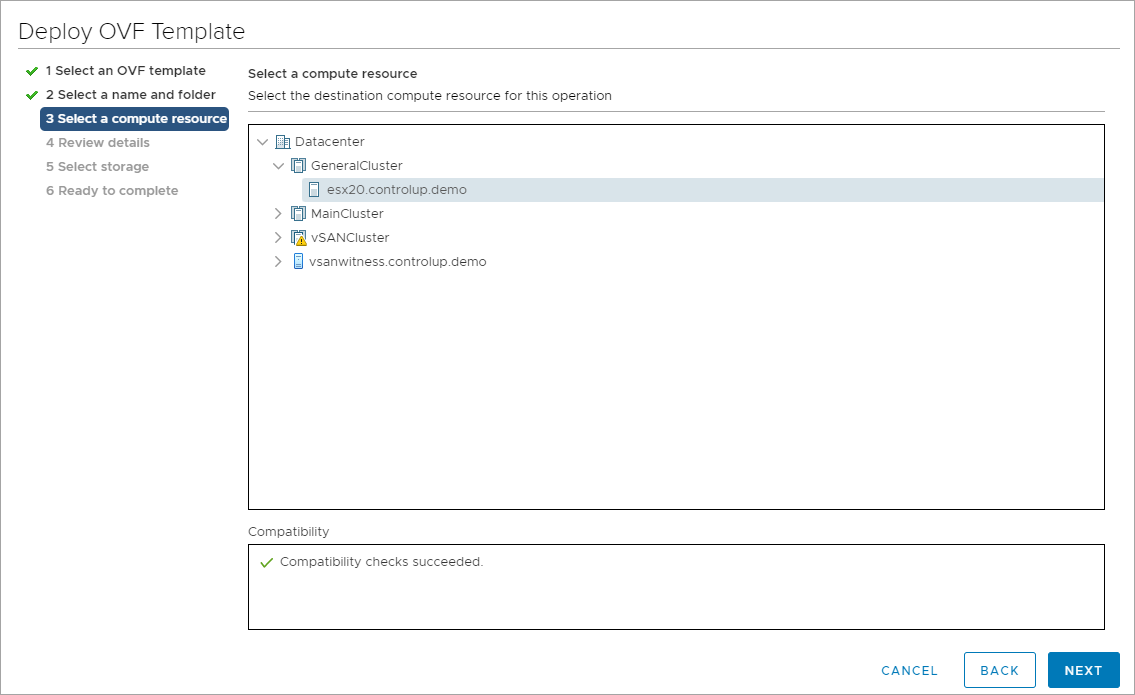
Select a compute resource on your host. Click NEXT to review the configuration.
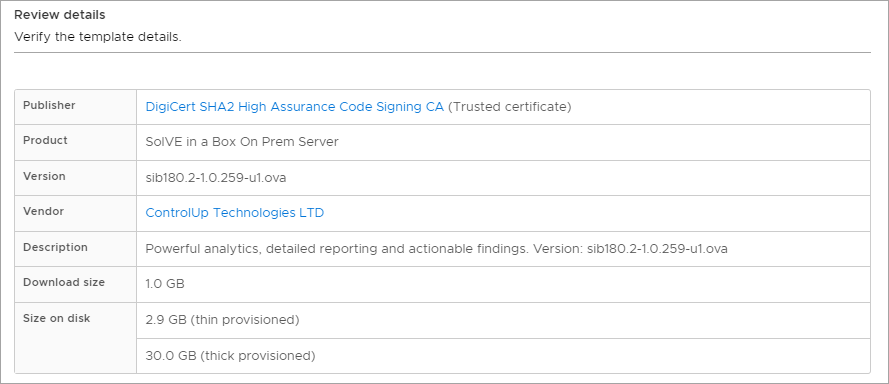
Review the pre-configured details for SOP. Click NEXT to select a storage location for the virtual hard disk.
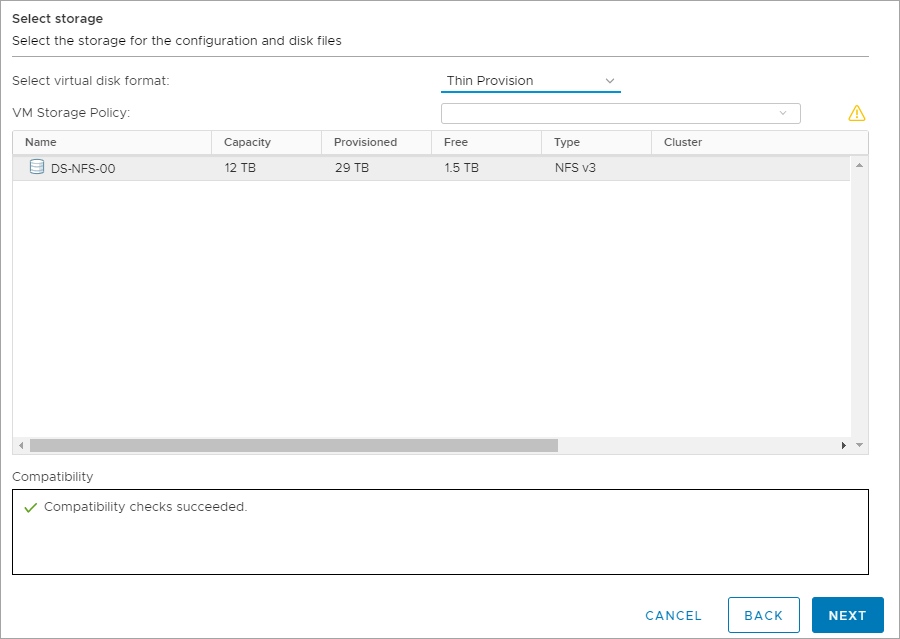
Select the storage location and disk format. The default disk size is 30 GB. Click NEXT to edit the network settings.
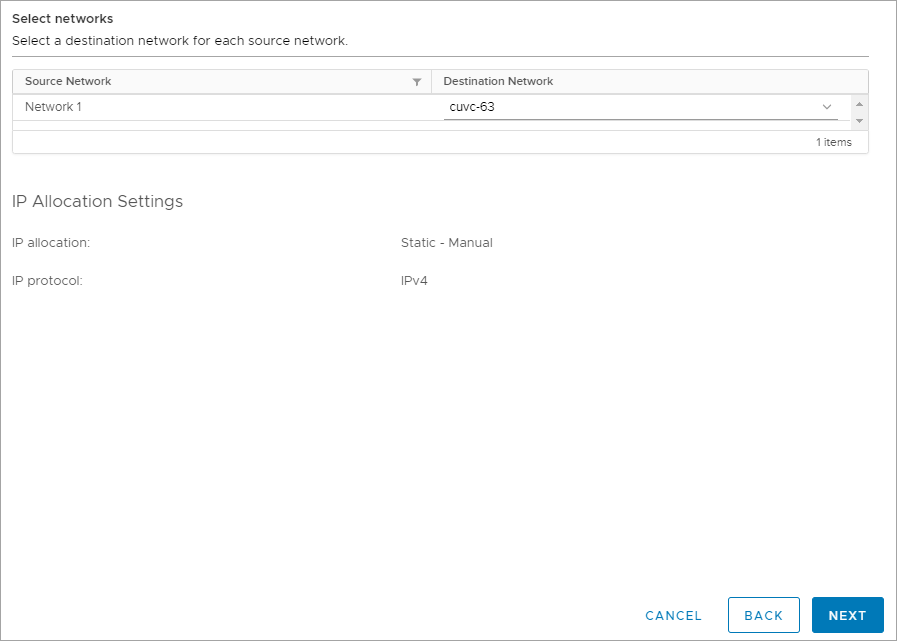
Select the network location. This location should be accessible from the ControlUp Monitors and ControlUp On-Premises (COP) Server via TCP port 443. Click NEXT.
Customize the template as follows:
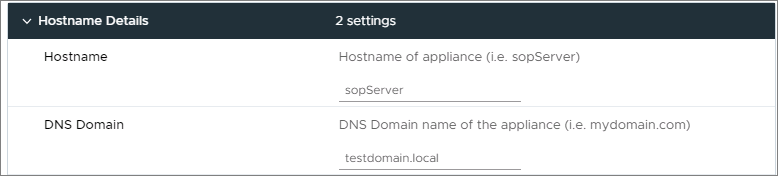
Hostname. The virtual appliance's hostname. For example, sopServer. Verify that this hostname can be resolved via DNS. If your DNS server does not contain the appropriate A and PTR records, create them.
Important
Do not use any underscores in the hostname. Linux does not allow hostnames that contain underscores ("_"). Please refer to the following troubleshooting article to fix the hostname.
DNS Domain. The virtual appliance’s DNS domain. For example testdomain.local.
Known Issue in SOP Server 8.7
Please refer to this troubleshooting article if your corporate naming conventions require a hyphen in the Hostname or DNS Domain.
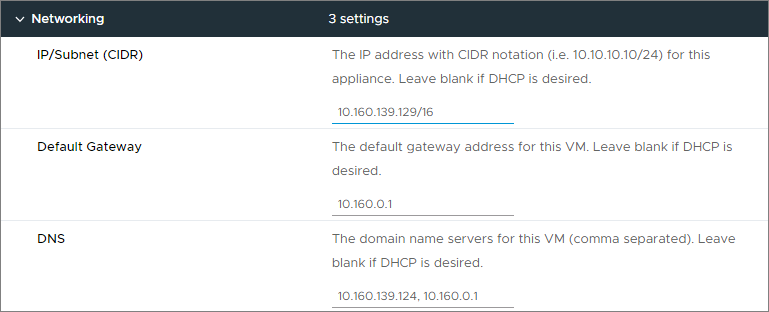
IP/Subnet (CIDR). The IP address in CIDR notation for the virtual appliance. For example, 10.10.10.10/24. Leave blank if DHCP should be used to retrieve IP information automatically.
Default Gateway. The default gateway address for this virtual appliance. Leave blank if DHCP should be used to automatically assign gateway information.
DNS. The domain name servers for this VM (comma separated). Leave blank if DHCP should be used.
Appliance Password. A password for your SOP Admin user.
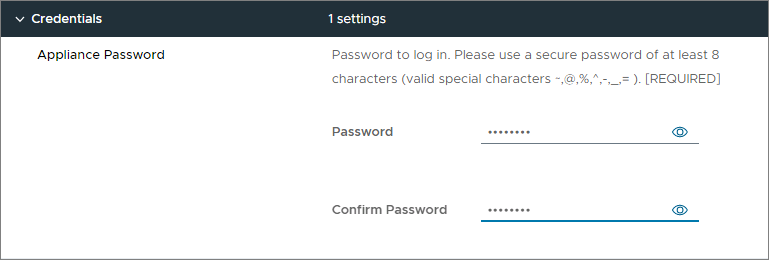
Note
Use a strong password, with a minimum of 8 characters. It should contain a combination of the following character types: uppercase, lowercase, special characters, and numbers. Spaces are not allowed.
Click NEXT to continue with the installation.
After the preceding configurations are done, review the summary of the installation and click FINISH to complete the deployment. Now, we need to configure the new SOP server in the COP server configuration.
On the COP server, open the Control Panel and select Programs and Features.
Right-click ControlUp Server > Change. The configuration wizard appears.
Click Solve On-Premises Configuration to configure the new Solve On-premises server.
Enter the IP or FQDN of the SOP server (1) and provide the JSON file that contains the Solve secret key (2). Read more about how to retrieve this JSON file.

After this step, you successfully installed your new SOP server. If you correctly configured Solve, you can test connectivity:
1.From the Solve tab, click Solve.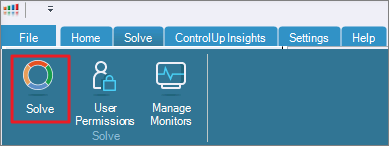
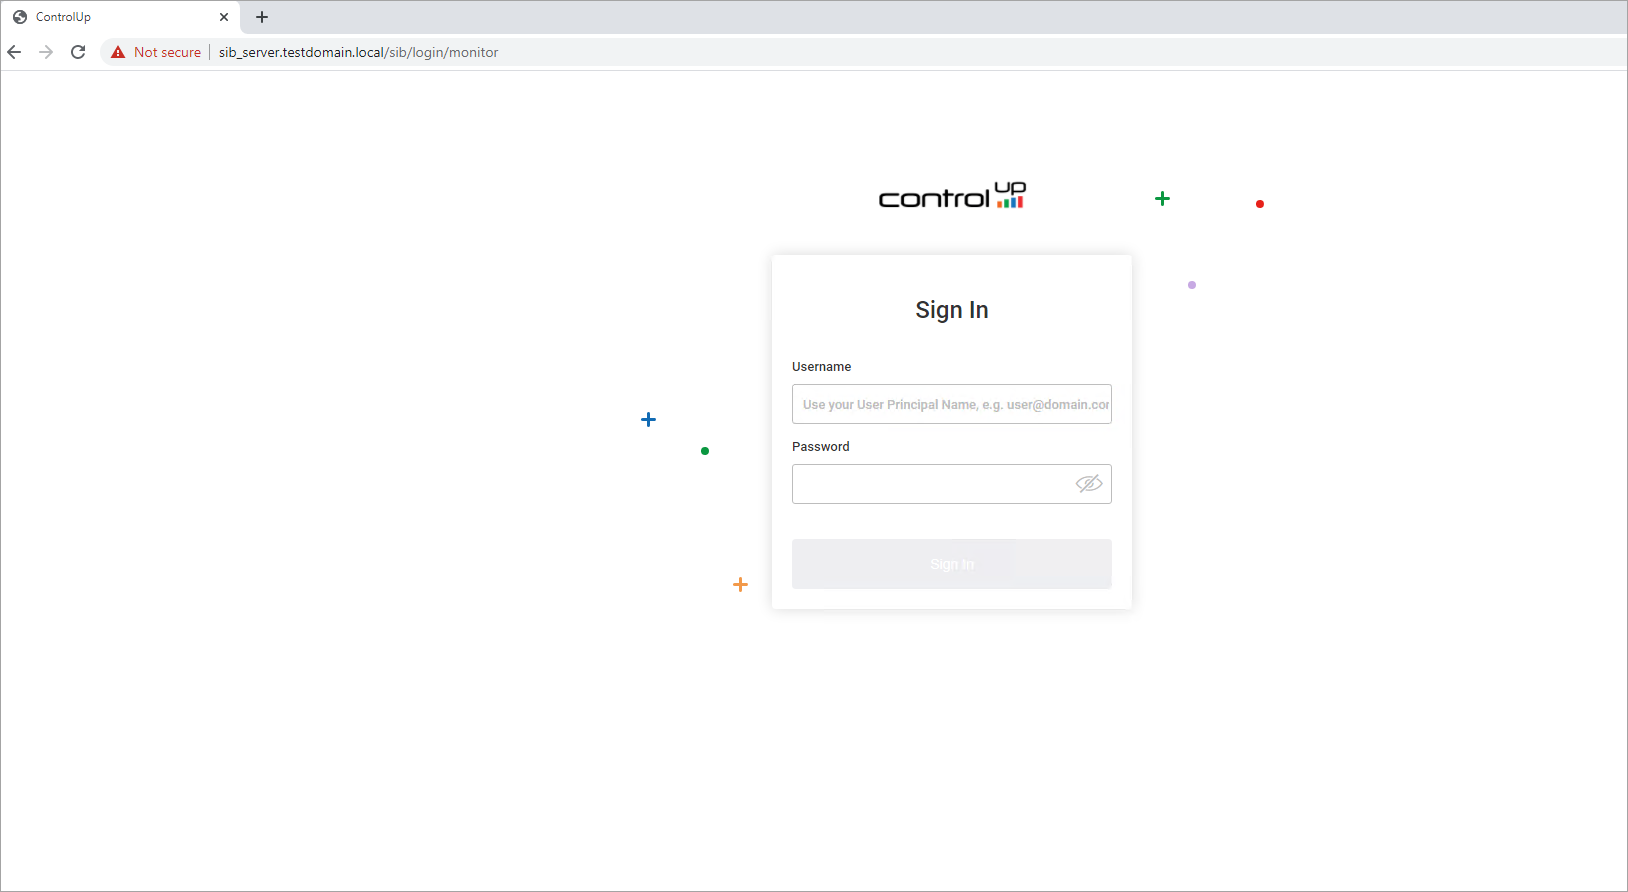
Open a browser and enter the address of the SOP Server.
If you see the login screen (as shown below), then you can move on to the configuration of the SOP Server. For more details, see Solve On-Premises Configuration.