This article describes how to set up Remote Clients (formerly Remote DX) for ChromeOS devices connecting to Citrix virtual environments.
Read Remote Clients Overview and Client Metrics for details about the Remote Clients feature.
ControlUp also supports more detailed monitoring of ChromeOS devices using the ControlUp for Desktops Agent. Read ChromeOS Deployment for details.
Prerequisites
- Requires Real-Time DX Agents and Monitors to be on version 9.0.5.426 or higher. You can find this version on the ControlUp Download Center.
- ChromeOS or ChromeOS Flex devices
- ChromeOS Enterprise Upgrade
- Devices must use the Citrix Workspace app
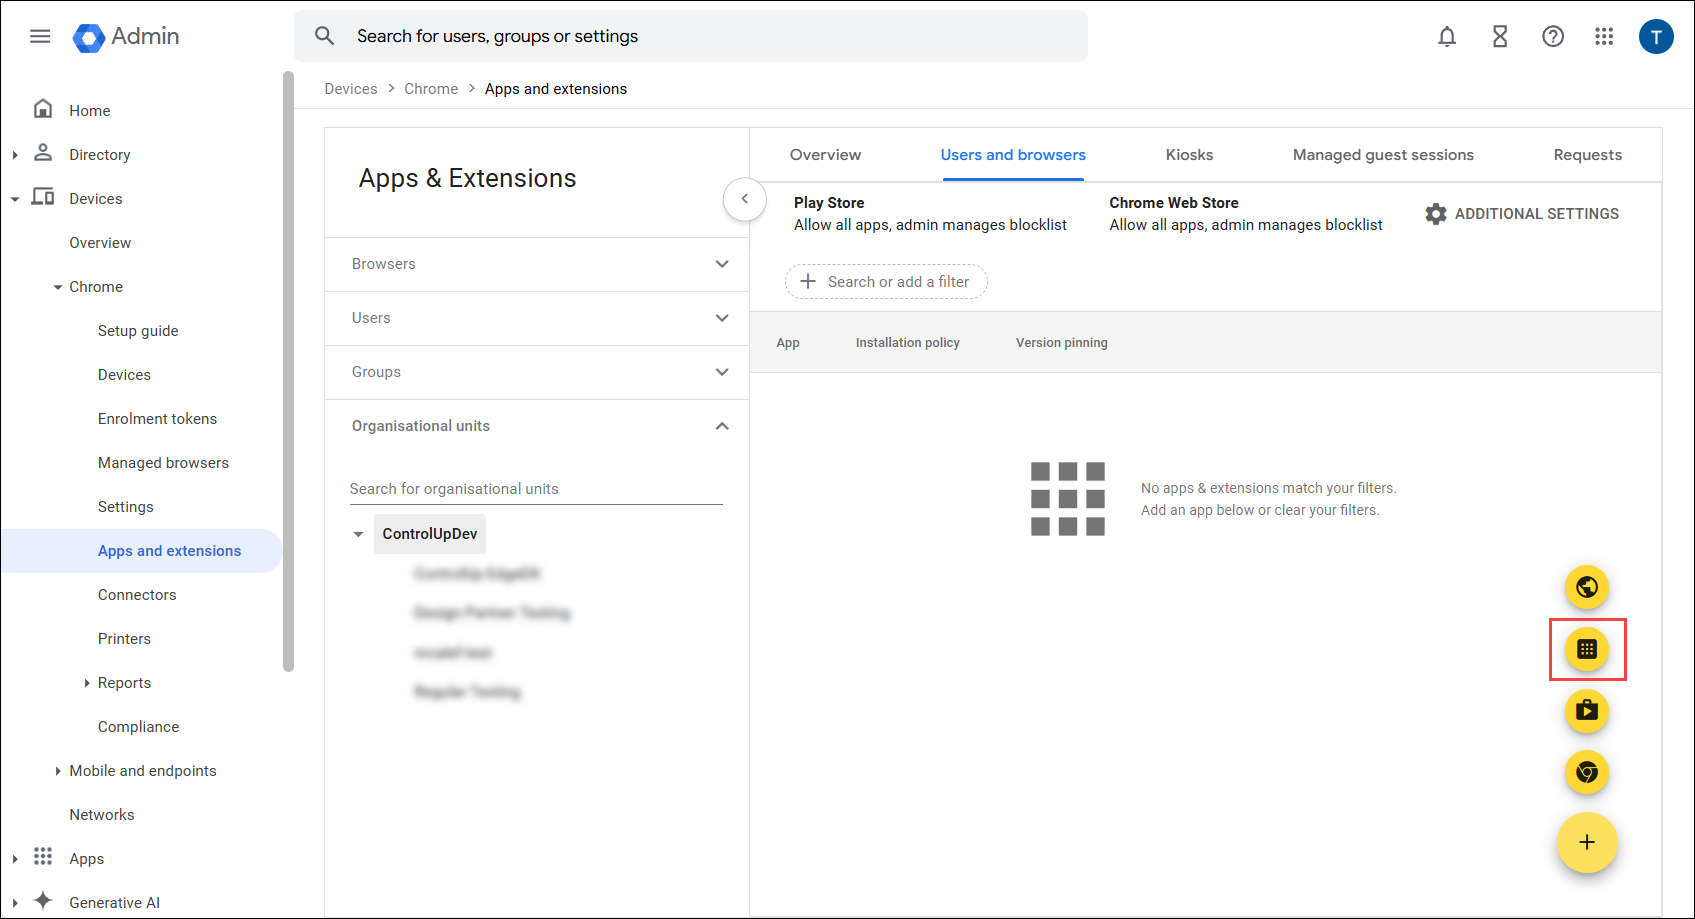
Step 1 - Deploy the ChromeOS DEX browser extension
-
In the Chrome Admin console (admin.google.com), go to Devices > Chrome > Apps and extensions.
-
Select the organizational unit that contains the devices on which you want to deploy the extension.
-
Click the type of extension you want to add (Users and browsers, Kiosks, or Managed guest sessions), and select to add an extension by ID.
-
Add the following extension ID from the Chrome Web Store:
cmllcafpnpcfnappeekbmjbellnlcoea -
Set the Installation policy of the ChromeOS DEX extension to Force-installed so that the extension is installed on all devices in the selected organizational unit.
Read Google's documentation to learn more about app/extension deployment.
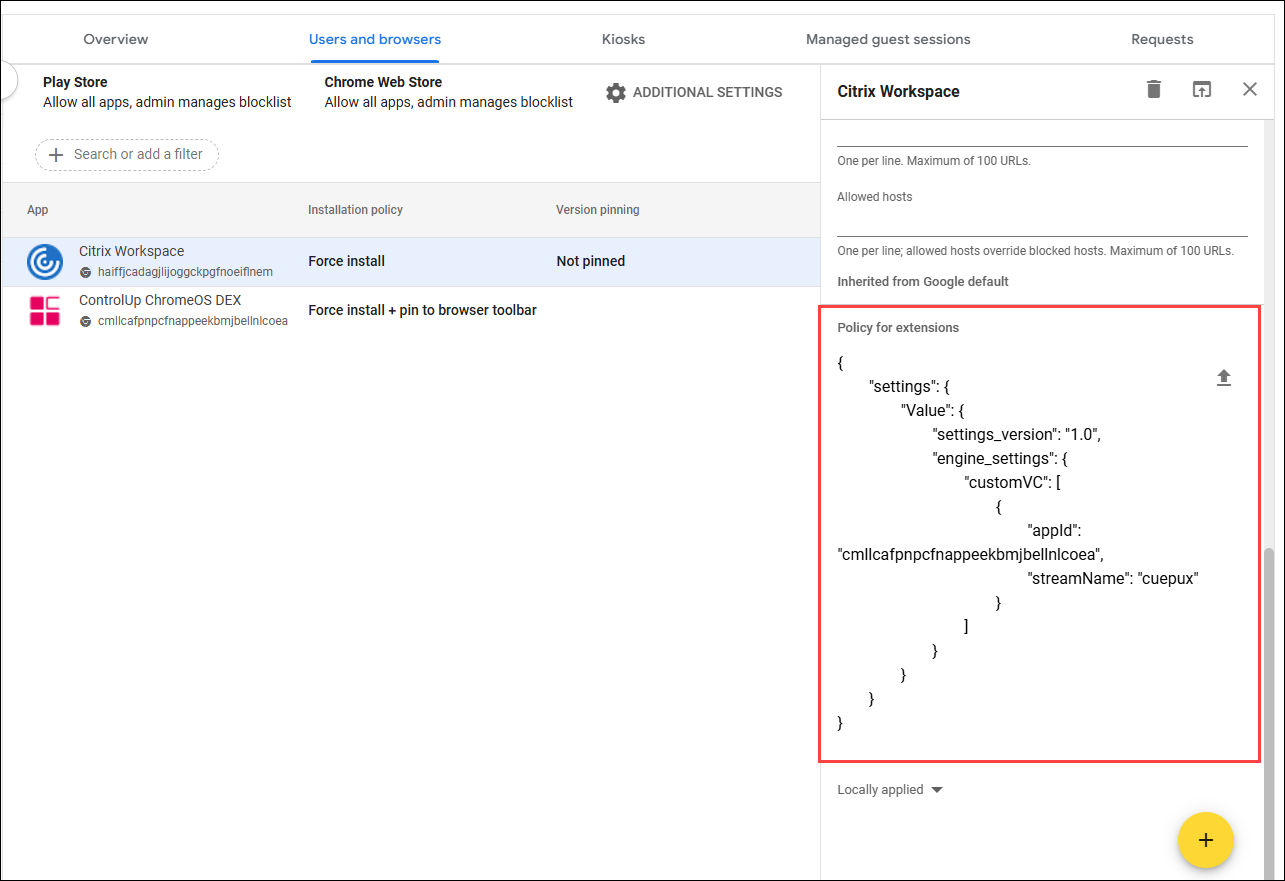
Step 2 - Add custom policy to the Citrix Workspace app
In the Chrome Admin console, open the settings for the Citrix Workspace app (in the same organizational unit that you selected in step 1), and add the following JSON under Policy for extensions.
{
	"settings": {
		"Value": {
			"settings_version": "1.0",
			"engine_settings": {
				"customVC": [
					{
						"appId": "cmllcafpnpcfnappeekbmjbellnlcoea",
						"streamName": "cuepux"
					}
				]
			}
		}
	}
}
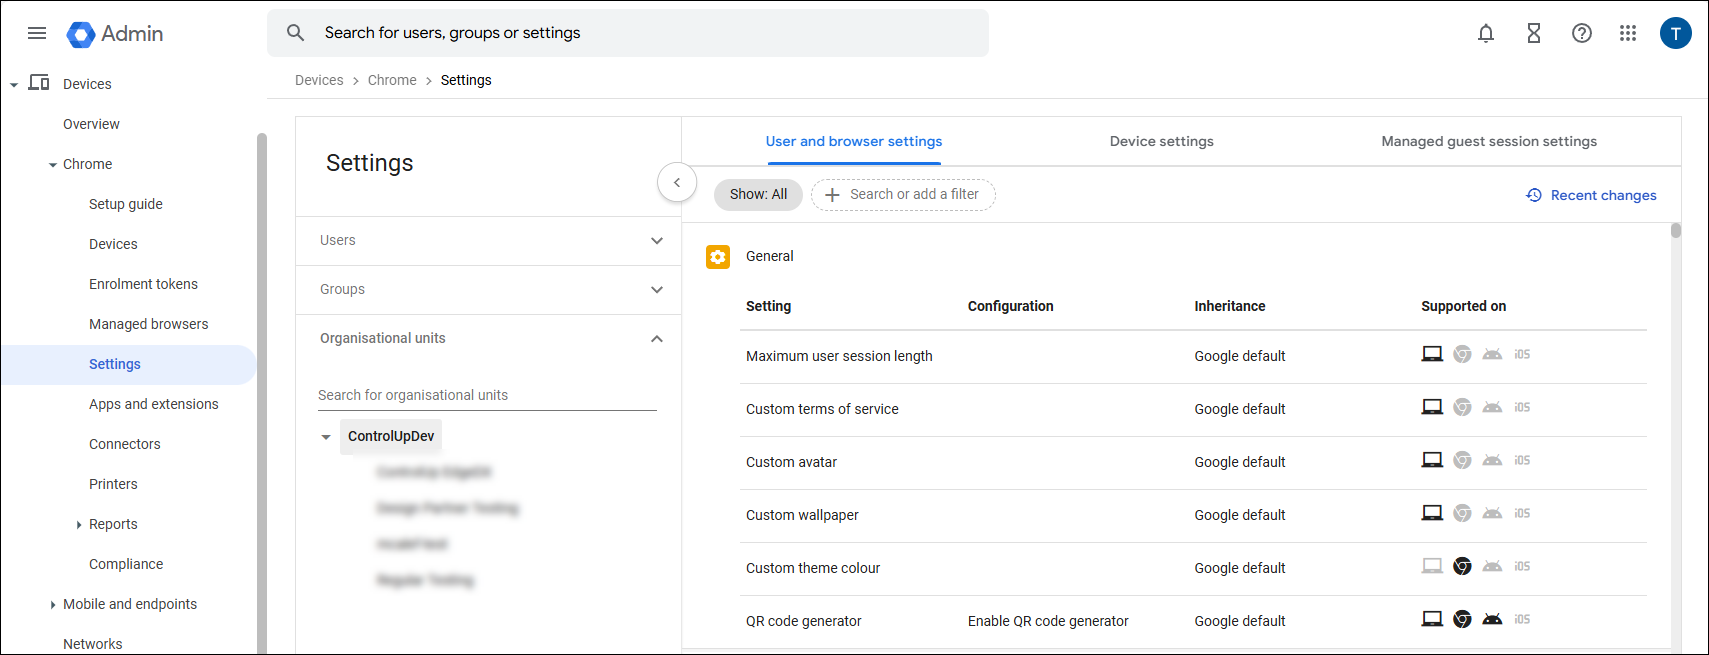
Step 3 - Configure Chrome policies
To access Chrome policy configuration, open the Admin console and go to Devices > Chrome > Settings. Make sure you apply the policies to the correct organizational units.
Read Google's documentation to learn more about Chrome policies.
User and browser or Managed guest sessions settings
Depending on your ChromeOS deployment scenario, configure the following settings under either the User and browser settings or Managed guest session settings tab.
| Category | Setting | Configuration |
|---|---|---|
| Hardware | Enterprise hardware platform API | Allow managed extensions to use the enterprise hardware platform API |
Device settings
Configure the following settings under the Device settings tab.
| Category | Setting | Configuration |
|---|---|---|
| User and device reporting | Report device OS information | Enable all OS reporting |
| User and device reporting | Report device hardware information | Enable all hardware information reporting |
| User and device reporting | Report device telemetry | Enable all telemetry reporting |
| User and device reporting | Device status report upload frequency | 60 minutes |
After performing the steps above, client metrics from the ChromeOS device are visible in ControlUp during an active connection to a Citrix machine with the ControlUp Agent installed.