This article covers how to install the Remote Clients (formerly Remote DX) plugin on Windows devices.
For an overview of Remote Clients and the client device metrics you can monitor, visit Remote Clients Overview and Client Metrics.
Citrix deployment best practices
If you are deploying for Citrix environments, read our Best Practices for Citrix Configuration with Remote Clients
Prerequisites
- For supported Windows versions and VDA platforms, see the Remote Clients Support Matrix.
- To collect all metrics, the device must meet the communication requirements.
- Installation requires Windows administrator privileges.
Download Remote Clients
Download the Windows Remote Clients plugin for your VDA platform.
- Go to our Download Center for all Remote Clients download options.
- Go to https://controlup.com/remotedx/ for a friendlier website that you can send to your users to help them install Remote Clients onto their devices. This site has:
- Fewer download options
- Step-by-step instructions
- Walkthrough videos
Manual GUI Install
- Run the downloaded Remote Clients file.
- In the installation wizard, select which private user metrics you want Remote Clients to collect.
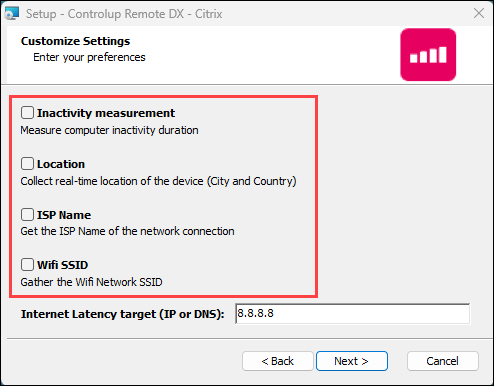
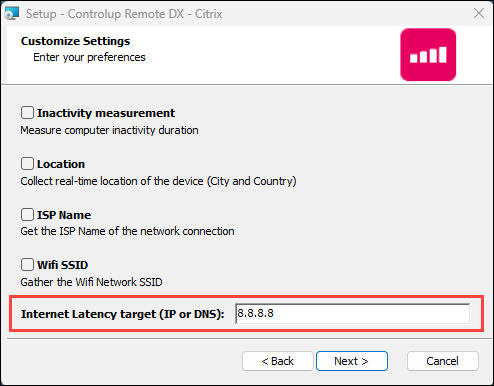
- Optionally, change the target for internet latency tests from the client device. By default, Google's DNS servers (8.8.8.8) are used for to test internet latency. Note that there is a known issue where the label "Google 8.8.8.8" appears in the UI even if you have set a custom latency target. For details, click here.
- Complete the installation wizard.
MSI Command Line Install
To install Remote Clients using the MSI installer, run the following command. Note that this example shows the command to install the Citrix plugin. You might need to change the file name to the file you downloaded.
msiexec /i curdx-windows-citrix.msiOptionally, add the following parameters to the command:
/qnto perform a silent install.Wifi=Trueto record the wireless network SSID.Inactivity=Trueto record inactivity duration.Location=Trueto record the device location.Isp=Trueto record the ISP name of the network connection.InternetLatencyTarget=x.x.x.xto specify the target IP or DNS for internet latency testing. By default, if you don't specify a target, Google's DNS servers (8.8.8.8) are used for internet latency testing. Note that there is a known issue where the label "Google 8.8.8.8" appears in the UI even if you have set a custom latency target. For details, click here.
For example, the following command performs a silent install, collects all private user metrics, and uses a custom internet latency target:
msiexec /i curdx-windows-citrix.msi /qn Wifi=True Inactivity=True Location=True Isp=True InternetLatencyTarget=192.0.2.0