This article describes how to use the Remote Control and Remote Shadow features.
Permissions
- To start a Remote Control session, you need the permission Allow Remote Control.
- To start a Remote Shadow session, you need the permission Allow Remote Shadow
- To start a Remote Control or Remote Shadow session without requiring consent from an active user, you need the permission Allow Remote Control and Remote Shadow without End User Consent.
- To transfer files during a Remote Control session, you need the permission Allow File Transfer.
- To open an elevated cmd prompt during a Remote Control session, you need the permission Allow Elevated Command Shell.
- To configure automatic reconnection settings for Remote Control or Remote Shadow sessions, you need the permission Manage Remote Control Settings.
You can set the scope of a permission so that it applies only to certain devices. For example, you can give a user permission to perform an action (such as remote control) only on devices used by the Finance department. Learn more.
Prerequisites
- For macOS devices, the device user might need to configure device settings to allow Remote Control. Learn how to allow Remote Control on macOS devices.
- For Linux devices, the x11vnc package must be installed and running on the device. Remote control is supported only when using the Xorg display manager.
Start a Remote Control session
To start a Remote Control session on a device:
-
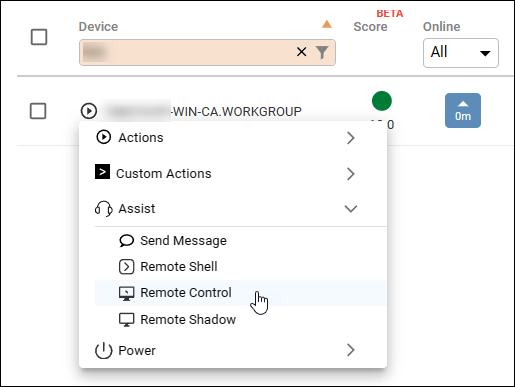
Open the Actions menu for a device and select Assist > Remote Control.
-
Select the user session to control.
- For Windows devices, select an active user session or the console session. If nobody is signed in on the device, you can start a console session and sign in from the lock screen.
- For Linux devices, select an active user session. You can use remote control on Linux devices only if a user is currently signed in to the device.
- For macOS devices, select an active user session or Login Screen. If you select Login Screen, you can sign in as any valid user on the macOS device. Note that remote control performance is generally better if you select an active user session than if you select Login Screen.
-
Select whether you want to require consent before starting the session. Learn more about user consent.
-
Select whether you want to start the remote session in a new browser tab or in a separate window.
-
Click Start Remote Control. If you have selected to Ask for user consent, then the Remote Control session starts only if the user agrees to the request.
Start a Remote Shadow session
To start a Remote Shadow session on a device:
-
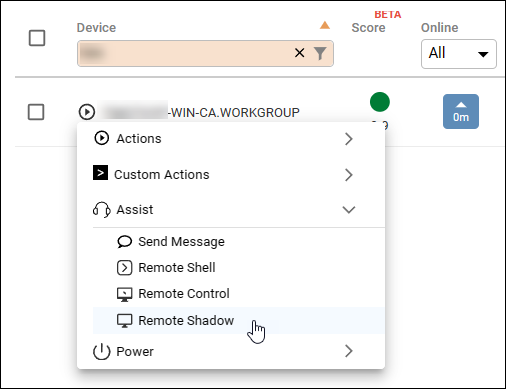
Open the Actions menu for a device and select Assist > Remote Shadow.
-
Select the user session to Remote Shadow.
-
Select whether you want ask for user consent before starting the Remote Shadow session. If you select Ask for user consent, then the Remote Shadow session begins only if the end user agrees to the prompt on their screen.
-
Click Start Remote Shadow. The Remote Control either starts or sends the consent request to the end user of the device, depending on whether you selected Ask for user consent.
End user consent
Devices with active users
If you start a remote session and Ask for user consent is enabled, then the session starts only if the end user agrees to a consent prompt.
If Ask for user consent is disabled, then the remote session starts immediately. Starting a remote session without requiring consent requires the permission Allow Remote Control and Remote Shadow without End User Consent.
Devices with no active users
If no users are signed in on the device, no consent is required because there is nobody available to grant consent. You can start a remote session as Console (for Windows) or login screen (for macOS) and access the sign-in screen without requiring the permission Allow Remote Control and Remote Shadow without End User Consent.
Note that it isn't possible to remotely access a Linux device with no active users.
What the end user sees
When a remote session is active on their device, the end user sees a notification icon in the bottom-right corner of their screen.
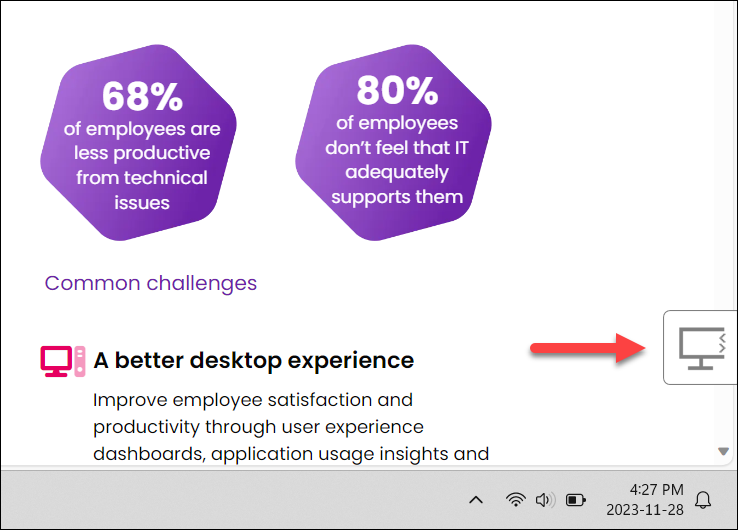
Clicking the icon displays the ControlUp user who initiated the session, and gives the end user the option to cancel the session. The end user can cancel a session even if the session was started without requiring their consent.
For Linux devices, an Extended Settings option lets you customize how end users are notified.
Consent prompt
If you start a session with Ask for user consent enabled, the end user sees the following prompt before the session begins:
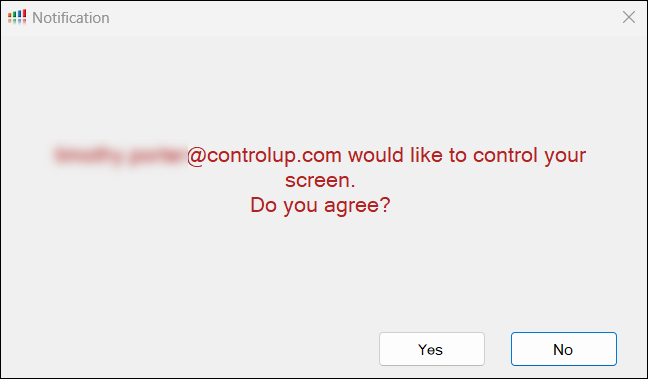
The session starts only if the end user agrees. Learn more about the consent requirement.
Session controls
This section describes the features you can use at the top of the remote session window:

Copy and paste between devices
To copy and paste between your local device and the remote device during a Remote Control session, click on Actions and enable the Clipboard.
The clipboard of the remote user is cleared at both the start and end of a session to protect sensitive information. This prevents an administrator from seeing data a user has copied. It also ensures that any information placed on the clipboard by the administrator is cleared, so it's not visible to the user after the session ends.
If you are remotely controlling a macOS device from a Windows device, you must press Alt-c and Alt-v to copy and paste within the remote session. If you are remotely controlling a Windows device from a macOS device, you must press Control-C and Control-V to copy and paste within the remote session.
If clipboard sharing is unsuitable (for example, if the remote device doesn't support the clipboard function at the login screen, or if you don't want to enable clipboard sharing), you can click Paste as keystrokes to send your local clipboard text to the remote device as individual keystrokes. The Paste as keystrokes option has a limit of 120 characters. When using Paste as keystrokes between macOS and Windows devices, some unicode characters might not translate correctly due to differences in keyboard mappings.
Multi-monitor support
When remotely controlling or shadowing Windows or macOS devices with multiple monitors (displays), you can select which display to view in the remote session window. Select All Displays to view all displays at the same time. If the device has only a single monitor, then the display selector doesn't appear.
For Linux devices, you can view only all displays at the same time in the remote session window.
Zoom
By default, Auto-Scale is enabled and the session will automatically scale as you resize the window.
To manually control zoom, deselect the Auto-Scale checkbox and use the +/- zoom controls to zoom in or out. After you zoom, you can select which part of the screen to view by clicking on the screen area map at the top right corner.
Take a screenshot
During a Remote Control or Shadow session, click on Actions and select Screenshot to take a screenshot of the remote display. The screenshot is saved to your local Downloads folder.
File transfer
During a Remote Control session, you can transfer files up to 100MB between your device and the end user's device.
To retrieve a file from a device:
- During a Remote Control session, click Retrieve Files.
- Navigate to and select the files you want to retrieve.
- Click Retrieve. A progress bar appears at the top of the Remote Control session to show the progress of the file transfer.
The retrieved files are saved to your local Downloads folder.
To send files to a device:
- During a Remote Control session, click Send Files and select whether you want to send Files or entire Folders.
- Navigate to and select the file or folder you want to send.
- Click Upload or Open. A progress bar appears at the top of the Remote Control session to show the progress of the file transfer.
The sent files are saved to the device in the \Downloads\EdgeDX folder.
Ctrl-Alt-Del
Click Actions > Ctrl-Alt-Del to send a Ctrl-Alt-Delete command.
Open an elevated command prompt
During a Remote Control session, click Actions > Elevated Cmd to open an Elevated Command Prompt, which gives you admin privileges. The Elevated Command Prompt automatically closes at the end of the remote control session so that the device user does not have admin access.
Note that this option is available only when you are controlling a Windows device.
Remote control/shadow connection flow
A remote control or shadow session is established with the following steps:
- A user requests to start a remote session on a device from the ControlUp. Read above for details on this step.
- A remote session window opens in the ControlUp user's browser and connects to your ControlUp tenant over a websocket.
- Your ControlUp tenant sends an action to the device via the operations websocket (this websocket is initiated by the device to the tenant).
- The Agent opens a new websocket connection to the tenant, and then launches cu_rc.exe and routes traffic to it over a local TCP port.
- The websocket connections opened in steps 2 (from the remote session browser window to the tenant) and 4 (from the Agent to the tenant) are joined through the tenant to connect the remote session browser window to the Agent.
- An app (RCNotifications.exe) displays a notification to the end user to let them know that a remote session is in progress, and allows them to end the remote session.
Note that all communications are outbound from the device to the tenant, and the cu_rc.exe component will not accept connections from any other source.
Automatic reconnect
Automatic reconnect requires Agent version 2.15 or higher.
If Automatic Reconnect after network change or error is enabled, remote control/shadow sessions on Windows devices automatically reconnect if the remote device's network connection is interrupted (for example, if the device loses temporarily loses WiFi connection or switches to a new network and gets a new IP address). The session times out if it is unable to reconnect after 6 minutes. If the session times out, then you must initiate a new remote session. This feature is enabled by default. You can disable it by going to Configuration > Settings > Remote Control.
A message appears for users on both ends of the remote session to let them know when the session is disconnected and reconnected.
Automatic reconnect after device reboot
If Automatic Reconnect after reboot is enabled, remote control/shadow sessions on Windows devices automatically reconnect if the remote device reboots. This feature is disabled by default. You can enable it by going to Configuration > Settings > Remote Control.
If the remote session was initiated for a specific user session, then the remote session reconnects after the end user signs into their device.
If the remote session was initiated for the console session, then the remote session reconnects at the login screen only if the following policy settings are enabled on the remote device. If these settings aren't enabled, then the remote session reconnects after an end user signs into the device. Note that if you use BitLocker, these settings are automatically enabled unless they have been explicitly disabled by a policy. Read Microsoft's documentation about these settings.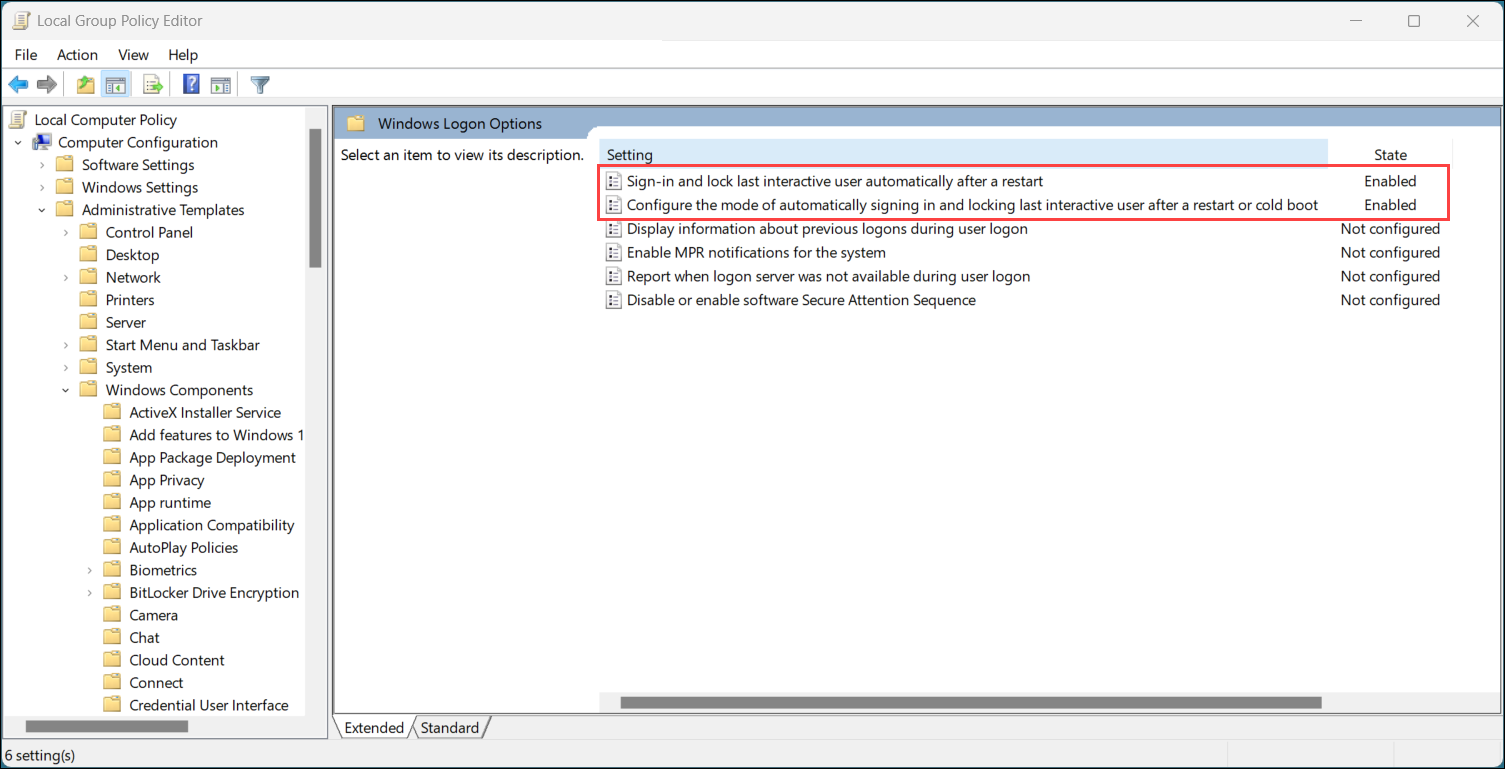
Note that automatic reconnect after reboot currently doesn't work if you initiate a remote session for the console session and then switch user sessions before rebooting.
Auditing
The ControlUp Audit Log and System Events log contains the following details related to Remote Control or Shadow:
- When the session started and ended.
- Who initiated the session.
- Whether the session was initiated with or without asking for user consent.
- What device was controlled/shadowed.
- What files were transferred.
- When an Elevated Command Prompt was opened.
Troubleshooting
If you are having connection problems, you can use our ControlUp Tester tool to test the websocket connection from both the local and remote devices.
Known issues
- If you reboot a macOS device and the device is at the FileVault unlock screen, Remote Control can't be initiated. This is because the Agent isn't running but ControlUp has not yet registered that the device isn't connected to your environment.