ControlUp requires a valid and reachable FQDN of a machine before adding it. However, you can add machines that aren't part of an Active Directory domain to your ControlUp environment.
From versions 9.0.5 and higher, you can add non-domain joined machines to your organization with the Real-Time Console. You can also locally install an agent with the Install-CUAgent PowerShell cmdlet.
For lower versions, you can locally install an agent with the Add-CUComputer PowerShell cmdlet.
Before you add a non-domain joined machine, first make sure to install a non-domain joined ControlUp Monitor.
Add Non-Domain Machine via Console (from 9.0.5)
- Login to the Real-Time Console and click Add Machines > Add Non-Domain Machine.
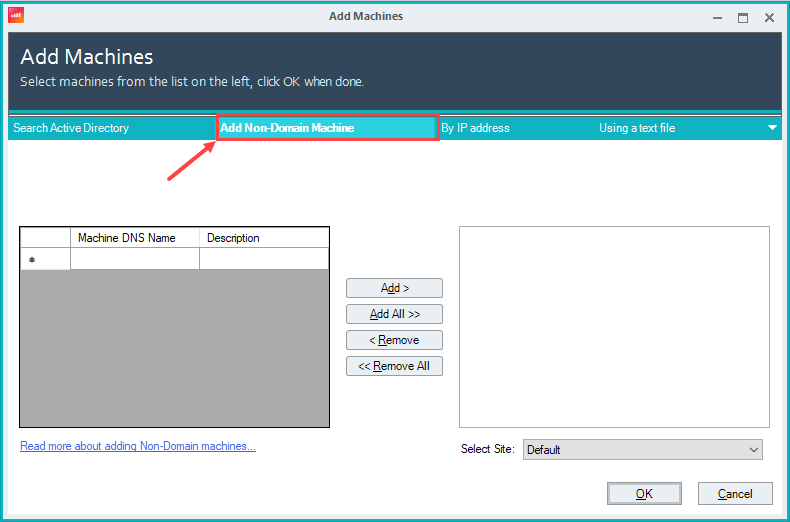
- In the Machine DNS Name, enter the DNS names of the non-domain joined machines you want to add as needed. Optionally, enter a description.
- Select the machine that you want to add and click Add. The pane on the right shows the machines currently selected to add to ControlUp. You can:
- Hold ctrl or shift to select multiple machines.
- Click Add All to add every machine in your search result.
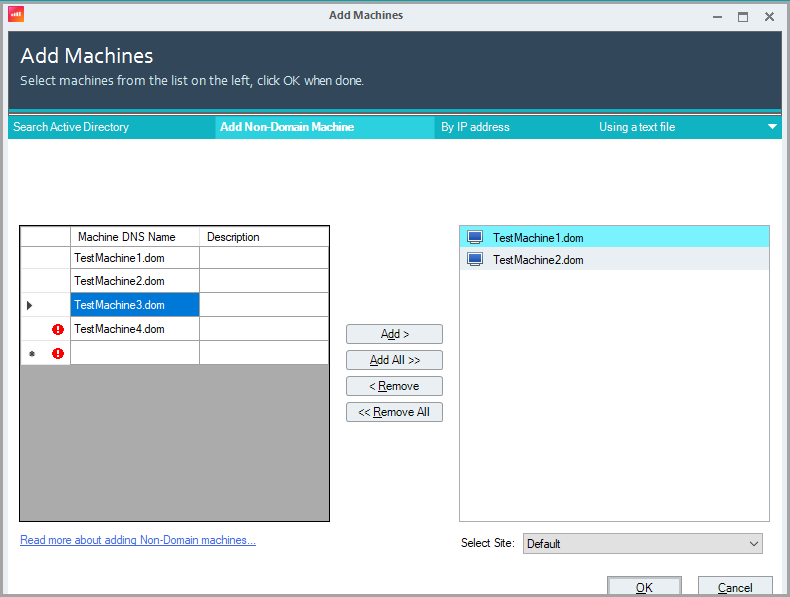
- If your organization has multiple ControlUp sites, from the Select Site dropdown, select which site to add the machine(s) to.
- Click OK to confirm your selection. You can now manage the non-domain joined machine(s) in your organizational tree.
Add Non-Domain Machine via PowerShell (pre 9.0.5)
In the following section, we show you how to add a non-domain joined machine with the hostname "NoDomainPC" to ControlUp.
![A PowerShell console window shows the command [System.Net.DNS]::GetHostByName($env:computerName) being executed. The output displays three columns: "HostName", "Aliases", and "AddressList". Below these headers, "NoDomainPC" is listed as the HostName, an empty set {} for Aliases, and {10.160.100.125} for AddressList.](https://cdn.document360.io/098100b7-b9da-4bea-b4b9-017140ab863e/Images/Documentation/image-VIPH296V.png)
-
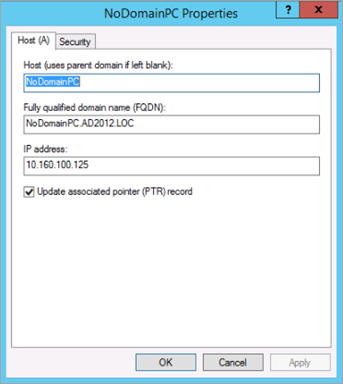
Add an A record for the non-domain joined machine on the Active Directory domain controller. Despite the FQDN being displayed, the machine does not have to be domain-joined.
-
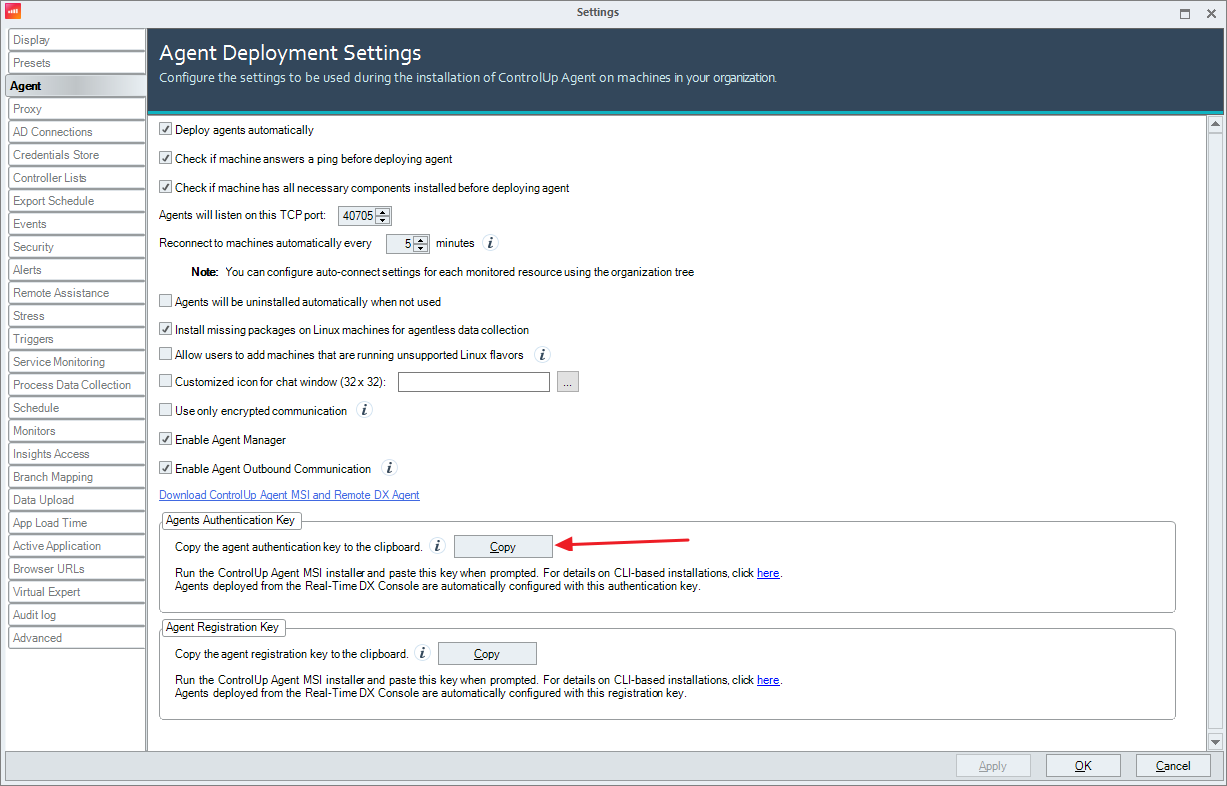
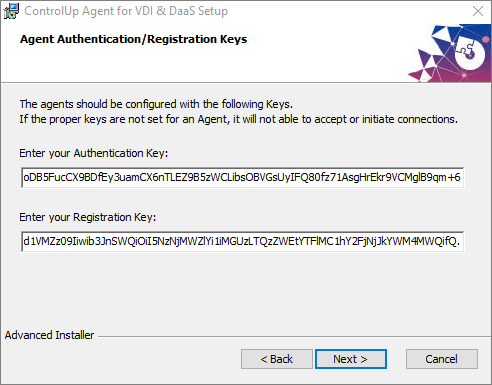
Login to the Real-Time Console and click Settings > Agent. Under Agent Authentication Key, click Copy to copy the Authentication Key to the clipboard. Under Registration Key, click Copy to copy the Registration Key needed for agent outbound communication. Ignore this key if you don't want to use this feature.
-
Remote connect to the machine and download the ControlUp Agent from our Download Center. Run the MSI installer.
-
During the installation, paste the Authentication Key and Registration Key from your clipboard.
-
When the installation is complete, switch back to the Real-Time Console and add a folder by right-clicking Add > Folder. In our example, we want to add the non-domain joined machine to a folder named “Non Domain Computers”.
-
Open a PowerShell session on a ControlUp Monitor machine.
a. Import the ControlUp.PowerShell.User module.$pathtomodule = (Get-ChildItem "C:\Program Files\Smart-X\ControlUpMonitor\*ControlUp.PowerShell.User.dll" -Recurse | Sort-Object LastWriteTime -Descending)[0] Import-Module $pathtomoduleb. Add the machine to the new folder by running the Add-CUComputer cmdlet.
Add-CUComputer -Name "NoDomainPC" -Domain "AD2012.LOC" -FolderPath "\non domain computers"TipTo avoid misspellings in the folder path, run the Get-CUFolders cmdlet and copy the Path to the -FolderPath parameter.

-
You can now manage the non-domain joined machine as any other domain-joined machine in your organizational tree.
